

Overview Legend 🧭
Overview Legend 🧭
Introduction
e-conomic is a cloud-based accounting software developed by Visma, primarily used by small and medium-sized businesses in Denmark and Scandinavia. It offers features such as invoicing, bookkeeping, VAT reporting, and financial reporting.Configure e-conomic
Prerequisites
The end user must have an active e-conomic subscription. Beyond that, the prerequisites depend on the authentication option you choose:- Option 1 — Use Chift’s app: no additional setup required.
- Option 2 — Use your own app: you must have an e-conomic developer agreement, create an app in your developer account, and store its
AppSecretToken.
Activation process
When connecting your end users to e-conomic, you can choose between two authentication approaches. In both cases the end-user experience is identical: the end user clicks an installation URL and generates anAgreementGrantToken.
Option 1 — Use Chift’s app
Use Chift’s own e-conomic app. No setup is required — the app appears under the Chift name on the end user’s e-conomic account.→ Reach out to your Chift point of contact, who will activate it for you.
Option 2 — Use your own app
Create your own e-conomic developer app and provide your ownAppSecretToken. The app then appears under your own brand name on the end user’s e-conomic account. This requires an e-conomic developer agreement.
- In your developer account, click Create a new app.
- Fill in the New app form. Note that the name and roles cannot be changed later.
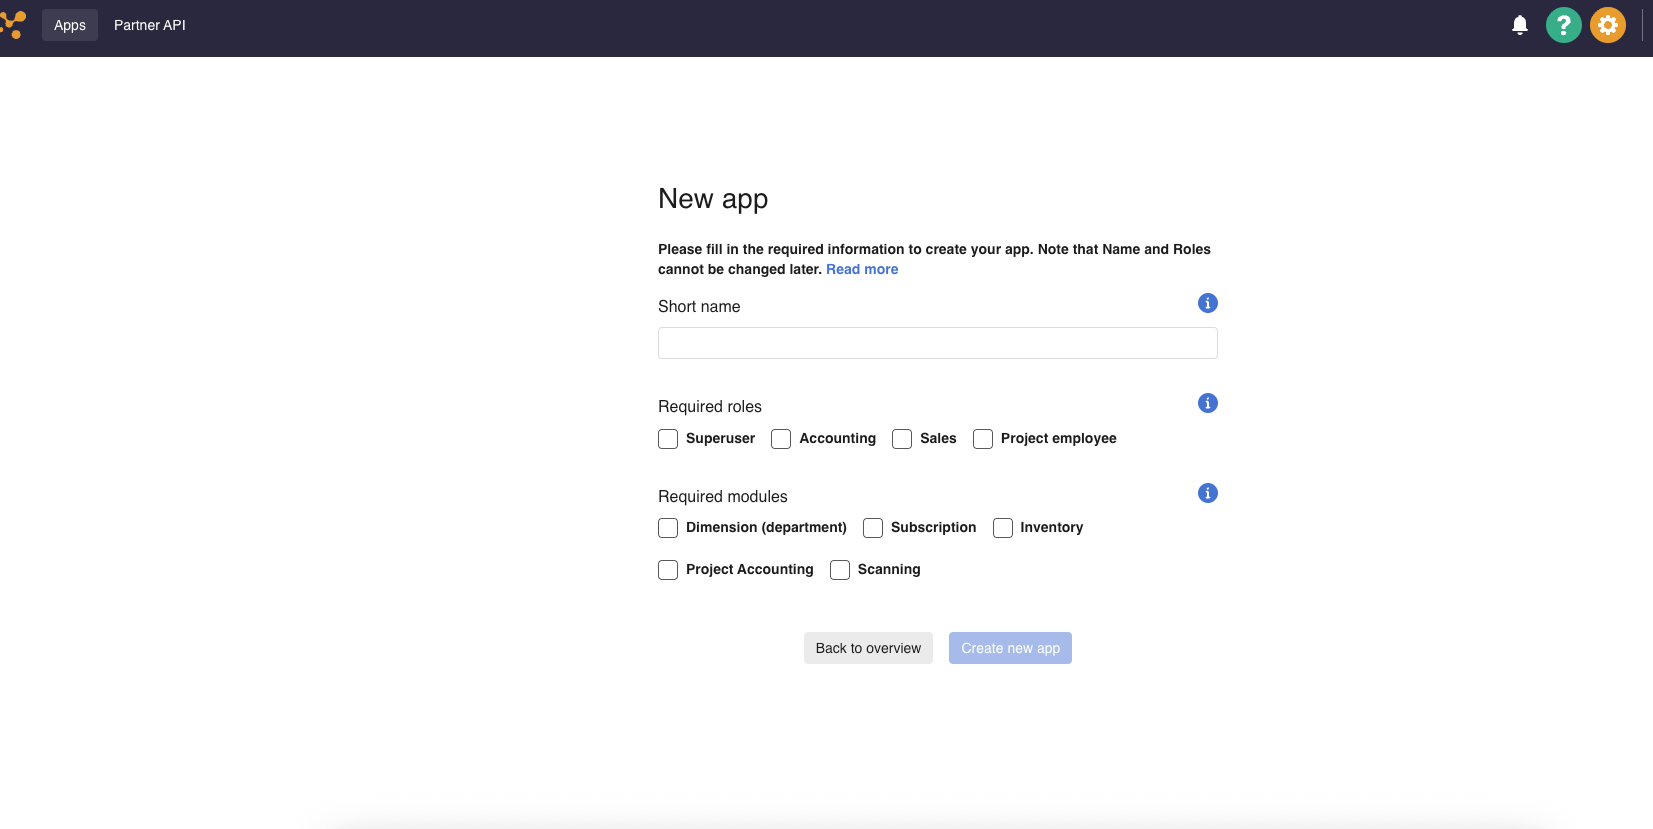
- Superuser — recommended for full accounting integrations (journals, customers, invoices, suppliers, attachments, company info). Note that regular users won’t be able to authorize access with this setting.
- Bookkeeping — suitable if you only need access to journals, entries, accounts and attachments (no access to customers or company information).
- Sales — if you want to handle customers and invoices.
- Project employee — not applicable to the Chift connector.
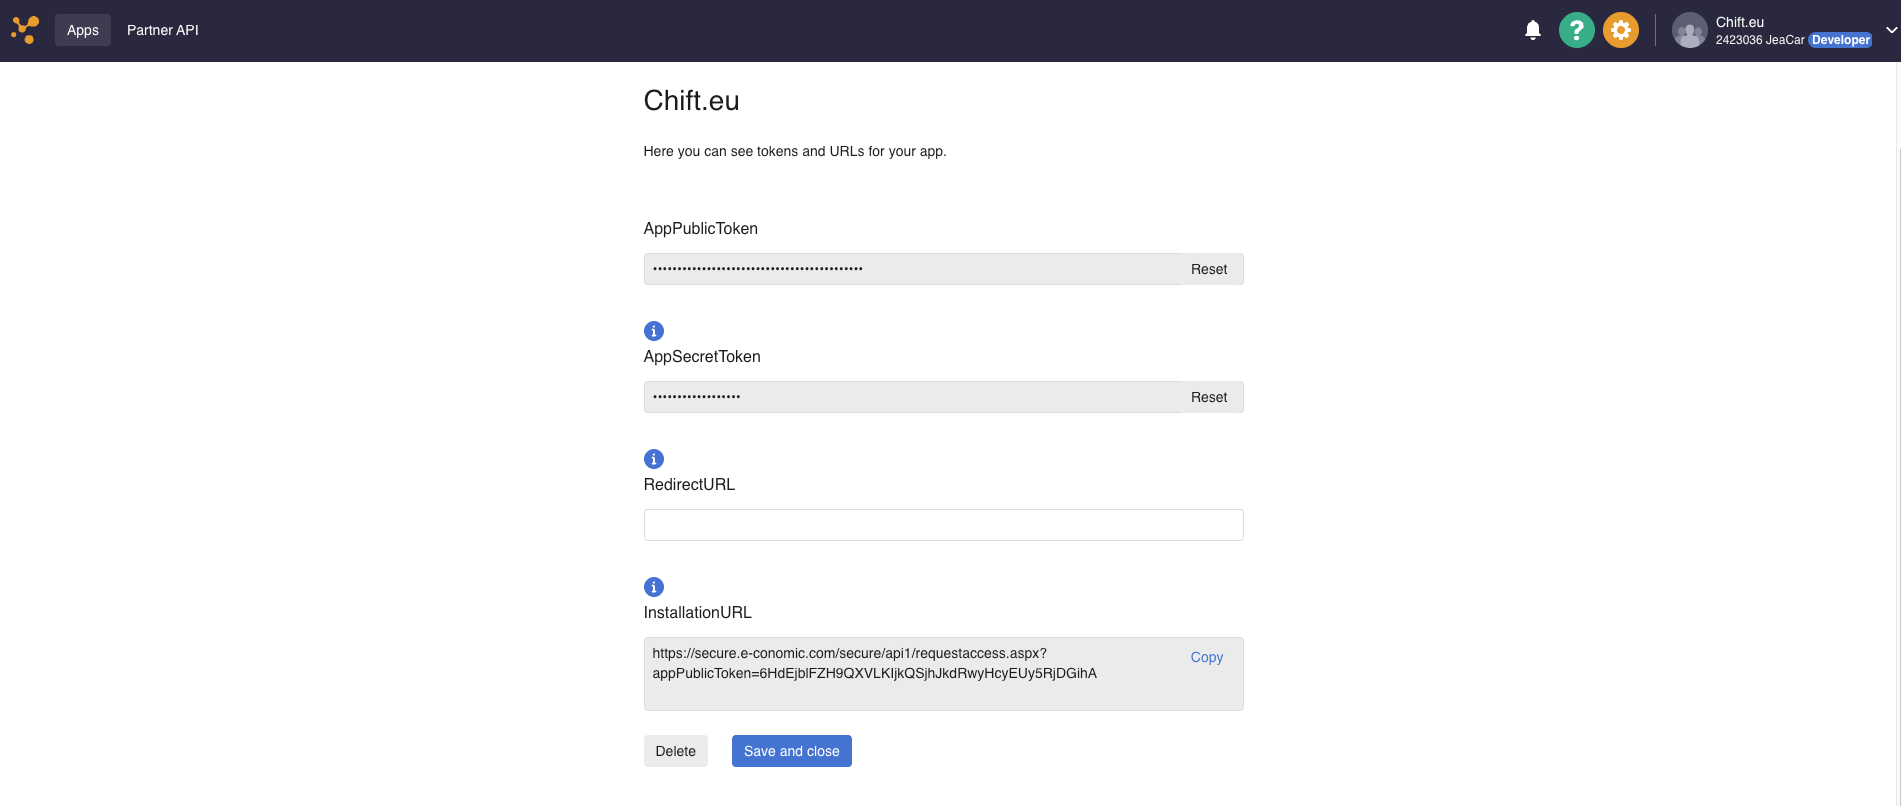
- After creating the app, retrieve its
AppSecretTokenandInstallationURLfrom the app’s credentials page.
Connector setup
Before creating connections, you can preconfigure the e-conomic connector at connector level from the Chift Platform. Fields set here are shared by all connections and hidden from your clients.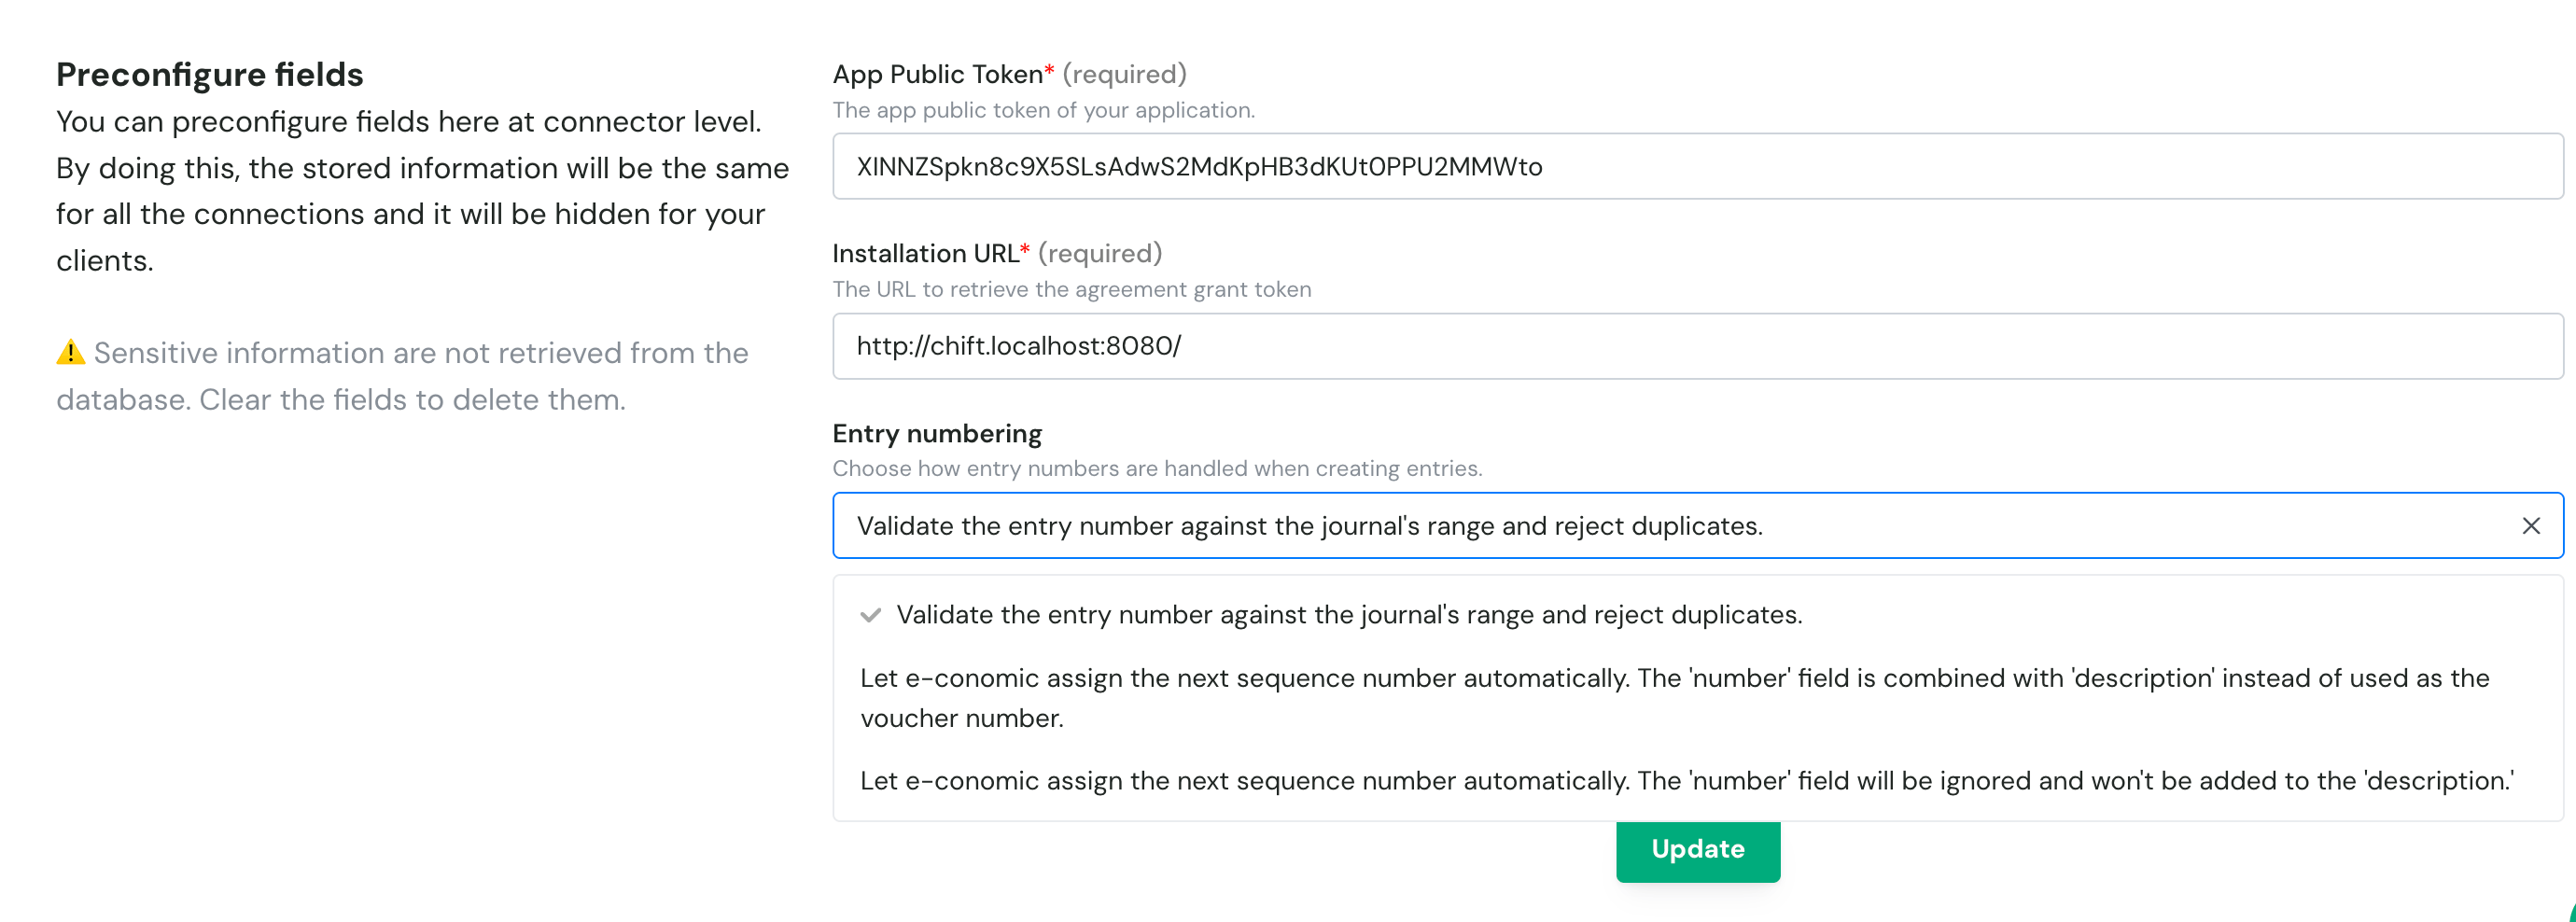
Sensitive information is not retrieved from the database once saved. Clear a field to delete it.
Test e-conomic
e-conomic provides a free trial environment that you can use to test integrations. To create a test account:- Go to e-conomic.dk/regnskabsprogram/demo-alle.
- Sign up for a free 14-day trial with demo data.
- If you need the trial extended beyond 14 days for testing purposes, contact api@e-conomic.com with your agreement number and the duration needed.
The sandbox is a real e-conomic agreement — it uses the same APIs as production. There is no separate sandbox base URL.
Connect e-conomic
To activate a connection with e-conomic, users will have to go through the following steps.- English article: Help Center - e-conomic EN
Rate limits
e-conomic uses a cost-based token bucket system (rolled out December 2025). Rather than limiting the number of requests per second, e-conomic limits the cost of requests, where each endpoint has a different cost based on its load on the platform.
When a limit is exceeded, e-conomic returns an HTTP
429 Too Many Requests error. Response headers include:
X-CallCost: the token cost of the request just made.X-RateLimiting: current bucket status (e.g.limit-2000-per-60-seconds: 1450/2000).
Technical limitations & specificities
Entry numbering
Entry numbering behavior is configured at connector level — see Connector setup above for the available options. Risks with automatic assignment (either of the two “Let e-conomic assign” options)- Sequence can run out of range. The sequence has no awareness of the journal’s configured min/max, and can drift past it. Returns
ERROR_JOURNAL_NOT_CONFIGURED(400): “The next sequence for the journal entry id is out of bound. Please choose another journal or increase the max possible sequence number in the configuration of the journal.” Fixes: switch journal, raise the journal’s max (not possible once it’s at the system ceiling of999999999), lower the journal’s sequence value instead (see below), or turn off automatic assignment. - Lowering the sequence can cause duplicates. If the journal’s sequence is manually lowered in e-conomic (e.g. to work around a maxed-out range), new entries can collide with previously created ones. e-conomic gives no signal when this happens.
- Duplicates across journals are merged. Since booked entries carry no journal reference, two entries from different journals sharing the same voucher number and same year (e.g.
2026$9002602) will be merged into one. This can happen even without a manual sequence change, since each journal has an independent counter.
Single-folder connector
Each e-conomic connection maps to a single accounting agreement. One Chift connection = one e-conomic agreement.Journal restrictions
e-conomic journals have anallowedEntryType field that restricts which account types can be used within a journal. This affects how journal entries are created via the Chift API.
When creating a journal entry, all lines must match the journal’s
allowedEntryType. If mixed line types are sent to a restricted journal, the API returns an ERROR_JOURNAL_NOT_GOOD_SCOPE error.
For journals with allowedEntryType: 2 (customer payment), e-conomic automatically applies the contra account (bank account) based on the journal’s customerContraAccount setting. You don’t need to specify it explicitly.
To retrieve the list of journals and their restrictions, use GET /consumers/{id}/accounting/journals.
The force_general_account field is not supported when creating journal entries in e-conomic. e-conomic always uses the collective account associated with the customer or supplier, so providing this field returns an error.
VAT auto-calculation
When creating journal entries with avatCode, e-conomic automatically calculates and posts the VAT amount to the corresponding VAT account at booking time. You don’t need to create an explicit VAT line.