General Information
Website: microsoft.com
Software type: Solution as a Software (Saas)
Geography: 🌍 Worldwide
Support multi-folder: ❌
Software type: Solution as a Software (Saas)
Geography: 🌍 Worldwide
Support multi-folder: ❌
Introduction
Microsoft Dynamics 365 Business Central is a cloud-based enterprise resource planning (ERP) software designed for small to medium-sized businesses. It provides a comprehensive solution for managing financials, operations, sales, and customer service. It also offers features such as supply chain management, project management, and human resources management.Configure Microsoft Dynamics Business Central 365
Prerequisite(s)- Obtain a Tenant Id, Client ID and secret by creating an Azure Application so that your end users can give access to their instance to your app
- Activate the Microsoft Dynamics Business Central 365 integration on the Chift platform
- Sign in to the Azure portal with your credentials (as an admin). If you do not yet have an Azure account, you can sign up for a free account here.
- You will see your tenant name in the right upper corner:
-
- If you don’t have a tenant, you can follow this link to create your tenant.
- You can now start registering your app; go to the portal and select “App registrations” (link here)
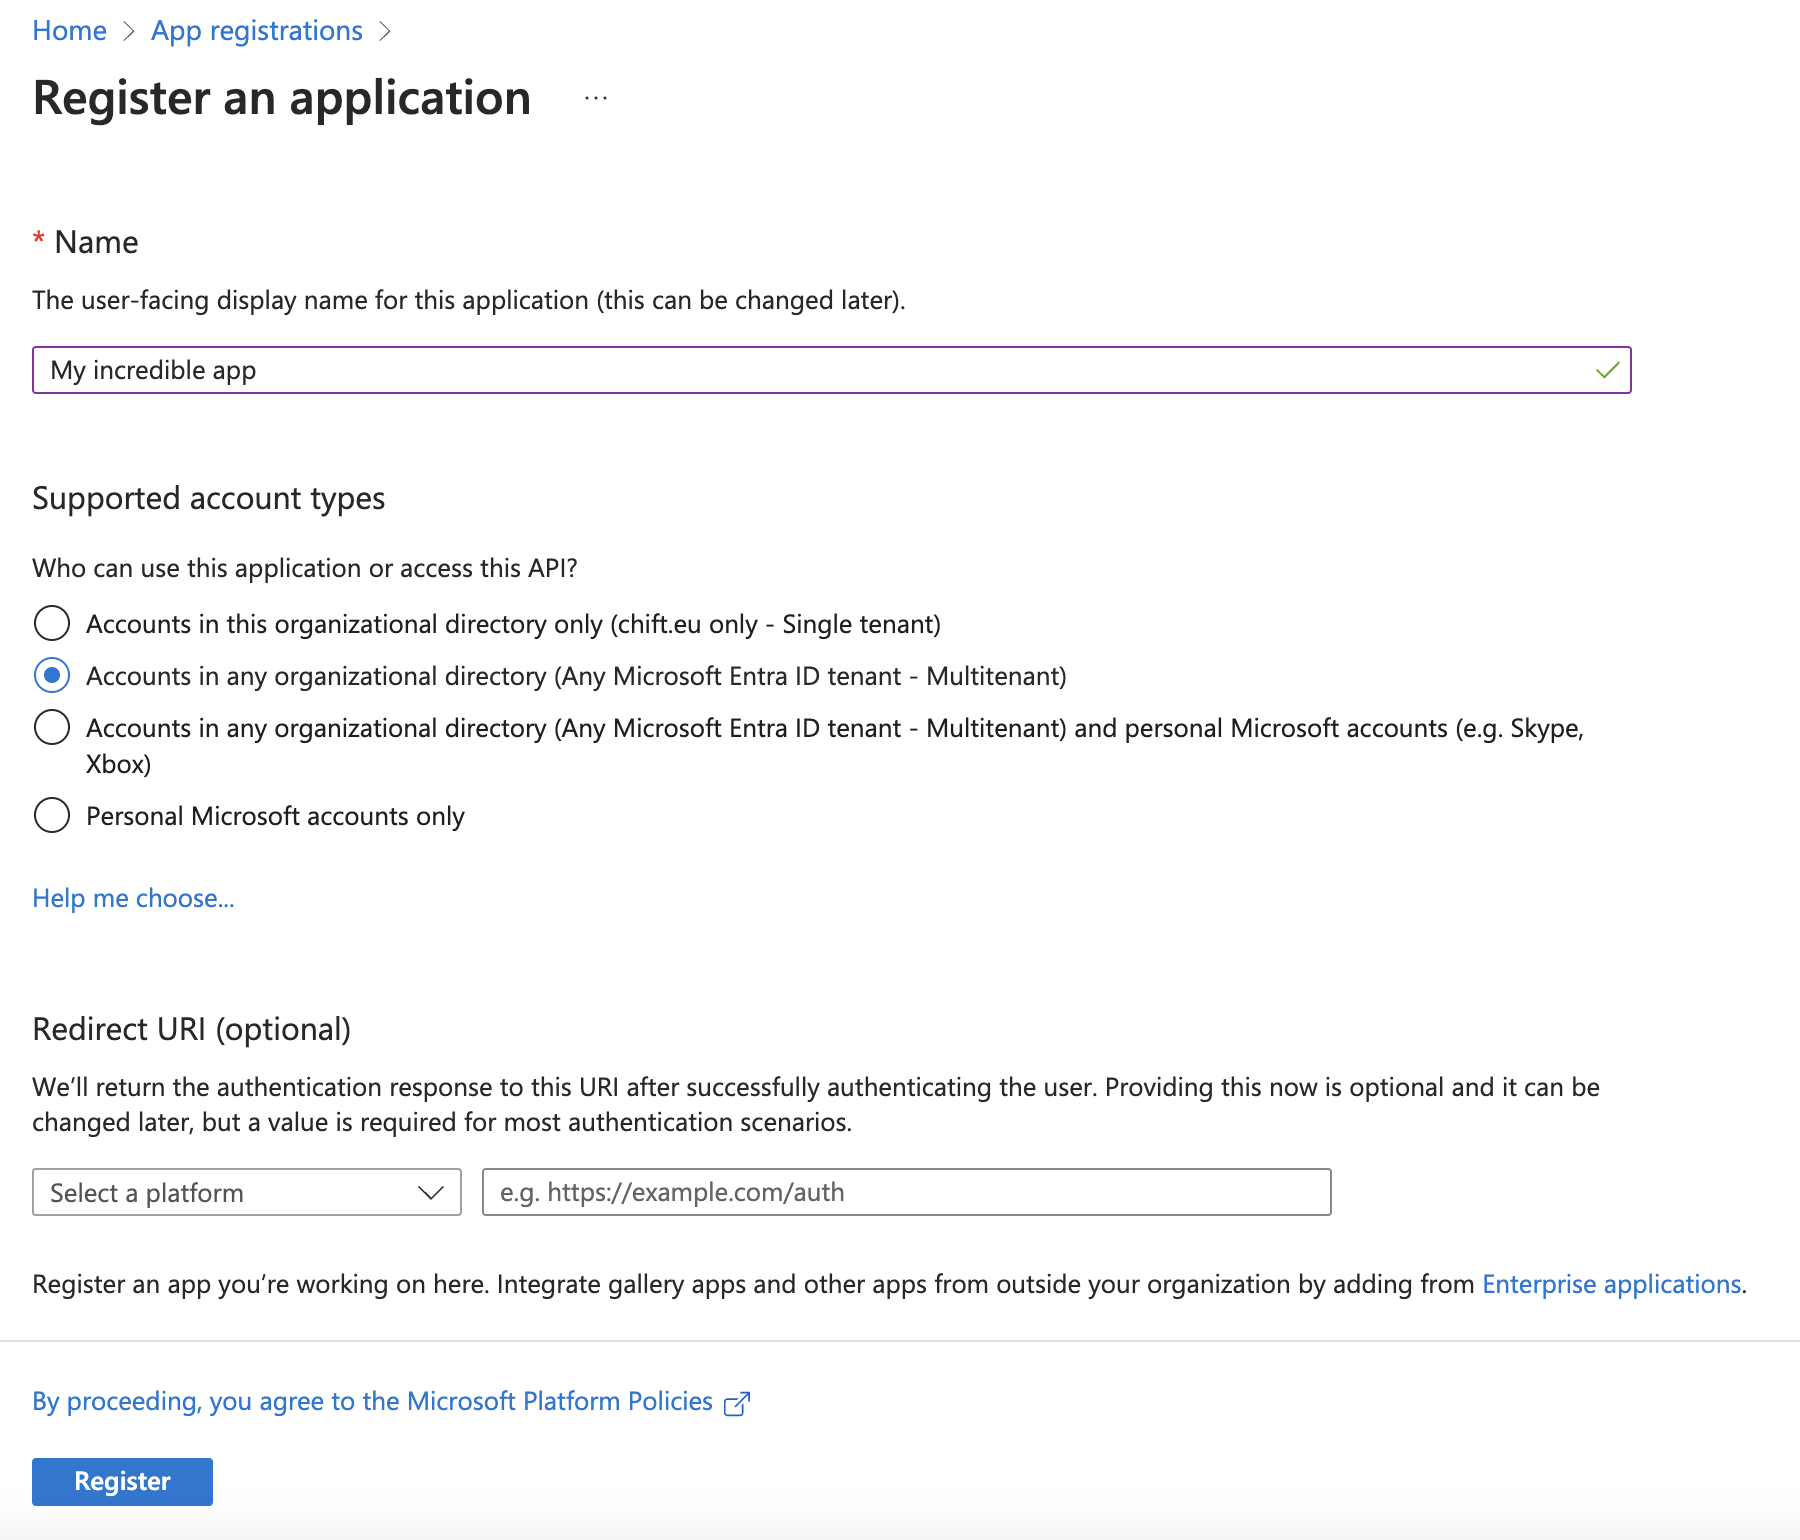
- Click on “New registration”
-

- Give a name to your application
- Select one of the “Multitenant” application depending on your need.
-
- Proceed for registration
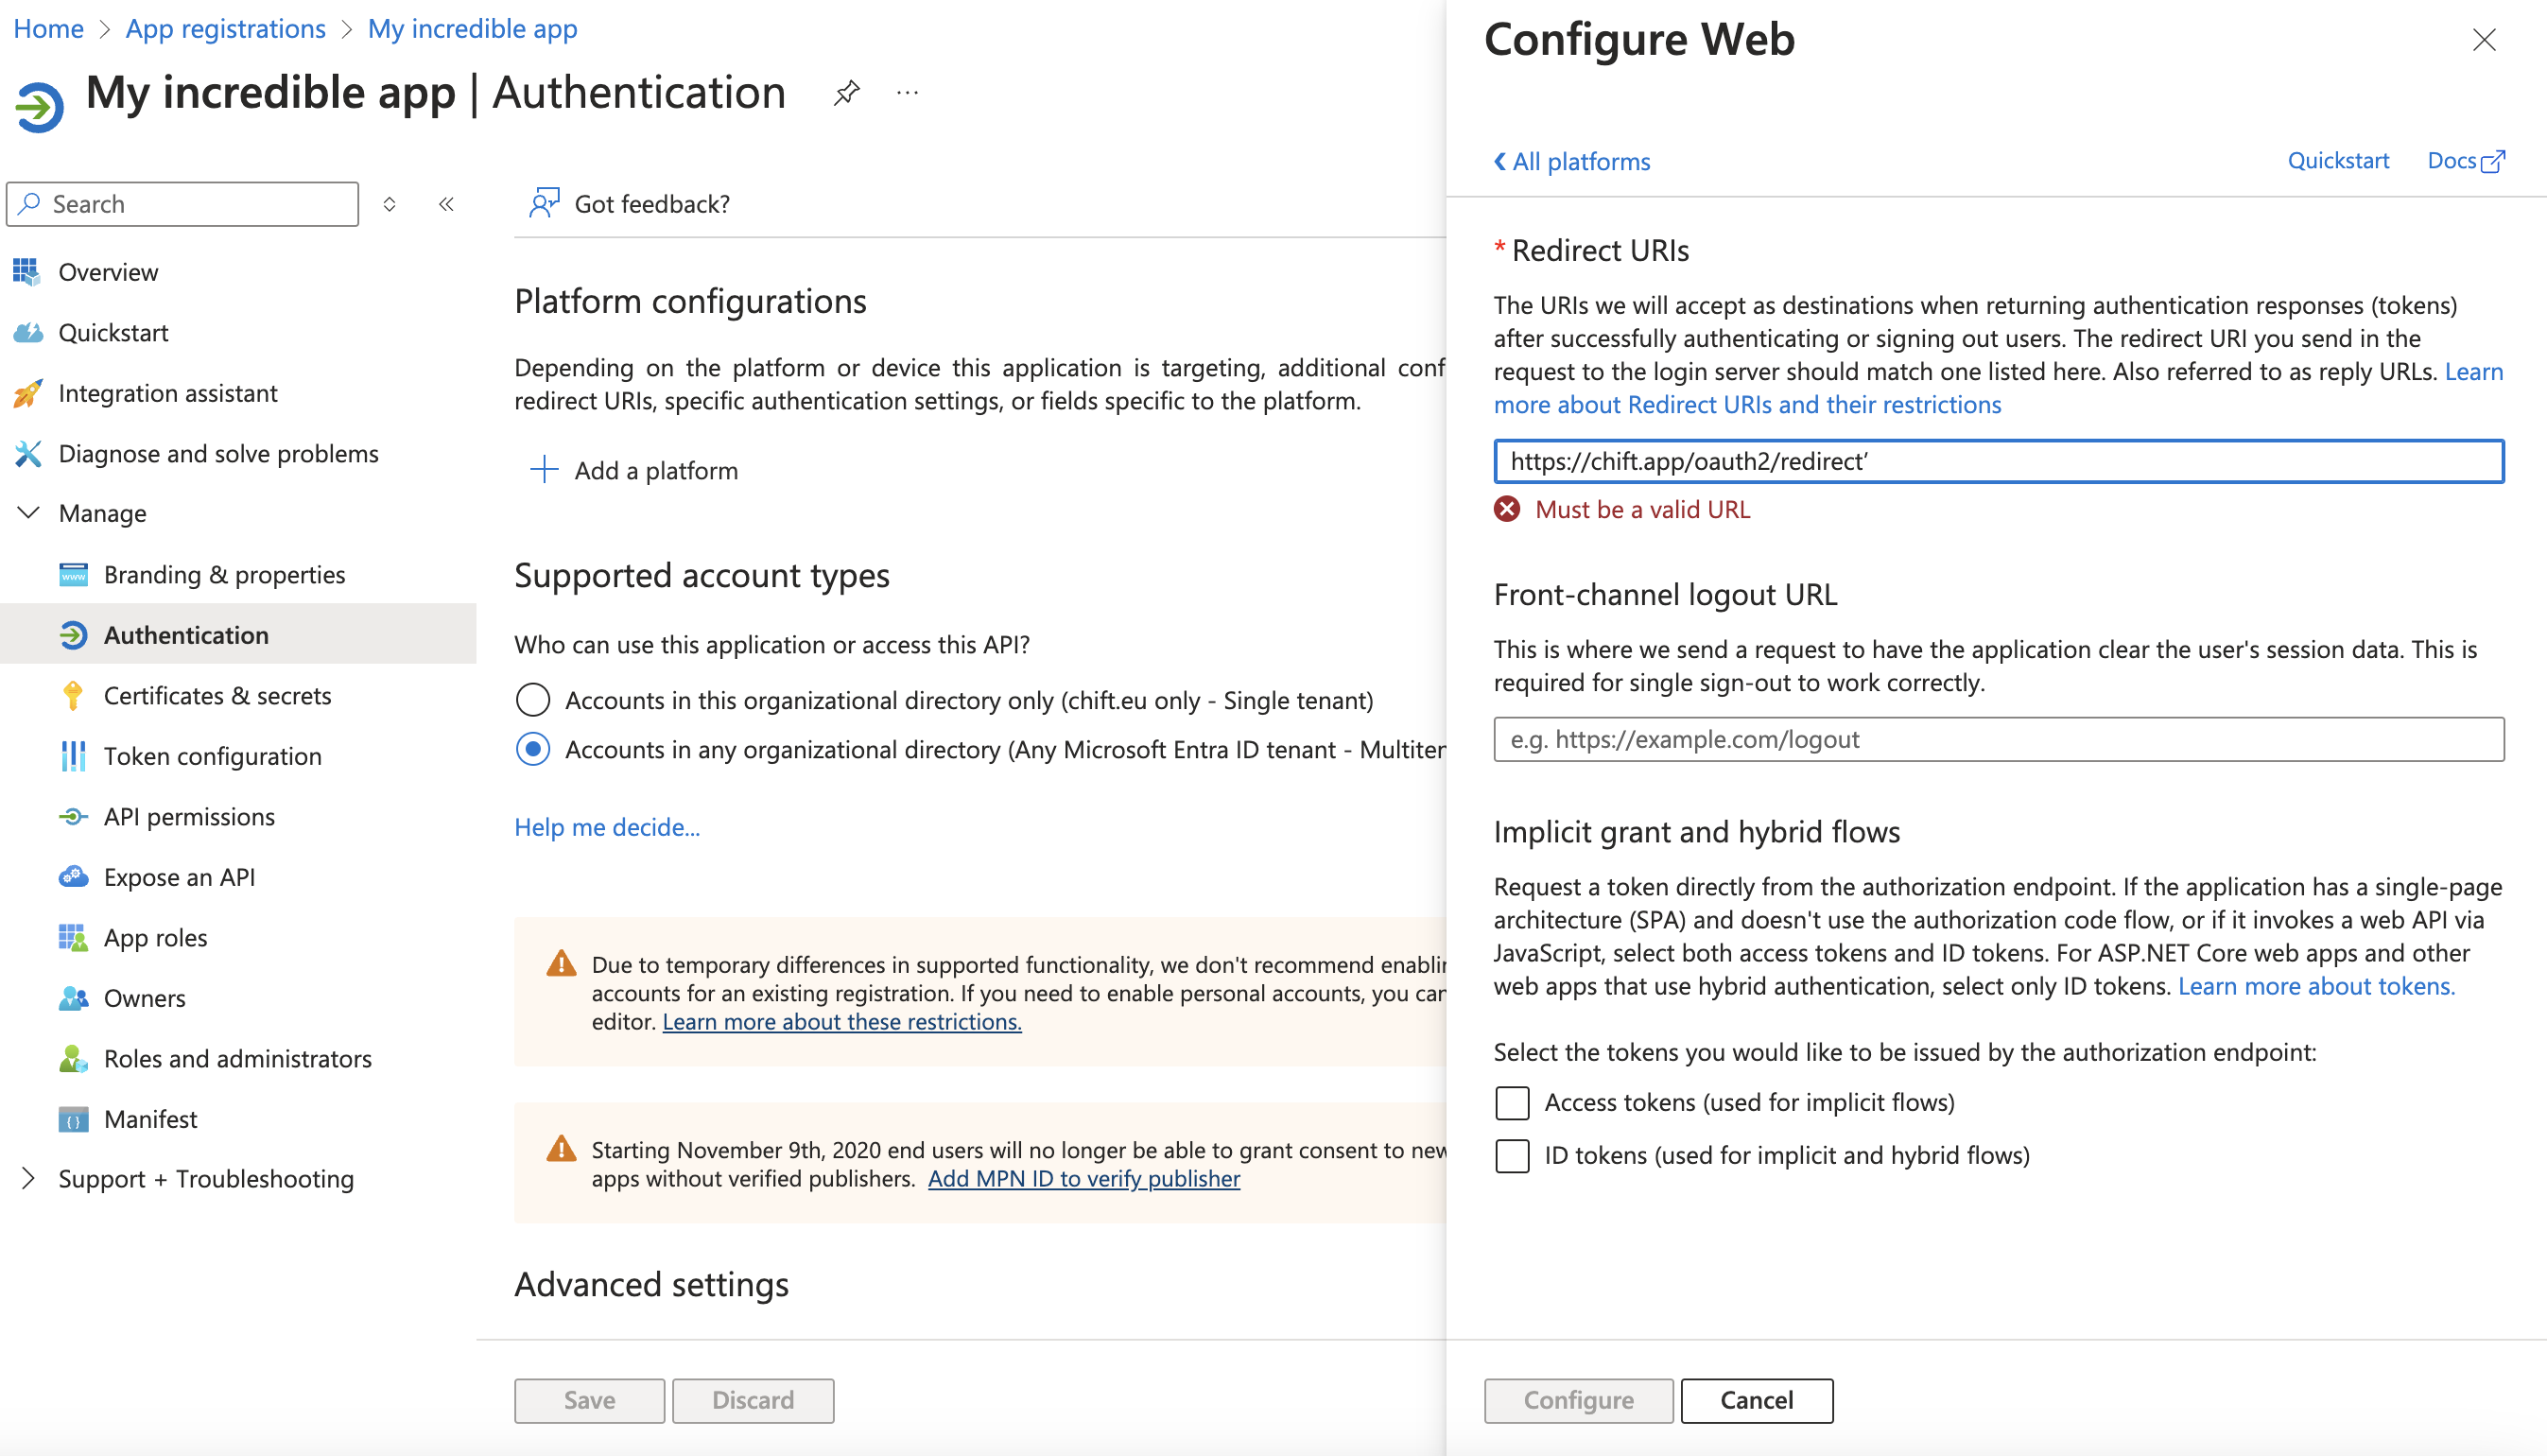
- Under your application, click right on “Manage” and then “Authentication” to configure the redirection url.
- Click on “Add a platform” and select “Web” and enter the following redirect URI: “https://chift.app/oauth2/redirect”
-
- Click on “Configure”.
-
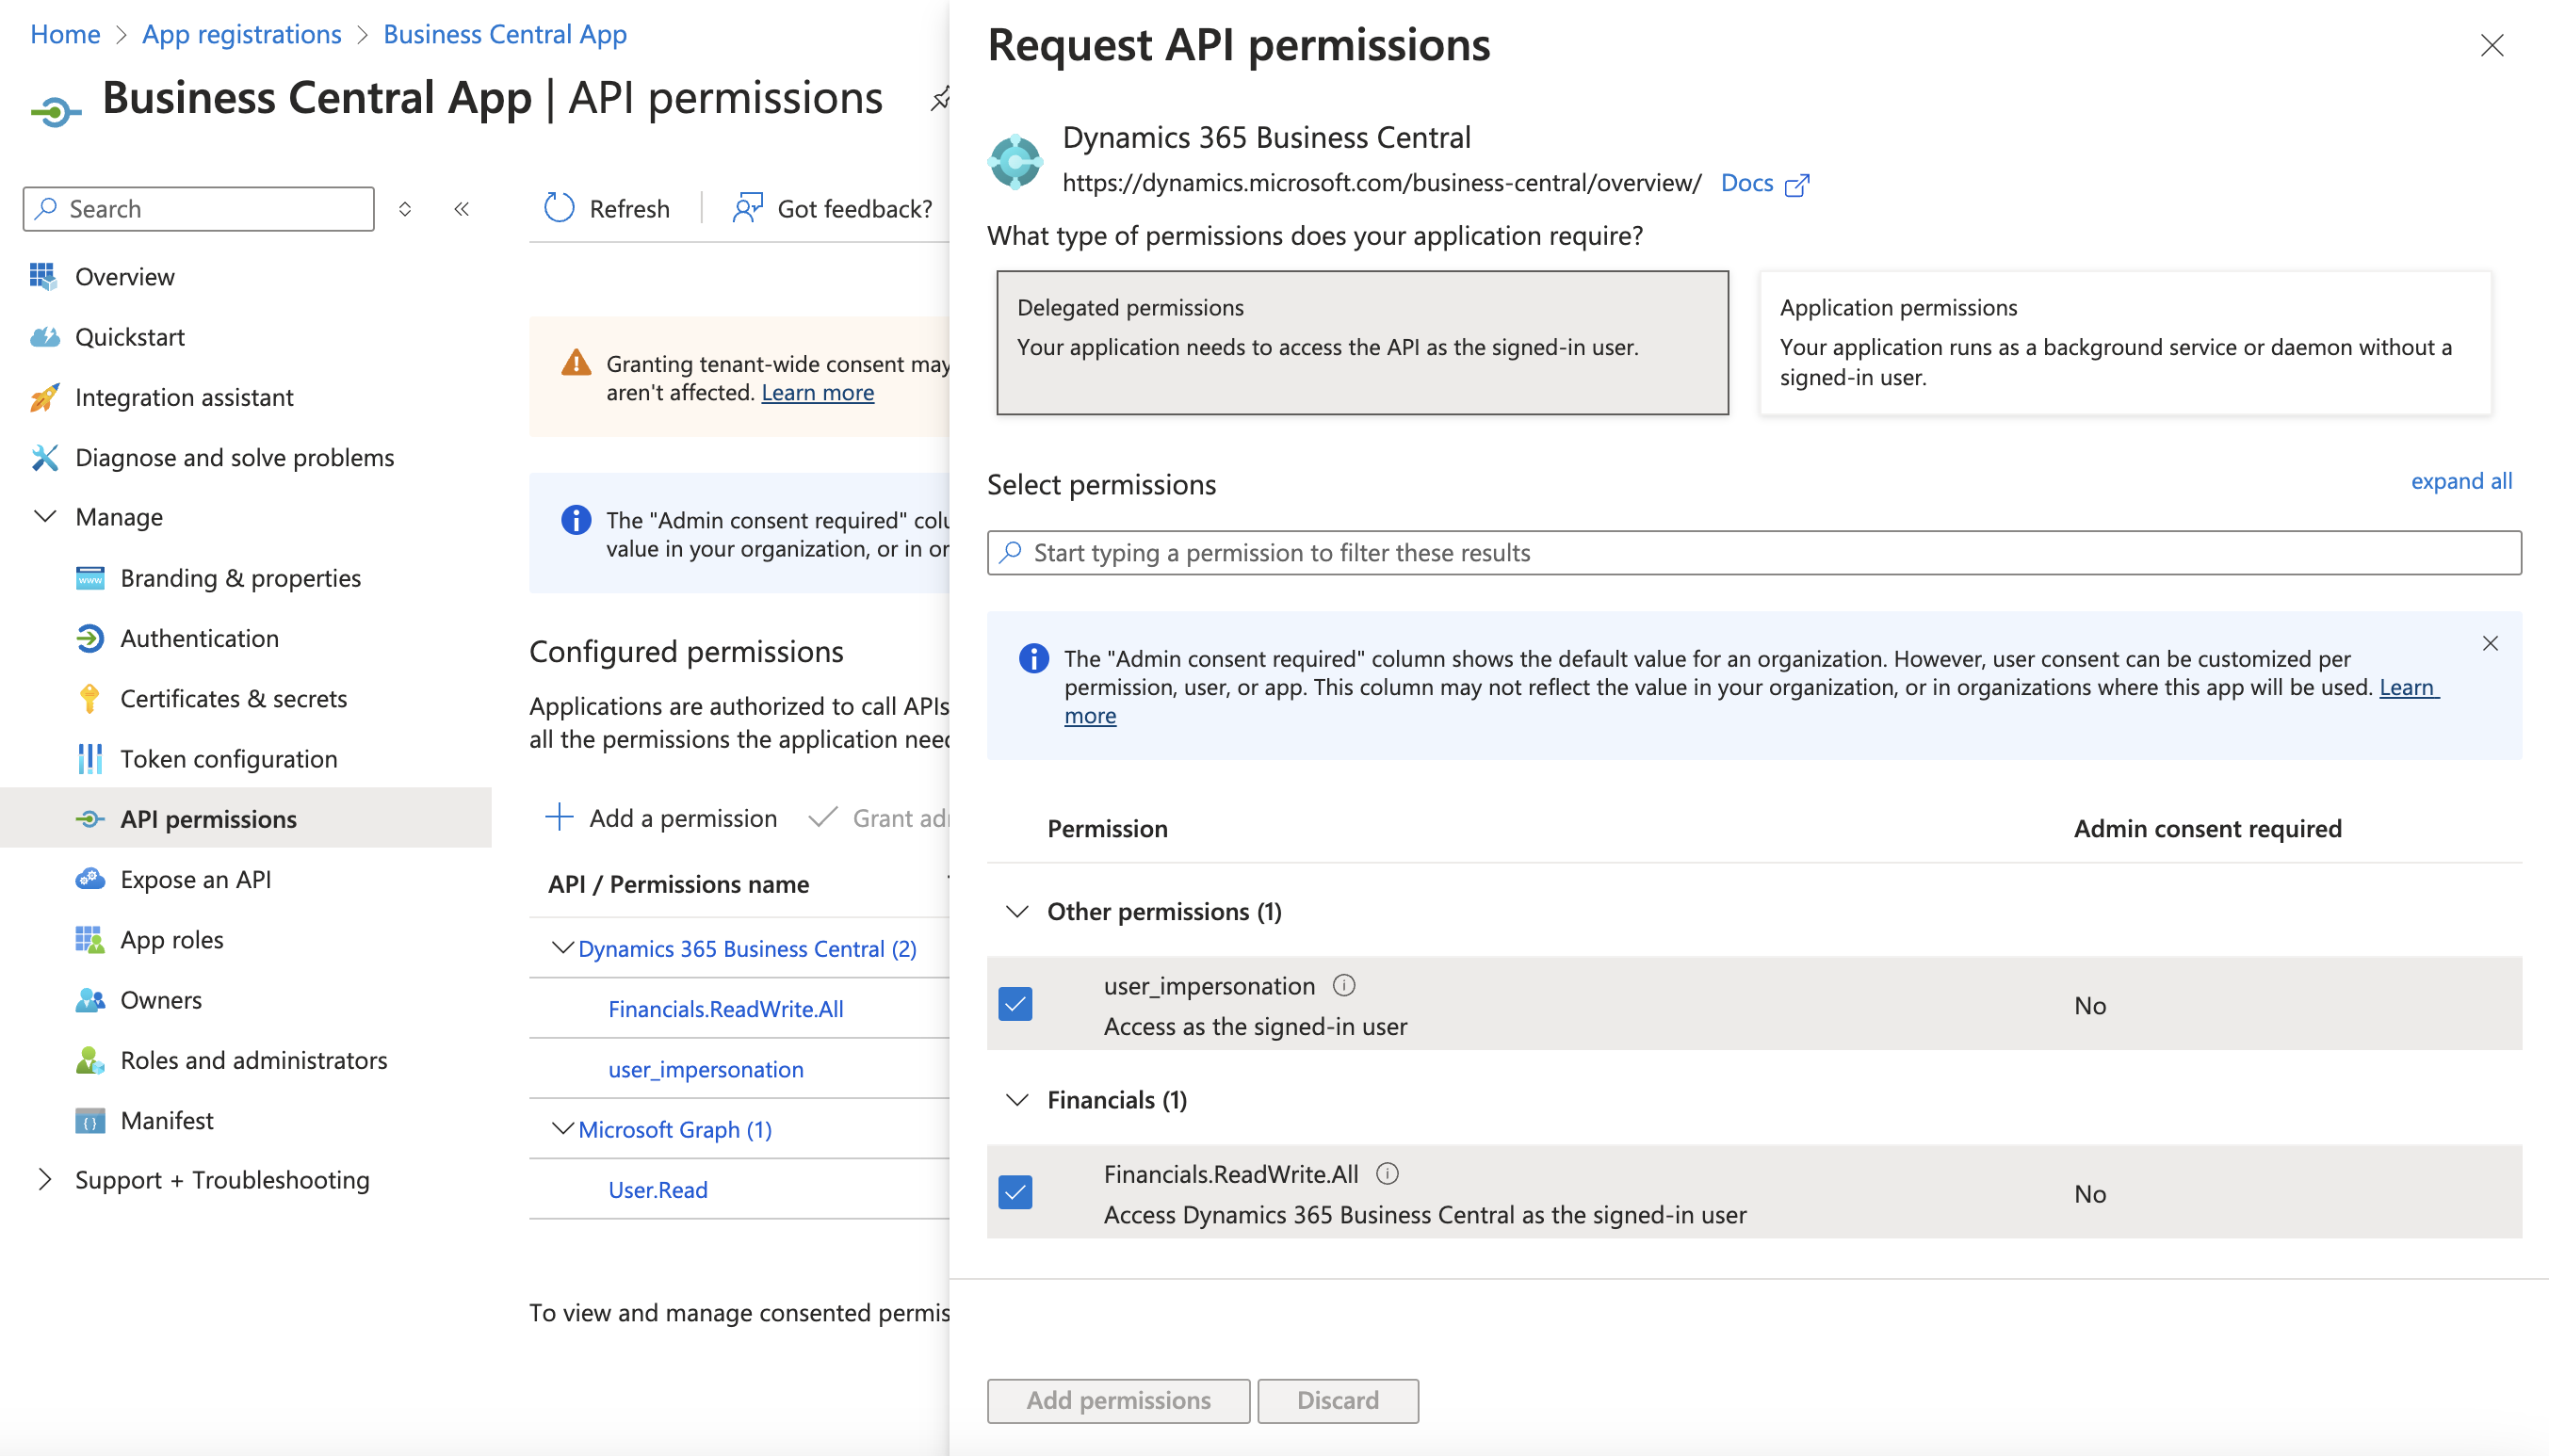
- Once this is done, we now need to configure permissions for this application. Go under “API permissions” and click on “Add a permission”.
- Select “Dynamics 365 Business Central” and search for “Financials.ReadWrite.All” as well as “user_impersonation” and “User.Read” under the “Delegated permissions”. Click on “Add permissions” to confirm your choice.
-
- As a last step, go to the “Certificates & secrets” tab and then “Client secrets” to add a new Client Secret.
- Give a description to your secret and an expiration date depending on your use case.
- Once this is confirmed, copy the value of your client secret to be able to use it in Chift. Under “Overview”, copy as well the application client id and your tenant id to be able to use it in Chift.
- Select “Dynamics 365 Business Central” and search for “Financials.ReadWrite.All” as well as “user_impersonation” and “User.Read” under the “Delegated permissions”. Click on “Add permissions” to confirm your choice.
- As final check, we need to ensure that assignment is not set to required in ‘Enterprise Application’ tab.
- Go to the ‘Enterprise Application’ tab in your portal
- Toggle off the ‘Assignement required ?’ setting - turn it to ‘No’
Test Microsoft Dynamics Business Central 365
To test the software integration, create a test account here. Another alternative is to identify a beta tester in your client base.Connect Microsoft Dynamics Business Central 365
To activate a connexion with Microsoft Dynamics Business Central 365, users will have to go through the following steps:- French article: Help Center - Microsoft Dynamics 365 Business Central FR
- English article: Help Center - Microsoft Dynamics 365 Business Central EN
Extension
A custom “Chift” extension might be needed to be installed (for end-users) depending on your use case. The Chift extension for Dynamics 365 Business Central is designed to expose additional data that is not available through Business Central’s standard API. It does not modify or create new behaviour within Business Central but enhances the existing capabilities by providing access to more data and functionalities.Compatibility
Available with Business Central version 23 and higher. The Chift extension is compatible with both new and existing customers. For existing customers, the extension can run alongside their current setup without requiring any changes to their existing connections. New customers can install the extension before or after setting up their initial connector.Mandatory Extension Setting
There is a setting on the connector side to make the Chift extension mandatory for new connections. This ensures that all new connections leverage the enhanced capabilities provided by the extension.Dynamics 365 Business Central coverage
Specificities
Invoice status correspondance| Chift | Dynamics |
|---|---|
| Draft | Draft |
| Posted | Open |
| Paid | Paid |
Specific errors for Business Central:
| Error Code | Error description | Resolution |
|---|---|---|
| ERROR_CONNECTOR_OUTDATED_EXTENSION | The extension is installed but the endpoint or the provided body/params requires the extension to be updated. | Update the extension through business central’s interface |


