

Access the connectors page
- Log in to your Chift account
- Navigate to the Connectors page on the environment you want to activate the connector for
- You’ll see a list of all available connectors organized by category (Accounting, eCommerce, POS, etc.)
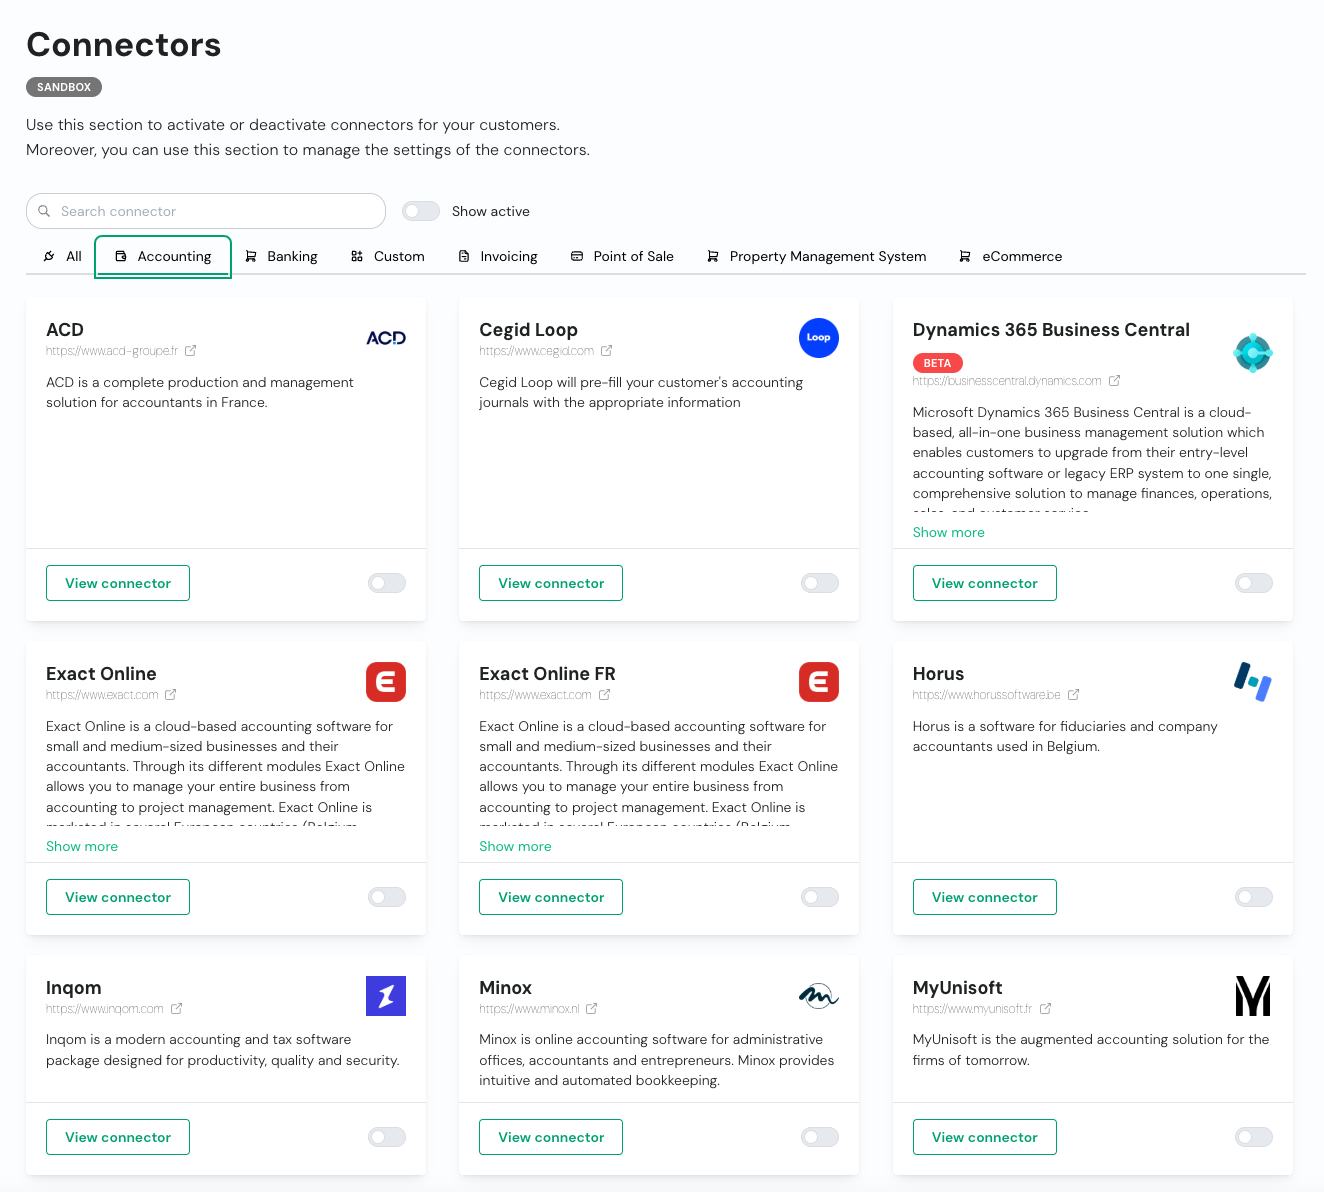
Specific connectors might not be available for your account. Please contact
your customer success manager if you need help.
Activate a connector
- Find the connector you want to activate in the list
- Click on “View connector” to open its details
- At the top of the connector page, you’ll see a “View documentation” link. It opens a separate page with detailed instructions and context about the connector. We recommend checking it before continuing configuration.
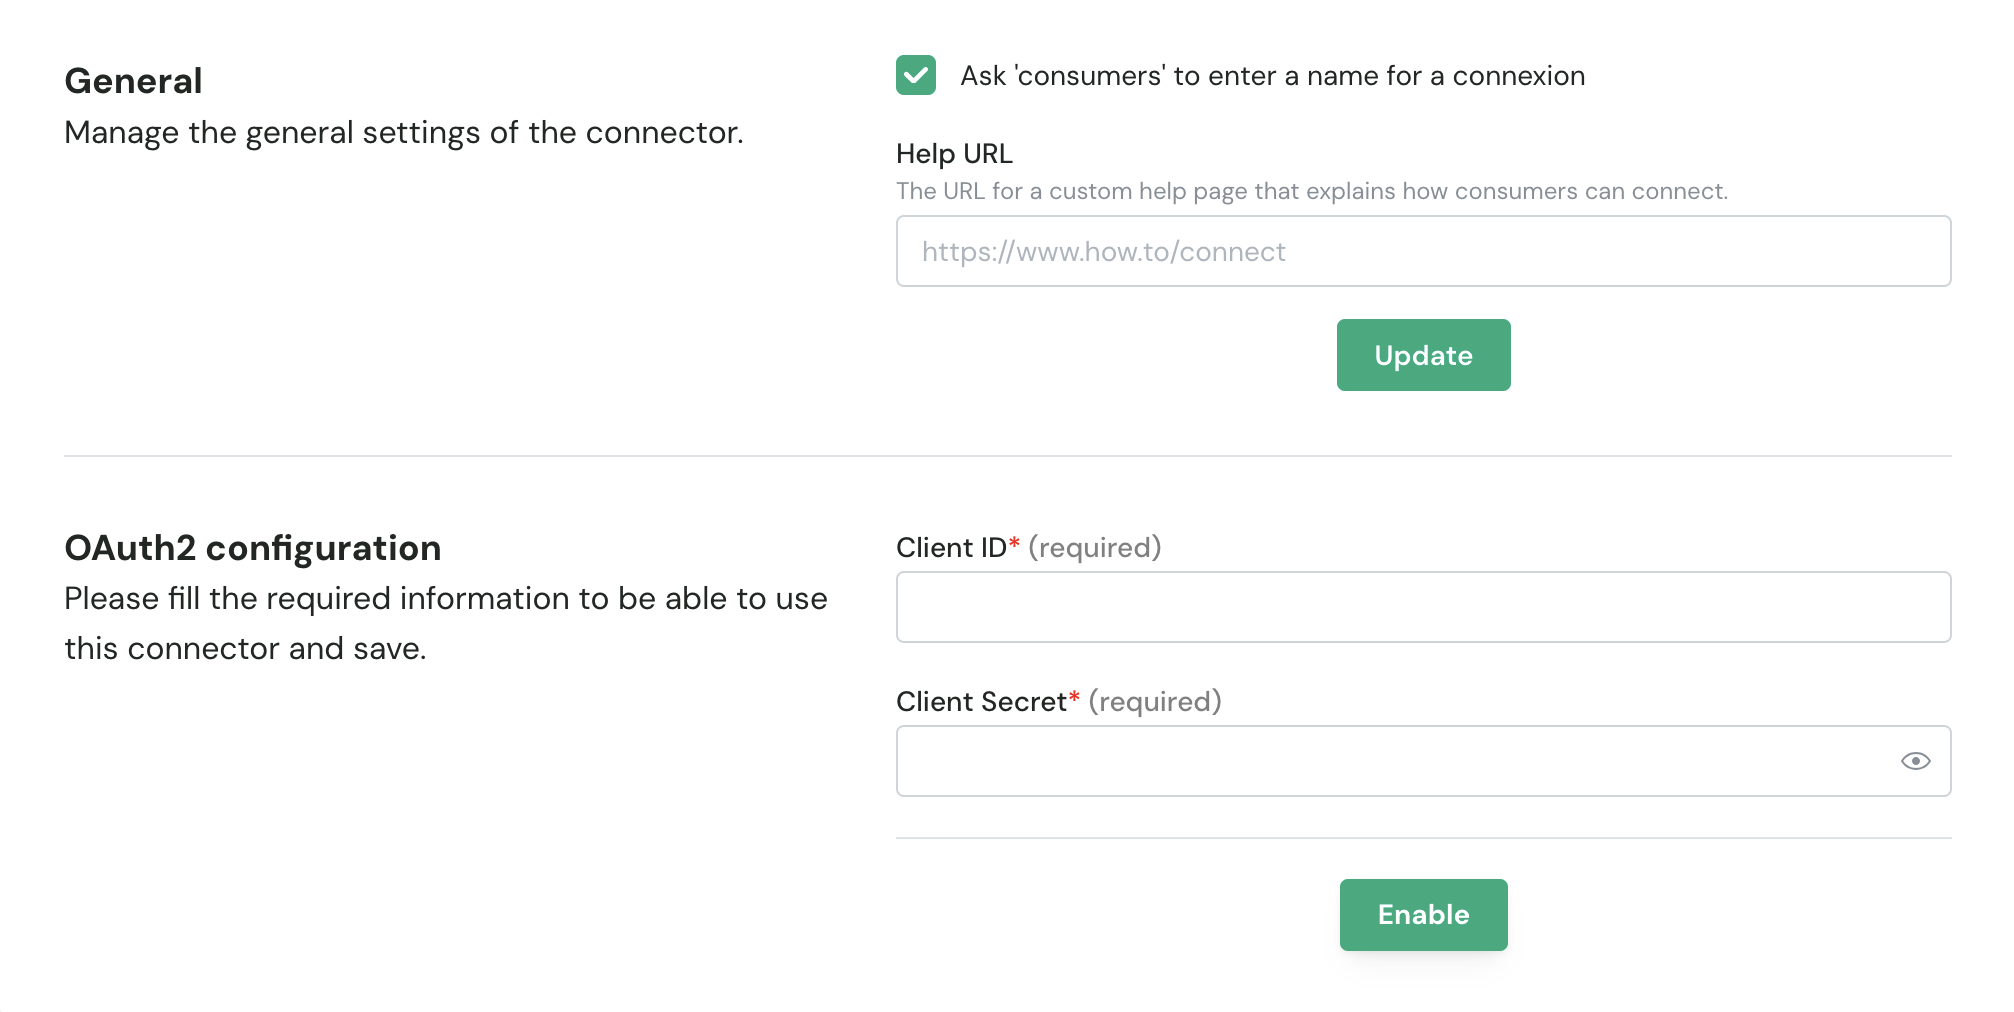
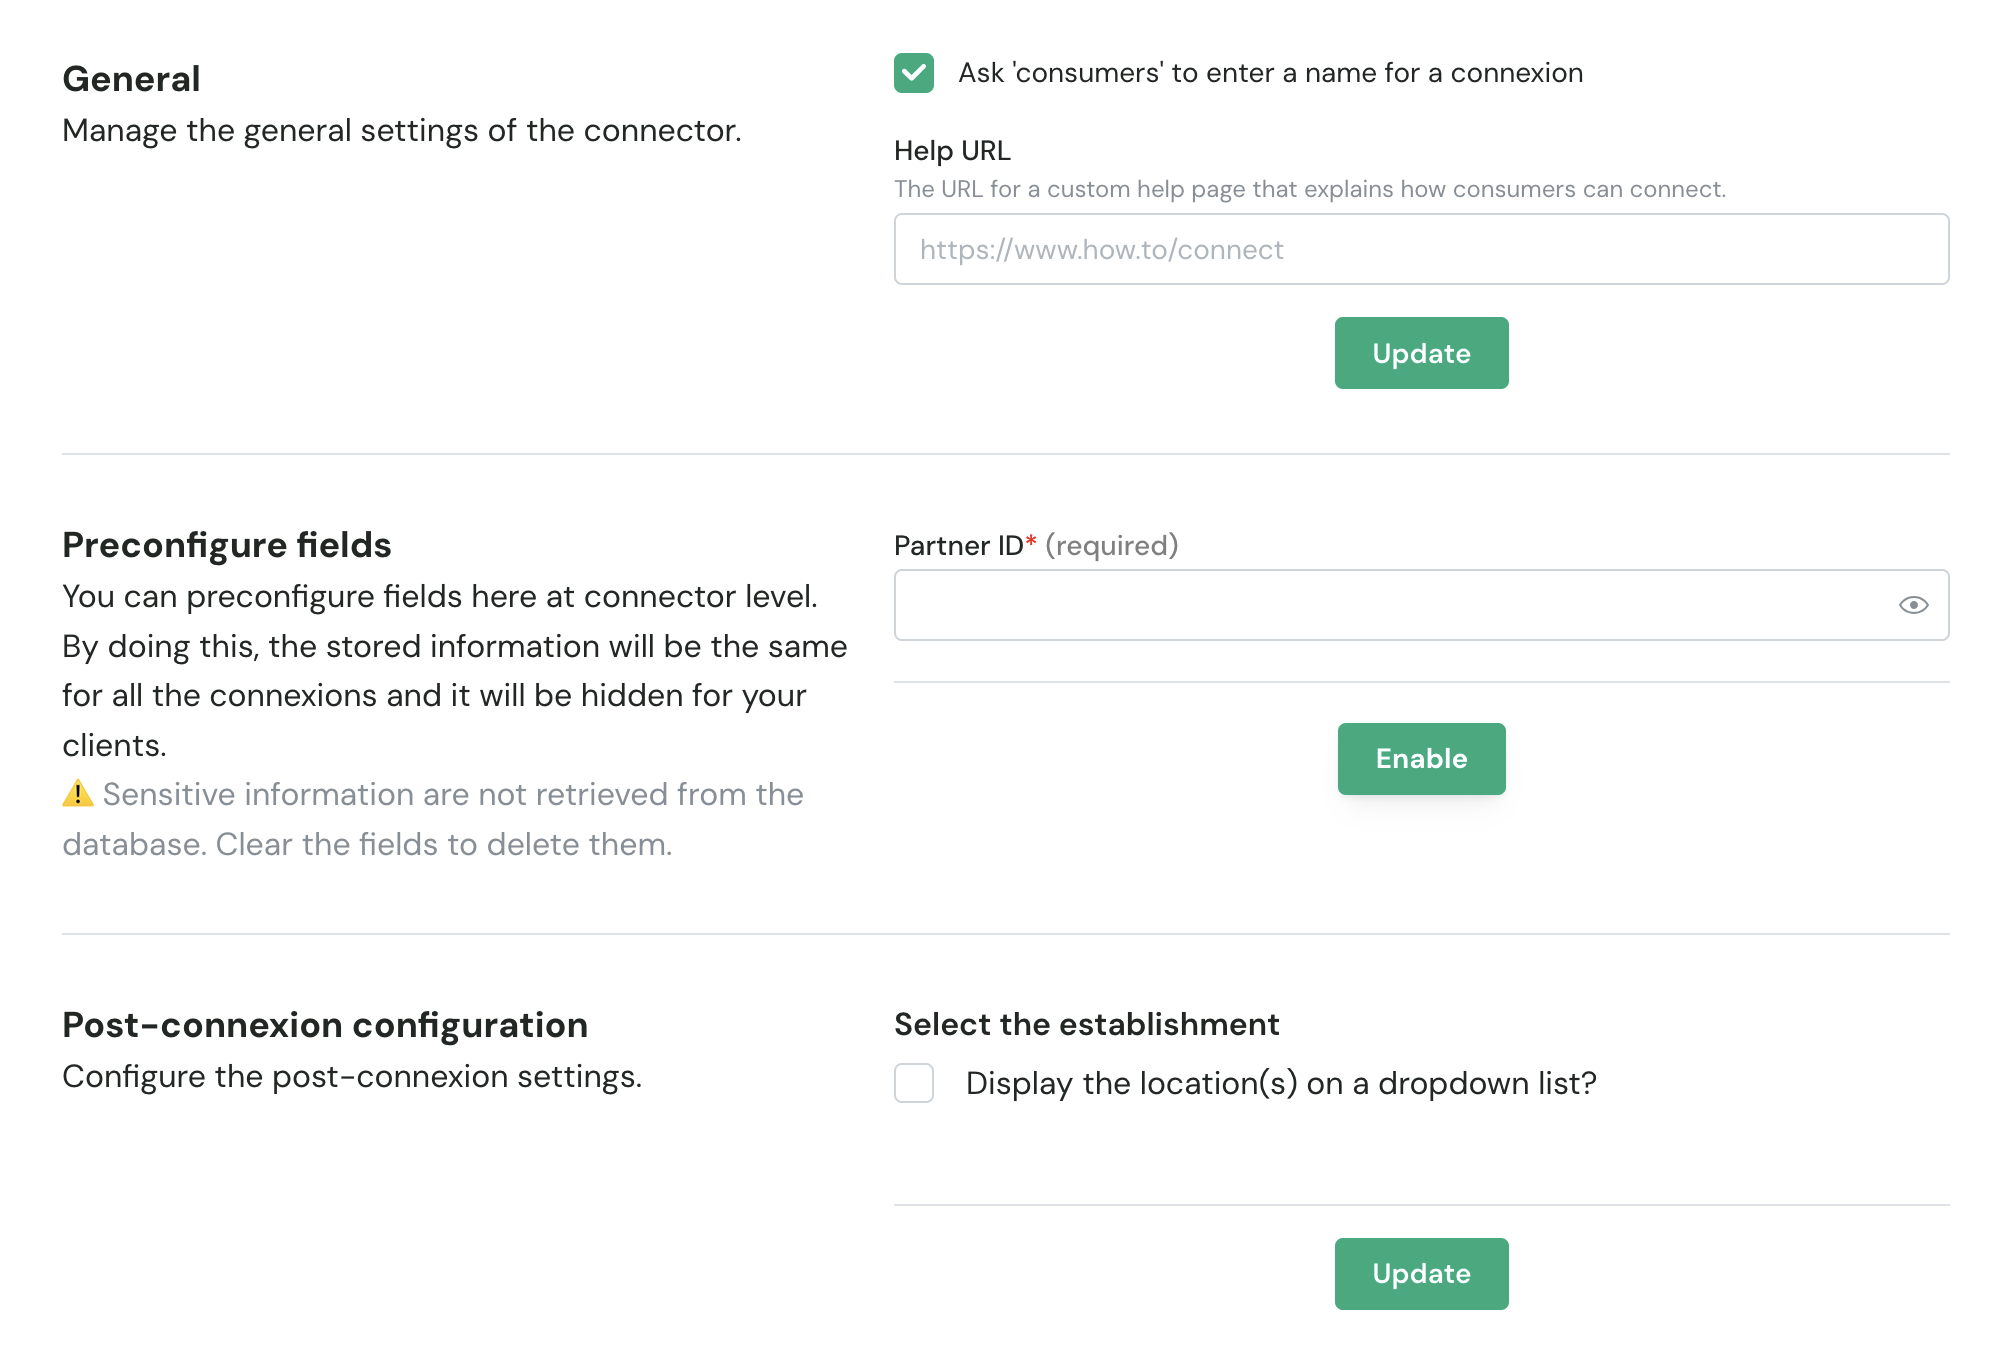
- On the same page, you’ll also find the following configuration sections:
- Click the “Activate” button to enable the connector
You need to activate connectors separately for each environment you’re working
in (Sandbox, Production). This allows you to test integrations in a sandbox
environment before deploying to production.
Managing active connectors
- You can view all your activated connectors through the “Show Active” filter
- You can search for a connector by name or filter by Unified API
- To deactivate a connector, you can use the toggle button on the connector card. Note that you can only deactivate connectors that are not currently connected to any consumer.
Next steps
Once you’ve activated your desired connectors, you can:- Create consumers who will use these connectors
- Generate API keys to access the APIs
- Start building integrations using our API documentation