- Your sync does not support manual execution for a specific period.
- Your sync supports manual execution for a specific period.
Your sync doesn’t support manual execution for a specific period
If your sync doesn’t support manual execution for a specific period, the following tab will open when you click the play button: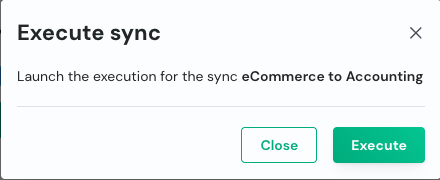
This will run the default synchronization.
Your sync supports manual execution for a specific period
In this case, you can either run the default synchronization or run it for a specific date. (If this view doesn’t appear when you click the play button, it means this feature hasn’t been implemented yet for your sync. Please reach out to your CSM.)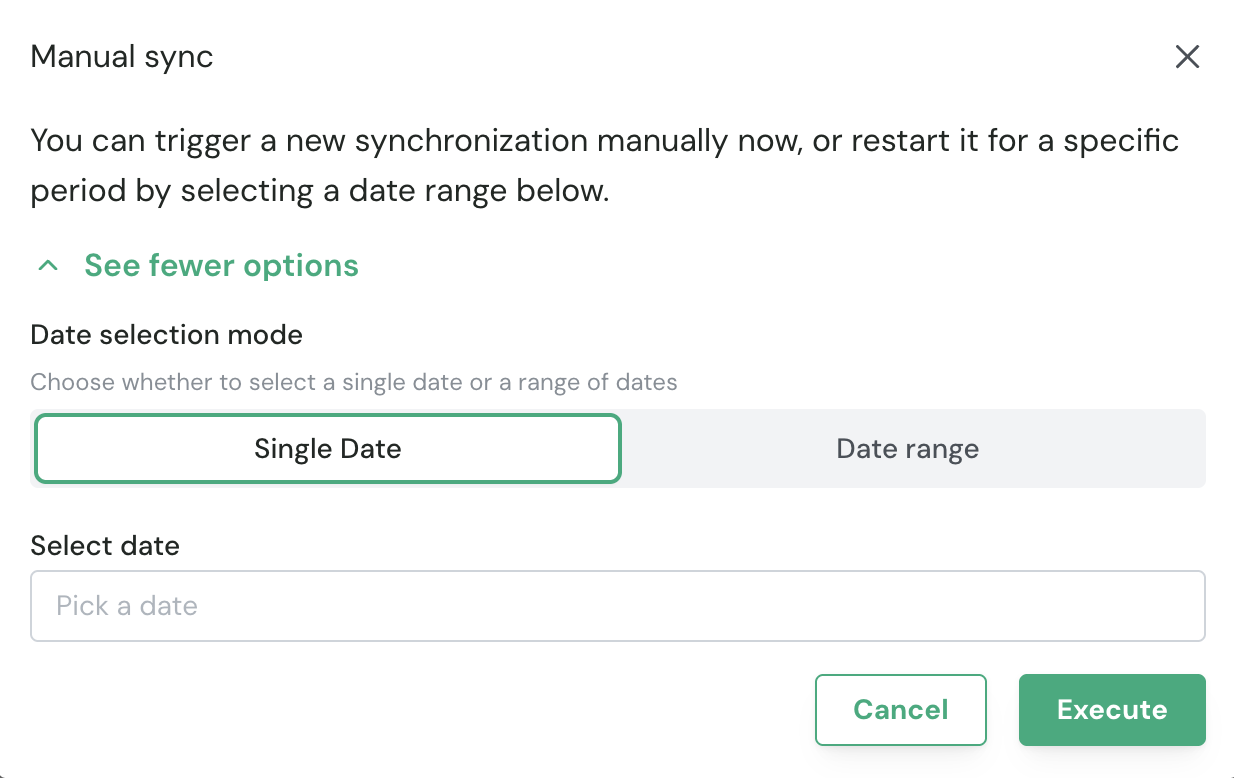
- Synchronize all missing data (don’t re-import data that’s already been synchronized).
- Synchronize all data for a specific date, as if nothing had been imported before.
- Synchronize all data for a specific date range, as if nothing had been imported before.
Run the default synchronization
To run the default synchronization (which won’t import anything that’s already been imported), simply click Execute without changing anything on this tab.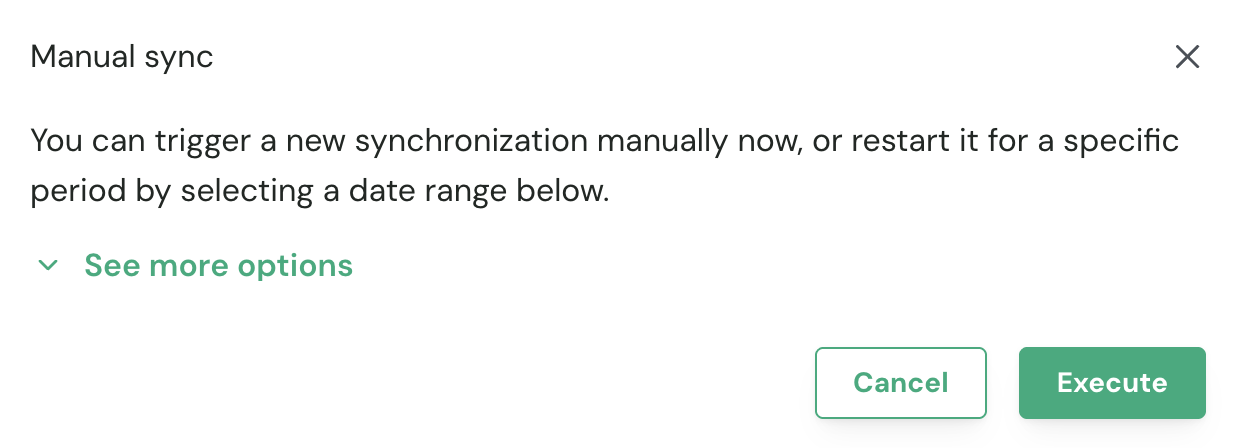
Force synchronization for a specific date
To run the synchronization for a specific date, click the Single Date tab, select the date you want to import, and click Execute.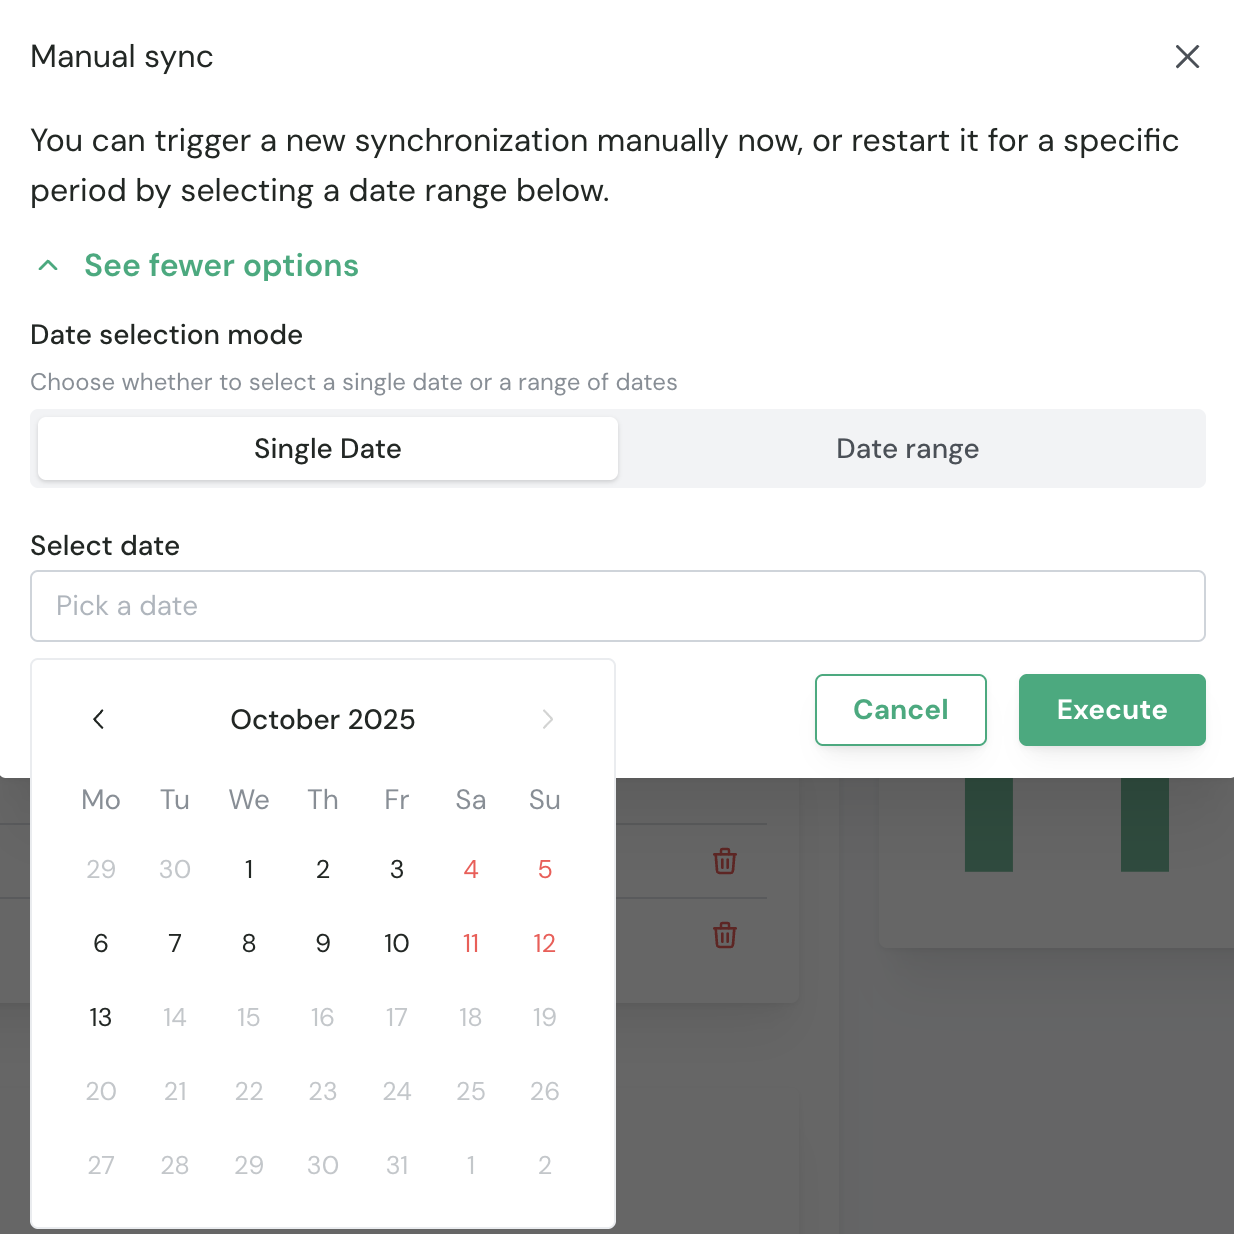
Force synchronization for a date range
To run the synchronization for a range of dates, click the Date Range tab, select the desired dates, and click Execute.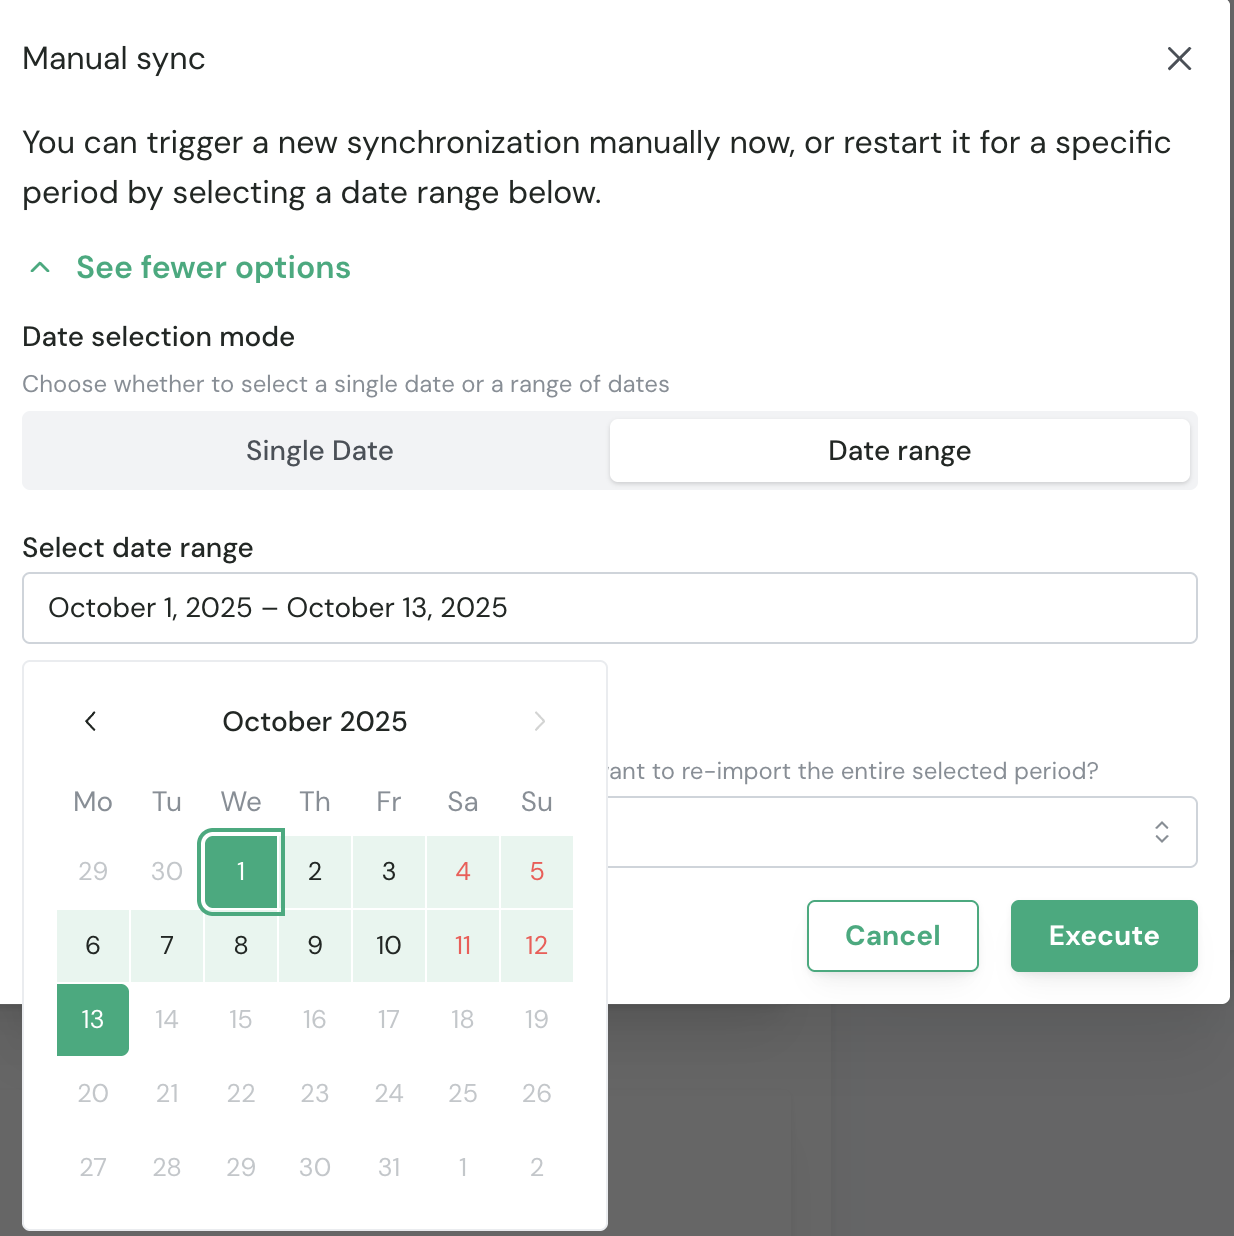
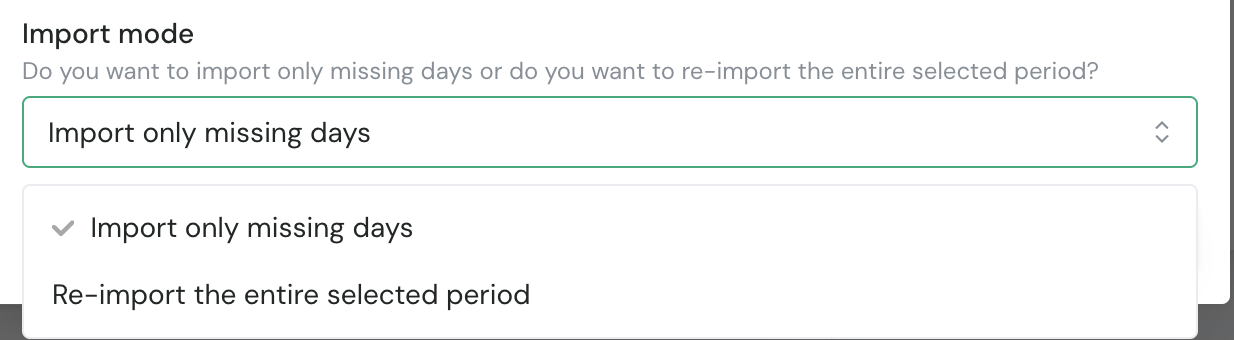
- If you only want to import missing data, simply click Execute and the sync will start immediately.
- If you want to re-import all data for that date range, select the second option.
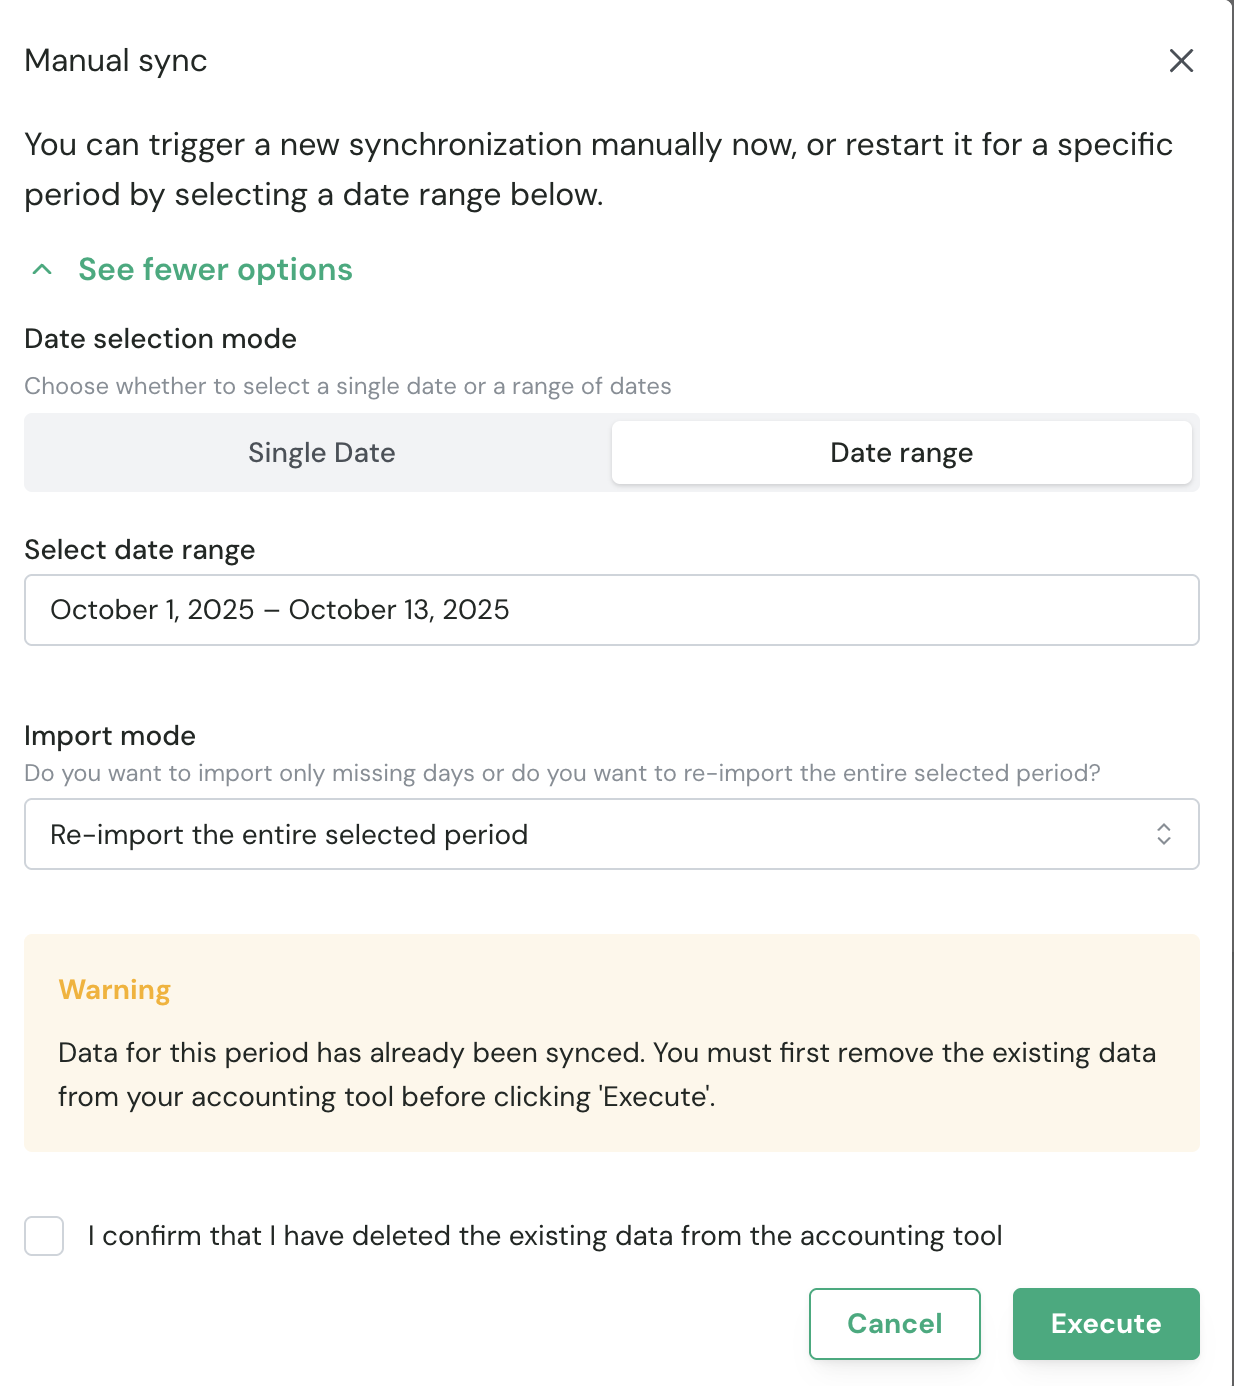
If data was already imported for that date range, you will see an alert asking you to confirm the import of data.
Make sure with the client that this is acceptable, otherwise this might result in duplicate data in your tool.
Check the “I confirm” checkbox and click Execute to start the synchronization.
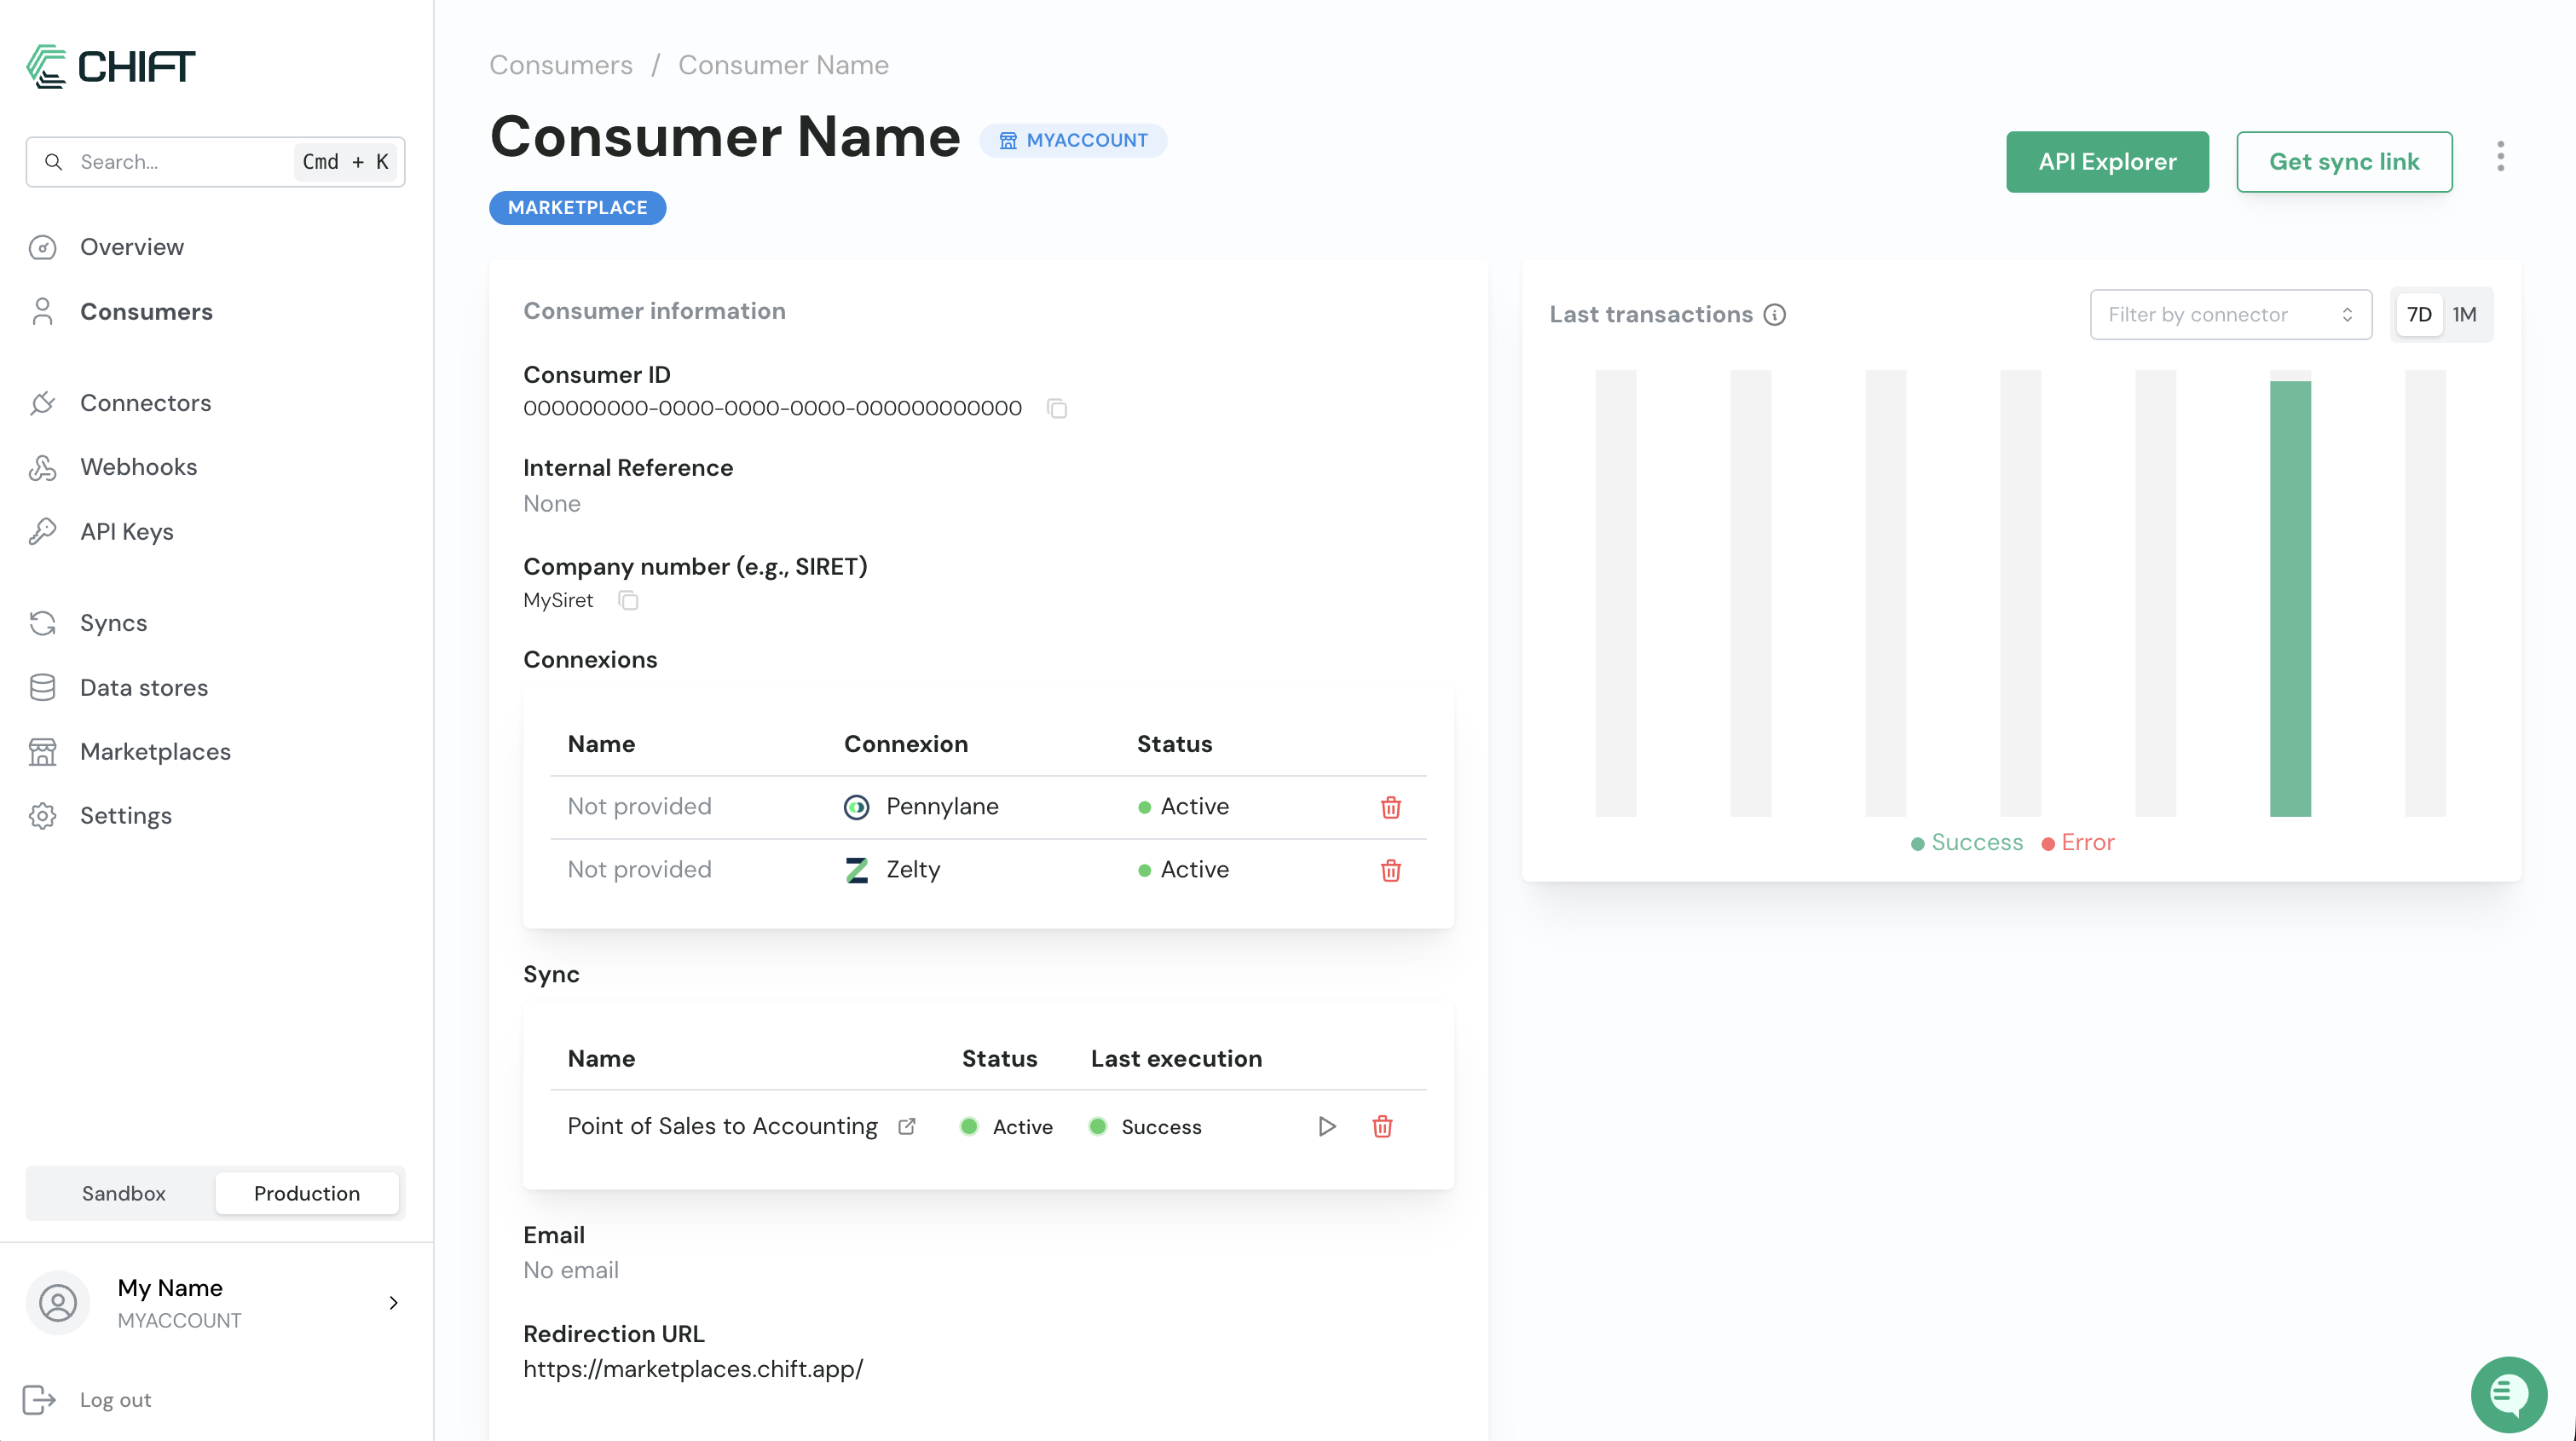
Execution statuses
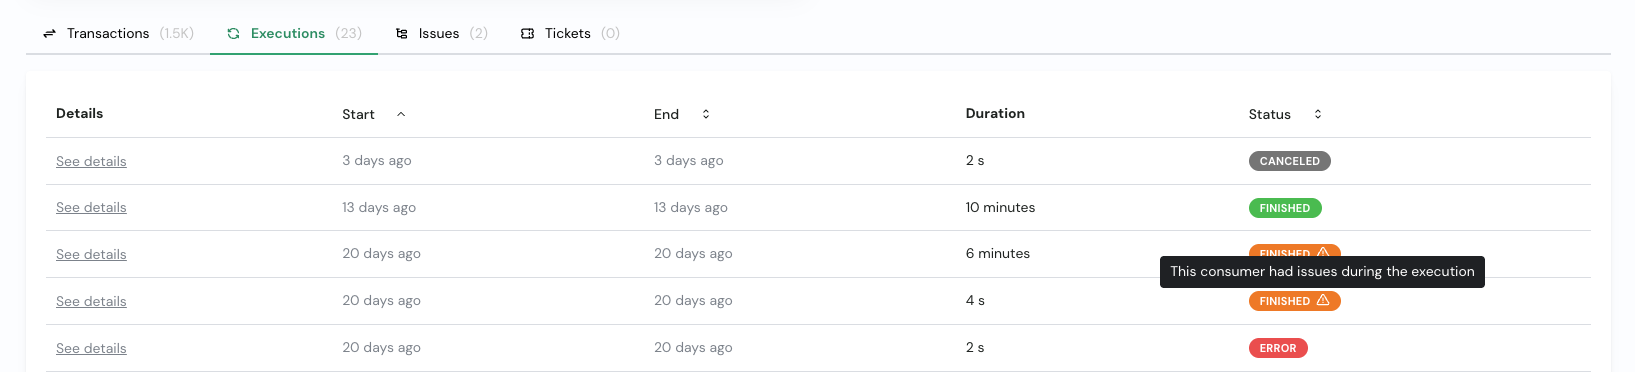
IN PROGRESS
The execution is currently running.- The sync has been triggered and is actively processing.
- Logs and results may still be incomplete.
- The status will update automatically once the execution finishes.
FINISHED
All good — no errors occurred.- The execution completed successfully.
- All steps were processed without validation or technical errors.
- No corrective action is required.
FINISHED ⚠︎
Completed with non-fatal errors.- The execution finished processing.
- One or more issues occurred (for example, validation errors or partial rejections).
- No fatal or system-level error interrupted the execution.
- Validation errors on specific records
- Business rule violations
- Non-blocking data inconsistencies
ERROR
Execution failed due to a fatal error.- The sync could not complete successfully.
- A critical issue interrupted the process.
- Authentication or authorization failures
- Connectivity issues
- Technical or system exceptions
- Configuration errors
CANCELED
Execution was manually stopped.- The sync was intentionally canceled before completion.
- No further processing occurred after cancellation.