

- Reach out to your CSM at Chift.
- Together, you agree on the sync timing that fits your use case (how often the sync runs). The cadence directly drives how fresh the data layer data will be for your end-users.
- Chift activates the sync. An initial run backfills historical data into the data layer store; the recurring sync then keeps it up to date at the agreed cadence.
Configuring the data layer
Once the feature is enabled on your account, you manage it yourself from the Data layer settings page in the Chift platform. Every vertical that supports the data layer appears as its own card, and each is configured independently.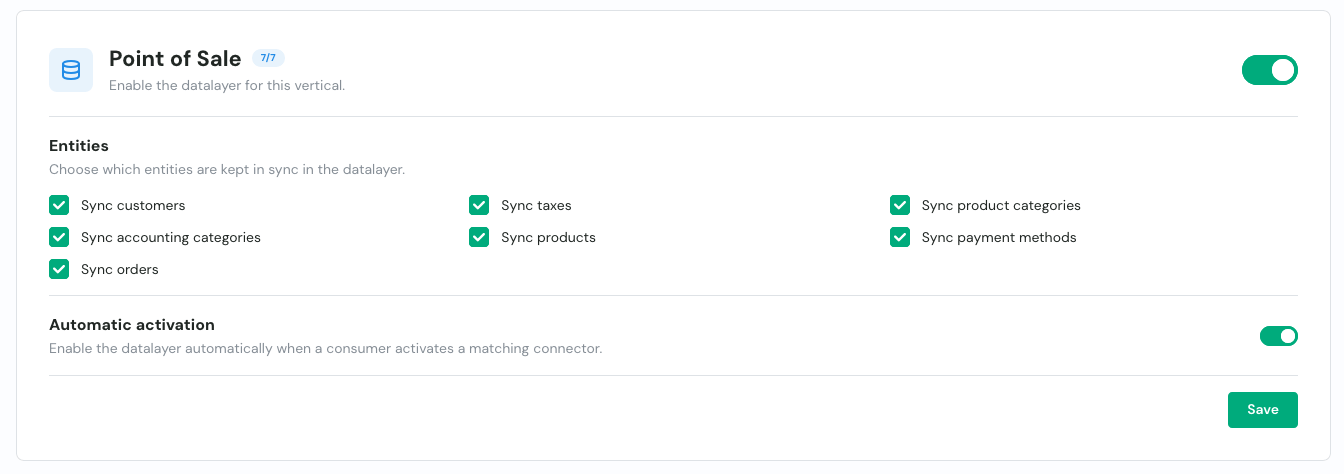
1
Enable the data layer
Turn the data layer on for the vertical. The card shows how many entities are currently selected.
2
Choose which entities to sync
Under Entities, tick the resources you want the sync to keep in the data layer store. For accounting, that’s folders, chart of accounts, journals, journal entries, invoices, partners, VAT codes and book years (see Overview). Only the entities you select are synced and served through the header, so leave out anything you don’t need to keep each run lean.
3
Choose how it's enabled on connections
The automatic enable mode (default) turns the data layer on the moment a consumer activates a matching connector, so it’s ready without any per-connection action. Switch to manual if you’d rather enable it yourself on each connection.
4
Choose how much history to load
Set the window the first sync backfills (see below).
Choosing how much history to load
The first sync backfills historical data into the data layer store. By default it loads the last 12 months, but you can widen or narrow that initial window from the same settings page. The value you set is applied each time the data layer is enabled on a connection. The start-date control offers a few modes:
If you enable the data layer manually from your own backend, you can pass the same window directly to the
enable_datalayer endpoint through its from_date, fiscal_years_back (accounting only) or full_history body options. These options are mutually exclusive and take precedence over the settings-page value.
Scoping to specific folders or locations
By default the data layer syncs every top-level entity the connection exposes: all accounting folders, or all POS locations. When you enable the data layer manually from your own backend, you can narrow it to a subset by passing anentity_filter to the enable_datalayer endpoint:
folder_ids— for accounting connections, the folders to sync.location_ids— for POS connections, the locations to sync.
ERROR_DATALAYER_ENTITY_NOT_AVAILABLE rather than silently syncing nothing. Omit entity_filter to sync everything (the default).
Use it on a request
Reading from the data layer is a per-request choice, controlled entirely by thex-chift-datalayer request header. It accepts three values, so you decide per request whether an unavailable data layer should error or quietly fall back to a live read:
To serve a given call from the data layer, send
x-chift-datalayer: true:
if_available when you’d rather get a live answer than an error (for example while the first sync is still running), without branching on the connection’s state yourself.
Knowing which source served a response
Every response to a request that opted into the data layer (true or if_available) carries an x-chift-datalayer-source header telling you which path actually served it:
x-chift-datalayer-source: datalayer— served from the data layer store.x-chift-datalayer-source: classic— served live from the source.
if_available tell whether a given response came fresh from the source or from the last sync.
Reading data you just wrote
Because writes go to the source and the data layer is updated only by the sync, a record you have just created or updated is not yet in the data layer until the next sync run. The pattern is simple: just don’t send thex-chift-datalayer header on that read. The call then goes through the live unified API and returns the up-to-date record from the source. On subsequent reads where freshness is no longer critical, you can send the header again.