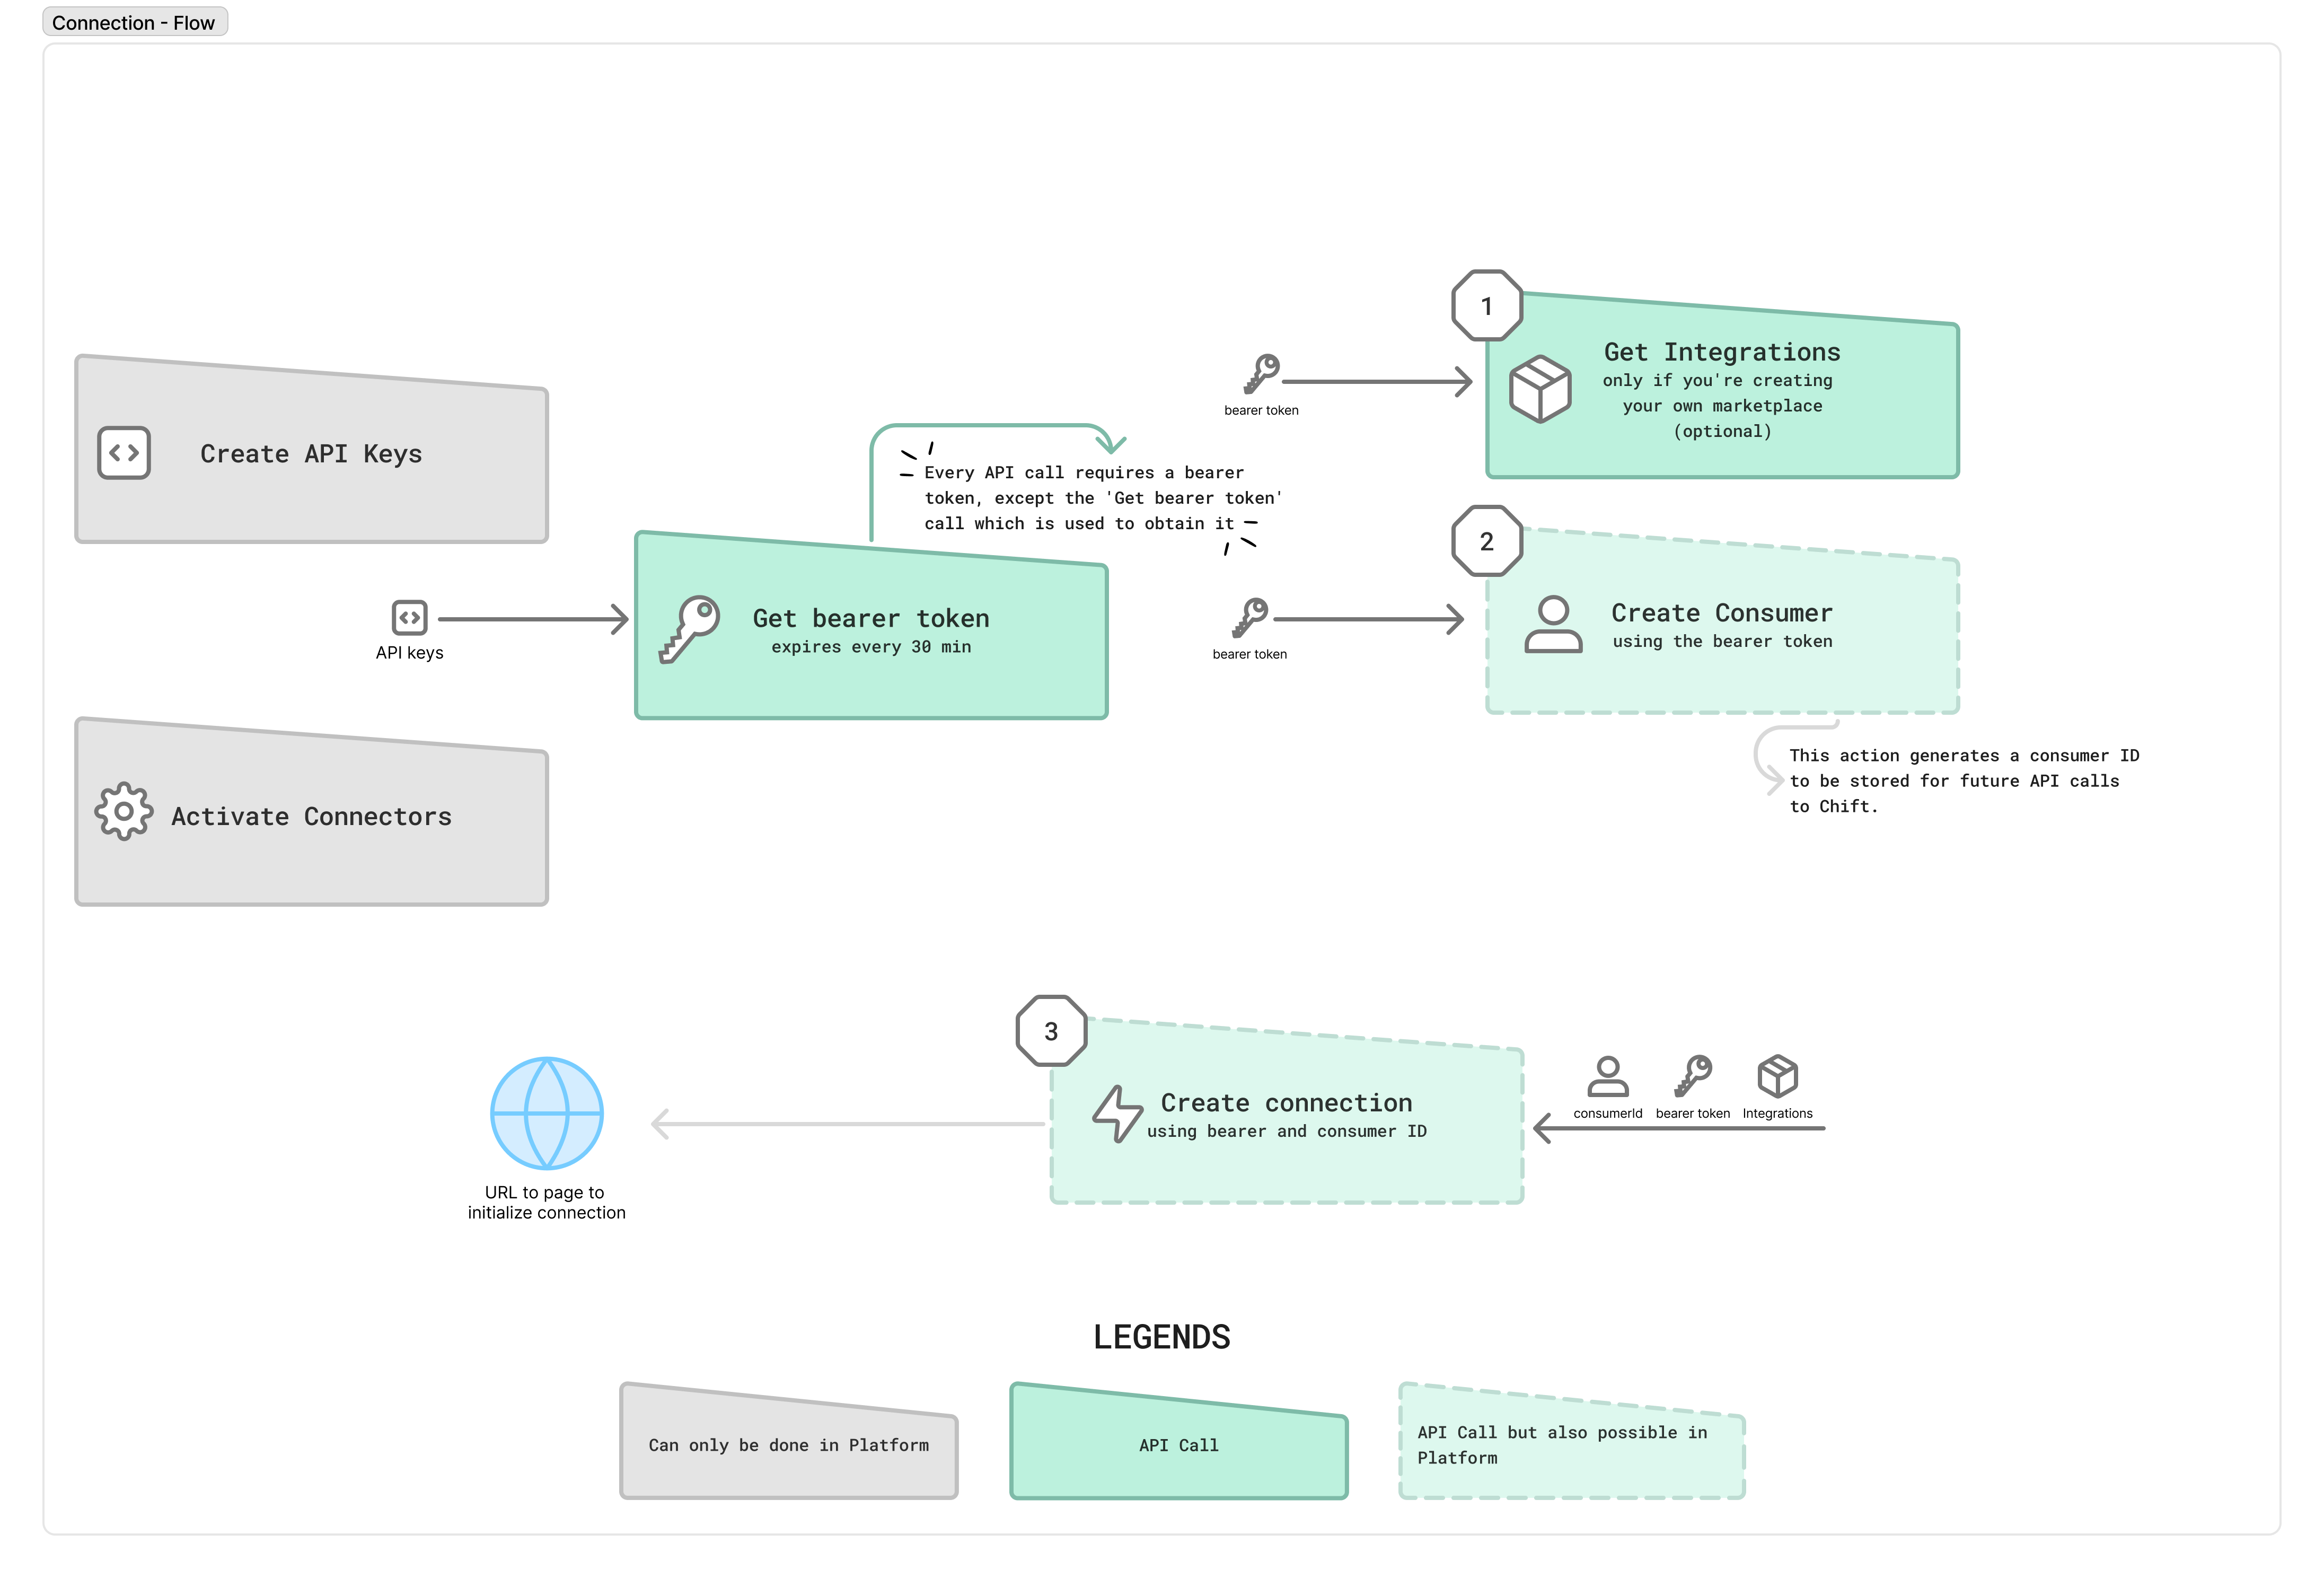
1. Retrieve active integrations (connectors)
This step is only required if you want to build your own marketplace inside your product.It lets you retrieve all active integrations (connectors) from your Chift platform, including their technical
integration_id and logos.
- If you build your own marketplace → use this endpoint.
- If you use Chift’s hosted marketplace → you can skip this step.
API Reference ↗️ Notes:
- Use the query parameter
status=activeto get the list of available connectors. - Logos can be retrieved as base64 for display in your interface:
Returns a logo/icon (as base64) ↗️
2. Create the consumer
A consumer represents your end-customer within Chift. Endpoint: Create new consumerAPI Reference ↗️ Fields:
name: Required — Consumer name.redirect_url: URL to redirect the user after activation.- Can be customized per consumer.
- Or defined as a static default for your account and connectors (see Configure account ↗️).
- A detailed explanation of how redirection works is provided in the Annex on Redirect URL.
internal_reference: Your internal ID/reference for this consumer, used to reconcile with your internal systems.email: Used for automated reminders and local agent deployment (if applicable).
3. Generate the activation link
Once the consumer exists, generate an activation link so they can connect their software. Endpoint: Add new connectionAPI Reference ↗️ Fields: A - Using your marketplace:
-
name: Required — Display name of the connection. -
consumerId: Required — From Step 2. -
integrationId: From Step 1. B - Using Chift’s marketplace: -
name: Required — Display name of the connection. -
consumerId: Required — From Step 2. -
redirect: Optional (true/false, default =false). See Redirect URL.
It is secured by a token and valid for 30 minutes. After this step, your consumer must authorize and sometimes provide additional information to complete the connection activation.
👉 Connection status and updates are covered in the following article Monitoring & Updating Connections.
Appendix
🔄 Redirect URL
The redirect behavior in Chift refers to the process of sending the consumer back to a specific URL (typically within your software) once the connection flow has been completed.It is controlled by two parameters:
redirect— a boolean that determines whether Chift should redirect the user after completing or failing the connection flow.redirect_url— the destination URL where the user is redirected after the connection process.
This can be defined per consumer or globally in your account settings.
See Configure account ↗️
1. During connection creation
2. During connection update
Note
- When defined at both levels, the consumer-level
redirect_urltakes precedence.
URL parameters
When redirection occurs, Chift automatically appends query parameters to provide context on the connection result (e.g.,connectionStatus, error).See Configure account ↗️ for details and to ensure it is activated.
✅ Summary
- Default behavior:
redirect = false redirect_urlcan be defined per consumer or globally in account settings.- Redirection behavior is consistent for both new and updated connections.