

Prerequisites
- An API key, and a bearer token obtained from it — see Authenticate with Chift API.
- At least one active connector on your account — see Activate a connector. Connectors you have not activated are invisible to the API and cannot be connected.
Two ways to present the choice
You can present the connector choice in two ways. Both ways run the same flow. They differ in one point only: who shows your end-user the list of connectors to choose from. It is a trade-off between a native experience and the amount you build. Embedded connector-picker — you show the connector choice inside your own product. The most seamless, on-brand experience for your end-user, but you build and maintain that screen.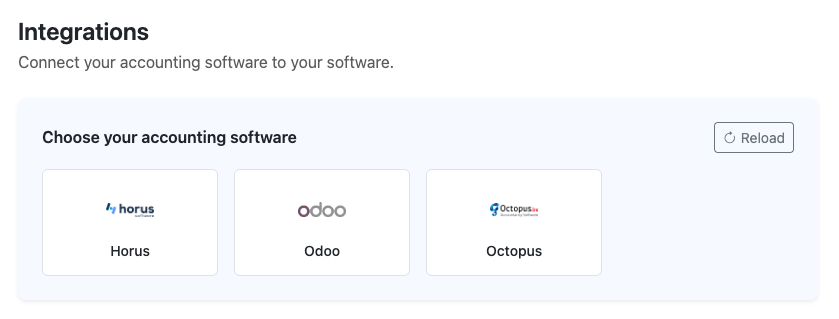
Embedded connector-picker: your end-user picks their software inside your product.
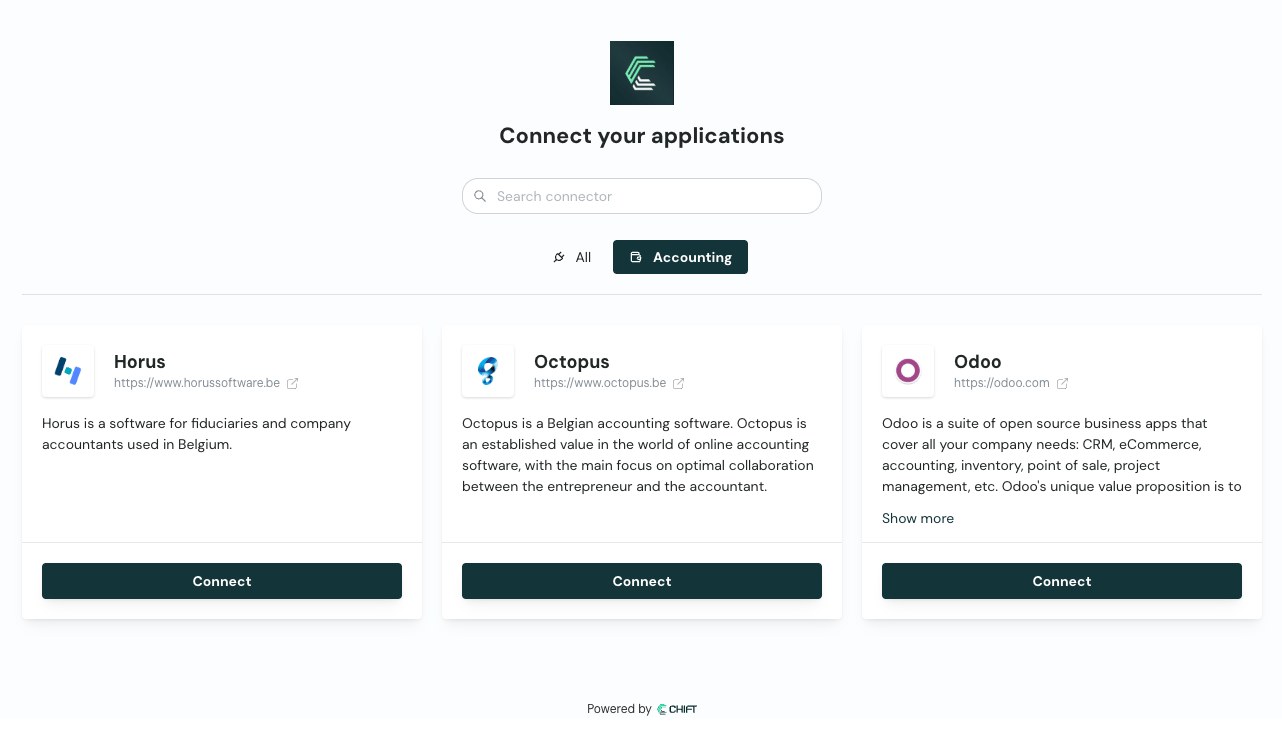
Chift connector-picker: your end-user picks their software on a Chift-hosted page.
integrationid; the Chift path skips both.
The flow
1
Create the consumer
Create one consumer per end-user. Store the returned API reference: Create new consumer ↗
consumerid on your end-user record — you reuse it for every connection that end-user makes.Already have a
consumerid for this end-user? Skip this step.2
Fetch the connectors (embedded connector-picker only)
Skip this step if you use the Chift connector-picker.
status=active returns only the connectors you have activated. Each entry gives you:integrationid— an integer, the value you send in 4. Note it is not a uuid, unlike most Chift identifiers.name,description,api— for display and grouping.logo_url,icon_url— ready-to-use image URLs. A base64 endpoint also exists if you prefer to proxy them.supported_countries,local_agent— useful for filtering or warning the user upfront.
3
Present the connector-picker
Two ways to do this — pick the one matching your setup (see Two ways to present the choice):Embedded connector-picker — render the list from step 2 in your own UI. To narrow it, filter on
supported_countries, or on api if this part of your product only needs one Unified API. You pass the chosen integrationid in the next step.Chift connector-picker — nothing to build here. Skip this step and omit integrationid in the next step; your end-user picks their software on the Chift-hosted page after you send them the link.4
Create the connection
Create the connection for this consumer with Add new connection ↗
POST:The call returns a single field:
url.If the consumer already has this connection (for example to refresh expired credentials) update it instead of creating a new one. This issues a fresh activation link while preserving the connection and its history.
See Update an existing connection ↗.
5
Send the user to the activation link
Redirect your end-user to the returned
url, or email it to them.With integrationid set, the link goes straight to that connector; without it, your end-user first picks their software on the Chift connector-picker (see Two ways to present the choice).What the user then sees depends on the connector: an OAuth2 consent screen, a credentials form, or instructions to install the local agent. Some connectors then ask follow-up questions — which accounting folder, which POS location.6
Handle the return
When the user finishes, reload their connections and confirm at least one is
active. Then you can call the Unified API for that consumer.Do not rely on the redirect alone — a user who abandons the flow never triggers it. See Monitoring & updating connections for the webhook, polling, and redirect-parameter options, and which combination to use.Next steps
Monitor connections
Confirm activation, then keep connections healthy.
Activation links and redirects
Control where the user lands afterwards.
Error codes
Every code the endpoints above can return.