# Documentation & AI
Source: https://docs.chift.eu/ai/documentation
## Overview
Chift relies on Mintlify as a documentation platform.\
Mintlify generates optimized formats and provides shortcuts that help users get faster, more accurate responses when using your documentation as context for LLMs and AI tools.
This gives you the opportunity to work with the following features:
* llms.txt can be found [here](https://docs.chift.eu/llms.txt)
This is an industry standard that helps general-purpose LLMs index more efficiently, similar to how a sitemap helps search engines.
* llms-full.txt can be found [here](https://docs.chift.eu/llms-full.txt)
This file combines your entire documentation site into a single file as context for AI tools.
* On every page of our documentation, a button allows you to see the markdown, the full text of the page or even directly ask a question in Claude or ChatGPT.
* You can use our global search to quickly get AI boosted responses.
# AI for developers
Source: https://docs.chift.eu/ai/introduction
We help you to use AI-technology (LLMs) to connect to our product and to our documentation:
* To connect to our APIs using LLMs you can rely on the MCP protocol, more information can be found [here](/ai/mcp).
* To connect or ingest some of our documentation into your product, you can rely on what's offered by our [documentation tool](ai/documentation) (Mintlify).
# Model Context Protocol (MCP)
Source: https://docs.chift.eu/ai/mcp
## Overview
Chift offers an MCP server that exposes the Chift Unified API to any LLM provider supporting the [MCP protocol](https://modelcontextprotocol.io/introduction).\
This enables you to build AI agents or other AI applications that can access all our integrations through one MCP server.\
Our endpoints are exposed as "tools" through the MCP server.
Chift MCP server can be found [here](https://github.com/chift-oneapi/chift-mcp).
## Installation
To be able to use the Chift MCP, the following prerequisites are needed:
* A Chift account with client credentials
* Python 3.11 or higher
* uv
More information can be found [here](https://github.com/chift-oneapi/chift-mcp?tab=readme-ov-file#prerequisites)
## Setup
### [Claude for Desktop](https://github.com/chift-oneapi/chift-mcp?tab=readme-ov-file#claude-for-desktop)
#### Configuration
This is an example of a configuration file for Claude:
```
{
"mcpServers": {
"chift": {
"command": "/path/to/uv",
"args": [
"chift-mcp-server",
"stdio"
],
"env": {
"CHIFT_CLIENT_SECRET": "your_client_secret",
"CHIFT_CLIENT_ID": "your_client_id",
"CHIFT_ACCOUNT_ID": "your_account_id",
"CHIFT_URL_BASE": "https://api.chift.eu"
}
}
}
}
```
#### After Configuration
1. Restart Claude for Desktop
2. You should see a tool icon in the chat input area
3. Click on the tool icon to see the available Chift API tools
4. Start chatting with Claude using the Chift tools
### Other examples
The MPC server can be accessed by any LLM provider supporting MCP.
We have elaborated on several examples (PydanticAI, Copilot, ...) [here](https://github.com/chift-oneapi/chift-ai-toolkit)
## [Available tools](https://github.com/chift-oneapi/chift-mcp?tab=readme-ov-file#-available-tools)
The Chift MCP Server dynamically generates tools based on the Chift OpenAPI specification. These tools provide access to various Chift API endpoints and include operations for:
* Retrieving financial data
* Managing your financial connections
* Creating new financial records (invoices, payments, etc.)
* Updating existing records
* ...
All our endpoints documented in our [api](/api-reference) can be accessed through Chift MCP server.
## [Environment variables](https://github.com/chift-oneapi/chift-mcp?tab=readme-ov-file#-environment-variables)
The following environment variables are used by the Chift MCP Server:
```
CHIFT_CLIENT_SECRET: Your Chift client secret
CHIFT_CLIENT_ID: Your Chift client ID
CHIFT_ACCOUNT_ID: Your Chift account ID
CHIFT_URL_BASE: Chift API URL (default: https://api.chift.eu)
CHIFT_FUNCTION_CONFIG: JSON string to configure which operations are available for each domain (optional)
```
## [Configuration](https://github.com/chift-oneapi/chift-mcp?tab=readme-ov-file#%EF%B8%8F-function-configuration)
The Chift MCP Server supports configuring which operations are available for each domain. By default, all operations are enabled for all domains:
```
DEFAULT_CONFIG = {
"accounting": ["get", "create", "update", "add"],
"commerce": ["get", "create", "update", "add"],
"invoicing": ["get", "create", "update", "add"],
"payment": ["get", "create", "update", "add"],
"pms": ["get", "create", "update", "add"],
"pos": ["get", "create", "update", "add"],
}
```
This can be [customized](https://github.com/chift-oneapi/chift-mcp?tab=readme-ov-file#%EF%B8%8F-function-configuration) if needed.
# Attach a document (PDF)
Source: https://docs.chift.eu/api-reference/endpoints/accounting/attach-a-document-pdf
post /consumers/{consumer_id}/accounting/invoices/pdf/{invoice_id}
Attach a document (PDF) to the invoice entry
# Create a financial entry
Source: https://docs.chift.eu/api-reference/endpoints/accounting/create-a-financial-entry
post /consumers/{consumer_id}/accounting/financial-entries
Create a new financial entry (Bank or Cash operation)
# Create analytic account
Source: https://docs.chift.eu/api-reference/endpoints/accounting/create-analytic-account
post /consumers/{consumer_id}/accounting/analytic-accounts
Create a new analytic account in the default analytic plan
# Create analytic account (Multiple Analytic Plans)
Source: https://docs.chift.eu/api-reference/endpoints/accounting/create-analytic-account-multiple-analytic-plans
post /consumers/{consumer_id}/accounting/analytic-accounts/multi-analytic-plans/{analytic_plan}
Create a new analytic account in a specific analytic plan
# Create bank account
Source: https://docs.chift.eu/api-reference/endpoints/accounting/create-bank-account
post /consumers/{consumer_id}/accounting/bank-accounts
Create a new bank account in the accounting system
# Create client
Source: https://docs.chift.eu/api-reference/endpoints/accounting/create-client
post /consumers/{consumer_id}/accounting/clients
Create a new client
# Create journal
Source: https://docs.chift.eu/api-reference/endpoints/accounting/create-journal
post /consumers/{consumer_id}/accounting/journal
Create a journal in the accounting system
# Create Journal Entry
Source: https://docs.chift.eu/api-reference/endpoints/accounting/create-journal-entry
post /consumers/{consumer_id}/accounting/journal-entries
Create a new Journal Entry in the accounting system
# Create ledger account
Source: https://docs.chift.eu/api-reference/endpoints/accounting/create-ledger-account
post /consumers/{consumer_id}/accounting/accounts
Create a new ledger account in the chart of accounts
# Create miscellaneous operation
Source: https://docs.chift.eu/api-reference/endpoints/accounting/create-miscellaneous-operation
post /consumers/{consumer_id}/accounting/miscellaneous-operation
Create a new miscellaneous operation
# Create sale/purchase entry
Source: https://docs.chift.eu/api-reference/endpoints/accounting/create-salepurchase-entry
post /consumers/{consumer_id}/accounting/invoices
Create a new sale/purchase accounting entry
# Create sale/purchase entry (Multiple plans)
Source: https://docs.chift.eu/api-reference/endpoints/accounting/create-salepurchase-entry-multiple-plans
post /consumers/{consumer_id}/accounting/invoices/multi-analytic-plans
Create a new sale/purchase entry with multiple analytic plans in the accounting
# Create supplier
Source: https://docs.chift.eu/api-reference/endpoints/accounting/create-supplier
post /consumers/{consumer_id}/accounting/suppliers
Create a new supplier
# Export entries in FEC format
Source: https://docs.chift.eu/api-reference/endpoints/accounting/export-entries-in-fec-format
get /consumers/{consumer_id}/accounting/export-fec
Returns accounting entries according to the FEC format
# Get analytic account
Source: https://docs.chift.eu/api-reference/endpoints/accounting/get-analytic-account
get /consumers/{consumer_id}/accounting/analytic-accounts/{analytic_account_id}
Returns one specific analytic account of the default analytic plan
# Get analytic account (Multiple Analytic Plans)
Source: https://docs.chift.eu/api-reference/endpoints/accounting/get-analytic-account-multiple-analytic-plans
get /consumers/{consumer_id}/accounting/analytic-accounts/{analytic_account_id}/multi-analytic-plans/{analytic_plan}
Returns one specific analytic account of a specific analytic plan
# Get analytic accounts
Source: https://docs.chift.eu/api-reference/endpoints/accounting/get-analytic-accounts
get /consumers/{consumer_id}/accounting/analytic-accounts
Returns all analytic accounts of the default analytic plan
# Get analytic accounts (Multiple Analytic Plans)
Source: https://docs.chift.eu/api-reference/endpoints/accounting/get-analytic-accounts-multiple-analytic-plans
get /consumers/{consumer_id}/accounting/analytic-accounts/multi-analytic-plans
Returns all analytic accounts of all analytic plans
# Get Analytic Plans
Source: https://docs.chift.eu/api-reference/endpoints/accounting/get-analytic-plans
get /consumers/{consumer_id}/accounting/analytic-plans
# Get attachments
Source: https://docs.chift.eu/api-reference/endpoints/accounting/get-attachments
get /consumers/{consumer_id}/accounting/attachments
Returns a list of all attachments linked to an accounting entry
# Get Bookyears
Source: https://docs.chift.eu/api-reference/endpoints/accounting/get-bookyears
get /consumers/{consumer_id}/accounting/bookyears
# Get chart of accounts
Source: https://docs.chift.eu/api-reference/endpoints/accounting/get-chart-of-accounts
get /consumers/{consumer_id}/accounting/chart-of-accounts
Get all accounts in the chart of accounts
# Get clients
Source: https://docs.chift.eu/api-reference/endpoints/accounting/get-clients
get /consumers/{consumer_id}/accounting/clients
Returns a list of accounting clients
# Get clients/suppliers outstanding items
Source: https://docs.chift.eu/api-reference/endpoints/accounting/get-clientssuppliers-outstanding-items
get /consumers/{consumer_id}/accounting/outstandings
Returns a list of all clients/suppliers outstanding items
# Get employees
Source: https://docs.chift.eu/api-reference/endpoints/accounting/get-employees
get /consumers/{consumer_id}/accounting/employees
Returns a list of the employees linked to the company
# Get Folders
Source: https://docs.chift.eu/api-reference/endpoints/accounting/get-folders
get /consumers/{consumer_id}/accounting/folders
# Get invoices by type (sale/purchase entries)
Source: https://docs.chift.eu/api-reference/endpoints/accounting/get-invoices-by-type-salepurchase-entries
get /consumers/{consumer_id}/accounting/invoices/type/{invoice_type}
Returns a list of invoices by a specific type (=sale/purchase entries). Each line of the invoice will include the analytic account linked to default analytic plan. Optionally dates can be defined to retrieve invoice from a certain date to another date
# Get invoices by type (sale/purchase entries - Multiple Analytic Plans)
Source: https://docs.chift.eu/api-reference/endpoints/accounting/get-invoices-by-type-salepurchase-entries--multiple-analytic-plans
get /consumers/{consumer_id}/accounting/invoices/multi-analytic-plans/type/{invoice_type}
Returns a list of invoices by a specific type (=sale/purchase entries) with invoice lines including multiple analytic plans. Optionally dates can be defined to retrieve invoice from a certain date to another date
# Get journal entries
Source: https://docs.chift.eu/api-reference/endpoints/accounting/get-journal-entries
get /consumers/{consumer_id}/accounting/journal/entries
Returns a list of journal entries. Each item will include the analytic account linked to default analytic plan. Optionally, you can retrieve journal entries linked to a specific client/supplier using the partner_id parameter. When retrieving entries linked to a specific client/supplier, some journal items of an entry (e.g. a miscellaneous operation) could be excluding resulting in an unbalanced journal entry.
# Get journal entries (Multiple Analytic Plans)
Source: https://docs.chift.eu/api-reference/endpoints/accounting/get-journal-entries-multiple-analytic-plans
get /consumers/{consumer_id}/accounting/journal/entries/multi-analytic-plans
Returns a list of journal entries with invoice items including multiple analytic plan.Optionally, you can retrieve journal entries linked to a specific client/supplier using the partner_id parameter. When retrieving entries linked to a specific client/supplier, some journal items of an entry (e.g. a miscellaneous operation) could be excluding resulting in an unbalanced journal entry.
# Get journals
Source: https://docs.chift.eu/api-reference/endpoints/accounting/get-journals
get /consumers/{consumer_id}/accounting/journals
Get journals existing in the accounting system
# Get miscellaneous operations
Source: https://docs.chift.eu/api-reference/endpoints/accounting/get-miscellaneous-operations
get /consumers/{consumer_id}/accounting/miscellaneous-operation
Get miscellaneous operations from the the accounting system
# Get one client
Source: https://docs.chift.eu/api-reference/endpoints/accounting/get-one-client
get /consumers/{consumer_id}/accounting/clients/{client_id}
Returns a specific accounting client
# Get one invoice (sale/purchase entry)
Source: https://docs.chift.eu/api-reference/endpoints/accounting/get-one-invoice-salepurchase-entry
get /consumers/{consumer_id}/accounting/invoices/{invoice_id}
Returns a specific invoice (sale/purchase entry). Each line will include the analytic account linked to default analytic plan
# Get one invoice (sale/purchase entry - Multiple Analytic Plans)
Source: https://docs.chift.eu/api-reference/endpoints/accounting/get-one-invoice-salepurchase-entry--multiple-analytic-plans
get /consumers/{consumer_id}/accounting/invoices/multi-analytic-plans/{invoice_id}
Returns a specific invoice (=sale/purchase entry) with invoice lines /oincluding multiple analytic plans
# Get one journal entry
Source: https://docs.chift.eu/api-reference/endpoints/accounting/get-one-journal-entry
get /consumers/{consumer_id}/accounting/journal/entries/{journal_entry_id}
Returns a single journal entry by ID.
# Get one miscellaneous operation
Source: https://docs.chift.eu/api-reference/endpoints/accounting/get-one-miscellaneous-operation
get /consumers/{consumer_id}/accounting/miscellaneous-operation/{operation_id}
Get a specific miscellaneous operation from the the accounting system
# Get one supplier
Source: https://docs.chift.eu/api-reference/endpoints/accounting/get-one-supplier
get /consumers/{consumer_id}/accounting/suppliers/{supplier_id}
Returns one accounting supplier
# Get suppliers
Source: https://docs.chift.eu/api-reference/endpoints/accounting/get-suppliers
get /consumers/{consumer_id}/accounting/suppliers
Returns a list of accounting suppliers
# Get the balance of accounts
Source: https://docs.chift.eu/api-reference/endpoints/accounting/get-the-balance-of-accounts
post /consumers/{consumer_id}/accounting/chart-of-accounts/balance
Get the balance of accounts in the accounting plan (chart of accounts) between specific months
# Get vat codes
Source: https://docs.chift.eu/api-reference/endpoints/accounting/get-vat-codes
get /consumers/{consumer_id}/accounting/vat-codes
Get vat codes existing in the accounting system
# Match entries
Source: https://docs.chift.eu/api-reference/endpoints/accounting/match-entries
post /consumers/{consumer_id}/accounting/matching
Match existing entries in the accounting system
# Update analytic account
Source: https://docs.chift.eu/api-reference/endpoints/accounting/update-analytic-account
patch /consumers/{consumer_id}/accounting/analytic-accounts/{analytic_account_id}
Update one specific analytic account in the default analytic plan
# Update analytic account (Multiple Analytic Plans)
Source: https://docs.chift.eu/api-reference/endpoints/accounting/update-analytic-account-multiple-analytic-plans
patch /consumers/{consumer_id}/accounting/analytic-accounts/{analytic_account_id}/multi-analytic-plans/{analytic_plan}
Update one specific analytic account in a specific analytic plan
# Update client
Source: https://docs.chift.eu/api-reference/endpoints/accounting/update-client
patch /consumers/{consumer_id}/accounting/clients/{client_id}
Endpoint that gives the possibility to update an accounting client
# Update one supplier
Source: https://docs.chift.eu/api-reference/endpoints/accounting/update-one-supplier
patch /consumers/{consumer_id}/accounting/suppliers/{supplier_id}
Update an accounting supplier
# Get aggregated list of account counterparts found in transactions
Source: https://docs.chift.eu/api-reference/endpoints/banking/get-aggregated-list-of-account-counterparts-found-in-transactions
get /consumers/{consumer_id}/banking/counterparts
Returns the aggregated list of account counterpats found in transactions. Useful for categorisation.
# Get list of banking accounts
Source: https://docs.chift.eu/api-reference/endpoints/banking/get-list-of-banking-accounts
get /consumers/{consumer_id}/banking/accounts
Returns the list of banking accounts
# Get list of financial institutions
Source: https://docs.chift.eu/api-reference/endpoints/banking/get-list-of-financial-institutions
get /consumers/{consumer_id}/banking/financial-institutions
Returns the list of financial institutions the user consent access to
# Get list of financial transactions
Source: https://docs.chift.eu/api-reference/endpoints/banking/get-list-of-financial-transactions
get /consumers/{consumer_id}/banking/{account_id}/transactions
Returns the list of transactions of an account
# Add new connection
Source: https://docs.chift.eu/api-reference/endpoints/connections/add-new-connection
post /consumers/{consumerid}/connections
Returns the url that can be used by your client to enable his integrations.
# Delete one connection
Source: https://docs.chift.eu/api-reference/endpoints/connections/delete-one-connection
delete /consumers/{consumerid}/connections/{connectionid}
Endpoint that deletes one connection of a consumer in Chift
# Get connections
Source: https://docs.chift.eu/api-reference/endpoints/connections/get-connections
get /consumers/{consumerid}/connections
Returns a list of the connections (active or inactive) linked to your consumer
# Update an existing connection
Source: https://docs.chift.eu/api-reference/endpoints/connections/update-an-existing-connection
patch /consumers/{consumerid}/connections/{connectionid}
Returns the url that can be used by your client to update the connection
# Create new consumer
Source: https://docs.chift.eu/api-reference/endpoints/consumers/create-new-consumer
post /consumers
Create a new consumer that will have the possibility to use the enabled integrations
# Delete one consumer
Source: https://docs.chift.eu/api-reference/endpoints/consumers/delete-one-consumer
delete /consumers/{consumerid}
Endpoint that deletes one consumer in Chift
# Get consumers
Source: https://docs.chift.eu/api-reference/endpoints/consumers/get-consumers
get /consumers
Returns the list of consumers linked to your account.
# Get execution data for a specific consumer and a specific datastore
Source: https://docs.chift.eu/api-reference/endpoints/consumers/get-execution-data-for-a-specific-consumer-and-a-specific-datastore
get /consumers/{consumerid}/datastore/{datastoreid}/data
Returns execution data related to a consumer and a datastore. Queryparams can be used to filter the restuls by datastore column or by executionid
# Get executions information for one consumer/flow/sync
Source: https://docs.chift.eu/api-reference/endpoints/consumers/get-executions-information-for-one-consumerflowsync
get /consumers/{consumerid}/syncs/{syncid}/flows/{flowid}/executions
Returns executions information for one consumer/flow/sync
# Get one consumer
Source: https://docs.chift.eu/api-reference/endpoints/consumers/get-one-consumer
get /consumers/{consumerid}
Returns the specified consumer
# Get sync information for one consumer
Source: https://docs.chift.eu/api-reference/endpoints/consumers/get-sync-information-for-one-consumer
get /consumers/{consumerid}/syncs/{syncid}
Returns sync information (creation date, mapping) related to a specific consumer
# Retrieve the url of a sync for a specific consumer
Source: https://docs.chift.eu/api-reference/endpoints/consumers/retrieve-the-url-of-a-sync-for-a-specific-consumer
post /consumers/{consumerid}/syncs
This route can be used to retrieve the url that can be shared with your clients to allow them to connect as specified in a sync
# Update one consumer
Source: https://docs.chift.eu/api-reference/endpoints/consumers/update-one-consumer
patch /consumers/{consumerid}
Update one consumer in Chift
# Get list of datastores
Source: https://docs.chift.eu/api-reference/endpoints/datastores/get-list-of-datastores
get /datastores
Returns a list of datastores (active and inactive) available for your account
# Create an order
Source: https://docs.chift.eu/api-reference/endpoints/ecommerce/create-an-order
post /consumers/{consumer_id}/commerce/orders
Create a new order
# Get all countries
Source: https://docs.chift.eu/api-reference/endpoints/ecommerce/get-all-countries
get /consumers/{consumer_id}/commerce/countries
Returns the list of all activated countries
# Get all customers
Source: https://docs.chift.eu/api-reference/endpoints/ecommerce/get-all-customers
get /consumers/{consumer_id}/commerce/customers
Returns a list of all the customers
# Get all locations
Source: https://docs.chift.eu/api-reference/endpoints/ecommerce/get-all-locations
get /consumers/{consumer_id}/commerce/locations
Returns a list of all locations
# Get all orders
Source: https://docs.chift.eu/api-reference/endpoints/ecommerce/get-all-orders
get /consumers/{consumer_id}/commerce/orders
Returns a list of all the orders
# Get all payment methods
Source: https://docs.chift.eu/api-reference/endpoints/ecommerce/get-all-payment-methods
get /consumers/{consumer_id}/commerce/payment-methods
Returns the list of the payment methods
# Get all product categories
Source: https://docs.chift.eu/api-reference/endpoints/ecommerce/get-all-product-categories
get /consumers/{consumer_id}/commerce/product-categories
Returns the list of the product categories
# Get all products
Source: https://docs.chift.eu/api-reference/endpoints/ecommerce/get-all-products
get /consumers/{consumer_id}/commerce/products
Returns a list of all the products
# Get all tax rates
Source: https://docs.chift.eu/api-reference/endpoints/ecommerce/get-all-tax-rates
get /consumers/{consumer_id}/commerce/taxes
Returns the list of all tax rates
# Get one specific customer
Source: https://docs.chift.eu/api-reference/endpoints/ecommerce/get-one-specific-customer
get /consumers/{consumer_id}/commerce/customers/{customer_id}
Returns a specific customer
# Get one specific order
Source: https://docs.chift.eu/api-reference/endpoints/ecommerce/get-one-specific-order
get /consumers/{consumer_id}/commerce/orders/{order_id}
Returns a specific order
# Get one specific product
Source: https://docs.chift.eu/api-reference/endpoints/ecommerce/get-one-specific-product
get /consumers/{consumer_id}/commerce/products/{product_id}
Returns a specific product
# Get one specific product variant
Source: https://docs.chift.eu/api-reference/endpoints/ecommerce/get-one-specific-product-variant
get /consumers/{consumer_id}/commerce/variants/{variant_id}
Returns a specific product variant
# Update available quantity
Source: https://docs.chift.eu/api-reference/endpoints/ecommerce/update-available-quantity
post /consumers/{consumer_id}/commerce/variants/set_quantity/{variant_id}
Update available quantity of a product variant in a specific location
# Get access token
Source: https://docs.chift.eu/api-reference/endpoints/general/get-access-token
post /token
This endpoint allows you to get an access token that can be used as a BEARER token to access the protected endpoints of this APIs. The token is valid for 30 minutes. You can refresh the token by requesting a new token.
# Get list of integrations
Source: https://docs.chift.eu/api-reference/endpoints/integrations/get-list-of-integrations
get /integrations
Returns a list of integrations (active and inactive) available for your account
# Returns a logo/icon of an integration (as base64)
Source: https://docs.chift.eu/api-reference/endpoints/integrations/returns-a-logoicon-of-an-integration-as-base64
get /integrations/{integrationid}/{image_type}.json
# Create a contact
Source: https://docs.chift.eu/api-reference/endpoints/invoicing/create-a-contact
post /consumers/{consumer_id}/invoicing/contacts
Create a new contact.
# Create a product
Source: https://docs.chift.eu/api-reference/endpoints/invoicing/create-a-product
post /consumers/{consumer_id}/invoicing/products
Create a new product.
# Create an invoice
Source: https://docs.chift.eu/api-reference/endpoints/invoicing/create-an-invoice
post /consumers/{consumer_id}/invoicing/invoices
Create a new invoice.
# Retrieve all contacts
Source: https://docs.chift.eu/api-reference/endpoints/invoicing/retrieve-all-contacts
get /consumers/{consumer_id}/invoicing/contacts
Returns a list of all the contacts. Optionally contact type can be defined to retrieve contact from a certain type.
# Retrieve all invoices
Source: https://docs.chift.eu/api-reference/endpoints/invoicing/retrieve-all-invoices
get /consumers/{consumer_id}/invoicing/invoices
Returns a list of invoices. Optionally invoice type and dates can be defined to retrieve invoices of a certain type from a certain date to another date
# Retrieve all opportunities
Source: https://docs.chift.eu/api-reference/endpoints/invoicing/retrieve-all-opportunities
get /consumers/{consumer_id}/invoicing/opportunities
Returns a list of all the opportunities
# Retrieve all payment methods
Source: https://docs.chift.eu/api-reference/endpoints/invoicing/retrieve-all-payment-methods
get /consumers/{consumer_id}/invoicing/payment-methods
Returns the list of payment methods
# Retrieve all payments
Source: https://docs.chift.eu/api-reference/endpoints/invoicing/retrieve-all-payments
get /consumers/{consumer_id}/invoicing/payments
Returns a list of payments
# Retrieve all products
Source: https://docs.chift.eu/api-reference/endpoints/invoicing/retrieve-all-products
get /consumers/{consumer_id}/invoicing/products
Returns a list of all the products
# Retrieve all taxes
Source: https://docs.chift.eu/api-reference/endpoints/invoicing/retrieve-all-taxes
get /consumers/{consumer_id}/invoicing/taxes
Returns a list of all the taxes
# Retrieve one contact
Source: https://docs.chift.eu/api-reference/endpoints/invoicing/retrieve-one-contact
get /consumers/{consumer_id}/invoicing/contacts/{contact_id}
Returns a contact
# Retrieve one invoice
Source: https://docs.chift.eu/api-reference/endpoints/invoicing/retrieve-one-invoice
get /consumers/{consumer_id}/invoicing/invoices/{invoice_id}
Returns a invoice
# Retrieve one opportunity
Source: https://docs.chift.eu/api-reference/endpoints/invoicing/retrieve-one-opportunity
get /consumers/{consumer_id}/invoicing/opportunities/{opportunity_id}
Returns an opportunity
# Retrieve one product
Source: https://docs.chift.eu/api-reference/endpoints/invoicing/retrieve-one-product
get /consumers/{consumer_id}/invoicing/products/{product_id}
Returns a product
# Retrieve one tax
Source: https://docs.chift.eu/api-reference/endpoints/invoicing/retrieve-one-tax
get /consumers/{consumer_id}/invoicing/taxes/{tax_id}
Returns a tax
# Get details about one issue
Source: https://docs.chift.eu/api-reference/endpoints/issues/get-details-about-one-issue
get /issues/{issue_id}
Returns one specific issue. This includes as well the list of events for this issue.
# Get issues
Source: https://docs.chift.eu/api-reference/endpoints/issues/get-issues
get /issues
Returns a list of the issues of your account. Filters can be used to query specific results. Filters can be combined and are inclusive.
# Get issues by consumer id
Source: https://docs.chift.eu/api-reference/endpoints/issues/get-issues-by-consumer-id
get /consumers/{consumer_id}/issues
Returns a list of the issues linked to specific consumer. Filters can be used to query specific results. Filters can be combined and are inclusive.
# Get a payment
Source: https://docs.chift.eu/api-reference/endpoints/payment/get-a-payment
get /consumers/{consumer_id}/payment/payments/{payment_id}
Returns a specific payment.
# Retrieve all balances
Source: https://docs.chift.eu/api-reference/endpoints/payment/retrieve-all-balances
get /consumers/{consumer_id}/payment/balances
Returns a list of balances.
# Retrieve all payments
Source: https://docs.chift.eu/api-reference/endpoints/payment/retrieve-all-payments
get /consumers/{consumer_id}/payment/payments
Returns a list of payments.
# Retrieve all refunds
Source: https://docs.chift.eu/api-reference/endpoints/payment/retrieve-all-refunds
get /consumers/{consumer_id}/payment/refunds
Returns a list of refunds.
# Retrieve all transactions
Source: https://docs.chift.eu/api-reference/endpoints/payment/retrieve-all-transactions
get /consumers/{consumer_id}/payment/transactions
Returns a list of transactions. Optionally transaction type and dates can be defined to retrieve transactions of a certain type from a certain date to another date
# Create one customer
Source: https://docs.chift.eu/api-reference/endpoints/point-of-sale/create-one-customer
post /consumers/{consumer_id}/pos/customers
Create a customer
# Get accounting categories
Source: https://docs.chift.eu/api-reference/endpoints/point-of-sale/get-accounting-categories
get /consumers/{consumer_id}/pos/accounting-categories
Returns a list of accounting categories. When not available for a specific POS, it will return the same values as the product categories.
# Get closure info for a specific day
Source: https://docs.chift.eu/api-reference/endpoints/point-of-sale/get-closure-info-for-a-specific-day
get /consumers/{consumer_id}/pos/closures/{date}
Returns whether the closure was already done for a specific day or not
# Get customers
Source: https://docs.chift.eu/api-reference/endpoints/point-of-sale/get-customers
get /consumers/{consumer_id}/pos/customers
Returns the list of customers
# Get locations
Source: https://docs.chift.eu/api-reference/endpoints/point-of-sale/get-locations
get /consumers/{consumer_id}/pos/locations
Returns a list of the locations
# Get objectives
Source: https://docs.chift.eu/api-reference/endpoints/point-of-sale/get-objectives
get /consumers/{consumer_id}/pos/objectives
Return the total amount and the tax amount for a specific period
# Get one order
Source: https://docs.chift.eu/api-reference/endpoints/point-of-sale/get-one-order
get /consumers/{consumer_id}/pos/orders/{order_id}
Returns a single order
# Get orders
Source: https://docs.chift.eu/api-reference/endpoints/point-of-sale/get-orders
get /consumers/{consumer_id}/pos/orders
Returns a list of the orders
# Get payment methods
Source: https://docs.chift.eu/api-reference/endpoints/point-of-sale/get-payment-methods
get /consumers/{consumer_id}/pos/payment-methods
Returns the list of payment methods
# Get payments
Source: https://docs.chift.eu/api-reference/endpoints/point-of-sale/get-payments
get /consumers/{consumer_id}/pos/payments
Returns a list of payments
# Get product categories
Source: https://docs.chift.eu/api-reference/endpoints/point-of-sale/get-product-categories
get /consumers/{consumer_id}/pos/product-categories
Returns a list of product categories
# Get products
Source: https://docs.chift.eu/api-reference/endpoints/point-of-sale/get-products
get /consumers/{consumer_id}/pos/products
Returns a list of products
# Get sales
Source: https://docs.chift.eu/api-reference/endpoints/point-of-sale/get-sales
get /consumers/{consumer_id}/pos/sales
Returns the summary of the sales
# Update order
Source: https://docs.chift.eu/api-reference/endpoints/point-of-sale/update-order
patch /consumers/{consumer_id}/pos/orders/{order_id}
Update one order
# Get accounting categories (PMS)
Source: https://docs.chift.eu/api-reference/endpoints/property-management-system/get-accounting-categories-pms
get /consumers/{consumer_id}/pms/accounting-categories
Returns a list of accounting categories. When not available for a specific PMS,it will return the same values as the product categories.
# Get closure info for a specific day (PMS)
Source: https://docs.chift.eu/api-reference/endpoints/property-management-system/get-closure-info-for-a-specific-day-pms
get /consumers/{consumer_id}/pms/closures/{date}
Returns whether the closure was already done for a specific day or not
# Get customers (PMS)
Source: https://docs.chift.eu/api-reference/endpoints/property-management-system/get-customers-pms
get /consumers/{consumer_id}/pms/customers
Returns a list of all the customers
# Get invoices (PMS)
Source: https://docs.chift.eu/api-reference/endpoints/property-management-system/get-invoices-pms
get /consumers/{consumer_id}/pms/invoices
Returns a list of the invoices
# Get locations (PMS)
Source: https://docs.chift.eu/api-reference/endpoints/property-management-system/get-locations-pms
get /consumers/{consumer_id}/pms/locations
Returns a list of the locations
# Get orders (PMS)
Source: https://docs.chift.eu/api-reference/endpoints/property-management-system/get-orders-pms
get /consumers/{consumer_id}/pms/orders
Returns a list of the orders
# Get payment methods (PMS)
Source: https://docs.chift.eu/api-reference/endpoints/property-management-system/get-payment-methods-pms
get /consumers/{consumer_id}/pms/payment-methods
Returns the list of payment methods
# Get payments (PMS)
Source: https://docs.chift.eu/api-reference/endpoints/property-management-system/get-payments-pms
get /consumers/{consumer_id}/pms/payments
Returns a list of payments
# Get tax rates (PMS)
Source: https://docs.chift.eu/api-reference/endpoints/property-management-system/get-tax-rates-pms
get /consumers/{consumer_id}/pms/taxes
Returns a list of the tax rates
# Enable a flow for a specific consumer
Source: https://docs.chift.eu/api-reference/endpoints/syncs/enable-a-flow-for-a-specific-consumer
post /consumers/{consumerid}/syncs/{syncid}/flows/{flowid}/enable
Route that can be used to enable a flow for a specific consumer
# Get execution start/end timestamp
Source: https://docs.chift.eu/api-reference/endpoints/syncs/get-execution-startend-timestamp
get /syncs/{syncid}/flows/{flowid}/executions/{executionid}
Get execution start/end timestamp
# Get sync
Source: https://docs.chift.eu/api-reference/endpoints/syncs/get-sync
get /syncs/{syncid}
Returns a sync by id
# Get syncs
Source: https://docs.chift.eu/api-reference/endpoints/syncs/get-syncs
get /syncs
Returns the syncs
# Send a custom event for a specific flow
Source: https://docs.chift.eu/api-reference/endpoints/syncs/send-a-custom-event-for-a-specific-flow
post /syncs/{syncid}/flows/{flowid}/event
Route that can be used to send a specific event for a flow
# Update flow mappings for a specific consumer
Source: https://docs.chift.eu/api-reference/endpoints/syncs/update-flow-mappings-for-a-specific-consumer
patch /consumers/{consumerid}/syncs/{syncid}
Route that can be used to update the flow mappings for a specific consumer. It will replace the existing configuration with the provided one.
# Update flow settings for a specific consumer
Source: https://docs.chift.eu/api-reference/endpoints/syncs/update-flow-settings-for-a-specific-consumer
patch /consumers/{consumerid}/syncs/{syncid}/flows/{flowid}
Route that can be used to update the flow configuration for a specific consumer. It will merge the new configuration with the existing one.
# Add new webhook instance
Source: https://docs.chift.eu/api-reference/endpoints/webhooks/add-new-webhook-instance
post /webhooks
Returns the created webhook instance
# Delete one webhook
Source: https://docs.chift.eu/api-reference/endpoints/webhooks/delete-one-webhook
delete /webhooks/{webhookid}
Endpoint that deletes one existing webhook
# Get list of possible webhooks
Source: https://docs.chift.eu/api-reference/endpoints/webhooks/get-list-of-possible-webhooks
get /webhooks/list
Returns a list of webhook that are available for your account
# Get list of webhook instances
Source: https://docs.chift.eu/api-reference/endpoints/webhooks/get-list-of-webhook-instances
get /webhooks
Returns a list of webhook instances (active/inactive) for your account
# Get list of webhook logs for one webhook
Source: https://docs.chift.eu/api-reference/endpoints/webhooks/get-list-of-webhook-logs-for-one-webhook
get /webhooks/{webhookid}/logs
Returns a list of webhook logs for one webhook for your account
# Get one webhook instance
Source: https://docs.chift.eu/api-reference/endpoints/webhooks/get-one-webhook-instance
get /webhooks/{webhookid}
Returns one webhook instance
# Update one webhook
Source: https://docs.chift.eu/api-reference/endpoints/webhooks/update-one-webhook
patch /webhooks/{webhookid}
Update one webhook in Chift
# null
Source: https://docs.chift.eu/api-reference/overview
Explore how to create and manage consumers
Explore how to setup connections for your consumers
Explore how to get the list of integrations
Explore how to setup webhooks
Explore how to manage syncs and automate executions
Explore how to get the list of datastores
# Unified APIs
Explore what you can do with the Accounting API
Explore what you can do with the Point of Sale API
Explore what you can do with the eCommerce API
Explore what you can do with the Invoicing API
Explore what you can do with the Banking API
Explore what you can do with the Payment API
Explore what you can do with the Property Management System API
# Product & connector updates - January, 2025
Source: https://docs.chift.eu/changelogs/2025-01
## Connectors
### Apitic
We are expanding our POS API with Apitic.
Apitic is a POS application for restaurants.
### Odoo POS
Next to accounting & invoicing, our Odoo connector now supports as well the POS vertical is now live as well.
Take a look at [our documentation](/connectors/pos/odoo_pos) to see how to activate the connector.
## Product
### New login methods for our back-office
We are moving away from the traditional email/password login method to support the following login methods:
* Log in through Google
* Log in with email (Magic link or OTP code)
Moreover we support as well SSO to better match with the needs of our customers and prospects.
### New login methods for our public marketplaces
For your end-users, we can as well offer now SSO capabilities to connect to your Chift's marketplace.
This offers huge benefits:
* Better user experience for end-user
* Streamline roles and accesses
* Automate account and consumer creation
### Email reminders
Email reminders can be used to help you to remind your consumers to complete the activation process in an automated way.
You can configure in your backoffice the intervals and type of reminders that you want to sent.
You can as well preview the email or send the email manually if preferred through the [Issue panel](/docs/user-onboarding/issues).
# Product & connector updates - February, 2025
Source: https://docs.chift.eu/changelogs/2025-02
## Product
### Internationalisation of syncs
We now support the dynamic translations of syncs.
Every label can be customized on our UI to tailor the pages to the language of your end-users.
# Product & connector updates - March, 2025
Source: https://docs.chift.eu/changelogs/2025-03
## Connectors
### Accounting
Updated coverage for "Create journal":
* Pennylane
* Exact Online
* Cegid Loop
* Inqom
* Octopus
* Horus
* ACD
* Minox
* Odoo
Updated coverage for "Create ledger account":
* Pennylane
* Exact Online
* Cegid Loop
* Inqom
* Octopus
* Horus
* ACD
* Minox
* Odoo
* Fullscope
### New connector Leo2
We are expanding our POS API with Leo2.
Leo2 is a modern, touch-screen POS (point of sale) for shops and restaurants
### New connector Tactilpad
We are expanding our POS API with Tactilpad.
TactilPad offers 360° payment solutions with its high-performance cash register software, specially designed to meet the needs of businesses
### New connector Yuki
We are expanding our Accounting API with Yuki.
Yuki is a cloud-based accounting software for small and medium-sized businesses.
# Product Updates - June, 2025
Source: https://docs.chift.eu/changelogs/2025-06
## Product
### Unified consumer management
We've streamlined the consumer management experience with several key improvements:
**Simplified interface**
* Removed the marketplace selector for a cleaner, more intuitive interface
* All consumers (syncs, non-syncs, and marketplace consumers) are now displayed together in a single, unified table
**Enhanced visibility**
* Added visual badges to clearly distinguish marketplace consumers from regular consumers
* Simplified table columns to focus on what matters most: consumer name, connected integrations, and status
**Improved data management**
* Enhanced filtering capabilities across all consumer types
* Unified CSV export that includes all consumer data in one comprehensive file
* Streamlined data structure for better performance and usability
These changes make it easier to manage all your consumers from one central location while maintaining clear visibility into different consumer types.
#### Before
#### After
### Added new translations for "Spain"
* Chift's backoffice is now available in Spanish.
* Spanish connectors are now available with Spanish translations.
# ACD
Source: https://docs.chift.eu/connectors/accounting/acd
export const PATCH = () => ;
export const DELETE = () => ;
export const POST = () => ;
export const GET = () => ;
}>
Website: [https://www.acd-groupe.fr/](https://www.acd-groupe.fr/)
Software type: On premise (API)
Geography: 🇫🇷 France
## Introduction
ACD supports the digitalization of your business through a modular software suite. Integrating a complete range of production and management, coupled with many specialized modules, web and mobile. Deliver the ACD integration your customers want in no time.
## Configure ACD
**Prerequisite(s)**
There are no prerequisite to enable ACD on your Chift APP.
**Process**
Activate the ACD integration on the Chift platform.
## Test ACD
To test the software integration, ask Chift to contact and request ACD for a sandbox account and test file (French speaking contacts) on your behalf.
ACD will provide us with an account ID, password and file code for dummy data.
Use this link to log onto your account: [here](https://isuiteapiprod.suiteexpert.fr/cnx/iSuiteExpert/Connexion)
## Connect ACD
To activate a connexion with ACD, users will have to go through the following steps.
* French article: [Help Center - ACD FR](https://help.chift.app/fr/articles/9011835-acd)
* English article: [Help Center - ACD EN](https://help.chift.app/en/articles/9011835-acd)
## Coverage
### ACD coverage
} horizontal>/bookyears Live} horizontal>/accounts Live} horizontal>/export-fec Live} horizontal>/folders On request} horizontal>/analytic-plans On request} horizontal>/clients On request} horizontal>/clients On request} horizontal>/clients/\{client\_id} On request} horizontal>/clients/\{client\_id} On request} horizontal>/suppliers On request} horizontal>/suppliers On request} horizontal>/suppliers/\{supplier\_id} On request} horizontal>/suppliers/\{supplier\_id} On request} horizontal>/invoices On request} horizontal>/invoices/multi-analytic-plans On request} horizontal>/invoices/type/\{invoice\_type} On request} horizontal>/invoices/multi-analytic-plans/type/\{invoice\_type} On request} horizontal>/invoices/\{invoice\_id} On request} horizontal>/invoices/multi-analytic-plans/\{invoice\_id} On request} horizontal>/bank-accounts On request} horizontal>/analytic-accounts On request} horizontal>/analytic-accounts On request} horizontal>/analytic-accounts/multi-analytic-plans/\{analytic\_plan} On request} horizontal>/analytic-accounts/\{analytic\_account\_id} On request} horizontal>/analytic-accounts/\{analytic\_account\_id} On request} horizontal>/analytic-accounts/\{analytic\_account\_id}/multi-analytic-plans/\{analytic\_plan} On request} horizontal>/analytic-accounts/\{analytic\_account\_id}/multi-analytic-plans/\{analytic\_plan} On request} horizontal>/analytic-accounts/multi-analytic-plans On request} horizontal>/journal/entries On request} horizontal>/journal/entries On request} horizontal>/journal/entries/multi-analytic-plans On request} horizontal>/journal/entries/\{journal\_entry\_id} On request} horizontal>/journal-entries On request} horizontal>/invoices/id/\{invoice\_id}/payments On request} horizontal>/journals On request} horizontal>/journal On request} horizontal>/vat-codes On request} horizontal>/miscellaneous-operation On request} horizontal>/miscellaneous-operation On request} horizontal>/miscellaneous-operation/\{operation\_id} On request} horizontal>/matching On request} horizontal>/matching-multiple On request} horizontal>/invoices/pdf/\{invoice\_id} On request} horizontal>/attachments On request} horizontal>/chart-of-accounts On request} horizontal>/chart-of-accounts/balance On request} horizontal>/employees On request} horizontal>/financial-entry On request} horizontal>/financial-entries On request} horizontal>/outstandings On request
## Troubleshooting
User must check that "Compta web" is available on iSuite and if not : contact ACD.
### Specific errors for ACD:
| Error Code | Error description | Resolution |
| --------------------------------------------- | --------------------------------------------------------------------------------- | --------------------------------------------------------------------------------------------------------- |
| ERROR\_CURRENCY\_NOT\_ALLOWED | Invoices can only be created in Euros in ACD | Please change currency or convert before submitting to ACD |
| ERROR\_ACCOUNT\_NUMBER\_NOT\_NOT\_GOOD\_SCOPE | The account 'XXXXXX' cannot be used to create entries. | Please change account number in the invoice line with a product/charge ledger account |
| UNEXPECTED\_ACD\_ERROR | Plan de classement inaccessible | User connected through Chift does not have access to the GED in order to upload invoice proof. |
| UNEXPECTED\_ACD\_ERROR | Le serveur MySQL est momentanément injoignable | User must contact ACD's support ; it may be due to an ongoing backup. |
| UNEXPECTED\_ACD\_ERROR | Le nom du serveur SQL est invalide | Connexion reference (CNX) is not valid. |
| UNEXPECTED\_ACD\_ERROR | La connexion à la base du dossier n'est pas initialisée | ACD's folder is not shared ; user must activate sharing options. |
| UNEXPECTED\_ACD\_ERROR | Le serveur n'est pas accessible | User needs to check that there is no security restriction to a specific area/IP. |
| UNEXPECTED\_ACD\_ERROR | Impossible de se connecter aux communs de la comptabilité | ACD's outdated, customer has to update ACD to version 23 (at least) and also check sharing options. |
| UNEXPECTED\_ACD\_ERROR | Object reference not set to an instance of an object | ACD's outdated, customer has to update ACD to version 23 (at least) and also check sharing options. |
| UNEXPECTED\_ACD\_ERROR | Echéance ne peut pas être négative | ACD's outdated, customer has to update ACD to version 23 (at least) and also check sharing options. |
| UNEXPECTED\_ACD\_ERROR | Une ligne d'échéance doit avoir un montant | Invoice with no lines cannot be pushed to ACD. No solution - Blocked on ACD side => Contact Chift support |
| UNEXPECTED\_ACD\_ERROR | Unknown column ‘LE\_FACTURE’ | User has to open the folder in the ACD interface, this should solve the issue. |
| UNEXPECTED\_ACD\_ERROR | Le code de TVA doit être saisie sur une ligne d'écriture avec un compte hors taxe | Change the ledger account to be used in the invoice/expense |
# AFAS Software
Source: https://docs.chift.eu/connectors/accounting/afassoftware
}>
Website: [afas.nl](https://www.afas.nl/)\
Geography: 🇳🇱Netherlands\
Software type: Software as a service (SAAS)\
Connector Status: In Development
## Introduction
AFAS Software aims to automate all administrative processes within a single software package. From financial management to HRM, document management to CRM and projects—all clearly visualized in reports and dashboards.
# Sage BOB 50
Source: https://docs.chift.eu/connectors/accounting/bob50
export const PATCH = () => ;
export const DELETE = () => ;
export const POST = () => ;
export const GET = () => ;
}>
Website: [sage.com](https://www.sage.com/fr-be/produits/sage-bob/)
Software type: On-premise (local agent to be installed)
Geography: 🇧🇪 Belgium
## Introduction
Sage BOB 50 is a range of Windows-based accounting and management programs that have been developed specifically for SMEs and fiduciaries. It provides tools for managing accounting, finance, invoicing, and inventory, helping businesses streamline their operations and maintain compliance with Belgian regulations.
## Configure Sage BOB 50
**Prerequisite(s)**
No prerequisite to enable the connector.
**Process**
Activate the Sage BOB 50 integration on the Chift platform.
## Test Sage BOB 50
To test the software integration, you need to go through an integrator to get a sandbox account or you must identify beta users in your client base willing to allow you to use their account for testing.
## Connect Sage BOB 50
To activate a connexion with Sage BOB 50, users will have to go through the following steps.
* French article: [Help Center - Sage Bob 50 FR](https://help.chift.app/fr/articles/9023776-sage-bob-50)
* English article: [Help Center - Sage BOB 50 EN](https://help.chift.app/en/articles/9023776-sage-bob-50)
### Sage BOB 50 coverage
} horizontal>/analytic-account-lines/account/\{analytic\_account\_id} Live} horizontal>/chart-of-accounts/balance Live} horizontal>/folders Live} horizontal>/analytic-accounts Live} horizontal>/analytic-accounts/multi-analytic-plans/\{analytic\_plan} Live} horizontal>/clients Live} horizontal>/analytic-accounts/\{analytic\_account\_id} Live} horizontal>/analytic-accounts/\{analytic\_account\_id}/multi-analytic-plans/\{analytic\_plan} Live} horizontal>/invoices/type/\{invoice\_type} Live} horizontal>/invoices/\{invoice\_id} Live} horizontal>/analytic-accounts/\{analytic\_account\_id} Live} horizontal>/analytic-accounts Live} horizontal>/analytic-accounts/multi-analytic-plans Live} horizontal>/analytic-accounts/\{analytic\_account\_id}/multi-analytic-plans/\{analytic\_plan} Live} horizontal>/analytic-plans Live} horizontal>/clients Live} horizontal>/clients/\{client\_id} Live} horizontal>/journal/entries Live} horizontal>/vat-codes Live} horizontal>/clients/\{client\_id} Live} horizontal>/invoices/pdf/\{invoice\_id} Live} horizontal>/invoices Live} horizontal>/suppliers Live} horizontal>/invoices/id/\{invoice\_id}/payments Live} horizontal>/suppliers/\{supplier\_id} Live} horizontal>/suppliers Live} horizontal>/suppliers/\{supplier\_id} Live} horizontal>/chart-of-accounts Live} horizontal>/miscellaneous-operation Live} horizontal>/journals Live} horizontal>/miscellaneous-operation Live} horizontal>/miscellaneous-operation/\{operation\_id} Live} horizontal>/matching Live} horizontal>/bookyears On request} horizontal>/invoices/multi-analytic-plans On request} horizontal>/invoices/multi-analytic-plans/type/\{invoice\_type} On request} horizontal>/invoices/multi-analytic-plans/\{invoice\_id} On request} horizontal>/accounts On request} horizontal>/bank-accounts On request} horizontal>/journal/entries On request} horizontal>/journal/entries/multi-analytic-plans On request} horizontal>/journal/entries/\{journal\_entry\_id} On request} horizontal>/journal-entries On request} horizontal>/journal On request} horizontal>/matching-multiple On request} horizontal>/attachments On request} horizontal>/employees On request} horizontal>/financial-entry On request} horizontal>/financial-entries On request} horizontal>/outstandings On request} horizontal>/export-fec On request
# Dynamics 365 Business Central
Source: https://docs.chift.eu/connectors/accounting/businesscentral
export const PATCH = () => ;
export const DELETE = () => ;
export const POST = () => ;
export const GET = () => ;
}>
Website: [microsoft.com](https://www.microsoft.com/fr-fr/dynamics-365/products/business-central)\
Software type: Solution as a Software (Saas)\
Geography: 🌍 Worldwide
## Introduction
Microsoft Dynamics 365 Business Central is a cloud-based enterprise resource planning (ERP) software designed for small to medium-sized businesses. It provides a comprehensive solution for managing financials, operations, sales, and customer service. It also offers features such as supply chain management, project management, and human resources management.
## Configure Microsoft Dynamics Business Central 365
**Prerequisite(s)**
* Obtain a Tenant Id, Client ID and secret by creating an Azure Application so that your end users can give access to their instance to your app
* Activate the Microsoft Dynamics Business Central 365 integration on the Chift platform
**Process**
1. Sign in to the [Azure portal](https://portal.azure.com) with your credentials (as an admin). If you do not yet have an Azure account, you can sign up for a free account [here](https://signup.azure.com/).
2. You will see your tenant name in the right upper corner:
* 
3. If you don't have a tenant, you can follow this link to [create your tenant.](https://learn.microsoft.com/en-us/entra/fundamentals/create-new-tenant)
4. You can now start registering your app; go to the portal and select "App registrations" (link [here](https://portal.azure.com/#view/Microsoft_AAD_RegisteredApps/ApplicationsListBlade))
5. Click on "New registration"
* 
* Give a name to your application
* Select one of the "Multitenant" application depending on your need.
* 
* Proceed for registration
* Under your application, click right on "Manage" and then "Authentication" to configure the redirection url.
* Click on "Add a platform" and select "Web" and enter the following redirect URI: "[https://chift.app/oauth2/redirect](https://chift.app/oauth2/redirect)"
* 
* Click on "Configure".
6. Once this is done, we now need to configure permissions for this application. Go under "API permissions" and click on "Add a permission".
* Select "Dynamics 365 Business Central" and search for "Financials.ReadWrite.All" as well as "user\_impersonation" and "User.Read" under the "Delegated permissions". Click on "Add permissions" to confirm your choice.
* 
* As a last step, go to the "Certificates & secrets" tab and then "Client secrets" to add a new Client Secret.
* Give a description to your secret and an expiration date depending on your use case.
* Once this is confirmed, copy the value of your client secret to be able to use it in Chift. Under "Overview", copy as well the application client id and your tenant id to be able to use it in Chift.
7. As final check, we need to ensure that assignment is not set to required in 'Enterprise Application' tab.
* Go to the 'Enterprise Application' tab in your portal
* Toggle off the 'Assignement required ?' setting - turn it to 'No'
## Test Microsoft Dynamics Business Central 365
To test the software integration, create a test account [here](https://www.microsoft.com/fr-fr/dynamics-365/products/business-central). Another alternative is to identify a beta tester in your client base.
## Connect Microsoft Dynamics Business Central 365
To activate a connexion with Microsoft Dynamics Business Central 365, users will have to go through the following steps.
* French article: [Help Center - Microsoft Dynamics 365 Business Central FR](https://help.chift.app/fr/articles/9404745-microsoft-dynamics-365-business-central)
* English article: [Help Center - Microsoft Dynamics 365 Business Central EN](https://help.chift.app/en/articles/9404745-microsoft-dynamics-365-business-central)
### Dynamics 365 Business Central coverage
} horizontal>/invoices Live} horizontal>/invoices/multi-analytic-plans Live} horizontal>/bank-accounts Live} horizontal>/journals Live} horizontal>/vat-codes Live} horizontal>/attachments Live} horizontal>/folders On request} horizontal>/bookyears On request} horizontal>/analytic-plans On request} horizontal>/clients On request} horizontal>/clients On request} horizontal>/clients/\{client\_id} On request} horizontal>/clients/\{client\_id} On request} horizontal>/suppliers On request} horizontal>/suppliers On request} horizontal>/suppliers/\{supplier\_id} On request} horizontal>/suppliers/\{supplier\_id} On request} horizontal>/invoices/type/\{invoice\_type} On request} horizontal>/invoices/multi-analytic-plans/type/\{invoice\_type} On request} horizontal>/invoices/\{invoice\_id} On request} horizontal>/invoices/multi-analytic-plans/\{invoice\_id} On request} horizontal>/accounts On request} horizontal>/analytic-accounts On request} horizontal>/analytic-accounts On request} horizontal>/analytic-accounts/multi-analytic-plans/\{analytic\_plan} On request} horizontal>/analytic-accounts/\{analytic\_account\_id} On request} horizontal>/analytic-accounts/\{analytic\_account\_id} On request} horizontal>/analytic-accounts/\{analytic\_account\_id}/multi-analytic-plans/\{analytic\_plan} On request} horizontal>/analytic-accounts/\{analytic\_account\_id}/multi-analytic-plans/\{analytic\_plan} On request} horizontal>/analytic-accounts/multi-analytic-plans On request} horizontal>/journal/entries On request} horizontal>/journal/entries On request} horizontal>/journal/entries/multi-analytic-plans On request} horizontal>/journal/entries/\{journal\_entry\_id} On request} horizontal>/journal-entries On request} horizontal>/invoices/id/\{invoice\_id}/payments On request} horizontal>/journal On request} horizontal>/miscellaneous-operation On request} horizontal>/miscellaneous-operation On request} horizontal>/miscellaneous-operation/\{operation\_id} On request} horizontal>/matching On request} horizontal>/matching-multiple On request} horizontal>/invoices/pdf/\{invoice\_id} On request} horizontal>/chart-of-accounts On request} horizontal>/chart-of-accounts/balance On request} horizontal>/employees On request} horizontal>/financial-entry On request} horizontal>/financial-entries On request} horizontal>/outstandings On request} horizontal>/export-fec On request
## Specificities
Depending on the vendor/customer payment configuration, invoice can go directly to paid when posted skipping the open/posted status. Explanation: [https://www.encorebusiness.com/blog/payment-methods-automatic-payment-in-dynamics-365-business-central/](https://www.encorebusiness.com/blog/payment-methods-automatic-payment-in-dynamics-365-business-central/)
**Invoice status correspondance**
| Chift | Dynamics |
| ------ | -------- |
| Draft | Draft |
| Posted | Open |
| Paid | Paid |
# Cegid Loop
Source: https://docs.chift.eu/connectors/accounting/cegidloop
export const PATCH = () => ;
export const DELETE = () => ;
export const POST = () => ;
export const GET = () => ;
}>
Website: [cegid.com](https://www.cegid.com/fr/produits/cegid-loop/)
Software type: Solution as a Software (SaaS)
Geography: 🇫🇷 France
## Introduction
Cegid Loop manages the entire activity of accounting firms in the Cloud, accelerating accounting production and reinventing the client-firm relationship.
## Configure Cegid Loop
**Prerequisite(s)**
* You need a subscription key from Cegid Loop to set up the connexion with the connector.
* Activate the Cegid Loop integration on the Chift platform.
**Process**
There are two ways to configure Cegid Loop:
1. **Get Listed as a Cegid Loop Partner**: You are or wish to be a listed partner with Cegid Loop. You will encode your own API Key, provided by Cegid in Chift’s.
2. **Use Chift's Partner Keys:** Chift can provide you with our API key and encode Chift’s API Key in your APP. (Important impact if you change between the two options - all clients will have to reconnect)
## Test Cegid Loop
To test the software integration, Chift can share its own sandbox account upon request.
## Connect Cegid Loop
To activate a connexion with Cegid Loop, users will have to go through the following steps.
* French article: [Help Center - Cegid Loop - FR](https://help.chift.app/fr/articles/9076124-cegid-loop)
* English article: [Help Center - Cegid Loop - EN](https://help.chift.app/en/articles/9076124-cegid-loop)
### Cegid Loop coverage
} horizontal>/accounts Live} horizontal>/journal-entries Live} horizontal>/folders Live} horizontal>/journals Live} horizontal>/vat-codes Live} horizontal>/clients Live} horizontal>/chart-of-accounts Live} horizontal>/suppliers Live} horizontal>/clients Live} horizontal>/clients/\{client\_id} Live} horizontal>/analytic-plans Live} horizontal>/analytic-accounts/multi-analytic-plans/\{analytic\_plan} Live} horizontal>/analytic-accounts Live} horizontal>/journal/entries Live} horizontal>/suppliers/\{supplier\_id} Live} horizontal>/clients/\{client\_id} Live} horizontal>/suppliers Live} horizontal>/suppliers/\{supplier\_id} Live} horizontal>/analytic-accounts/multi-analytic-plans Live} horizontal>/analytic-accounts/\{analytic\_account\_id}/multi-analytic-plans/\{analytic\_plan} Live} horizontal>/analytic-accounts Live} horizontal>/analytic-accounts/\{analytic\_account\_id} Live} horizontal>/invoices Live} horizontal>/invoices/type/\{invoice\_type} Live} horizontal>/invoices/\{invoice\_id} Live} horizontal>/journal Live} horizontal>/bookyears On request} horizontal>/invoices/multi-analytic-plans On request} horizontal>/invoices/multi-analytic-plans/type/\{invoice\_type} On request} horizontal>/invoices/multi-analytic-plans/\{invoice\_id} On request} horizontal>/bank-accounts On request} horizontal>/analytic-accounts/\{analytic\_account\_id} On request} horizontal>/analytic-accounts/\{analytic\_account\_id}/multi-analytic-plans/\{analytic\_plan} On request} horizontal>/journal/entries On request} horizontal>/journal/entries/multi-analytic-plans On request} horizontal>/journal/entries/\{journal\_entry\_id} On request} horizontal>/invoices/id/\{invoice\_id}/payments On request} horizontal>/miscellaneous-operation On request} horizontal>/miscellaneous-operation On request} horizontal>/miscellaneous-operation/\{operation\_id} On request} horizontal>/matching On request} horizontal>/matching-multiple On request} horizontal>/invoices/pdf/\{invoice\_id} On request} horizontal>/attachments On request} horizontal>/chart-of-accounts/balance On request} horizontal>/employees On request} horizontal>/financial-entry On request} horizontal>/financial-entries On request} horizontal>/outstandings On request} horizontal>/export-fec On request
## Troubleshooting
### Specific errors for Cegid Loop:
| Error Code | Error description | Resolution |
| ---------------------------- | ----------------- | ------------------------------------------------------------------------------------------------ |
| UNEXPECTED\_CEGIDLOOP\_ERROR | Error: Addon | Temporary error in Cegid Loop, try again later and contact chift's support if the error persists |
# Cegid Quadra
Source: https://docs.chift.eu/connectors/accounting/cegidquadra
}>
Website: [cegid.com](https://www.cegid.com/fr/produits/cegid-quadra/)
Geography: 🇫🇷 France
Connector Status: In Development
## Introduction
The integrated solution to boost productivity in small and medium-sized accountancy firms.
# Accounting API - Coverage
Source: https://docs.chift.eu/connectors/accounting/coverage
## Coverage of endpoints by connector
| Route | Myunisoft | Sage100fr | Yuki | Holded | Pennylane | Exactonline | Snelstart | Winbiz | Exactonlinefr | Tiime | Fulll | Exactonlinenl | Odoo | Visma\_eaccounting | Sagege | Eboekhouden | Minox | Businesscentral | Cegidloop | Inexweb | Bob50 | Sage50uk | Winbooksclassic | Inqom | Octopus | Netsuite | Sage50fr | Horus | Acd |
| ---------------------------------------------------------------------------------------- | --------- | --------- | ---- | ------ | --------- | ----------- | --------- | ------ | ------------- | ----- | ----- | ------------- | ---- | ------------------ | ------ | ----------- | ----- | --------------- | --------- | ------- | ----- | -------- | --------------- | ----- | ------- | -------- | -------- | ----- | --- |
| GET /bookyears | ✅ | ❌ | ✅ | ❌ | ❌ | ✅ | ✅ | ❌ | ✅ | ✅ | ✅ | ✅ | ✅ | ✅ | ✅ | ✅ | ❌ | ❌ | ❌ | ✅ | ❌ | ❌ | ❌ | ✅ | ❌ | ✅ | ❌ | ❌ | ✅ |
| POST /accounts | ✅ | ❌ | ❌ | ✅ | ✅ | ✅ | ✅ | ❌ | ✅ | ❌ | ✅ | ✅ | ❌ | ✅ | ❌ | ✅ | ✅ | ❌ | ✅ | ❌ | ❌ | ❌ | ❌ | ✅ | ✅ | ❌ | ❌ | ✅ | ✅ |
| GET /export-fec | ✅ | ❌ | ❌ | ❌ | ❌ | ❌ | ❌ | ❌ | ❌ | ❌ | ❌ | ❌ | ❌ | ❌ | ❌ | ❌ | ❌ | ❌ | ❌ | ❌ | ❌ | ❌ | ❌ | ❌ | ❌ | ❌ | ❌ | ❌ | ✅ |
| GET /folders | ❌ | ✅ | ✅ | ❌ | ❌ | ✅ | ✅ | ❌ | ✅ | ✅ | ✅ | ✅ | ✅ | ✅ | ✅ | ✅ | ✅ | ❌ | ✅ | ✅ | ✅ | ❌ | ✅ | ✅ | ✅ | ✅ | ❌ | ❌ | ❌ |
| GET /analytic-plans | ❌ | ✅ | ✅ | ❌ | ❌ | ✅ | ✅ | ❌ | ✅ | ❌ | ✅ | ✅ | ❌ | ✅ | ✅ | ✅ | ✅ | ❌ | ✅ | ✅ | ✅ | ❌ | ✅ | ✅ | ✅ | ✅ | ✅ | ❌ | ❌ |
| POST /clients | ❌ | ✅ | ✅ | ✅ | ❌ | ✅ | ✅ | ✅ | ✅ | ❌ | ✅ | ✅ | ❌ | ✅ | ✅ | ✅ | ✅ | ❌ | ✅ | ✅ | ✅ | ❌ | ✅ | ✅ | ✅ | ✅ | ❌ | ❌ | ❌ |
| GET /clients | ❌ | ✅ | ✅ | ✅ | ❌ | ✅ | ✅ | ✅ | ✅ | ✅ | ✅ | ✅ | ❌ | ✅ | ✅ | ✅ | ✅ | ❌ | ✅ | ✅ | ✅ | ✅ | ✅ | ✅ | ✅ | ✅ | ✅ | ❌ | ❌ |
| PATCH /clients/\{client\_id} | ❌ | ✅ | ✅ | ✅ | ❌ | ✅ | ✅ | ✅ | ❌ | ❌ | ❌ | ❌ | ❌ | ✅ | ❌ | ✅ | ✅ | ❌ | ✅ | ❌ | ✅ | ❌ | ✅ | ✅ | ✅ | ❌ | ❌ | ❌ | ❌ |
| GET /clients/\{client\_id} | ❌ | ✅ | ✅ | ✅ | ❌ | ✅ | ✅ | ✅ | ✅ | ✅ | ✅ | ✅ | ❌ | ✅ | ✅ | ✅ | ✅ | ❌ | ✅ | ✅ | ✅ | ✅ | ✅ | ✅ | ✅ | ✅ | ✅ | ❌ | ❌ |
| POST /suppliers | ❌ | ✅ | ✅ | ✅ | ❌ | ✅ | ✅ | ✅ | ✅ | ❌ | ✅ | ✅ | ❌ | ✅ | ✅ | ✅ | ✅ | ❌ | ✅ | ✅ | ✅ | ❌ | ✅ | ✅ | ✅ | ✅ | ❌ | ❌ | ❌ |
| GET /suppliers | ❌ | ✅ | ✅ | ✅ | ❌ | ✅ | ✅ | ✅ | ✅ | ✅ | ✅ | ✅ | ❌ | ✅ | ✅ | ✅ | ✅ | ❌ | ✅ | ✅ | ✅ | ✅ | ✅ | ✅ | ✅ | ✅ | ✅ | ❌ | ❌ |
| GET /suppliers/\{supplier\_id} | ❌ | ✅ | ✅ | ✅ | ❌ | ✅ | ✅ | ✅ | ✅ | ✅ | ✅ | ✅ | ❌ | ✅ | ✅ | ✅ | ✅ | ❌ | ✅ | ✅ | ✅ | ✅ | ✅ | ✅ | ✅ | ✅ | ✅ | ❌ | ❌ |
| PATCH /suppliers/\{supplier\_id} | ❌ | ✅ | ✅ | ✅ | ❌ | ✅ | ✅ | ✅ | ❌ | ❌ | ❌ | ❌ | ❌ | ✅ | ❌ | ✅ | ✅ | ❌ | ✅ | ❌ | ✅ | ❌ | ✅ | ✅ | ✅ | ❌ | ❌ | ❌ | ❌ |
| POST /invoices | ❌ | ✅ | ✅ | ✅ | ❌ | ✅ | ✅ | ✅ | ✅ | ✅ | ✅ | ✅ | ❌ | ✅ | ✅ | ✅ | ✅ | ✅ | ✅ | ✅ | ✅ | ❌ | ✅ | ✅ | ✅ | ✅ | ❌ | ❌ | ❌ |
| POST /invoices/multi-analytic-plans | ❌ | ❌ | ✅ | ✅ | ❌ | ❌ | ❌ | ❌ | ❌ | ❌ | ❌ | ❌ | ❌ | ❌ | ❌ | ❌ | ❌ | ✅ | ❌ | ❌ | ❌ | ❌ | ❌ | ❌ | ❌ | ✅ | ❌ | ❌ | ❌ |
| GET /invoices/type/\{invoice\_type} | ❌ | ✅ | ✅ | ✅ | ❌ | ✅ | ✅ | ✅ | ✅ | ❌ | ✅ | ✅ | ❌ | ✅ | ✅ | ✅ | ✅ | ❌ | ✅ | ✅ | ✅ | ✅ | ✅ | ✅ | ✅ | ✅ | ✅ | ❌ | ❌ |
| GET /invoices/multi-analytic-plans/type/\{invoice\_type} | ❌ | ❌ | ✅ | ✅ | ❌ | ❌ | ❌ | ❌ | ❌ | ❌ | ❌ | ❌ | ❌ | ❌ | ❌ | ❌ | ❌ | ❌ | ❌ | ❌ | ❌ | ❌ | ❌ | ❌ | ❌ | ✅ | ❌ | ❌ | ❌ |
| GET /invoices/\{invoice\_id} | ❌ | ✅ | ✅ | ✅ | ❌ | ✅ | ✅ | ✅ | ✅ | ❌ | ✅ | ✅ | ❌ | ✅ | ✅ | ✅ | ❌ | ❌ | ✅ | ✅ | ✅ | ❌ | ✅ | ✅ | ✅ | ✅ | ❌ | ❌ | ❌ |
| GET /invoices/multi-analytic-plans/\{invoice\_id} | ❌ | ❌ | ✅ | ✅ | ❌ | ❌ | ❌ | ❌ | ❌ | ❌ | ❌ | ❌ | ❌ | ❌ | ❌ | ❌ | ❌ | ❌ | ❌ | ❌ | ❌ | ❌ | ❌ | ❌ | ❌ | ✅ | ❌ | ❌ | ❌ |
| POST /bank-accounts | ❌ | ❌ | ❌ | ❌ | ❌ | ✅ | ❌ | ❌ | ✅ | ❌ | ❌ | ✅ | ❌ | ❌ | ❌ | ❌ | ❌ | ✅ | ❌ | ❌ | ❌ | ❌ | ❌ | ❌ | ❌ | ❌ | ❌ | ❌ | ❌ |
| POST /analytic-accounts | ❌ | ✅ | ✅ | ❌ | ❌ | ✅ | ❌ | ✅ | ✅ | ❌ | ❌ | ✅ | ❌ | ❌ | ❌ | ❌ | ✅ | ❌ | ✅ | ❌ | ✅ | ❌ | ✅ | ✅ | ✅ | ❌ | ❌ | ❌ | ❌ |
| GET /analytic-accounts | ❌ | ✅ | ✅ | ❌ | ❌ | ✅ | ✅ | ✅ | ✅ | ❌ | ✅ | ✅ | ❌ | ✅ | ❌ | ✅ | ✅ | ❌ | ✅ | ✅ | ✅ | ❌ | ✅ | ✅ | ✅ | ✅ | ✅ | ❌ | ❌ |
| POST /analytic-accounts/multi-analytic-plans/\{analytic\_plan} | ❌ | ✅ | ✅ | ❌ | ❌ | ✅ | ❌ | ❌ | ✅ | ❌ | ❌ | ✅ | ❌ | ❌ | ❌ | ❌ | ✅ | ❌ | ✅ | ❌ | ✅ | ❌ | ✅ | ✅ | ✅ | ❌ | ❌ | ❌ | ❌ |
| PATCH /analytic-accounts/\{analytic\_account\_id} | ❌ | ✅ | ✅ | ❌ | ❌ | ✅ | ✅ | ✅ | ✅ | ❌ | ❌ | ✅ | ❌ | ✅ | ❌ | ✅ | ✅ | ❌ | ❌ | ❌ | ✅ | ❌ | ✅ | ❌ | ✅ | ❌ | ❌ | ❌ | ❌ |
| GET /analytic-accounts/\{analytic\_account\_id} | ❌ | ✅ | ✅ | ❌ | ❌ | ✅ | ✅ | ✅ | ✅ | ❌ | ✅ | ✅ | ❌ | ✅ | ❌ | ✅ | ✅ | ❌ | ✅ | ✅ | ✅ | ❌ | ✅ | ✅ | ✅ | ✅ | ✅ | ❌ | ❌ |
| PATCH /analytic-accounts/\{analytic\_account\_id}/multi-analytic-plans/\{analytic\_plan} | ❌ | ✅ | ✅ | ❌ | ❌ | ✅ | ✅ | ❌ | ✅ | ❌ | ❌ | ✅ | ❌ | ✅ | ❌ | ✅ | ✅ | ❌ | ❌ | ❌ | ✅ | ❌ | ✅ | ❌ | ✅ | ❌ | ❌ | ❌ | ❌ |
| GET /analytic-accounts/\{analytic\_account\_id}/multi-analytic-plans/\{analytic\_plan} | ❌ | ✅ | ✅ | ❌ | ❌ | ✅ | ✅ | ❌ | ✅ | ❌ | ✅ | ✅ | ❌ | ✅ | ❌ | ✅ | ✅ | ❌ | ✅ | ✅ | ✅ | ❌ | ✅ | ✅ | ✅ | ✅ | ✅ | ❌ | ❌ |
| GET /analytic-accounts/multi-analytic-plans | ❌ | ✅ | ✅ | ❌ | ❌ | ✅ | ✅ | ❌ | ✅ | ❌ | ✅ | ✅ | ❌ | ✅ | ✅ | ✅ | ✅ | ❌ | ✅ | ✅ | ✅ | ❌ | ✅ | ✅ | ✅ | ✅ | ✅ | ❌ | ❌ |
| GET /journal/entries | ❌ | ✅ | ✅ | ✅ | ❌ | ✅ | ✅ | ❌ | ✅ | ❌ | ✅ | ✅ | ✅ | ✅ | ✅ | ✅ | ❌ | ❌ | ✅ | ✅ | ✅ | ❌ | ✅ | ✅ | ✅ | ✅ | ✅ | ❌ | ❌ |
| POST /journal/entries | ❌ | ✅ | ❌ | ✅ | ❌ | ❌ | ❌ | ❌ | ❌ | ❌ | ❌ | ❌ | ❌ | ❌ | ❌ | ❌ | ❌ | ❌ | ❌ | ❌ | ❌ | ❌ | ❌ | ❌ | ✅ | ❌ | ❌ | ❌ | ❌ |
| GET /journal/entries/multi-analytic-plans | ❌ | ❌ | ❌ | ✅ | ❌ | ❌ | ❌ | ❌ | ❌ | ❌ | ❌ | ❌ | ✅ | ❌ | ✅ | ❌ | ❌ | ❌ | ❌ | ❌ | ❌ | ❌ | ❌ | ❌ | ❌ | ✅ | ❌ | ❌ | ❌ |
| GET /journal/entries/\{journal\_entry\_id} | ❌ | ❌ | ❌ | ✅ | ❌ | ❌ | ❌ | ❌ | ❌ | ❌ | ❌ | ❌ | ❌ | ❌ | ❌ | ❌ | ❌ | ❌ | ❌ | ❌ | ❌ | ❌ | ❌ | ❌ | ❌ | ❌ | ❌ | ❌ | ❌ |
| POST /journal-entries | ❌ | ✅ | ❌ | ✅ | ❌ | ✅ | ✅ | ❌ | ✅ | ✅ | ✅ | ✅ | ❌ | ✅ | ✅ | ✅ | ✅ | ❌ | ✅ | ✅ | ❌ | ❌ | ❌ | ✅ | ❌ | ✅ | ❌ | ❌ | ❌ |
| GET /invoices/id/\{invoice\_id}/payments | ❌ | ✅ | ❌ | ❌ | ❌ | ✅ | ❌ | ✅ | ✅ | ❌ | ❌ | ✅ | ❌ | ❌ | ❌ | ❌ | ❌ | ❌ | ❌ | ❌ | ✅ | ❌ | ✅ | ❌ | ✅ | ❌ | ❌ | ❌ | ❌ |
| GET /journals | ❌ | ✅ | ✅ | ✅ | ❌ | ✅ | ✅ | ✅ | ✅ | ✅ | ✅ | ✅ | ✅ | ✅ | ✅ | ✅ | ✅ | ✅ | ✅ | ✅ | ✅ | ❌ | ✅ | ✅ | ✅ | ✅ | ✅ | ❌ | ❌ |
| POST /journal | ❌ | ❌ | ❌ | ✅ | ❌ | ✅ | ✅ | ❌ | ❌ | ❌ | ❌ | ✅ | ❌ | ✅ | ❌ | ✅ | ✅ | ❌ | ✅ | ❌ | ❌ | ❌ | ❌ | ✅ | ✅ | ❌ | ❌ | ❌ | ❌ |
| GET /vat-codes | ❌ | ✅ | ✅ | ✅ | ❌ | ✅ | ✅ | ✅ | ✅ | ✅ | ✅ | ✅ | ✅ | ✅ | ✅ | ✅ | ✅ | ✅ | ✅ | ✅ | ✅ | ❌ | ✅ | ✅ | ✅ | ✅ | ❌ | ✅ | ❌ |
| POST /miscellaneous-operation | ❌ | ❌ | ✅ | ❌ | ❌ | ✅ | ❌ | ❌ | ✅ | ❌ | ❌ | ✅ | ❌ | ❌ | ❌ | ❌ | ❌ | ❌ | ❌ | ❌ | ✅ | ❌ | ✅ | ❌ | ✅ | ❌ | ❌ | ❌ | ❌ |
| GET /miscellaneous-operation | ❌ | ❌ | ❌ | ❌ | ❌ | ✅ | ❌ | ❌ | ✅ | ❌ | ❌ | ✅ | ❌ | ❌ | ❌ | ❌ | ✅ | ❌ | ❌ | ❌ | ✅ | ❌ | ✅ | ❌ | ✅ | ❌ | ❌ | ❌ | ❌ |
| GET /miscellaneous-operation/\{operation\_id} | ❌ | ❌ | ❌ | ❌ | ❌ | ✅ | ❌ | ❌ | ✅ | ❌ | ❌ | ✅ | ❌ | ❌ | ❌ | ❌ | ❌ | ❌ | ❌ | ❌ | ✅ | ❌ | ✅ | ❌ | ✅ | ❌ | ❌ | ❌ | ❌ |
| POST /matching | ❌ | ✅ | ❌ | ❌ | ✅ | ✅ | ❌ | ❌ | ✅ | ❌ | ❌ | ✅ | ❌ | ❌ | ❌ | ❌ | ❌ | ❌ | ❌ | ❌ | ✅ | ❌ | ✅ | ❌ | ✅ | ❌ | ❌ | ✅ | ❌ |
| POST /matching-multiple | ❌ | ❌ | ❌ | ❌ | ❌ | ✅ | ❌ | ❌ | ✅ | ❌ | ❌ | ✅ | ❌ | ❌ | ❌ | ❌ | ❌ | ❌ | ❌ | ❌ | ❌ | ❌ | ❌ | ❌ | ❌ | ❌ | ❌ | ❌ | ❌ |
| POST /invoices/pdf/\{invoice\_id} | ✅ | ✅ | ❌ | ✅ | ❌ | ✅ | ❌ | ✅ | ✅ | ❌ | ❌ | ✅ | ❌ | ❌ | ❌ | ❌ | ❌ | ❌ | ❌ | ❌ | ✅ | ❌ | ✅ | ❌ | ✅ | ❌ | ❌ | ❌ | ❌ |
| GET /attachments | ❌ | ✅ | ✅ | ✅ | ❌ | ✅ | ✅ | ❌ | ✅ | ❌ | ❌ | ✅ | ❌ | ✅ | ❌ | ✅ | ❌ | ✅ | ❌ | ❌ | ❌ | ❌ | ❌ | ✅ | ✅ | ❌ | ❌ | ❌ | ❌ |
| GET /chart-of-accounts | ❌ | ✅ | ✅ | ✅ | ✅ | ✅ | ✅ | ✅ | ✅ | ✅ | ✅ | ✅ | ❌ | ✅ | ✅ | ✅ | ✅ | ❌ | ✅ | ✅ | ✅ | ❌ | ✅ | ✅ | ✅ | ✅ | ✅ | ❌ | ❌ |
| POST /chart-of-accounts/balance | ❌ | ✅ | ✅ | ✅ | ❌ | ✅ | ✅ | ❌ | ✅ | ❌ | ❌ | ✅ | ❌ | ✅ | ❌ | ✅ | ❌ | ❌ | ❌ | ❌ | ✅ | ❌ | ✅ | ✅ | ✅ | ❌ | ❌ | ❌ | ❌ |
| GET /employees | ❌ | ✅ | ❌ | ✅ | ❌ | ❌ | ✅ | ❌ | ❌ | ✅ | ✅ | ❌ | ❌ | ✅ | ❌ | ✅ | ❌ | ❌ | ❌ | ✅ | ❌ | ❌ | ❌ | ❌ | ❌ | ✅ | ❌ | ❌ | ❌ |
| POST /financial-entry | ❌ | ❌ | ❌ | ❌ | ❌ | ❌ | ❌ | ❌ | ❌ | ❌ | ❌ | ❌ | ❌ | ❌ | ❌ | ❌ | ❌ | ❌ | ❌ | ❌ | ❌ | ❌ | ❌ | ❌ | ❌ | ❌ | ❌ | ✅ | ❌ |
| POST /financial-entries | ❌ | ✅ | ❌ | ❌ | ❌ | ✅ | ❌ | ❌ | ✅ | ❌ | ❌ | ✅ | ❌ | ❌ | ❌ | ❌ | ❌ | ❌ | ❌ | ❌ | ❌ | ❌ | ✅ | ❌ | ✅ | ❌ | ❌ | ❌ | ❌ |
| GET /outstandings | ❌ | ✅ | ✅ | ❌ | ❌ | ✅ | ✅ | ❌ | ✅ | ❌ | ❌ | ✅ | ❌ | ✅ | ❌ | ✅ | ❌ | ❌ | ❌ | ❌ | ❌ | ❌ | ❌ | ❌ | ✅ | ❌ | ❌ | ❌ | ❌ |
# DATEV
Source: https://docs.chift.eu/connectors/accounting/datev
export const PATCH = () => ;
export const DELETE = () => ;
export const POST = () => ;
export const GET = () => ;
}>
Website: [https://www.datev.com/](https://www.datev.com/)
Software type: On premise (API)
Geography: 🇩🇪 Germany
## Introduction
DATEV is a leading German software provider specializing in accounting. Its ecosystem includes powerful desktop applications like DATEV Rechnungswesen for accounting and DATEV Unternehmen Online for the document management.
##### Our integration covers two services:
* DATEV Rechnungswesen is an on-premise accounting solution designed for businesses that manage their own accounting. It's especially popular with mid-sized and larger companies that need more advanced features. The software covers everything from basic financial accounting to cost tracking and asset management, making it a complete all-in-one solution for managing your company’s finances.
* DATEV Unternehmen Online is a cloud-based platform that facilitates digital collaboration between businesses and their accountants. It's designed to support the exchange of documents such as invoices from companies to accountants and tax advisors.
By activating this premium connector, our API allows you to interact with these two solutions at the same time or only with DATEV Rechnungswesen depending on your needs.
## Configure DATEV
**Prerequisite(s)**
* You need premium access to activate this connector.
* For DATEV Rechnungswesen, there are no prerequisites to enable it in your Chift App.
* For DATEV Unternehmen Online, you need a Client ID and Secret.
**Process**
1. If you need a Client ID and Secret, you can either use yours if you already have a valid pair of ID and Secret or we can provide you with our credentials.
2. Activate the DATEV integration on the Chift platform.
## Test DATEV
To test your connection, please contact a DATEV partner. If you don't have one, we can put you in contact with our partner.
## Connect DATEV
To activate a connection with DATEV, users need to provide their email address and password from DATEV Rechnungswesen.
If they want to use DATEV Unternehmen Online as well, they will need to provide their client number and consultant number. They can find these numbers on this page: [https://webapps.datev.de/duo-start](https://webapps.datev.de/duo-start)
## Technical limitations
* It is not possible to reconcile or assign a payment to an invoice. Your client will have to use the application to do so
* It is not possible to create journal entries, because there is no endpoint from DATEV for this.
## Coverage
### DATEV coverage
} horizontal>/bookyears Live} horizontal>/chart-of-accounts Live} horizontal>/folders Live} horizontal>/vat-codes Live} horizontal>/clients/\{client\_id} Live} horizontal>/clients Live} horizontal>/suppliers Live} horizontal>/suppliers/\{supplier\_id} Live} horizontal>/analytic-accounts/\{analytic\_account\_id}/multi-analytic-plans/\{analytic\_plan} Live} horizontal>/analytic-accounts Live} horizontal>/analytic-accounts/multi-analytic-plans Live} horizontal>/analytic-accounts/\{analytic\_account\_id} Live} horizontal>/journal/entries/multi-analytic-plans Live} horizontal>/journal/entries/\{journal\_entry\_id} Live} horizontal>/journal/entries Live} horizontal>/invoices/type/\{invoice\_type} Live} horizontal>/invoices/\{invoice\_id} Live} horizontal>/analytic-plans Live} horizontal>/invoices/multi-analytic-plans/type/\{invoice\_type} Live} horizontal>/invoices/multi-analytic-plans/\{invoice\_id} Live} horizontal>/invoices/id/\{invoice\_id}/payments Live} horizontal>/outstandings Live} horizontal>/invoices Live} horizontal>/multiples invoices Live} horizontal>/clients Live} horizontal>/suppliers Live} horizontal>/analytic-accounts Live} horizontal>/clients/\{client\_id} Live} horizontal>/suppliers/\{supplier\_id} Live} horizontal>/analytic-accounts/\{analytic\_account\_id} Live
## Troubleshooting
### Specific errors for DATEV:
| Error Code | Error description | Resolution |
| -------------------------------- | --------------------------------------------------------------------------------------------------------------------- | ------------------------------------------------------------------------------------------------------ |
| ERROR\_CONNECTOR\_AUTHENTICATION | An error occurred while authenticating with DATEV | Verify that your account has still the rights to use the API or you user still exist |
| CREDENTIALS\_ERROR | The provided Client Number and/or Consultant Number doesn't seem to be correct or you don't seem to have access to it | Verify that your Client Number and /or Consultant number is still valid or that your user still exist |
| ERROR\_NO\_DOCUMENT\_MANAGEMENT | The client doesn't have the document management feature | Verify that your client has access to the document management features |
# e-Boekhouden
Source: https://docs.chift.eu/connectors/accounting/eboekhouden
export const PATCH = () => ;
export const DELETE = () => ;
export const POST = () => ;
export const GET = () => ;
}>
Website: [e-boekhouden.nl](https://www.e-boekhouden.nl)\
Geography: 🇳🇱 Netherlands\
Connector Status: Live
## Introduction
E-Boekhouden is an accounting platform widely used by freelancers, small businesses, and associations in the Netherlands.
It provides essential features such as invoicing, bookkeeping, bank reconciliation, VAT returns (BTW), and inventory management.
Known for its affordability and ease of use, the platform is also compliant with Dutch tax regulations and integrates easily with the Belastingdienst (Dutch Tax Authority).
e-Boekhouden.nl offers various automation options and supports API access for connecting with other software systems, making it a flexible solution for managing financial administration.
## Configure E-Boekhouden
**Prerequisite(s)**
There are no prerequisite to enable eAccounting in your Chift App.
## Test E-Boekhouden
To test the software integration, you can create yourself a test account.
### EBoekhouden coverage
} horizontal>/outstandings Live} horizontal>/get-environments Live} horizontal>/attachments Live} horizontal>/journal/entries Live} horizontal>/vat-codes Live} horizontal>/accounts Live} horizontal>/journal-entries Live} horizontal>/clients/\{client\_id} Live} horizontal>/clients Live} horizontal>/analytic-accounts/\{analytic\_account\_id} Live} horizontal>/analytic-accounts Live} horizontal>/analytic-accounts/multi-analytic-plans Live} horizontal>/analytic-accounts/\{analytic\_account\_id}/multi-analytic-plans/\{analytic\_plan} Live} horizontal>/analytic-accounts/\{analytic\_account\_id}/multi-analytic-plans/\{analytic\_plan} Live} horizontal>/analytic-accounts/\{analytic\_account\_id} Live} horizontal>/employees Live} horizontal>/invoices Live} horizontal>/journals Live} horizontal>/bookyears Live} horizontal>/suppliers Live} horizontal>/suppliers/\{supplier\_id} Live} horizontal>/analytic-plans Live} horizontal>/chart-of-accounts Live} horizontal>/folders Live} horizontal>/chart-of-accounts/balance Live} horizontal>/analytic-accounts/\{analytic\_account\_id}/multi-analytic-plans/\{analytic\_plan} Live} horizontal>/analytic-accounts/\{analytic\_account\_id} Live} horizontal>/suppliers/\{supplier\_id} Live} horizontal>/clients/\{client\_id} Live} horizontal>/clients Live} horizontal>/suppliers Live} horizontal>/invoices/\{invoice\_id} Live} horizontal>/invoices/type/\{invoice\_type} Live} horizontal>/journal Live} horizontal>/invoices/multi-analytic-plans On request} horizontal>/invoices/multi-analytic-plans/type/\{invoice\_type} On request} horizontal>/invoices/multi-analytic-plans/\{invoice\_id} On request} horizontal>/bank-accounts On request} horizontal>/analytic-accounts On request} horizontal>/analytic-accounts/multi-analytic-plans/\{analytic\_plan} On request} horizontal>/journal/entries On request} horizontal>/journal/entries/multi-analytic-plans On request} horizontal>/journal/entries/\{journal\_entry\_id} On request} horizontal>/invoices/id/\{invoice\_id}/payments On request} horizontal>/miscellaneous-operation On request} horizontal>/miscellaneous-operation On request} horizontal>/miscellaneous-operation/\{operation\_id} On request} horizontal>/matching On request} horizontal>/matching-multiple On request} horizontal>/invoices/pdf/\{invoice\_id} On request} horizontal>/financial-entry On request} horizontal>/financial-entries On request} horizontal>/export-fec On request
# Exact Online
Source: https://docs.chift.eu/connectors/accounting/exactonline
export const PATCH = () => ;
export const DELETE = () => ;
export const POST = () => ;
export const GET = () => ;
}>
Website: [exact.com](https://www.exact.com)
Software type: Solution as a Software (Saas)
Geography: 🇧🇪Belgium, 🇳🇱Netherlands
## Introduction
Exact Online is a business software that provides a range of tools for small and medium-sized enterprises to manage their finances, accounting, inventory, and project management. Deliver the Exact integration your customer wants in no time.
## Configure Exact Online
**Prerequisite(s)**
You will have to get listed as an Exact Online partner to collect partner account keys to configure the connector on your account. To do so, you will need to:
* Create an Exact Online partner account, with an OAuth2 application.
* Configure your partner account
* Submit your application for Exact Online's approval
**Process**
1. Create your Exact Online account: \
[Link for a Belgium account](https://start.exactonline.be/docs/HRMSubTrialNew.aspx?bcaction=0\&type=10\&language=EN\&UseSimpleWizard=1\&PackageSetCode=APPCENTER)\
[Link for a French account](https://start.exactonline.fr/docs/HRMSubTrialNew.aspx?bcaction=0\&type=10\&language=EN\&UseSimpleWizard=1\&PackageSetCode=APPCENTER)\
[Link for a Dutch account](https://start.exactonline.nl/docs/HRMSubTrialNew.aspx?bcaction=0\&type=10\&language=EN\&UseSimpleWizard=1\&PackageSetCode=APPCENTER)
2. Set up your Oauth2 application by going to your Exact Online account → “Partners” section in the menu → “Exact Online App Store” (In the section “Manage my applications”)
* Create a new application by clicking on “+”
* Enter the name of your APP to be displayed in Exact Online’s Marketplace
* Enter the redirect URL (Chift): [https://chift.app/oauth2/redirect](https://chift.app/oauth2/redirect)
* Make sure you tick all the below configurations of you app

3. Wait for Exact Online’s approval of your application - this may take a few days.
4. Go to your account, connectors menu and activate Exact Online in one click. Then, you will be asked to provide your Exact Online client ID & secret.
## Test Exact Online
To test the software integration, you can use the partner account you created during the configuration process.
-> Once the testing is done, you need to get the approval of Exact Online to use the integration (your app) with external clients. Once your app is approved, external clients will be able to use the integration.
## Connect Exact Online
To activate a connexion with Exact Online, users will have to go through the following steps.
* French article: [Help Center - Exact Online - FR](https://help.chift.app/fr/articles/9023716-exact-online)
* English article: [Help Center - Exact Online - EN](https://help.chift.app/en/articles/9023716-exact-online)
### Exact Online BE coverage
} horizontal>/chart-of-accounts/balance Live} horizontal>/analytic-account-lines/account/\{analytic\_account\_id} Live} horizontal>/attachments Live} horizontal>/outstandings Live} horizontal>/bookyears Live} horizontal>/accounts Live} horizontal>/matching-multiple Live} horizontal>/financial-entries Live} horizontal>/folders Live} horizontal>/journal Live} horizontal>/journal-entries Live} horizontal>/bank-accounts Live} horizontal>/analytic-accounts Live} horizontal>/analytic-accounts/multi-analytic-plans/\{analytic\_plan} Live} horizontal>/clients Live} horizontal>/analytic-accounts/\{analytic\_account\_id} Live} horizontal>/analytic-accounts/\{analytic\_account\_id}/multi-analytic-plans/\{analytic\_plan} Live} horizontal>/invoices/\{invoice\_id} Live} horizontal>/invoices/type/\{invoice\_type} Live} horizontal>/analytic-accounts Live} horizontal>/analytic-accounts/\{analytic\_account\_id} Live} horizontal>/analytic-accounts/\{analytic\_account\_id}/multi-analytic-plans/\{analytic\_plan} Live} horizontal>/analytic-accounts/multi-analytic-plans Live} horizontal>/analytic-plans Live} horizontal>/clients/\{client\_id} Live} horizontal>/clients Live} horizontal>/journal/entries Live} horizontal>/vat-codes Live} horizontal>/clients/\{client\_id} Live} horizontal>/invoices/pdf/\{invoice\_id} Live} horizontal>/invoices Live} horizontal>/suppliers Live} horizontal>/invoices/id/\{invoice\_id}/payments Live} horizontal>/suppliers/\{supplier\_id} Live} horizontal>/suppliers Live} horizontal>/suppliers/\{supplier\_id} Live} horizontal>/chart-of-accounts Live} horizontal>/miscellaneous-operation Live} horizontal>/journals Live} horizontal>/miscellaneous-operation Live} horizontal>/miscellaneous-operation/\{operation\_id} Live} horizontal>/matching Live} horizontal>/invoices/multi-analytic-plans On request} horizontal>/invoices/multi-analytic-plans/type/\{invoice\_type} On request} horizontal>/invoices/multi-analytic-plans/\{invoice\_id} On request} horizontal>/journal/entries On request} horizontal>/journal/entries/multi-analytic-plans On request} horizontal>/journal/entries/\{journal\_entry\_id} On request} horizontal>/employees On request} horizontal>/financial-entry On request} horizontal>/export-fec On request
# Fulll
Source: https://docs.chift.eu/connectors/accounting/fulll
export const PATCH = () => ;
export const DELETE = () => ;
export const POST = () => ;
export const GET = () => ;
}>
Website: [fulll.fr](https://www.fulll.fr/)
Software type: Solution as a Software (Saas)
Geography: 🇫🇷 France
## Introduction
Fulll is an accounting software designed to streamline financial management for small to medium-sized businesses, offering features such as automated bookkeeping, invoicing, expense tracking, and financial reporting.
## Configure Fulll
**Prerequisite(s)**
* Obtain a client ID and Secret for a Fulll partner account with an OAuth2 application enabled.
* Activate the Fulll integration on the Chift platform.
**Process**
Upon request Chift will introduce you and request Fulll for your dedicated partner account and Oauth2 application to be created. Specify it in your request if you need wish to have dummy data to be into your account for testing purposes.
## Test Fulll
To test the software integration, you can use the partner account created previously. Check with Fulll if they can also inject dummy data into your sandbox account.
## Connect Fulll
To activate a connexion with Fulll, users will have to go through the following steps.
* French article: [Help Center - Full FR](https://intercom.help/chift/fr/articles/9877477-fulll)
* English article: [Help Center - Full EN](https://intercom.help/chift/en/articles/9877477-fulll)
### Fulll coverage
} horizontal>/suppliers Live} horizontal>/journal/entries Live} horizontal>/journal-entries Live} horizontal>/bookyears Live} horizontal>/invoices/type/\{invoice\_type} Live} horizontal>/invoices/\{invoice\_id} Live} horizontal>/chart-of-accounts Live} horizontal>/invoices Live} horizontal>/analytic-plans Live} horizontal>/employees Live} horizontal>/journals Live} horizontal>/clients/\{client\_id} Live} horizontal>/clients Live} horizontal>/analytic-accounts/\{analytic\_account\_id}/multi-analytic-plans/\{analytic\_plan} Live} horizontal>/analytic-accounts Live} horizontal>/analytic-accounts/multi-analytic-plans Live} horizontal>/analytic-accounts/\{analytic\_account\_id} Live} horizontal>/suppliers Live} horizontal>/suppliers/\{supplier\_id} Live} horizontal>/clients Live} horizontal>/folders Live} horizontal>/vat-codes Live} horizontal>/accounts Live} horizontal>/clients/\{client\_id} On request} horizontal>/suppliers/\{supplier\_id} On request} horizontal>/invoices/multi-analytic-plans On request} horizontal>/invoices/multi-analytic-plans/type/\{invoice\_type} On request} horizontal>/invoices/multi-analytic-plans/\{invoice\_id} On request} horizontal>/bank-accounts On request} horizontal>/analytic-accounts On request} horizontal>/analytic-accounts/multi-analytic-plans/\{analytic\_plan} On request} horizontal>/analytic-accounts/\{analytic\_account\_id} On request} horizontal>/analytic-accounts/\{analytic\_account\_id}/multi-analytic-plans/\{analytic\_plan} On request} horizontal>/journal/entries On request} horizontal>/journal/entries/multi-analytic-plans On request} horizontal>/journal/entries/\{journal\_entry\_id} On request} horizontal>/invoices/id/\{invoice\_id}/payments On request} horizontal>/journal On request} horizontal>/miscellaneous-operation On request} horizontal>/miscellaneous-operation On request} horizontal>/miscellaneous-operation/\{operation\_id} On request} horizontal>/matching On request} horizontal>/matching-multiple On request} horizontal>/invoices/pdf/\{invoice\_id} On request} horizontal>/attachments On request} horizontal>/chart-of-accounts/balance On request} horizontal>/financial-entry On request} horizontal>/financial-entries On request} horizontal>/outstandings On request} horizontal>/export-fec On request
## Troubleshooting
### Specific errors for Fulll:
| Error Code | Error description | Resolution |
| ----------------------------------- | ---------------------------------------------------------------------------- | ------------------------------------------------------- |
| UNEXPECTED\_FULLL\_ERROR | Setup a collective customer/supplier account in Fulll | |
| UNEXPECTED\_INEXWEBINEXTENSO\_ERROR | Missing fields: "XXX" | Retry, if error persists contact Chift support |
| UNEXPECTED\_INEXWEBINEXTENSO\_ERROR | Unexpected error while trying to perform the request - Internal Server Error | Wait and retry, if error persists contact Chift support |
| UNEXPECTED\_INEXWEBINEXTENSO\_ERROR | Impossible to get a result | Retry, if error persists contact Chift support |
# Holded
Source: https://docs.chift.eu/connectors/accounting/holded
export const PATCH = () => ;
export const DELETE = () => ;
export const POST = () => ;
export const GET = () => ;
}>
Website: [https://www.holded.com/](https://www.holded.com/)\
Software type: Solution as a Software (Saas)\
Geography: 🇪🇸 Spain
## Introduction
Holded is a cloud-based accounting solution designed to simplify invoicing, expense tracking, and financial reporting for small and medium-sized businesses.
## Configure Holded
**Prerequisite(s)**
There are no prerequisite to enable Holded on your Chift APP.
**Process**
Activate the Holded integration on the Chift platform.
## Test Holded
To test the software integration, you can create a free trial account [here](https://app.holded.com/signup?lang=en)
## Connect Holded
To activate a connexion with Holded, users will have to go through the following steps.
* Spanish article: [Help Center - Holded ES](https://help.chift.app/es/articles/11719471-holded)
* English article: [Help Center - Holded EN](https://help.chift.app/en/articles/11719471-holded)
## Coverage
### Holded coverage
} horizontal>/clients Live} horizontal>/clients Live} horizontal>/clients/\{client\_id} Live} horizontal>/clients/\{client\_id} Live} horizontal>/suppliers Live} horizontal>/suppliers Live} horizontal>/suppliers/\{supplier\_id} Live} horizontal>/suppliers/\{supplier\_id} Live} horizontal>/invoices Live} horizontal>/invoices/multi-analytic-plans Live} horizontal>/invoices/type/\{invoice\_type} Live} horizontal>/invoices/multi-analytic-plans/type/\{invoice\_type} Live} horizontal>/invoices/\{invoice\_id} Live} horizontal>/invoices/multi-analytic-plans/\{invoice\_id} Live} horizontal>/accounts Live} horizontal>/journal/entries Live} horizontal>/journal/entries Live} horizontal>/journal/entries/multi-analytic-plans Live} horizontal>/journal/entries/\{journal\_entry\_id} Live} horizontal>/journal-entries Live} horizontal>/journals Live} horizontal>/journal Live} horizontal>/vat-codes Live} horizontal>/invoices/pdf/\{invoice\_id} Live} horizontal>/attachments Live} horizontal>/chart-of-accounts Live} horizontal>/chart-of-accounts/balance Live} horizontal>/employees Live} horizontal>/folders On request} horizontal>/bookyears On request} horizontal>/analytic-plans On request} horizontal>/bank-accounts On request} horizontal>/analytic-accounts On request} horizontal>/analytic-accounts On request} horizontal>/analytic-accounts/multi-analytic-plans/\{analytic\_plan} On request} horizontal>/analytic-accounts/\{analytic\_account\_id} On request} horizontal>/analytic-accounts/\{analytic\_account\_id} On request} horizontal>/analytic-accounts/\{analytic\_account\_id}/multi-analytic-plans/\{analytic\_plan} On request} horizontal>/analytic-accounts/\{analytic\_account\_id}/multi-analytic-plans/\{analytic\_plan} On request} horizontal>/analytic-accounts/multi-analytic-plans On request} horizontal>/invoices/id/\{invoice\_id}/payments On request} horizontal>/miscellaneous-operation On request} horizontal>/miscellaneous-operation On request} horizontal>/miscellaneous-operation/\{operation\_id} On request} horizontal>/matching On request} horizontal>/matching-multiple On request} horizontal>/financial-entry On request} horizontal>/financial-entries On request} horizontal>/outstandings On request} horizontal>/export-fec On request
### Specific errors for Holded:
| Error Code | Error description | Resolution |
| ------------------------------------ | -------------------------------------------------------------------------------------------------------------- | ------------------------------------------------------------------------------------------------------------- |
| ERROR\_PARTNER\_NOT\_CONFIGURED | The client/supplier 'XXX' is not linked to an account. | Configure the client/supplier accordingly. |
| ERROR\_UNSUPPORTED\_BODY | Holded requires the account\_number to be exactly 4 digits (prefix), the full account number is then returned. | Only provide a 4-digit prefix as account number, full account number can only be set through their interface. |
| ERROR\_UNSUPPORTED\_BODY | The account number prefix is invalid. | The account number prefix does not exist in the system's chart of accounts. |
| ERROR\_UNSUPPORTED\_QUERY\_PARAMETER | Unsupported entry line type 'line\_type'. | N/A |
| ERROR\_UNSUPPORTED\_BODY | Holded does not support journal of types 'journal\_type'. | N/A |
| ERROR\_UNSUPPORTED\_QUERY\_PARAMETER | Attachments are only retrievable for invoices. | N/A |
| ERROR\_UNSUPPORTED\_QUERY\_PARAMETER | Can not retrieve account balances for periods greater than a year. | N/A |
# Horus
Source: https://docs.chift.eu/connectors/accounting/horus
export const PATCH = () => ;
export const DELETE = () => ;
export const POST = () => ;
export const GET = () => ;
}>
Website: [horus.be](https://www.horussoftware.be/)
Software type: On premise (API)
Geography: 🇧🇪 Belgium
## Introduction
Horus is an accounting software based on new technologies, designed with and for digital technology. It simplifies your work considerably, you save time on a daily basis and you follow your figures in real time. Deliver the Horus integration your customers want in no time.
## Configure Horus
**Prerequisite(s)**
* ️ obtain a “Client ID ” and “Client Secret”
* ️ get an OAuth2 application for your partner account.
* Activate the Horus integration on the Chift platform.
**Process**
* send an email to [developer@horus-software.be](mailto:developer@horus-software.be) to ask for your Client ID and Client Secret that will be used for all your customers. Provide the following information when requesting the Client ID and Client Secret:
* name of the integration
* contact person & email address
* short description of how (= using Chift) and why you intend to use the API
* redirect Url: [https://chift.app/oauth2/redirect](https://chift.app/oauth2/redirect)
## Test Horus
To test the software integration, ask Chift to contact and request Horus for a sandbox account on your behalf.
## Connect Horus
To activate a connexion with Horus, users will have to go through the following steps.
* French article: [Help Center - Horus FR](https://help.chift.app/fr/articles/9023735-horus)
* English article: [Help Center - Horus EN](https://help.chift.app/en/articles/9023735-horus)
### Horus coverage
} horizontal>/accounts Live} horizontal>/vat-codes Live} horizontal>/matching Live} horizontal>/financial-entry Live} horizontal>/folders On request} horizontal>/bookyears On request} horizontal>/analytic-plans On request} horizontal>/clients On request} horizontal>/clients On request} horizontal>/clients/\{client\_id} On request} horizontal>/clients/\{client\_id} On request} horizontal>/suppliers On request} horizontal>/suppliers On request} horizontal>/suppliers/\{supplier\_id} On request} horizontal>/suppliers/\{supplier\_id} On request} horizontal>/invoices On request} horizontal>/invoices/multi-analytic-plans On request} horizontal>/invoices/type/\{invoice\_type} On request} horizontal>/invoices/multi-analytic-plans/type/\{invoice\_type} On request} horizontal>/invoices/\{invoice\_id} On request} horizontal>/invoices/multi-analytic-plans/\{invoice\_id} On request} horizontal>/bank-accounts On request} horizontal>/analytic-accounts On request} horizontal>/analytic-accounts On request} horizontal>/analytic-accounts/multi-analytic-plans/\{analytic\_plan} On request} horizontal>/analytic-accounts/\{analytic\_account\_id} On request} horizontal>/analytic-accounts/\{analytic\_account\_id} On request} horizontal>/analytic-accounts/\{analytic\_account\_id}/multi-analytic-plans/\{analytic\_plan} On request} horizontal>/analytic-accounts/\{analytic\_account\_id}/multi-analytic-plans/\{analytic\_plan} On request} horizontal>/analytic-accounts/multi-analytic-plans On request} horizontal>/journal/entries On request} horizontal>/journal/entries On request} horizontal>/journal/entries/multi-analytic-plans On request} horizontal>/journal/entries/\{journal\_entry\_id} On request} horizontal>/journal-entries On request} horizontal>/invoices/id/\{invoice\_id}/payments On request} horizontal>/journals On request} horizontal>/journal On request} horizontal>/miscellaneous-operation On request} horizontal>/miscellaneous-operation On request} horizontal>/miscellaneous-operation/\{operation\_id} On request} horizontal>/matching-multiple On request} horizontal>/invoices/pdf/\{invoice\_id} On request} horizontal>/attachments On request} horizontal>/chart-of-accounts On request} horizontal>/chart-of-accounts/balance On request} horizontal>/employees On request} horizontal>/financial-entries On request} horizontal>/outstandings On request} horizontal>/export-fec On request
# Inqom
Source: https://docs.chift.eu/connectors/accounting/inqom
export const PATCH = () => ;
export const DELETE = () => ;
export const POST = () => ;
export const GET = () => ;
}>
Website: \[inqom.com]\([https://www.inqom.com/](https://www.inqom.com/)
Software type: Solution as a Software (Saas)
Geography: 🇫🇷 France
# Introduction
Inqom is a French cloud-based accounting software that leverages artificial intelligence to automate and optimize accounting processes. It offers features such as real-time bookkeeping, automated data entry, and financial reporting, designed to enhance the efficiency and accuracy of accounting tasks. The software is part of the Visma ecosystem.
## Configure Inqom
**Prerequisite(s)**
* Obtain Inqom’s approval to use Chift’s Partner Key
* Activate the Inqom integration on the Chift platform.
**Process**
Upon request, Chift can request Inqom’s approval and encoding Chift’s generic API keys in your Chift account.
## Test Inqom
To test the software integration, Chift can request or share a test account.
## Connect Inqom
To activate a connexion with Inqom, users will have to go through the following steps.
* French article: [Help Center - Inqom FR](https://help.chift.app/fr/articles/9546036-inqom)
* English article: [Help Center - Inqom EN](https://help.chift.app/en/articles/9546036-inqom)
### Inqom coverage
} horizontal>/analytic-accounts/multi-analytic-plans Live} horizontal>/analytic-accounts/\{analytic\_account\_id} Live} horizontal>/analytic-accounts/\{analytic\_account\_id}/multi-analytic-plans/\{analytic\_plan} Live} horizontal>/analytic-accounts Live} horizontal>/get-environments Live} horizontal>/chart-of-accounts Live} horizontal>/clients/\{client\_id} Live} horizontal>/clients Live} horizontal>/analytic-plans Live} horizontal>/journals Live} horizontal>/journal/entries Live} horizontal>/invoices/\{invoice\_id} Live} horizontal>/invoices/type/\{invoice\_type} Live} horizontal>/analytic-accounts/multi-analytic-plans/\{analytic\_plan} Live} horizontal>/analytic-accounts Live} horizontal>/vat-codes Live} horizontal>/suppliers Live} horizontal>/suppliers/\{supplier\_id} Live} horizontal>/journal-entries Live} horizontal>/invoices Live} horizontal>/clients Live} horizontal>/clients/\{client\_id} Live} horizontal>/suppliers/\{supplier\_id} Live} horizontal>/attachments Live} horizontal>/suppliers Live} horizontal>/folders Live} horizontal>/bookyears Live} horizontal>/chart-of-accounts/balance Live} horizontal>/accounts Live} horizontal>/journal Live} horizontal>/invoices/multi-analytic-plans On request} horizontal>/invoices/multi-analytic-plans/type/\{invoice\_type} On request} horizontal>/invoices/multi-analytic-plans/\{invoice\_id} On request} horizontal>/bank-accounts On request} horizontal>/analytic-accounts/\{analytic\_account\_id} On request} horizontal>/analytic-accounts/\{analytic\_account\_id}/multi-analytic-plans/\{analytic\_plan} On request} horizontal>/journal/entries On request} horizontal>/journal/entries/multi-analytic-plans On request} horizontal>/journal/entries/\{journal\_entry\_id} On request} horizontal>/invoices/id/\{invoice\_id}/payments On request} horizontal>/miscellaneous-operation On request} horizontal>/miscellaneous-operation On request} horizontal>/miscellaneous-operation/\{operation\_id} On request} horizontal>/matching On request} horizontal>/matching-multiple On request} horizontal>/invoices/pdf/\{invoice\_id} On request} horizontal>/employees On request} horizontal>/financial-entry On request} horizontal>/financial-entries On request} horizontal>/outstandings On request} horizontal>/export-fec On request
## Troubleshooting
### Specific errors for Inqom:
| Error Code | Error description | Resolution |
| ------------------------------- | ------------------------------------------------------------------- | --------------------------------------------------------------------------------- |
| UNEXPECTED\_INQOM\_ERROR | This file MimeType is not allowed! | Notify Chift if error observed |
| UNEXPECTED\_INQOM\_ERROR | Account XXX cannot be created : parent account XXX is not dividable | Please check account setup in accounting system |
| ERROR\_PARTNER\_ALREADY\_EXISTS | Account XXX already exists in PCG | You cannot use create an account with the same partner\_id as an existing account |
# Minox
Source: https://docs.chift.eu/connectors/accounting/minox
export const PATCH = () => ;
export const DELETE = () => ;
export const POST = () => ;
export const GET = () => ;
}>
Website: \[minox.nl]\([https://www.minox.nl/](https://www.minox.nl/)
Software type: Solution as a Software (Saas)
Geography: 🇳🇱 Netherlands
## Introduction
Minox offers innovative cloud accounting software to SME's and accounting firms. The key strengths are robotic accounting, superior UX and flexible collaboration to provide an intuitive and automated accounting processing.
## Configure Minox
**Prerequisite(s)**
* ️ Obtain a Client ID and Secret from Minox
* ️ Get an Oauth2 application for your Minox account.
**Process**
1. Create your account - [here](https://www.minox.nl/)
2. Request for an Oauth2 application - [here](https://app.minox.nl/request)
## Test Minox
To test the software integration, you can use the account you created during the configuration steps.
## Connect Minox
To activate a connexion with Minox, users will have to go through the following steps.
* French article: [Help Center - Minox FR](https://help.chift.app/fr/articles/9076372-minox)
* English article: [Help Center - Minox EN](https://help.chift.app/en/articles/9076372-minox)
### Minox coverage
} horizontal>/journal-entries Live} horizontal>/miscellaneous-operation Live} horizontal>/clients Live} horizontal>/clients/\{client\_id} Live} horizontal>/invoices Live} horizontal>/folders Live} horizontal>/suppliers Live} horizontal>/suppliers/\{supplier\_id} Live} horizontal>/vat-codes Live} horizontal>/journals Live} horizontal>/chart-of-accounts Live} horizontal>/analytic-plans Live} horizontal>/analytic-accounts/\{analytic\_account\_id}/multi-analytic-plans/\{analytic\_plan} Live} horizontal>/analytic-accounts/\{analytic\_account\_id} Live} horizontal>/analytic-accounts Live} horizontal>/analytic-accounts/\{analytic\_account\_id} Live} horizontal>/analytic-accounts/multi-analytic-plans Live} horizontal>/analytic-accounts/\{analytic\_account\_id}/multi-analytic-plans/\{analytic\_plan} Live} horizontal>/clients Live} horizontal>/clients/\{client\_id} Live} horizontal>/invoices/type/\{invoice\_type} Live} horizontal>/suppliers Live} horizontal>/suppliers/\{supplier\_id} Live} horizontal>/analytic-accounts Live} horizontal>/analytic-accounts/multi-analytic-plans/\{analytic\_plan} Live} horizontal>/accounts Live} horizontal>/journal Live} horizontal>/bookyears On request} horizontal>/invoices/multi-analytic-plans On request} horizontal>/invoices/multi-analytic-plans/type/\{invoice\_type} On request} horizontal>/invoices/\{invoice\_id} On request} horizontal>/invoices/multi-analytic-plans/\{invoice\_id} On request} horizontal>/bank-accounts On request} horizontal>/journal/entries On request} horizontal>/journal/entries On request} horizontal>/journal/entries/multi-analytic-plans On request} horizontal>/journal/entries/\{journal\_entry\_id} On request} horizontal>/invoices/id/\{invoice\_id}/payments On request} horizontal>/miscellaneous-operation On request} horizontal>/miscellaneous-operation/\{operation\_id} On request} horizontal>/matching On request} horizontal>/matching-multiple On request} horizontal>/invoices/pdf/\{invoice\_id} On request} horizontal>/attachments On request} horizontal>/chart-of-accounts/balance On request} horizontal>/employees On request} horizontal>/financial-entry On request} horizontal>/financial-entries On request} horizontal>/outstandings On request} horizontal>/export-fec On request
# MyUnisoft
Source: https://docs.chift.eu/connectors/accounting/myunisoft
export const PATCH = () => ;
export const DELETE = () => ;
export const POST = () => ;
export const GET = () => ;
}>
Website: [myunisoft.fr](http://www.myunisoft.fr)
Software type: Solution as a Software (Saas)
Geography: 🇫🇷 France
# Introduction
My Unisoft offers a B2B2C solution for accountants, including features such as automated accounting production, a collaborative client platform and a firm platform (CRM, internal management, etc.). Deliver the MyUnisoft integration your customers want in no time.
## Configure MyUnisoft
**Prerequisite(s)**
* Get listed as a technology partner of MyUnisoft (link to the partner page)
* Obtain a X-Third-Party Key from MyUnisoft
**Process**
1. Ask Chift for the person of contact
2. Inform him that you are connected to Chift’s Unified API - Accounting and wish to become partners and setup the API connection with MyUnisoft
* Exchange Marketing informations (logo, descriptions,etc)
* Collect your X-Third-Party Key (to encode your X-Third-Party Key: it is one unique partner key in both staging and production environments)
## Test MyUnisoft
To test the software integration, you can ask our contact for a test account including dummy data.
## Connect MyUnisoft
To activate a connexion with MyUnisoft, users will have to go through the following steps.
* French article: [Help Center - MyUnisoft FR](https://help.chift.app/fr/articles/9023766-myunisoft)
* English article: [Help Center - MyUnisoft EN](https://help.chift.app/en/articles/9023766-myunisoft)
### MyUnisoft coverage
} horizontal>/bookyears Live} horizontal>/accounts Live} horizontal>/invoices/pdf/\{invoice\_id} Live} horizontal>/export-fec Live} horizontal>/folders On request} horizontal>/analytic-plans On request} horizontal>/clients On request} horizontal>/clients On request} horizontal>/clients/\{client\_id} On request} horizontal>/clients/\{client\_id} On request} horizontal>/suppliers On request} horizontal>/suppliers On request} horizontal>/suppliers/\{supplier\_id} On request} horizontal>/suppliers/\{supplier\_id} On request} horizontal>/invoices On request} horizontal>/invoices/multi-analytic-plans On request} horizontal>/invoices/type/\{invoice\_type} On request} horizontal>/invoices/multi-analytic-plans/type/\{invoice\_type} On request} horizontal>/invoices/\{invoice\_id} On request} horizontal>/invoices/multi-analytic-plans/\{invoice\_id} On request} horizontal>/bank-accounts On request} horizontal>/analytic-accounts On request} horizontal>/analytic-accounts On request} horizontal>/analytic-accounts/multi-analytic-plans/\{analytic\_plan} On request} horizontal>/analytic-accounts/\{analytic\_account\_id} On request} horizontal>/analytic-accounts/\{analytic\_account\_id} On request} horizontal>/analytic-accounts/\{analytic\_account\_id}/multi-analytic-plans/\{analytic\_plan} On request} horizontal>/analytic-accounts/\{analytic\_account\_id}/multi-analytic-plans/\{analytic\_plan} On request} horizontal>/analytic-accounts/multi-analytic-plans On request} horizontal>/journal/entries On request} horizontal>/journal/entries On request} horizontal>/journal/entries/multi-analytic-plans On request} horizontal>/journal/entries/\{journal\_entry\_id} On request} horizontal>/journal-entries On request} horizontal>/invoices/id/\{invoice\_id}/payments On request} horizontal>/journals On request} horizontal>/journal On request} horizontal>/vat-codes On request} horizontal>/miscellaneous-operation On request} horizontal>/miscellaneous-operation On request} horizontal>/miscellaneous-operation/\{operation\_id} On request} horizontal>/matching On request} horizontal>/matching-multiple On request} horizontal>/attachments On request} horizontal>/chart-of-accounts On request} horizontal>/chart-of-accounts/balance On request} horizontal>/employees On request} horizontal>/financial-entry On request} horizontal>/financial-entries On request} horizontal>/outstandings On request
## Troubleshooting
### Specific errors for MyUnisoft:
| Error Code | Error description | Resolution |
| ----------------------------------- | --------------------------------------------- | ------------------------------------------------------------------------------------------------------------------- |
| ERROR\_BOOKYEAR\_CLOSED | Impossible de saisir dans un exercice cloturé | The fiscal year is closed, it must be reopened or the start date of the synchronization must be adapted accordingly |
| ERROR\_ACCOUNT\_NUMBER\_NOT\_ACTIVE | Le compte "XXX" est fermé | Activate the ledger account in the accounting system |
| UNEXPECTED\_MYUNISOFT\_ERROR | Les valeurs débit et crédit sont invalides | Chift will bypass those invoices in the future |
| UNEXPECTED\_MYUNISOFT\_ERROR | Une erreur est survenue lors du traitement | Retry, if error persists contact Chift support |
# Netsuite
Source: https://docs.chift.eu/connectors/accounting/netsuite
export const PATCH = () => ;
export const DELETE = () => ;
export const POST = () => ;
export const GET = () => ;
}>
Website: [netsuite.com](https://www.netsuite.com)\
Geography: 🌍 Worldwide\
Connector Status: Live
## Introduction
NetSuite is the leading integrated cloud business software suite, including business accounting, ERP, CRM and ecommerce software.
An AI-powered business management suite, encompassing ERP/Financials, CRM, and ecommerce for more than 41,000 customers.
## Configure NetSuite
**Prerequisite(s)**
There's no prerequisite to activate the connector on your Chift App.
**Process**
Activate the connector in one click on the connector section in your Chift account.
## Test NetSuite
It is possible to test NetSuite with a demo account. A demo account can be requested by contact NetSuite support on the following link.
\[NetSuite support contact for demo account - [https://www.netsuite.com/portal/resource/demo.shtml](https://www.netsuite.com/portal/resource/demo.shtml)]
## Connect NetSuite
For detailed connection steps, check out the documentation:
* [Connect NetSuite – English](https://help.chift.app/en/articles/11518125-netsuite)
* [Connecter NetSuite – Français](https://help.chift.app/fr/articles/11518125-netsuite)
### NetSuite coverage
} horizontal>/folders Live} horizontal>/bookyears Live} horizontal>/analytic-plans Live} horizontal>/clients Live} horizontal>/clients Live} horizontal>/clients/\{client\_id} Live} horizontal>/suppliers Live} horizontal>/suppliers Live} horizontal>/suppliers/\{supplier\_id} Live} horizontal>/invoices Live} horizontal>/invoices/multi-analytic-plans Live} horizontal>/invoices/type/\{invoice\_type} Live} horizontal>/invoices/multi-analytic-plans/type/\{invoice\_type} Live} horizontal>/invoices/\{invoice\_id} Live} horizontal>/invoices/multi-analytic-plans/\{invoice\_id} Live} horizontal>/analytic-accounts Live} horizontal>/analytic-accounts/\{analytic\_account\_id} Live} horizontal>/analytic-accounts/\{analytic\_account\_id}/multi-analytic-plans/\{analytic\_plan} Live} horizontal>/analytic-accounts/multi-analytic-plans Live} horizontal>/journal/entries Live} horizontal>/journal/entries/multi-analytic-plans Live} horizontal>/journal-entries Live} horizontal>/journals Live} horizontal>/vat-codes Live} horizontal>/chart-of-accounts Live} horizontal>/employees Live} horizontal>/clients/\{client\_id} On request} horizontal>/suppliers/\{supplier\_id} On request} horizontal>/accounts On request} horizontal>/bank-accounts On request} horizontal>/analytic-accounts On request} horizontal>/analytic-accounts/multi-analytic-plans/\{analytic\_plan} On request} horizontal>/analytic-accounts/\{analytic\_account\_id} On request} horizontal>/analytic-accounts/\{analytic\_account\_id}/multi-analytic-plans/\{analytic\_plan} On request} horizontal>/journal/entries On request} horizontal>/journal/entries/\{journal\_entry\_id} On request} horizontal>/invoices/id/\{invoice\_id}/payments On request} horizontal>/journal On request} horizontal>/miscellaneous-operation On request} horizontal>/miscellaneous-operation On request} horizontal>/miscellaneous-operation/\{operation\_id} On request} horizontal>/matching On request} horizontal>/matching-multiple On request} horizontal>/invoices/pdf/\{invoice\_id} On request} horizontal>/attachments On request} horizontal>/chart-of-accounts/balance On request} horizontal>/financial-entry On request} horizontal>/financial-entries On request} horizontal>/outstandings On request} horizontal>/export-fec On request
# Octopus
Source: https://docs.chift.eu/connectors/accounting/octopus
export const PATCH = () => ;
export const DELETE = () => ;
export const POST = () => ;
export const GET = () => ;
}>
Website: [octopus.be](https://www.octopus.be)
Software type: Solution as a Software (Saas)
Geography: 🇧🇪 Belgium
## Introduction
Accounting software that allows accounting operations such as bookkeeping, customer and supplier invoices, VAT management, bank reconciliations, inventory management, financial reporting and many others. Deliver the Octopus integration your customers want in no time.
## Configure Octopus
**Prerequisite(s)**
No prerequisite to enable the connector.
**Process**
Activate the connector in one click on the connector section in your Chift account.
## Test Octopus
To test the software integration, you can create your Octopus demo account [here](https://www.octopus.be/nl/demo)
## Connect Octopus
To activate a connexion with Octopus, users will have to go through the following steps.
* French article: [Help Center - Octopus FR](https://help.chift.app/fr/articles/9023767-octopus)
* English article: [Help Center - Octopus EN](https://help.chift.app/en/articles/9023767-octopus)
### Octopus coverage
} horizontal>/chart-of-accounts/balance Live} horizontal>/outstandings Live} horizontal>/attachments Live} horizontal>/accounts Live} horizontal>/journal Live} horizontal>/financial-entries Live} horizontal>/journal/entries Live} horizontal>/analytic-accounts/\{analytic\_account\_id} Live} horizontal>/analytic-accounts/\{analytic\_account\_id}/multi-analytic-plans/\{analytic\_plan} Live} horizontal>/folders Live} horizontal>/vat-codes Live} horizontal>/suppliers/\{supplier\_id} Live} horizontal>/invoices/pdf/\{invoice\_id} Live} horizontal>/journals Live} horizontal>/suppliers/\{supplier\_id} Live} horizontal>/suppliers Live} horizontal>/analytic-plans Live} horizontal>/invoices/id/\{invoice\_id}/payments Live} horizontal>/analytic-accounts Live} horizontal>/analytic-accounts/\{analytic\_account\_id} Live} horizontal>/analytic-accounts/multi-analytic-plans Live} horizontal>/analytic-accounts/\{analytic\_account\_id}/multi-analytic-plans/\{analytic\_plan} Live} horizontal>/clients/\{client\_id} Live} horizontal>/clients Live} horizontal>/chart-of-accounts Live} horizontal>/matching Live} horizontal>/miscellaneous-operation Live} horizontal>/miscellaneous-operation/\{operation\_id} Live} horizontal>/invoices/type/\{invoice\_type} Live} horizontal>/invoices/\{invoice\_id} Live} horizontal>/clients Live} horizontal>/suppliers Live} horizontal>/journal/entries Live} horizontal>/analytic-accounts Live} horizontal>/analytic-accounts/multi-analytic-plans/\{analytic\_plan} Live} horizontal>/clients/\{client\_id} Live} horizontal>/invoices Live} horizontal>/miscellaneous-operation Live} horizontal>/bookyears On request} horizontal>/invoices/multi-analytic-plans On request} horizontal>/invoices/multi-analytic-plans/type/\{invoice\_type} On request} horizontal>/invoices/multi-analytic-plans/\{invoice\_id} On request} horizontal>/bank-accounts On request} horizontal>/journal/entries/multi-analytic-plans On request} horizontal>/journal/entries/\{journal\_entry\_id} On request} horizontal>/journal-entries On request} horizontal>/matching-multiple On request} horizontal>/employees On request} horizontal>/financial-entry On request} horizontal>/export-fec On request
# Odoo Accounting
Source: https://docs.chift.eu/connectors/accounting/odoo-accounting
export const PATCH = () => ;
export const DELETE = () => ;
export const POST = () => ;
export const GET = () => ;
}>
Website: [odoo.com](https://www.odoo.com/)\
Software type: Solution as a Software (Saas)\
Geography: 🌍 Worldwide
# Introduction
Odoo Accounting module is a software that tracks your accounting & finances with utmost accuracy. It helps you fulfill all your accounting needs like payments and invoices, bank reconciliations, reports also much more. Deliver the Odoo integration your customer wants in no time.
## Configure Odoo
**Prerequisite(s)**
No prerequisite to enable the connector.
**Process**
Activate the connector in one click on the connector section in your Chift account.
## Test Odoo
To test the software integration, you can create an Odoo account [here](https://www.odoo.com/trial). (You need to get a free trial on the plan named “Personnalisé” to benefit from the API.)
## Connect Odoo
To activate a connexion with Odoo, users will have to go through the following steps.
French article: [Help Center - Odoo Comptabilité FR](https://help.chift.app/fr/articles/9023770-odoo-comptabilite)
English article: [Help Center - Odoo Accounting EN](https://help.chift.app/en/articles/9023770-odoo-accounting)
### Odoo coverage
} horizontal>/folders Live} horizontal>/bookyears Live} horizontal>/journal/entries Live} horizontal>/journal/entries/multi-analytic-plans Live} horizontal>/journals Live} horizontal>/vat-codes Live} horizontal>/analytic-plans On request} horizontal>/clients On request} horizontal>/clients On request} horizontal>/clients/\{client\_id} On request} horizontal>/clients/\{client\_id} On request} horizontal>/suppliers On request} horizontal>/suppliers On request} horizontal>/suppliers/\{supplier\_id} On request} horizontal>/suppliers/\{supplier\_id} On request} horizontal>/invoices On request} horizontal>/invoices/multi-analytic-plans On request} horizontal>/invoices/type/\{invoice\_type} On request} horizontal>/invoices/multi-analytic-plans/type/\{invoice\_type} On request} horizontal>/invoices/\{invoice\_id} On request} horizontal>/invoices/multi-analytic-plans/\{invoice\_id} On request} horizontal>/accounts On request} horizontal>/bank-accounts On request} horizontal>/analytic-accounts On request} horizontal>/analytic-accounts On request} horizontal>/analytic-accounts/multi-analytic-plans/\{analytic\_plan} On request} horizontal>/analytic-accounts/\{analytic\_account\_id} On request} horizontal>/analytic-accounts/\{analytic\_account\_id} On request} horizontal>/analytic-accounts/\{analytic\_account\_id}/multi-analytic-plans/\{analytic\_plan} On request} horizontal>/analytic-accounts/\{analytic\_account\_id}/multi-analytic-plans/\{analytic\_plan} On request} horizontal>/analytic-accounts/multi-analytic-plans On request} horizontal>/journal/entries On request} horizontal>/journal/entries/\{journal\_entry\_id} On request} horizontal>/journal-entries On request} horizontal>/invoices/id/\{invoice\_id}/payments On request} horizontal>/journal On request} horizontal>/miscellaneous-operation On request} horizontal>/miscellaneous-operation On request} horizontal>/miscellaneous-operation/\{operation\_id} On request} horizontal>/matching On request} horizontal>/matching-multiple On request} horizontal>/invoices/pdf/\{invoice\_id} On request} horizontal>/attachments On request} horizontal>/chart-of-accounts On request} horizontal>/chart-of-accounts/balance On request} horizontal>/employees On request} horizontal>/financial-entry On request} horizontal>/financial-entries On request} horizontal>/outstandings On request} horizontal>/export-fec On request
\*Match entries (PDF): Only available after Odoo 12 \*Attach a document (PDF): Only available after Odoo 12
# Accounting connectors overview
Source: https://docs.chift.eu/connectors/accounting/overview
| Connector | Geography | Partner Approval | Status |
| --------------------------------------- | ------------------------------------------ | ---------------- | ------------------- |
| ACD | 🇫🇷 (FR) | ✅ Yes | ✅ Live |
| Cegid Loop | 🇫🇷 (FR) | ✅ Yes | ✅ Live |
| Cegid Quadra | 🇫🇷 (FR) | ✅ Yes | 🚧 In developpement |
| Datev | 🇩🇪 (GE) | | 🚧 In developpement |
| E-Boekhouden | 🇳🇱 (NL) | | ✅ Live |
| Exact Online | 🇧🇪 (BE), 🇫🇷 (FR) | ✅ Yes | ✅ Live |
| Fulll | 🇫🇷 (FR) | ✅ Yes | ✅ Live |
| Holded | 🇪🇸 (ES) | ❌ No | ✅ Live |
| Horus | 🇧🇪 (BE) | ✅ Yes | ✅ Live |
| Inqom | 🇫🇷 (FR) | ✅ Yes | ✅ Live |
| Microsoft Dynamics 365 Business Central | 🌎 Worldwide | ✅ Yes | ✅ Live |
| Minox | 🇳🇱 (NL) | ✅ Yes | ✅ Live |
| MyUnisoft | 🇫🇷 (FR) | ✅ Yes | ✅ Live |
| Netsuite | 🌎 Worldwide | | ✅ Live |
| Octopus | 🇧🇪 (BE) | ❌ No | ✅ Live |
| Odoo Accounting | 🇧🇪 (BE), 🇨🇭 (CH), 🇫🇷 (FR), 🇱🇺 (LU) | ❌ No | ✅ Live |
| Pennylane | 🇫🇷 (FR) | ✅ Yes | ✅ Live |
| Sage 50 FR | 🇫🇷 (FR) | ❌ No | 🔒 Live (Private) |
| Sage 50 UK | 🇬🇧 (UK) | ❌ No | 🔒 Live (Private) |
| Sage 100 Comptabilité | 🇫🇷 (FR) | ❌ No | ✅ Live |
| Sage BOB 50 | 🇧🇪 (BE), 🇱🇺 (LU) | ❌ No | ✅ Live |
| Sage Génération Experts (ex Coala) | 🇫🇷 (FR) | ❌ No | ✅ Live |
| Snelstart | 🇳🇱 (NL) | | ✅ Live |
| Tiime | 🇫🇷 (FR) | ✅ Yes | ✅ Live |
| Visma eAccounting | | | ✅ Live |
| Winbiz | 🇨🇭 (CH) | ❌ No | 🗑️ Deprecated |
| Winbooks Classic | 🇧🇪 (BE) | ❌ No | ✅ Live |
| Yuki | 🇧🇪 (BE) | ❌ No | ✅ Live |
# Pennylane
Source: https://docs.chift.eu/connectors/accounting/pennylane
export const PATCH = () => ;
export const DELETE = () => ;
export const POST = () => ;
export const GET = () => ;
}>
Website: [pennylane.com](https://www.pennylane.com/)
Software type: Solution as a Software (Saas)
Geography: 🇫🇷 France
# Introduction
Pennylane centralizes in real time all the financial flows of companies and facilitates the collaboration between managers and their accountant. Deliver the Pennylane integration your customers want in no time.
## Configure Pennylane
**Prerequisite(s)**
* [x] Have an OAuth2 application on a Pennylane account (a sandbox is provided by default when requesting Pennylane for an OAuth2 application but not mandatory to activate the API route)
* [x] Activate the Pennylane integration on the Chift platform.
**Process**
1. Request Pennylane for a sandbox account with an OAuth2 application by completing this partner form [here](https://form.typeform.com/to/Vn0iWTJv)
* **Question:** “are you a?” / **Response:** Software Editor
* **Question:** “describe the integration” / **Response:** Create journal entries in Pennylane for the different kind of transactions done in our software
* **Question:** “your callback URL” / **Response:** [https://chift.app/oauth2/redirect](https://chift.app/oauth2/redirect)
* **Question:** “What email address can we reach you at?” / **Response:** provide here the email of the person who will be the owner and manager of the pennylane account which enables the integraiton via Chift. If you already have a Pennylane account, let Pennylane know of it. Nonetheless, they will always create a separate environment for your partner sandbox
2. You will receive two emails from Pennylane: one to activate your sandbox account and a second one, with a one password link to provide you with your: Client ID and Client Secret. (store safely)
3. Encode your Client ID & Client secret, in the connector page on your Chift account. The same key is to be used for staging and production.
## Test Pennylane
To test the software integration, you can use the sandbox provided in the configuration steps.
## Connect Pennylane
To activate a connexion with Pennylane, users will have to go through the following steps.
French article: [Help Center - Pennylane FR](https://help.chift.app/fr/articles/9099846-pennylane)
English article: [Help Center - Pennylane EN](https://help.chift.app/en/articles/9099846-pennylane)
### Pennylane coverage
} horizontal>/accounts Live} horizontal>/matching Live} horizontal>/chart-of-accounts Live} horizontal>/folders On request} horizontal>/bookyears On request} horizontal>/analytic-plans On request} horizontal>/clients On request} horizontal>/clients On request} horizontal>/clients/\{client\_id} On request} horizontal>/clients/\{client\_id} On request} horizontal>/suppliers On request} horizontal>/suppliers On request} horizontal>/suppliers/\{supplier\_id} On request} horizontal>/suppliers/\{supplier\_id} On request} horizontal>/invoices On request} horizontal>/invoices/multi-analytic-plans On request} horizontal>/invoices/type/\{invoice\_type} On request} horizontal>/invoices/multi-analytic-plans/type/\{invoice\_type} On request} horizontal>/invoices/\{invoice\_id} On request} horizontal>/invoices/multi-analytic-plans/\{invoice\_id} On request} horizontal>/bank-accounts On request} horizontal>/analytic-accounts On request} horizontal>/analytic-accounts On request} horizontal>/analytic-accounts/multi-analytic-plans/\{analytic\_plan} On request} horizontal>/analytic-accounts/\{analytic\_account\_id} On request} horizontal>/analytic-accounts/\{analytic\_account\_id} On request} horizontal>/analytic-accounts/\{analytic\_account\_id}/multi-analytic-plans/\{analytic\_plan} On request} horizontal>/analytic-accounts/\{analytic\_account\_id}/multi-analytic-plans/\{analytic\_plan} On request} horizontal>/analytic-accounts/multi-analytic-plans On request} horizontal>/journal/entries On request} horizontal>/journal/entries On request} horizontal>/journal/entries/multi-analytic-plans On request} horizontal>/journal/entries/\{journal\_entry\_id} On request} horizontal>/journal-entries On request} horizontal>/invoices/id/\{invoice\_id}/payments On request} horizontal>/journals On request} horizontal>/journal On request} horizontal>/vat-codes On request} horizontal>/miscellaneous-operation On request} horizontal>/miscellaneous-operation On request} horizontal>/miscellaneous-operation/\{operation\_id} On request} horizontal>/matching-multiple On request} horizontal>/invoices/pdf/\{invoice\_id} On request} horizontal>/attachments On request} horizontal>/chart-of-accounts/balance On request} horizontal>/employees On request} horizontal>/financial-entry On request} horizontal>/financial-entries On request} horizontal>/outstandings On request} horizontal>/export-fec On request
## Troubleshooting
### Specific errors for Pennylane:
| Error Code | Error description | Resolution |
| --------------------------------------- | ----------------------------------------------------------------------------------- | ---------------------------------------------------------------------------------------------------------------------------------------------------------------------------------------------------------------- |
| ERROR\_SUPPLIER\_INVOICE\_PDF\_REQUIRED | PDFs are mandatory for invoices on Pennylane. |
Make sure that each invoices has an attachment.
If you are using the sync option, block the option to create invoice when no PDF are attached to the invoice
|
| ERROR\_CONNECTOR\_AUTHENTICATION | The token used to connect to Pennylane is not Valid anymore. | Reconnect Pennylane to your existing consumer to generate a new authentication token. |
| ERROR\_BOOKYEAR\_NOT\_FOUND | The accounting system is not set up for this date. | Create a fiscal year in the accounting system including the date of the invoice. |
| ERROR\_BOOKYEAR\_CLOSED | The bookyear/fiscal year is already closed in the accounting system | The fiscal year is closed, it must be reopened or the start date of the synchronization must be adapted accordingly. |
| ERROR\_INVOICE\_NUMBER\_ALREADY\_USED | The sent invoice number is already attributed to an existing invoice in Pennylane | Invoice seems to be already imported in Pennylane through another synchronization. Please contact the customer to see how this is possible. |
| UNEXPECTED\_PENNYLANE\_ERROR | The pdf received already exists in the application on another invoice | The pdf received already exists in the application on another invoice Invoice seems to be already imported in Pennylane through another synchronization. Please contact the customer to see how this is possible |
| UNEXPECTED\_PENNYLANE\_ERROR | It's not possible to create any more invoices on that folder | Account is not active anymore or blocked Contact the customer to see if the account is still active + if date is not in a closed book/fiscal year |
| UNEXPECTED\_PENNYLANE\_ERROR | Invoice lines quantity must be different than 0, Accounting frozen until Given Date | Invoice lines quantity doit être différent de 0, La comptabilité est figée jusqu’au 30 septembre 2024 Please unfreeze accounting/books on Pennylane |
| UNEXPECTED\_PENNYLANE\_ERROR | Invoice lines quantity must be different than 0 | Pennylane API doesn't allow lines with quantity 0 Chift will bpass those lines in the future |
| UNEXPECTED\_PENNYLANE\_ERROR | The setup of the invoice tab is incomplete on Pennylane. | Setup an invoicing sequence for customer invoices in Pennylane => To be done in Pennylane so that Pennylane knows how to generate invoice number |
# Reviso
Source: https://docs.chift.eu/connectors/accounting/reviso
{/* import Coverage from '/snippets/coverage/reviso.mdx' */}
}>
Website: [reviso.com](https://www.reviso.com/)
Geography: 🇪🇺Europe
Connector Status: In Development
## Introduction
Reviso is a cloud accounting software for small businesses and bookkeepers. Do online invoices, bank reconciliation and bookkeeping.
# Sage 100 Comptabilité
Source: https://docs.chift.eu/connectors/accounting/sage100
export const PATCH = () => ;
export const DELETE = () => ;
export const POST = () => ;
export const GET = () => ;
}>
Website: [sage100.com](https://www.sage.com/fr-be/produits/sage-100/)
Software type: On-premise (local agent to be installed)
Geography: 🇫🇷 France
## Introduction
Sage 100 is designed for mid-sized companies. It offers a wider range of features and capabilities than Sage 50, including more robust financial management, inventory management, and customer relationship management (CRM) capabilities. Deliver the Sage 100 integration your customers want in no time.
## Configure Sage 100
**Prerequisite(s)**
No prerequisite to enable the connector. However, it is important to know that Sage100 is an accounting tool for SMEs. Sage 100 runs from a local server OR is installed on the Sage cloud (Sage Partner Cloud).
**Process**
Activate the connector in one click on the connector section in your Chift account.
## Test Sage 100
To test the software integration, you need to go through an integrator to get a sandbox account or you must identify beta users in your client base willing to allow you to use their account for testing.
## Connect Sage 100
To activate a connexion with Sage 100, users will have to go through the following steps.
* French article: [Help Center - Sage100 FR](https://help.chift.app/fr/articles/10255999-sage-100-fr)
N.B.: Important to know that in France Sage only distributes through Integration partner - thus the client wishing to connect to Sage 100 will need the help of its Sage100 integration partner to do so.
### Sage 100 FR coverage
} horizontal>/chart-of-accounts/balance Live} horizontal>/journal-entries Live} horizontal>/employees Live} horizontal>/financial-entries Live} horizontal>/attachments Live} horizontal>/folders Live} horizontal>/matching Live} horizontal>/outstandings Live} horizontal>/analytic-accounts Live} horizontal>/analytic-accounts/multi-analytic-plans/\{analytic\_plan} Live} horizontal>/clients Live} horizontal>/analytic-accounts/\{analytic\_account\_id} Live} horizontal>/analytic-accounts/\{analytic\_account\_id}/multi-analytic-plans/\{analytic\_plan} Live} horizontal>/invoices/type/\{invoice\_type} Live} horizontal>/invoices/\{invoice\_id} Live} horizontal>/analytic-accounts/multi-analytic-plans Live} horizontal>/analytic-accounts/\{analytic\_account\_id} Live} horizontal>/analytic-accounts Live} horizontal>/analytic-accounts/\{analytic\_account\_id}/multi-analytic-plans/\{analytic\_plan} Live} horizontal>/analytic-plans Live} horizontal>/clients/\{client\_id} Live} horizontal>/clients Live} horizontal>/journal/entries Live} horizontal>/vat-codes Live} horizontal>/clients/\{client\_id} Live} horizontal>/invoices/pdf/\{invoice\_id} Live} horizontal>/invoices Live} horizontal>/invoices/id/\{invoice\_id}/payments Live} horizontal>/suppliers Live} horizontal>/suppliers/\{supplier\_id} Live} horizontal>/suppliers Live} horizontal>/suppliers/\{supplier\_id} Live} horizontal>/chart-of-accounts Live} horizontal>/journal/entries Live} horizontal>/journals Live} horizontal>/bookyears On request} horizontal>/invoices/multi-analytic-plans On request} horizontal>/invoices/multi-analytic-plans/type/\{invoice\_type} On request} horizontal>/invoices/multi-analytic-plans/\{invoice\_id} On request} horizontal>/accounts On request} horizontal>/bank-accounts On request} horizontal>/journal/entries/multi-analytic-plans On request} horizontal>/journal/entries/\{journal\_entry\_id} On request} horizontal>/journal On request} horizontal>/miscellaneous-operation On request} horizontal>/miscellaneous-operation On request} horizontal>/miscellaneous-operation/\{operation\_id} On request} horizontal>/matching-multiple On request} horizontal>/financial-entry On request} horizontal>/export-fec On request
## Troubleshooting
### Specific errors for Sage 100:
| Error Code | Error description | Resolution |
| ----------------------------- | ----------------------------------------------------- | ------------------------------------------------------------------------------- |
| ERROR\_JOURNAL\_ALREADY\_OPEN | The accountant has the journal opened on his computer | The client cannot be on the same journal when the sync try to push data to Sage |
# Sage 50 FR
Source: https://docs.chift.eu/connectors/accounting/sage50FR
export const PATCH = () => ;
export const DELETE = () => ;
export const POST = () => ;
export const GET = () => ;
}>
Website: [sage50.fr](https://www.sage.com/fr-fr/)
Software type: On-premise (local agent to be installed)
Geography: 🇫🇷 France
## Introduction
Sage 50 France, formerly known as Peachtree Accounting, is a desktop accounting software that is designed for small businesses. It provides basic accounting and financial management features, including invoicing, payroll, and bank reconciliation. Deliver the Sage 50 integration your customers want in no time.
## Configure Sage 50 France
**Prerequisite(s)**
No prerequisite to enable the connector.
**Process**
Activate the connector in one click on the connector section in your Chift account.
## Test Sage 50 France
To test the software integration, you can create your sandbox by getting a free test account on Sage 50 [here](https://www.ciel.com/demande-version-test-gratuit.aspx?og=sage\&pc=S5KCL0002).
## Connect Sage 50 France
To activate a connexion with Sage 50 France, users will have to go through the following steps.
* French article: [Help Center - Sage 50 France FR](https://intercom.help/chift/fr/articles/9093525-sage-50-fr)
* English article: [Help Center - Sage 50 France EN](https://intercom.help/chift/en/articles/9093525-sage-50-fr)
### Sage 50 FR coverage
} horizontal>/chart-of-accounts Live} horizontal>/journals Live} horizontal>/clients Live} horizontal>/clients/\{client\_id} Live} horizontal>/suppliers Live} horizontal>/suppliers/\{supplier\_id} Live} horizontal>/analytic-plans Live} horizontal>/invoices/type/\{invoice\_type} Live} horizontal>/journal/entries Live} horizontal>/analytic-accounts Live} horizontal>/analytic-accounts/\{analytic\_account\_id} Live} horizontal>/analytic-accounts/multi-analytic-plans Live} horizontal>/analytic-accounts/\{analytic\_account\_id}/multi-analytic-plans/\{analytic\_plan} Live} horizontal>/folders On request} horizontal>/bookyears On request} horizontal>/clients On request} horizontal>/clients/\{client\_id} On request} horizontal>/suppliers On request} horizontal>/suppliers/\{supplier\_id} On request} horizontal>/invoices On request} horizontal>/invoices/multi-analytic-plans On request} horizontal>/invoices/multi-analytic-plans/type/\{invoice\_type} On request} horizontal>/invoices/\{invoice\_id} On request} horizontal>/invoices/multi-analytic-plans/\{invoice\_id} On request} horizontal>/accounts On request} horizontal>/bank-accounts On request} horizontal>/analytic-accounts On request} horizontal>/analytic-accounts/multi-analytic-plans/\{analytic\_plan} On request} horizontal>/analytic-accounts/\{analytic\_account\_id} On request} horizontal>/analytic-accounts/\{analytic\_account\_id}/multi-analytic-plans/\{analytic\_plan} On request} horizontal>/journal/entries On request} horizontal>/journal/entries/multi-analytic-plans On request} horizontal>/journal/entries/\{journal\_entry\_id} On request} horizontal>/journal-entries On request} horizontal>/invoices/id/\{invoice\_id}/payments On request} horizontal>/journal On request} horizontal>/vat-codes On request} horizontal>/miscellaneous-operation On request} horizontal>/miscellaneous-operation On request} horizontal>/miscellaneous-operation/\{operation\_id} On request} horizontal>/matching On request} horizontal>/matching-multiple On request} horizontal>/invoices/pdf/\{invoice\_id} On request} horizontal>/attachments On request} horizontal>/chart-of-accounts/balance On request} horizontal>/employees On request} horizontal>/financial-entry On request} horizontal>/financial-entries On request} horizontal>/outstandings On request} horizontal>/export-fec On request
# Sage Generation Expert
Source: https://docs.chift.eu/connectors/accounting/sagege
export const PATCH = () => ;
export const DELETE = () => ;
export const POST = () => ;
export const GET = () => ;
}>
Website: [sage.com](https://www.sage.com/fr-fr/experts-comptables/produits/sage-generation-experts-connect/)\
Software type: On premise (API)\
Geography: 🇫🇷 France
## Introduction
Sage Generation Experts (formerly Sage Coala) is an integrated & modular solution dedicated to the accounting and social production activities for certified accountants.
## Configure Sage Generation Expert
**Prerequisite(s)**
* Encode a sage partner account Application ID, Client ID and Secret ID.
* Activate the Sage Generation Expert integration on the Chift platform.
**Process**
Ask Chift to encode their Partner, Client and Secret ID on your Application in sandbox and production.
## Test Sage Generation Expert
To test the software integration, requesting Sage for a sandbox, can be very complex. The other option is to go through an integrator to get a Sage sandbox account. Last option, most used, is to identify a beta tester in your client or prospects and test the connexion with them.
## Connect Sage Generation Expert
To activate a connexion with Sage Generation Expert, users will have to go through the following steps.
* French article: [Help Center - Sage Generation Expert FR](https://help.chift.app/fr/articles/9877490-sage-generation-expert)
* English article: [Help Center - Sage Generation Expert EN](https://help.chift.app/en/articles/9877490-sage-generation-expert)
### Sage Génération Experts coverage
} horizontal>/vat-codes Live} horizontal>/clients/\{client\_id} Live} horizontal>/clients Live} horizontal>/suppliers Live} horizontal>/analytic-accounts/multi-analytic-plans Live} horizontal>/invoices/\{invoice\_id} Live} horizontal>/invoices/type/\{invoice\_type} Live} horizontal>/folders Live} horizontal>/analytic-plans Live} horizontal>/clients Live} horizontal>/journal-entries Live} horizontal>/journals Live} horizontal>/journal/entries Live} horizontal>/invoices Live} horizontal>/chart-of-accounts Live} horizontal>/get-environments Live} horizontal>/suppliers/\{supplier\_id} Live} horizontal>/suppliers Live} horizontal>/journal/entries/multi-analytic-plans Live} horizontal>/bookyears Live} horizontal>/clients/\{client\_id} On request} horizontal>/suppliers/\{supplier\_id} On request} horizontal>/invoices/multi-analytic-plans On request} horizontal>/invoices/multi-analytic-plans/type/\{invoice\_type} On request} horizontal>/invoices/multi-analytic-plans/\{invoice\_id} On request} horizontal>/accounts On request} horizontal>/bank-accounts On request} horizontal>/analytic-accounts On request} horizontal>/analytic-accounts On request} horizontal>/analytic-accounts/multi-analytic-plans/\{analytic\_plan} On request} horizontal>/analytic-accounts/\{analytic\_account\_id} On request} horizontal>/analytic-accounts/\{analytic\_account\_id} On request} horizontal>/analytic-accounts/\{analytic\_account\_id}/multi-analytic-plans/\{analytic\_plan} On request} horizontal>/analytic-accounts/\{analytic\_account\_id}/multi-analytic-plans/\{analytic\_plan} On request} horizontal>/journal/entries On request} horizontal>/journal/entries/\{journal\_entry\_id} On request} horizontal>/invoices/id/\{invoice\_id}/payments On request} horizontal>/journal On request} horizontal>/miscellaneous-operation On request} horizontal>/miscellaneous-operation On request} horizontal>/miscellaneous-operation/\{operation\_id} On request} horizontal>/matching On request} horizontal>/matching-multiple On request} horizontal>/invoices/pdf/\{invoice\_id} On request} horizontal>/attachments On request} horizontal>/chart-of-accounts/balance On request} horizontal>/employees On request} horizontal>/financial-entry On request} horizontal>/financial-entries On request} horizontal>/outstandings On request} horizontal>/export-fec On request
## Troubleshooting
### Specific errors for Sage Génération Expert:
| Error Code | Error description | Resolution |
| --------------------------------------------- | ---------------------------------------------------------- | ------------------------------------------------------------------------------------- |
| ERROR\_INVALID\_REQUEST | Invalid line amount | Chift will bypass those invoices in the future |
| ERROR\_ACCOUNT\_NUMBER\_NOT\_NOT\_GOOD\_SCOPE | The account 'XXXXXX' cannot be used to create entries. | Please change account number in the invoice line with a product/charge ledger account |
| ERROR\_ACCOUNT\_NUMBER\_NOT\_NOT\_GOOD\_SCOPE | The account number 'XX' cannot be used in an invoice line. | Please change account number in the invoice line with a product/charge ledger account |
# SnelStart
Source: https://docs.chift.eu/connectors/accounting/snelstart
export const PATCH = () => ;
export const DELETE = () => ;
export const POST = () => ;
export const GET = () => ;
}>
Website: [snelstart.nl](https://www.snelstart.nl/)\
Geography: 🇳🇱 Netherlands\
Connector Status: Live
## Introduction
SnelStart is an accounting suite that gives companies an overview of their most important financial metrics. By automizing data exchange, SnelStart gives an overview of the company health.
## Configure SnelStart
**Prerequisite(s)**
* Sign up on the [SnelStart Developer Portal](https://b2bapi-developer.snelstart.nl/) and complete the registration form.
* Once your account is created, activate the **SnelStart integration** on the **Chift back office platform**.
**Process**
* Log in to the **SnelStart B2B API portal** using the credentials you created.
* Navigate to your **profile page**.
* In the **Subscription** section, copy **one of the two available subscription keys** (the **primary key is recommended**).
* Then, go to the **connector page** in the **Chift back office** and **toggle the activation switch of Snelstart**.
* When activating the connector, you will be prompted to **enter the subscription key** you previously copied.
### Snelstart coverage
} horizontal>/outstandings Live} horizontal>/get-environments Live} horizontal>/attachments Live} horizontal>/journal/entries Live} horizontal>/vat-codes Live} horizontal>/accounts Live} horizontal>/journal-entries Live} horizontal>/clients/\{client\_id} Live} horizontal>/clients Live} horizontal>/analytic-accounts/\{analytic\_account\_id} Live} horizontal>/analytic-accounts Live} horizontal>/analytic-accounts/multi-analytic-plans Live} horizontal>/analytic-accounts/\{analytic\_account\_id}/multi-analytic-plans/\{analytic\_plan} Live} horizontal>/analytic-accounts/\{analytic\_account\_id}/multi-analytic-plans/\{analytic\_plan} Live} horizontal>/analytic-accounts/\{analytic\_account\_id} Live} horizontal>/employees Live} horizontal>/invoices Live} horizontal>/journals Live} horizontal>/bookyears Live} horizontal>/suppliers Live} horizontal>/suppliers/\{supplier\_id} Live} horizontal>/analytic-plans Live} horizontal>/chart-of-accounts Live} horizontal>/folders Live} horizontal>/chart-of-accounts/balance Live} horizontal>/analytic-accounts/\{analytic\_account\_id}/multi-analytic-plans/\{analytic\_plan} Live} horizontal>/analytic-accounts/\{analytic\_account\_id} Live} horizontal>/suppliers/\{supplier\_id} Live} horizontal>/clients/\{client\_id} Live} horizontal>/clients Live} horizontal>/suppliers Live} horizontal>/invoices/\{invoice\_id} Live} horizontal>/invoices/type/\{invoice\_type} Live} horizontal>/journal Live} horizontal>/invoices/multi-analytic-plans On request} horizontal>/invoices/multi-analytic-plans/type/\{invoice\_type} On request} horizontal>/invoices/multi-analytic-plans/\{invoice\_id} On request} horizontal>/bank-accounts On request} horizontal>/analytic-accounts On request} horizontal>/analytic-accounts/multi-analytic-plans/\{analytic\_plan} On request} horizontal>/journal/entries On request} horizontal>/journal/entries/multi-analytic-plans On request} horizontal>/journal/entries/\{journal\_entry\_id} On request} horizontal>/invoices/id/\{invoice\_id}/payments On request} horizontal>/miscellaneous-operation On request} horizontal>/miscellaneous-operation On request} horizontal>/miscellaneous-operation/\{operation\_id} On request} horizontal>/matching On request} horizontal>/matching-multiple On request} horizontal>/invoices/pdf/\{invoice\_id} On request} horizontal>/financial-entry On request} horizontal>/financial-entries On request} horizontal>/export-fec On request
# Tiime
Source: https://docs.chift.eu/connectors/accounting/tiime
export const PATCH = () => ;
export const DELETE = () => ;
export const POST = () => ;
export const GET = () => ;
}>
Website: [Tiime.fr](https://www.tiime.fr/)
Software type: Solution as a Software (Saas)
Geography: 🇫🇷 France
## Introduction
Tiime offers an all-in-one platform that simplifies accounting and administrative tasks for entrepreneurs and accountants. It includes features like invoicing, expense tracking, professional accounts, and financial management tools, streamlining the business processes of small enterprises.
## Configure Tiime
**Prerequisite(s)**
* Have an Oauth 2 application configured for the integration. Either your own partner application or Chift's generic.
* Activate the Tiime integration on the Chift platform.
**Process**
Ask Chift to encode the partner key or request for a dedicated Oauth2 application.
## Test Tiime
To test the software integration, requesting for a sandbox, can be very complex. The other option is to go through an integrator to get a Tiime sandbox account. Last option, most used, is to identify a beta tester in your client or prospects and test the connexion with them.
## Connect Tiime
To activate a connexion with Tiime , users will have to go through the following steps.
* French article: [Help Center - Tiime FR](https://intercom.help/chift/fr/articles/9992329-tiime)
* English article: [Help Center - Tiime EN](https://intercom.help/chift/en/articles/9992329-tiime)
## Technical limitations
The route allowing the clients/suppliers creation is not supported due to some technical limitations on Tiime's APIs. The only way to create a client/supplier is by creating an invoice for this non existing client/supplier.
To be able to create a client or supplier related to your invoice, you must provide a field named "partner\_infos" instead of the partner id. This field must be a json object following the structure of the following example:
```json
"partner_info": {
"account_number": "XXX",
"account_name": "XXX"
}
```
By providing the following informations, the endpoint from Tiime responsible for the invoice creation will create the related client/supplier before actually creating the invoice.
### Tiime coverage
} horizontal>/chart-of-accounts Live} horizontal>/folders Live} horizontal>/vat-codes Live} horizontal>/bookyears Live} horizontal>/journal-entries Live} horizontal>/employees Live} horizontal>/invoices Live} horizontal>/journals Live} horizontal>/suppliers Live} horizontal>/suppliers/\{supplier\_id} Live} horizontal>/clients/\{client\_id} Live} horizontal>/clients Live} horizontal>/analytic-plans On request} horizontal>/clients On request} horizontal>/clients/\{client\_id} On request} horizontal>/suppliers On request} horizontal>/suppliers/\{supplier\_id} On request} horizontal>/invoices/multi-analytic-plans On request} horizontal>/invoices/type/\{invoice\_type} On request} horizontal>/invoices/multi-analytic-plans/type/\{invoice\_type} On request} horizontal>/invoices/\{invoice\_id} On request} horizontal>/invoices/multi-analytic-plans/\{invoice\_id} On request} horizontal>/accounts On request} horizontal>/bank-accounts On request} horizontal>/analytic-accounts On request} horizontal>/analytic-accounts On request} horizontal>/analytic-accounts/multi-analytic-plans/\{analytic\_plan} On request} horizontal>/analytic-accounts/\{analytic\_account\_id} On request} horizontal>/analytic-accounts/\{analytic\_account\_id} On request} horizontal>/analytic-accounts/\{analytic\_account\_id}/multi-analytic-plans/\{analytic\_plan} On request} horizontal>/analytic-accounts/\{analytic\_account\_id}/multi-analytic-plans/\{analytic\_plan} On request} horizontal>/analytic-accounts/multi-analytic-plans On request} horizontal>/journal/entries On request} horizontal>/journal/entries On request} horizontal>/journal/entries/multi-analytic-plans On request} horizontal>/journal/entries/\{journal\_entry\_id} On request} horizontal>/invoices/id/\{invoice\_id}/payments On request} horizontal>/journal On request} horizontal>/miscellaneous-operation On request} horizontal>/miscellaneous-operation On request} horizontal>/miscellaneous-operation/\{operation\_id} On request} horizontal>/matching On request} horizontal>/matching-multiple On request} horizontal>/invoices/pdf/\{invoice\_id} On request} horizontal>/attachments On request} horizontal>/chart-of-accounts/balance On request} horizontal>/financial-entry On request} horizontal>/financial-entries On request} horizontal>/outstandings On request} horizontal>/export-fec On request
# Twinfield
Source: https://docs.chift.eu/connectors/accounting/twinfield
{/* import Coverage from '/snippets/coverage/twinfield.mdx' */}
}>
Website: [twinfield.com](https://www.wolterskluwer.com/en/solutions/twinfield-accounting)
Geography: 🇳🇱 Netherlands
Connector Status: In Development
## Introduction
Twinfield online accounting software easily manages all accounting functions, from invoicing to management accounting – for the smallest startup to the largest international group.
# Visma eAccounting
Source: https://docs.chift.eu/connectors/accounting/visma_eaccounting
export const PATCH = () => ;
export const DELETE = () => ;
export const POST = () => ;
export const GET = () => ;
}>
Website: [eAccounting.nl](https://www.eaccounting.nl/)\
Geography: 🇳🇱 Netherlands\
Connector Status: Live
## Introduction
Visma eAccounting is an accounting software developed by Visma, primarily designed for accountants as well as small and medium-sized businesses in the Netherlands and other European markets.
It offers a user-friendly interface and a range of features, including invoicing, expense tracking, bank reconciliation, payroll integration, and VAT reporting.
Because it is fully cloud-based, users can access their financial data from anywhere and collaborate easily with their accountants.
## Configure eAccounting
**Prerequisite(s)**
There are no prerequisite to enable eAccounting in your Chift App.
* A registered **partner account** on Visma’s Developer Portal: [https://selfservice.developer.vismaonline.com](https://selfservice.developer.vismaonline.com)
Access to **Sandbox credentials**, sent via email after registration
* Request \*\*Production credentials \*\*to the visma partner in your country.
**Process**
### **A. Register for Sandbox Access**
1. **Create a Partner Account**
* Go to [https://selfservice.developer.vismaonline.com](https://selfservice.developer.vismaonline.com)
* Complete the registration to create a developer/partner account.
2. **Receive Sandbox Credentials**
* Visma will send you an email with:
* `client_id`
* `client_secret`
* Other relevant sandbox access tokens
3. **Activate connection in Chift's Back-Office**
Enable Visma Eaccounting connetor in the connector list and enter **client\_id** and **client\_secret**
### **B. Request Production Credentials**
1. **Send an Email Request**
* Depending on your country, send an email request to the appropriate address:
| Country | Email |
| :-------------- | :-------------------------------------------------------------------- |
| **Sweden** | [api@spiris.se](mailto:api@spiris.se) |
| **Norway** | [api\_eaccounting@visma.com](mailto:api_eaccounting@visma.com) |
| **Netherlands** | [partner.eaccounting@visma.com](mailto:partner.eaccounting@visma.com) |
Include the following information in your mail :
* **Application name**: `Chift`
* **Company name**: (Include a 2-line description, e.g. *"Chift is a unified API platform connecting various accounting and banking systems to centralize business data."*)
* **Redirect URI(s)**: `https://chift.app/oauth2/redirect`
* **Requested scopes**:
| Scope | Purpose |
| :--------------- | :--------------------------------------------------- |
| `ea:api` | Base access to the eAccounting API |
| `ea:sales` | Access to customer sales and invoices |
| `ea:purchase` | Access to purchase and supplier invoices |
| `ea:accounting` | Access to accounting data like journals and accounts |
| `offline_access` | Enables long-lived tokens for background syncing |
* To have the partnership request and access to the production environment approved, a **Terms and Conditions document** provided by Visma eAccounting/Advisor Production API will need to be **signed electronically**.
* ****Once approval received, activate the eAccounting integration on theChift platform**** with production keys.
## Test eAccounting
You can ask our contact for a test account including dummy data
## Coverage
### Visma Eaccounting coverage
} horizontal>/outstandings Live} horizontal>/get-environments Live} horizontal>/attachments Live} horizontal>/journal/entries Live} horizontal>/vat-codes Live} horizontal>/accounts Live} horizontal>/journal-entries Live} horizontal>/clients/\{client\_id} Live} horizontal>/clients Live} horizontal>/analytic-accounts/\{analytic\_account\_id} Live} horizontal>/analytic-accounts Live} horizontal>/analytic-accounts/multi-analytic-plans Live} horizontal>/analytic-accounts/\{analytic\_account\_id}/multi-analytic-plans/\{analytic\_plan} Live} horizontal>/analytic-accounts/\{analytic\_account\_id}/multi-analytic-plans/\{analytic\_plan} Live} horizontal>/analytic-accounts/\{analytic\_account\_id} Live} horizontal>/employees Live} horizontal>/invoices Live} horizontal>/journals Live} horizontal>/bookyears Live} horizontal>/suppliers Live} horizontal>/suppliers/\{supplier\_id} Live} horizontal>/analytic-plans Live} horizontal>/chart-of-accounts Live} horizontal>/folders Live} horizontal>/chart-of-accounts/balance Live} horizontal>/analytic-accounts/\{analytic\_account\_id}/multi-analytic-plans/\{analytic\_plan} Live} horizontal>/analytic-accounts/\{analytic\_account\_id} Live} horizontal>/suppliers/\{supplier\_id} Live} horizontal>/clients/\{client\_id} Live} horizontal>/clients Live} horizontal>/suppliers Live} horizontal>/invoices/\{invoice\_id} Live} horizontal>/invoices/type/\{invoice\_type} Live} horizontal>/journal Live} horizontal>/invoices/multi-analytic-plans On request} horizontal>/invoices/multi-analytic-plans/type/\{invoice\_type} On request} horizontal>/invoices/multi-analytic-plans/\{invoice\_id} On request} horizontal>/bank-accounts On request} horizontal>/analytic-accounts On request} horizontal>/analytic-accounts/multi-analytic-plans/\{analytic\_plan} On request} horizontal>/journal/entries On request} horizontal>/journal/entries/multi-analytic-plans On request} horizontal>/journal/entries/\{journal\_entry\_id} On request} horizontal>/invoices/id/\{invoice\_id}/payments On request} horizontal>/miscellaneous-operation On request} horizontal>/miscellaneous-operation On request} horizontal>/miscellaneous-operation/\{operation\_id} On request} horizontal>/matching On request} horizontal>/matching-multiple On request} horizontal>/invoices/pdf/\{invoice\_id} On request} horizontal>/financial-entry On request} horizontal>/financial-entries On request} horizontal>/export-fec On request
# Winbooks
Source: https://docs.chift.eu/connectors/accounting/winbooksclassic
export const PATCH = () => ;
export const DELETE = () => ;
export const POST = () => ;
export const GET = () => ;
}>
Website: [winbooks.com](https://www.exact.com/befr/software/exact-winbooks)
Software type: On-premise (local agent to be installed)
Geography: 🇧🇪 Belgium
## Introduction
WinBooks is an accounting and financial management software for small and medium-sized businesses. It allows you to manage company finances, track invoices and payments, produce financial reports and monitor company performance. Deliver the Winbooks integration your customer wants in no time.
## Configure Winbooks
**Prerequisite(s)**
No prerequisite to enable the connector.
**Process**
Activate the connector in one click on the connector section in your Chift account.
## Test Winbooks
To test the software integration, you need to go through an integrator to get a sandbox account or you must identify beta users in your client base willing to allow you to use their account for testings
## Connect Winbooks
To activate a connexion with Winbooks, users will have to go through the following steps.
* French article: [Help Center - Winbooks FR](https://help.chift.app/fr/articles/9023792-winbooks)
* English article: [Help Center - Winbooks EN](https://help.chift.app/en/articles/9023792-winbooks)
### Winbooks Classic coverage
} horizontal>/financial-entries Live} horizontal>/analytic-account-lines/account/\{analytic\_account\_id} Live} horizontal>/chart-of-accounts/balance Live} horizontal>/folders Live} horizontal>/analytic-accounts Live} horizontal>/analytic-accounts/multi-analytic-plans/\{analytic\_plan} Live} horizontal>/clients Live} horizontal>/analytic-accounts/\{analytic\_account\_id} Live} horizontal>/analytic-accounts/\{analytic\_account\_id}/multi-analytic-plans/\{analytic\_plan} Live} horizontal>/invoices/\{invoice\_id} Live} horizontal>/invoices/type/\{invoice\_type} Live} horizontal>/analytic-accounts/\{analytic\_account\_id} Live} horizontal>/analytic-accounts Live} horizontal>/analytic-accounts/multi-analytic-plans Live} horizontal>/analytic-accounts/\{analytic\_account\_id}/multi-analytic-plans/\{analytic\_plan} Live} horizontal>/analytic-plans Live} horizontal>/clients Live} horizontal>/clients/\{client\_id} Live} horizontal>/journal/entries Live} horizontal>/vat-codes Live} horizontal>/clients/\{client\_id} Live} horizontal>/invoices/pdf/\{invoice\_id} Live} horizontal>/invoices Live} horizontal>/suppliers Live} horizontal>/invoices/id/\{invoice\_id}/payments Live} horizontal>/suppliers/\{supplier\_id} Live} horizontal>/suppliers Live} horizontal>/suppliers/\{supplier\_id} Live} horizontal>/chart-of-accounts Live} horizontal>/miscellaneous-operation Live} horizontal>/journals Live} horizontal>/miscellaneous-operation/\{operation\_id} Live} horizontal>/miscellaneous-operation Live} horizontal>/matching Live} horizontal>/bookyears On request} horizontal>/invoices/multi-analytic-plans On request} horizontal>/invoices/multi-analytic-plans/type/\{invoice\_type} On request} horizontal>/invoices/multi-analytic-plans/\{invoice\_id} On request} horizontal>/accounts On request} horizontal>/bank-accounts On request} horizontal>/journal/entries On request} horizontal>/journal/entries/multi-analytic-plans On request} horizontal>/journal/entries/\{journal\_entry\_id} On request} horizontal>/journal-entries On request} horizontal>/journal On request} horizontal>/matching-multiple On request} horizontal>/attachments On request} horizontal>/employees On request} horizontal>/financial-entry On request} horizontal>/outstandings On request} horizontal>/export-fec On request
# Yuki
Source: https://docs.chift.eu/connectors/accounting/yuki
export const PATCH = () => ;
export const DELETE = () => ;
export const POST = () => ;
export const GET = () => ;
}>
Website: [yukisoftware.com](https://www.yukisoftware.com/)\
Software type: Software as a service (Saas)\
Geography: 🇧🇪 Belgium, 🇳🇱 Netherlands
## Introduction
Optimal collaboration allows you to focus on what really matters: growing your practice or business. This way, you are on the same page and can:
* Make your accounting more efficient and simple
* Serve your clients even better
* Reduce your administration to a minimum
## Connect Yuki
To activate a connexion with Yuki, users will have to go through the following steps.
* French article: [Help Center - Yuki - FR](https://help.chift.app/fr/articles/9023716-yuki)
* English article: [Help Center - Yuki - EN](https://help.chift.app/en/articles/10430846-yuki)
### Yuki coverage
} horizontal>/folders Live} horizontal>/bookyears Live} horizontal>/analytic-plans Live} horizontal>/clients Live} horizontal>/clients Live} horizontal>/clients/\{client\_id} Live} horizontal>/clients/\{client\_id} Live} horizontal>/suppliers Live} horizontal>/suppliers Live} horizontal>/suppliers/\{supplier\_id} Live} horizontal>/suppliers/\{supplier\_id} Live} horizontal>/invoices Live} horizontal>/invoices/multi-analytic-plans Live} horizontal>/invoices/type/\{invoice\_type} Live} horizontal>/invoices/multi-analytic-plans/type/\{invoice\_type} Live} horizontal>/invoices/\{invoice\_id} Live} horizontal>/invoices/multi-analytic-plans/\{invoice\_id} Live} horizontal>/analytic-accounts Live} horizontal>/analytic-accounts Live} horizontal>/analytic-accounts/multi-analytic-plans/\{analytic\_plan} Live} horizontal>/analytic-accounts/\{analytic\_account\_id} Live} horizontal>/analytic-accounts/\{analytic\_account\_id} Live} horizontal>/analytic-accounts/\{analytic\_account\_id}/multi-analytic-plans/\{analytic\_plan} Live} horizontal>/analytic-accounts/\{analytic\_account\_id}/multi-analytic-plans/\{analytic\_plan} Live} horizontal>/analytic-accounts/multi-analytic-plans Live} horizontal>/journal/entries Live} horizontal>/journals Live} horizontal>/vat-codes Live} horizontal>/miscellaneous-operation Live} horizontal>/attachments Live} horizontal>/chart-of-accounts Live} horizontal>/chart-of-accounts/balance Live} horizontal>/outstandings Live} horizontal>/accounts On request} horizontal>/bank-accounts On request} horizontal>/journal/entries On request} horizontal>/journal/entries/multi-analytic-plans On request} horizontal>/journal/entries/\{journal\_entry\_id} On request} horizontal>/journal-entries On request} horizontal>/invoices/id/\{invoice\_id}/payments On request} horizontal>/journal On request} horizontal>/miscellaneous-operation On request} horizontal>/miscellaneous-operation/\{operation\_id} On request} horizontal>/matching On request} horizontal>/matching-multiple On request} horizontal>/invoices/pdf/\{invoice\_id} On request} horizontal>/employees On request} horizontal>/financial-entry On request} horizontal>/financial-entries On request} horizontal>/export-fec On request
# Banking API - Coverage
Source: https://docs.chift.eu/connectors/banking/coverage
## Coverage of endpoints by connector
| Route | Ponto |
| -------------------------------- | ----- |
| GET /counterparts | ✅ |
| GET /\{account\_id}/transactions | ✅ |
| GET /financial-institutions | ✅ |
| GET /accounts | ✅ |
# Banking connectors overview
Source: https://docs.chift.eu/connectors/banking/overview
| Connector | Geography | Partner Approval | Status |
| --------- | --------- | ---------------- | ------ |
| Ponto | 🇧🇪 (BE) | ✅ Yes | ✅ Live |
# Ponto
Source: https://docs.chift.eu/connectors/banking/ponto
export const PATCH = () => ;
export const DELETE = () => ;
export const POST = () => ;
export const GET = () => ;
}>
Website: [Ponto](https://www.myponto.com/)\
Software type: Solution as a Software (Saas)\
Geography: 🇧🇪 Belgium
## Introduction
Ponto can be used to connect to a lot of banks. It will be able to retrieve your bank transactions and the balance of your connected bank accounts.
## Configure Ponto
**Prerequisite(s)**
You need a pair of keys (clientId & ClientSecret) from Ponto to set up the connector.
## Test Ponto
## Connect Ponto
To activate a connexion with Ponto, users will have to go through the following steps.
* French article: [Help Center - Ponto FR](https://help.chift.app/fr/articles/9546380-ponto)
* English article: [Help Center - Ponto EN](https://help.chift.app/en/articles/9546380-ponto)
### Ponto coverage
} horizontal>/counterparts Live} horizontal>/\{account\_id}/transactions Live} horizontal>/financial-institutions Live} horizontal>/accounts Live
# Overview of connectors in Chift
Source: https://docs.chift.eu/connectors/connectors
## Accounting
}>
Explore ACD
}>
Explore AFAS Software
}>
Explore Cegid Loop
}>
Explore Cegid Quadra
}>
Explore Datev
}>
Explore Dynamics 365 Business Central
}>
Explore e-Boekhouden
}>
Explore VISMA eAccounting
}>
Explore Exact Online
}>
Explore Fulll
}>
Explore Holded
}>
Explore Horus
}>
Explore Inqom
}>
Explore Minox
}>
Explore MyUnisoft
}>
Explore Netsuite
}>
Explore Octopus
}>
Explore Odoo
}>
Explore Pennylane
}>
Explore Reviso
}>
Explore Sage 50 FR
}>
Explore Sage 100 FR
}>
Explore Sage Bob 50
}>
Explore Sage Generation Expert
}>
Explore SnelStart
}>
Explore Tiime
}>
Explore Twinfield
}>
Explore Yuki
}>
Explore Winbooks
## Ecommerce
}>
Explore Prestashop
}>
Explore Shopify
}>
Explore Woocommerce
## Invoicing
}>
Explore Axonaut
}>
Explore Boondmanager
}>
Explore Chargebee
}>
Explore Evoliz
}>
Explore Factomos
}>
Explore Harvest
}>
Explore Odoo Invoicing
}>
Explore Paypal
}>
Explore Qonto
}>
Explore Quickbooks
}>
Explore Sage100 Invocing
}>
Explore Sellsy
}>
Explore Teamleader
}>
Explore Vos Factures
}>
Explore Zoho One
## POS
}>
Explore Abill
}>
Explore Addictill
}>
Explore BDP
}>
Explore Cashmag
}>
Explore Cashpad
}>
Explore Clyo Systems
}>
Explore Connectill
}>
Explore Fülle
}>
Explore helloCash
}>
Explore Hiboutik
}>
Explore Innovorder
}>
Explore Jalia (by JDC)
}>
Explore L'addition
}>
Explore LastApp
}>
Explore Leo2
}>
Explore Lightspeed
}>
Explore Odoo POS
}>
Explore Popina
}>
Explore Restomax
}>
Explore Square
}>
Explore Synapsy
}>
Explore Tactilpad
}>
Explore Tiller
}>
Explore Trivec
}>
Explore Zelty
}>
Explore Zettle
## PMS
}>
Explore Mews
}>
Explore Noovy
## Payment
}>
Explore GoCardLess
}>
Explore Mollie
}>
Explore Paypal
}>
Explore Stripe
}>
Explore SumUp
## Banking
}>
Explore Ponto
# E-commerce API - Coverage
Source: https://docs.chift.eu/connectors/ecommerce/coverage
## Coverage of endpoints by connector
| Route | Woocommerce | Magento | Shopify | Prestashop |
| ------------------------------------------- | ----------- | ------- | ------- | ---------- |
| GET /countries | ✅ | ❌ | ✅ | ✅ |
| GET /locations | ✅ | ✅ | ✅ | ✅ |
| GET /payment-methods | ✅ | ❌ | ✅ | ✅ |
| GET /product-categories | ✅ | ✅ | ✅ | ✅ |
| GET /products | ✅ | ✅ | ✅ | ✅ |
| GET /products/\{product\_id} | ✅ | ✅ | ✅ | ✅ |
| GET /orders | ✅ | ✅ | ✅ | ✅ |
| GET /orders/\{order\_id} | ✅ | ✅ | ✅ | ✅ |
| GET /variants/\{variant\_id} | ✅ | ✅ | ✅ | ✅ |
| GET /taxes | ✅ | ❌ | ✅ | ✅ |
| GET /customers | ❌ | ❌ | ❌ | ❌ |
| GET /customers/\{customer\_id} | ❌ | ❌ | ❌ | ❌ |
| POST /variants/set\_quantity/\{variant\_id} | ✅ | ✅ | ✅ | ❌ |
| POST /orders | ❌ | ❌ | ✅ | ❌ |
# Magento
Source: https://docs.chift.eu/connectors/ecommerce/magento
export const PATCH = () => ;
export const DELETE = () => ;
export const POST = () => ;
export const GET = () => ;
## Introduction
Magento gives its users the ability to control the look, functionality, and content on their online store without compromising the shopping experience. In addition, it provides its users a variety of useful tools and features. This includes marketing, search engine optimization, and catalog-management tools. Deliver the Magento integration your customers want in no time.
### Magento coverage
} horizontal>/product-categories Live} horizontal>/locations Live} horizontal>/orders/\{order\_id} Live} horizontal>/orders Live} horizontal>/products/\{product\_id} Live} horizontal>/products Live} horizontal>/variants/\{variant\_id} Live} horizontal>/variants/set\_quantity/\{variant\_id} Live} horizontal>/customers On request} horizontal>/customers/\{customer\_id} On request} horizontal>/orders On request} horizontal>/payment-methods On request} horizontal>/taxes On request} horizontal>/countries On request
# eCommerce connectors overview
Source: https://docs.chift.eu/connectors/ecommerce/overview
| Connector | Geography | Partner Approval | Status |
| ----------- | ------------ | ---------------- | ------ |
| Magento | 🌎 Worldwide | ❌ No | ✅ Live |
| Prestashop | 🇫🇷 (FR) | ❌ No | ✅ Live |
| Shopify | 🌎 Worldwide | ✅ Yes | ✅ Live |
| WooCommerce | 🌎 Worldwide | ❌ No | ✅ Live |
# Prestashop
Source: https://docs.chift.eu/connectors/ecommerce/prestashop
export const PATCH = () => ;
export const DELETE = () => ;
export const POST = () => ;
export const GET = () => ;
}>
Website: [prestashop.fr](https://prestashop.fr/)\
Software type: Solution as a Software (Saas)\
Geography:🇫🇷 France
## Introduction
PrestaShop is an open-source e-commerce platform that allows businesses of all sizes to create and manage their online stores. It offers a wide range of customizable features, including product management, payment processing, and marketing tools, enabling users to build a tailored shopping experience.
## Configure Prestashop
**Prerequisite(s)**\
No prerequisite to enable the connector.
**Process**\
Activate the connector in one click on the connector section in your Chift account.
## Test Prestashop
To test the software integration, you need to host a Prestashop test account.
Recommendation: test with a client account
## Connect Prestashop
To activate a connexion with Prestashop, users will have to go through the following steps.
* French article: [Help Center - Prestashop FR](https://help.chift.app/fr/articles/9089281-prestashop)
* English article: [Help Center - Prestashop EN](https://help.chift.app/en/articles/9089281-prestashop)
### Prestashop coverage
} horizontal>/countries Live} horizontal>/locations Live} horizontal>/languages Live} horizontal>/payment-methods Live} horizontal>/product-categories Live} horizontal>/products Live} horizontal>/products/\{product\_id} Live} horizontal>/orders Live} horizontal>/orders/\{order\_id} Live} horizontal>/variants/\{variant\_id} Live} horizontal>/taxes Live} horizontal>/customers On request} horizontal>/customers/\{customer\_id} On request} horizontal>/variants/set\_quantity/\{variant\_id} On request} horizontal>/orders On request
# Shopify
Source: https://docs.chift.eu/connectors/ecommerce/shopify
export const PATCH = () => ;
export const DELETE = () => ;
export const POST = () => ;
export const GET = () => ;
}>
Website: [shopify.com](https://www.shopify.com)\
Software type: Solution as a Software (Saas)\
Geography: 🌍 Worldwide
## Introduction
Shopify is a comprehensive e-commerce platform that allows businesses of all sizes to create, manage, and scale their online stores. It offers a wide range of features, including customizable storefronts, payment processing, inventory management, and marketing tools. Shopify is known for its ease of use, extensive app integrations, and scalability, making it a popular choice for entrepreneurs and established businesses looking to sell products online and across multiple sales channels.
## Configure Shopify
**Prerequisite(s)**
* Obtain a Client ID and Client Secret to set up the connector Shopify
* Activate an OAuth2 Application on your Shopify partner account
* Get Shopify’s approval for your partner application.
* Activate the Shopify integration on the Chift platform.
**Process**
1. Create your partner account using this [link](https://accounts.shopify.com/signup)
2. On your Partner account, create an API and OAuth2 application.
* [Create an account](https://partners.shopify.com/signup/developer) on the Shopify Partners site
* Click on 'Apps' in the side panel
* Click on 'Create app' on the 'Apps' page
* Click on 'Create app manually'
* Fill in the 'General settings'
* Add [https://chift.app/oauth2/redirect](https://chift.app/oauth2/redirect) in the 'Allowed redirection URL(s)' section
* Click on 'Create app'
* If you want to retrieve orders older than 60 days: Go to the 'App setup' page and click on 'Request access' of the 'Read all orders' box
3. Configure your OAuth2 application and select the scope "read\_all\_orders". This is done in the parameters of your Shopify account.
* Menu → “API Access” →select “read all orders” to get a response for orders older than 60 days.
* In the same section “API Access” → Subsection “Protected customer data access”, select the consumer data you need Shopify to communicate in the API response.
4. Get you application approved by Shopify - To submit your app for approval, you have to:
* Go to the 'Distribution' page of your newly created Shopify app
* Click on 'Choose Shopify App Store'
* Click on 'Choose'
* Click on 'Create listing'
* Register to the Shopify App Store (only needed if it is your first Shopify app)
* Click on 'App visibility'
* Select 'Unlisted' in the dialog box and click on 'Save'
* Configure Shopify on your Chift account.
## Test Shopify
To test the software integration, you have the capability to create a sandbox account, within your Shopify partner portal (where you created the OAuth2 application).
## Connect Shopify
To activate a connexion with Shopify, users will have to go through the following steps.
* French article: [Help Center - Shopify FR](https://help.chift.app/fr/articles/9023780-shopify)
* English article: [Help Center - Shopify EN](https://help.chift.app/en/articles/9023780-shopify)
## Handle customer data protection
The new version of the Shopify API introduced a [customer data protection](https://shopify.dev/apps/store/data-protection/protected-customer-data) policy. This policy requires App creators to ask authorization to be able to retrieve customer data from Shopify. Without this authorization you will not be able to retrieve customers and orders from Shopify. The policy consists of two levels. With the first level you will be able to retrieve customers and orders but with limited data (you don't have access to the name, email, addresses and phone number of the customers). The second level gives you access to all the customer data. Each level is linked to specific requirements. You can find more information about the customer data protection policy and the requirements on the [Shopify dedicated documentation](https://shopify.dev/apps/store/data-protection/protected-customer-data).
To be able to use all the functionalities offered by the eCommerce API you have to meet the level 2 requirements.
The customer data protection settings can be modified via your 'App setup' page.

### Shopify coverage
} horizontal>/payment-methods Live} horizontal>/product-categories Live} horizontal>/taxes Live} horizontal>/countries Live} horizontal>/locations Live} horizontal>/orders Live} horizontal>/orders/\{order\_id} Live} horizontal>/products Live} horizontal>/products/\{product\_id} Live} horizontal>/variants/\{variant\_id} Live} horizontal>/variants/set\_quantity/\{variant\_id} Live} horizontal>/orders Live} horizontal>/customers On request} horizontal>/customers/\{customer\_id} On request
# WooCommerce
Source: https://docs.chift.eu/connectors/ecommerce/woocommerce
export const PATCH = () => ;
export const DELETE = () => ;
export const POST = () => ;
export const GET = () => ;
}>
Website: [woocommerce.com](https://woocommerce.com/)\
Software type: Solution as a Software (Saas)\
Geography: 🌍 Worldwide
## Introduction
WooCommerce is an open-source flexible software solution built for WordPress-based websites. It’s commonly used to create online e-commerce shops .Deliver the WooCommerce integration your customers want in no time.
## Configure WooCommerce
**Prerequisite(s)**\
No prerequisite to enable the connector.
**Process**\
Activate the connector in one click on the connector section in your Chift account.
## Test WooCommerce
To test the software integration,
If you need to test WooCommerce specifically, Chift’s advice is to identify a beta tester in your clients that is willing to allow you to use the client’s WooCommerce account for you to conduct some tests.
## Connect WooCommerce
To activate a connexion with WooCommerce, users will have to go through the following steps.
* French article: [Help Center - WooCommerce FR](https://help.chift.app/fr/articles/9023793-woocommerce)
* English article: [Help Center - WooCommerce EN](https://help.chift.app/en/articles/9023793-woocommerce)
### WooCommerce coverage
} horizontal>/payment-methods Live} horizontal>/product-categories Live} horizontal>/taxes Live} horizontal>/countries Live} horizontal>/locations Live} horizontal>/orders Live} horizontal>/orders/\{order\_id} Live} horizontal>/products/\{product\_id} Live} horizontal>/products Live} horizontal>/variants/\{variant\_id} Live} horizontal>/variants/set\_quantity/\{variant\_id} Live} horizontal>/customers On request} horizontal>/customers/\{customer\_id} On request} horizontal>/orders On request
# Axonaut
Source: https://docs.chift.eu/connectors/invoicing/axonaut
export const PATCH = () => ;
export const DELETE = () => ;
export const POST = () => ;
export const GET = () => ;
}>
Website: [axonaut.com](https://axonaut.com/)
Software type: Solution as a Software (Saas)
Geography: 🇫🇷 France
## Introduction
Axonaut helps small businesses streamline administrative processes related to customer relationship management (CRM), invoicing, marketing, inventory tracking, and more. Deliver the Axonaut integration your customers want in no time.
## Configure Axonaut
**Prerequisite(s)**
No prerequisite to enable the connector.
**Process**
Activate the connector in one click on the connector section in your Chift account.
## Test Axonaut
To test the software integration, you can create your demo account [here](https://axonaut.com/onboarding/).
## Connect Axonaut
To activate a connexion with Axonaut, users will have to go through the following steps.
* French article: [Help Center - Axonaut FR](https://help.chift.app/fr/articles/9023711-axonaut)
* English article: [Help Center - Axonaut EN](https://help.chift.app/en/articles/9023711-axonaut)
## Limitations & Exceptions
* The distinction between refunds and invoices is based on the sign of the total amount, if negative it is considered as a refund.
### Axonaut coverage
} horizontal>/taxes Live} horizontal>/taxes/\{tax\_id} Live} horizontal>/invoices/\{invoice\_id} Live} horizontal>/invoices Live} horizontal>/products Live} horizontal>/products/\{product\_id} Live} horizontal>/opportunities Live} horizontal>/opportunities/\{opportunity\_id} Live} horizontal>/contacts Live} horizontal>/contacts/\{contact\_id} Live} horizontal>/invoices On request} horizontal>/products On request} horizontal>/contacts On request} horizontal>/payments On request} horizontal>/payment-methods On request
## Troubleshooting
### Specific errors for Axonaut:
| Error Code | Error description | Resolution |
| ------------------------- | -------------------------------------------------------------------------------------------------------------------------------------------------------------------------------------------------------- | -------------------------------------------------------------- |
| ERROR\_BACKEND\_FORBIDDEN | Impossible to retrieve data due to a permission issue. Unauthorized action. User is not enabled or you need one of these roles: ROLE\_MANAGER, ROLE\_ACCOUNTING, ROLE\_BUSINESS, ROLE\_BUSINESS\_MANAGER | Use another API token in the Axonaut connexion of the consumer |
# Boondmanager
Source: https://docs.chift.eu/connectors/invoicing/boondmanager
export const PATCH = () => ;
export const DELETE = () => ;
export const POST = () => ;
export const GET = () => ;
}>
Website: [boondmanager.com](https://www.boondmanager.com/)\
Software type: Solution as a Software (Saas)\
Geography: 🇪🇺 Europe
## Introduction
BoondManager is an enterprise process management (ERP) and resource management software that helps businesses manage projects, track invoices, handle prospecting, monitor expenses, and more on a centralised platform. Deliver the Boondmanager integration your customers want in no time.
## General Information
## Configure Boondmanager
**Prerequisite(s)**\
No prerequisite to enable the connector.
**Process**\
Activate the connector in one click on the connector section in your Chift account.
## Test Boondmanager
To test the software integration, you can create your demo account [here](https://www.boondmanager.com/testez-nous/).
## Connect Boondmanager
To activate a connexion with Boondmanager, users will have to go through the following steps.
* French article: [Help Center - Boondmanager FR](https://help.chift.app/fr/articles/9023713-boondmanager)
* English article: [Help Center - Boondmanager EN](https://help.chift.app/en/articles/9023713-boondmanager)
## Limitations & Exceptions
* The partner is not always present on the expenses/invoices.
### Boondmanager coverage
} horizontal>/taxes Live} horizontal>/taxes/\{tax\_id} Live} horizontal>/contacts Live} horizontal>/contacts/\{contact\_id} Live} horizontal>/products Live} horizontal>/products/\{product\_id} Live} horizontal>/invoices/\{invoice\_id} Live} horizontal>/invoices Live} horizontal>/opportunities/\{opportunity\_id} Live} horizontal>/opportunities Live} horizontal>/folders Live} horizontal>/invoices On request} horizontal>/products On request} horizontal>/contacts On request} horizontal>/payments On request} horizontal>/payment-methods On request
# Chargebee
Source: https://docs.chift.eu/connectors/invoicing/chargebee
export const PATCH = () => ;
export const DELETE = () => ;
export const POST = () => ;
export const GET = () => ;
}>
Website: [chargebee.com](https://www.chargebee.com/)
Software type: Solution as a Software (Saas)
Geography: 🌍 Worldwide
## Introduction
Chargebee is a billing platform for SaaS and subscription-based businesses. Chargebee integrates with leading payment gateways around the world to let you automate payment collection, invoicing, email notifications, and customer management. Deliver the Chargebee integration your customers want in no time.
## Configure Chargebee
**Prerequisite(s)**\
No prerequisite to enable the connector.
**Process**\
Activate the connector in one click on the connector section in your Chift account.
## Test Chargebee
To test the software integration, you can create your demo account [here](https://www.chargebee.com/trial-signup).
## Connect Chargebee
To activate a connexion with Chargebee, users will have to go through the following steps.
* French article: [Help Center - Chargebee FR](https://help.chift.app/fr/articles/9101285-chargebee)
* English article: [Help Center - Chargebee EN](https://help.chift.app/en/articles/9101285-chargebee)
### Chargebee coverage
} horizontal>/invoices Live} horizontal>/invoices/\{invoice\_id} Live} horizontal>/contacts/\{contact\_id} Live} horizontal>/contacts Live} horizontal>/invoices On request} horizontal>/taxes On request} horizontal>/taxes/\{tax\_id} On request} horizontal>/products On request} horizontal>/products On request} horizontal>/products/\{product\_id} On request} horizontal>/opportunities On request} horizontal>/opportunities/\{opportunity\_id} On request} horizontal>/contacts On request} horizontal>/payments On request} horizontal>/payment-methods On request
# Invoicing API - Coverage
Source: https://docs.chift.eu/connectors/invoicing/coverage
## Coverage of endpoints by connector
| Route | Factomos | Boondmanager | Chargebee | Fuga\_invoicing | Zoho | Pipedrive | Axonaut | Sage100frgc | Fattureincloud | Quickbooks | Organilog | Zenfacture | Teamleader | Hubspot | Harvest | Odoo\_invoicing | Paypal | Evoliz | Sellsy | Qonto | Vosfactures |
| ------------------------------------- | -------- | ------------ | --------- | --------------- | ---- | --------- | ------- | ----------- | -------------- | ---------- | --------- | ---------- | ---------- | ------- | ------- | --------------- | ------ | ------ | ------ | ----- | ----------- |
| GET /invoices | ✅ | ✅ | ✅ | ✅ | ✅ | ❌ | ✅ | ✅ | ✅ | ✅ | ✅ | ❌ | ✅ | ✅ | ✅ | ✅ | ✅ | ✅ | ✅ | ✅ | ✅ |
| GET /invoices/\{invoice\_id} | ✅ | ✅ | ✅ | ✅ | ✅ | ❌ | ✅ | ✅ | ✅ | ✅ | ✅ | ❌ | ✅ | ✅ | ✅ | ✅ | ✅ | ✅ | ✅ | ✅ | ✅ |
| GET /contacts/\{contact\_id} | ✅ | ✅ | ✅ | ✅ | ✅ | ❌ | ✅ | ✅ | ✅ | ✅ | ✅ | ❌ | ✅ | ✅ | ✅ | ✅ | ❌ | ✅ | ✅ | ✅ | ✅ |
| GET /contacts | ✅ | ✅ | ✅ | ✅ | ✅ | ❌ | ✅ | ✅ | ✅ | ✅ | ✅ | ❌ | ✅ | ✅ | ✅ | ✅ | ❌ | ✅ | ✅ | ✅ | ✅ |
| GET /products/\{product\_id} | ✅ | ✅ | ❌ | ✅ | ✅ | ❌ | ✅ | ✅ | ✅ | ✅ | ✅ | ❌ | ✅ | ✅ | ❌ | ✅ | ❌ | ✅ | ✅ | ❌ | ✅ |
| GET /products | ✅ | ✅ | ❌ | ✅ | ✅ | ❌ | ✅ | ✅ | ✅ | ✅ | ✅ | ❌ | ✅ | ✅ | ❌ | ✅ | ❌ | ✅ | ✅ | ❌ | ✅ |
| GET /taxes | ✅ | ✅ | ❌ | ✅ | ✅ | ❌ | ✅ | ✅ | ✅ | ✅ | ✅ | ❌ | ✅ | ✅ | ❌ | ✅ | ❌ | ✅ | ✅ | ✅ | ✅ |
| POST /invoices | ❌ | ❌ | ❌ | ❌ | ❌ | ❌ | ❌ | ❌ | ❌ | ❌ | ❌ | ❌ | ❌ | ❌ | ❌ | ❌ | ❌ | ✅ | ✅ | ✅ | ❌ |
| GET /taxes/\{tax\_id} | ✅ | ✅ | ❌ | ✅ | ✅ | ❌ | ✅ | ✅ | ✅ | ✅ | ✅ | ❌ | ✅ | ✅ | ❌ | ✅ | ❌ | ✅ | ✅ | ✅ | ❌ |
| POST /products | ❌ | ❌ | ❌ | ❌ | ❌ | ❌ | ❌ | ❌ | ❌ | ❌ | ❌ | ❌ | ❌ | ❌ | ❌ | ❌ | ❌ | ✅ | ✅ | ❌ | ❌ |
| GET /opportunities | ✅ | ✅ | ❌ | ❌ | ❌ | ❌ | ✅ | ❌ | ❌ | ❌ | ❌ | ❌ | ✅ | ✅ | ❌ | ✅ | ❌ | ❌ | ✅ | ❌ | ❌ |
| GET /opportunities/\{opportunity\_id} | ✅ | ✅ | ❌ | ❌ | ❌ | ❌ | ✅ | ❌ | ❌ | ❌ | ❌ | ❌ | ✅ | ✅ | ❌ | ✅ | ❌ | ❌ | ✅ | ❌ | ❌ |
| POST /contacts | ❌ | ❌ | ❌ | ❌ | ❌ | ❌ | ❌ | ❌ | ❌ | ❌ | ❌ | ❌ | ❌ | ❌ | ❌ | ❌ | ❌ | ✅ | ✅ | ✅ | ❌ |
| GET /payments | ❌ | ❌ | ❌ | ✅ | ❌ | ❌ | ❌ | ❌ | ❌ | ❌ | ❌ | ❌ | ❌ | ❌ | ❌ | ❌ | ❌ | ❌ | ❌ | ❌ | ❌ |
| GET /payment-methods | ❌ | ❌ | ❌ | ✅ | ❌ | ❌ | ❌ | ❌ | ❌ | ❌ | ❌ | ❌ | ❌ | ❌ | ❌ | ❌ | ❌ | ❌ | ✅ | ❌ | ❌ |
# Evoliz
Source: https://docs.chift.eu/connectors/invoicing/evoliz
export const PATCH = () => ;
export const DELETE = () => ;
export const POST = () => ;
export const GET = () => ;
}>
Website: [evoliz.com](https://www.evoliz.com/)\
Software type: Solution as a Software (Saas)\
Geography: 🇫🇷 France
## Introduction
Evoliz enables real-time online management throughout the year and generates company accounting. Deliver the Evoliz integration your customers want in no time.
## Configure Evoliz
**Prerequisite(s)**\
No prerequisite to enable the connector.
**Process**\
Activate the connector in one click on the connector section in your Chift account.
## Test Evoliz
To test the software integration, you can create your demo account [here](https://www.evoliz.com/inscription.php).
## Connect Evoliz
To activate a connexion with Evoliz , users will have to go through the following steps.
* French article: [Help Center - Evoliz FR](https://help.chift.app/fr/articles/9023715-evoliz)
* English article: [Help Center - Evoliz EN](https://help.chift.app/en/articles/9023715-evoliz)
### Evoliz coverage
} horizontal>/contacts Live} horizontal>/contacts/\{contact\_id} Live} horizontal>/invoices Live} horizontal>/invoices/\{invoice\_id} Live} horizontal>/contacts Live} horizontal>/invoices Live} horizontal>/products Live} horizontal>/taxes/\{tax\_id} Live} horizontal>/taxes Live} horizontal>/products Live} horizontal>/products/\{product\_id} Live} horizontal>/opportunities On request} horizontal>/opportunities/\{opportunity\_id} On request} horizontal>/payments On request} horizontal>/payment-methods On request
# Factomos
Source: https://docs.chift.eu/connectors/invoicing/factomos
export const PATCH = () => ;
export const DELETE = () => ;
export const POST = () => ;
export const GET = () => ;
}>
Website: [factomos.com](https://factomos.com/)\
Software type: Solution as a Software (Saas)\
Geography: 🇫🇷 France
## Introduction
Factomos is a cloud-based solution designed to help businesses manage billing and invoicing operations. The platform enables organizations to create quotes and invoices and link them with banking services to streamline financial activities. Deliver the Factomos integration your customers want in no time.
## Configure Factomos
**Prerequisite(s)**
* You need an Oauth 2 application to enable the connector.
* Activate the Factomos integration on the Chift platform.
**Process**
Ask Chift to encode the partner key or request for a dedicated Oauth2 application.
## Test Factomos
To test the software integration, you can create your demo account [here](https://www.factomos.com/en-gb).
## Connect Factomos
To activate a connexion with Factomos, users will have to go through the following steps.
* French article: [Help Center - Factomos FR](https://help.chift.app/fr/articles/9952969-factomos)
* English article: [Help Center - Factomos EN](https://help.chift.app/en/articles/9952969-factomos)
### Factomos coverage
} horizontal>/contacts Live} horizontal>/contacts/\{contact\_id} Live} horizontal>/opportunities Live} horizontal>/opportunities/\{opportunity\_id} Live} horizontal>/invoices/\{invoice\_id} Live} horizontal>/invoices Live} horizontal>/products/\{product\_id} Live} horizontal>/products Live} horizontal>/taxes/\{tax\_id} Live} horizontal>/taxes Live} horizontal>/invoices On request} horizontal>/products On request} horizontal>/contacts On request} horizontal>/payments On request} horizontal>/payment-methods On request
# HubSpot
Source: https://docs.chift.eu/connectors/invoicing/hubspot
export const PATCH = () => ;
export const DELETE = () => ;
export const POST = () => ;
export const GET = () => ;
} />
# Introduction
HubSpot is a CRM platform with all the software, integrations, and resources you need to connect marketing, sales, content management, and customer service.
## Setup
In order to activate the Hubspot connector you will have to:
* Create an app on Hubspot
* Submit your app for review
* Activate the Hubspot integration on the Chift platform
### Create an app on Hubspot Developer Center
1. Log in to [Hubspot](https://developers.hubspot.com/)
2. Click on ` Create app`.
3. Enter a unique name and fill [https://chift.app/oauth2/redirect](https://chift.app/oauth2/redirect) in the field `Redirect URLs`
4. Click on `Create app`
5. Keep safe your `Client ID`, `Client Secret` because you won't be able to see it again.
6. You will need the `Client ID` and `Client Secret` below

### Activate the Hubspot integration on the Chift platform
1. With the `Client ID` and `Client Secret` that you have generated in the previous steps, you can enable the Hubspot connector by going to 'Connectors' tab
2. Open the 'Connectors' tabs
3. Activate the Hubspot integration and click on "View connector"
4. Enter the `Client ID` and `Client Secret` that you have obtained in the previous steps and save.

## Limitations
* Invoices are not present. They are represented as 'opportunities' in Hubspot.
### Hubspot coverage
} horizontal>/contacts Live} horizontal>/contacts/\{contact\_id} Live} horizontal>/invoices/\{invoice\_id} Live} horizontal>/invoices Live} horizontal>/taxes/\{tax\_id} Live} horizontal>/taxes Live} horizontal>/products/\{product\_id} Live} horizontal>/products Live} horizontal>/opportunities Live} horizontal>/opportunities/\{opportunity\_id} Live} horizontal>/invoices On request} horizontal>/products On request} horizontal>/contacts On request} horizontal>/payments On request} horizontal>/payment-methods On request
# Odoo Invoicing
Source: https://docs.chift.eu/connectors/invoicing/odoo-invoicing
export const PATCH = () => ;
export const DELETE = () => ;
export const POST = () => ;
export const GET = () => ;
}>
Website: [odoo.com](https://www.odoo.com/)\
Software type: Solution as a Software (Saas)\
Geography: 🌍 Worldwide
## Introduction
Odoo Invoicing is a cloud-based invoicing software that simplifies the creation, management, and tracking of invoices for businesses of all sizes. It features automated invoice generation and payment tracking. Odoo Invoicing is designed to streamline the billing process, reduce administrative workload, and improve cash flow management.
## Configure Odoo
**Prerequisite(s)**\
No prerequisite to enable the connector.
**Process**\
Activate the connector in one click on the connector section in your Chift account.
## Test Odoo
To test the software integration, you can create your demo account [here](https://www.odoo.com/fr_FR/trial). (You need to get a free trial on the plan named “Personnalisé” to benefit from the API.)
## Connect Odoo
To activate a connexion with Odoo, users will have to go through the following steps.
* French article: [Help Center - Odoo FR](https://help.chift.app/fr/articles/9023772-odoo-facturation)
* English article: [Help Center - Odoo EN](https://help.chift.app/en/articles/9023772-odoo-invoicing)
## Limitations & Exceptions
* You need the CRM app to be installed to acces your opportunities/leads.
* You can connect only one company per consumer (one company = one consumer)
* We support all Odoo versions as of 13.0
### Odoo Invoicing coverage
} horizontal>/journals Live} horizontal>/taxes Live} horizontal>/contacts Live} horizontal>/contacts/\{contact\_id} Live} horizontal>/taxes/\{tax\_id} Live} horizontal>/opportunities/\{opportunity\_id} Live} horizontal>/opportunities Live} horizontal>/products Live} horizontal>/products/\{product\_id} Live} horizontal>/invoices Live} horizontal>/invoices/\{invoice\_id} Live} horizontal>/folders Live} horizontal>/invoices On request} horizontal>/products On request} horizontal>/contacts On request} horizontal>/payments On request} horizontal>/payment-methods On request
# Invoicing connectors overview
Source: https://docs.chift.eu/connectors/invoicing/overview
| Connector | Geography | Partner Approval | Status |
| ---------------------------- | ------------------------------------------ | ---------------- | ------ |
| Axonaut | 🇫🇷 (FR) | ❌ No | ✅ Live |
| Boondmanager | 🇫🇷 (FR) | ❌ No | ✅ Live |
| Chargebee | 🌎 Worldwide | ❌ No | ✅ Live |
| Evoliz | 🇫🇷 (FR) | ❌ No | ✅ Live |
| Factomos | 🇫🇷 (FR) | ✅ Yes | ✅ Live |
| Fatture in Cloud | 🇮🇹 (IT) | ✅ Yes | ✅ Live |
| Fuga | 🇧🇪 (BE), 🇱🇺 (LU), 🇳🇱 (NL) | ✅ Yes | ✅ Live |
| Harvest | 🇫🇷 (FR), 🇬🇧 (UK) | ✅ Yes | ✅ Live |
| Hubspot | 🇪🇺 Europe | ✅ Yes | ✅ Live |
| Odoo Invoicing | 🇧🇪 (BE), 🇨🇭 (CH), 🇫🇷 (FR), 🇱🇺 (LU) | ❌ No | ✅ Live |
| Paypal | 🌎 Worldwide | ❌ No | ✅ Live |
| Qonto | 🇪🇺 Europe | ✅ Yes | ✅ Live |
| Quickbooks | 🌎 Worldwide | ✅ Yes | ✅ Live |
| Sage 100 Gestion Commerciale | 🇪🇺 Europe | ❌ No | ✅ Live |
| Sellsy | 🇫🇷 (FR) | ✅ Yes | ✅ Live |
| TeamLeader | 🇫🇷 (FR) | ✅ Yes | ✅ Live |
| Vos Factures | 🇫🇷 (FR) | ❌ No | ✅ Live |
| Zoho One | 🇪🇺 Europe | ✅ Yes | ✅ Live |
# Paypal
Source: https://docs.chift.eu/connectors/invoicing/paypal
export const PATCH = () => ;
export const DELETE = () => ;
export const POST = () => ;
export const GET = () => ;
}>
Website: [paypal.com](https://www.paypal.com/)\
Software type: Solution as a Software (Saas)\
Geography: 🌍 Worldwide
## Introduction
Paypal is an online financial service that enables you to pay for items using a secure internet account. You simply add your bank account, credit card or debit card details and whenever you pay using PayPal, you can choose which of your cards or accounts it pays with. Deliver the Paypal integration your customers want in no time.
## Configure Paypal
**Prerequisite(s)**\
No prerequisite to enable the connector.
**Process**\
Activate the connector in one click on the connector section in your Chift account.
## Test Paypal
To test the software integration, you can create your demo account [here](https://developer.paypal.com/tools/sandbox/accounts).
## Connect Paypal
To activate a connexion with Paypal, users will have to go through the following steps.
* French article: [Help Center - Paypal FR](https://help.chift.app/fr/articles/9546270-paypal)
* English article: [Help Center - Paypal EN](https://help.chift.app/en/articles/9546270-paypal)
### Paypal coverage
} horizontal>/invoices Live} horizontal>/invoices/\{invoice\_id} Live} horizontal>/invoices On request} horizontal>/taxes On request} horizontal>/taxes/\{tax\_id} On request} horizontal>/products On request} horizontal>/products On request} horizontal>/products/\{product\_id} On request} horizontal>/opportunities On request} horizontal>/opportunities/\{opportunity\_id} On request} horizontal>/contacts On request} horizontal>/contacts On request} horizontal>/contacts/\{contact\_id} On request} horizontal>/payments On request} horizontal>/payment-methods On request
# Qonto
Source: https://docs.chift.eu/connectors/invoicing/qonto
export const PATCH = () => ;
export const DELETE = () => ;
export const POST = () => ;
export const GET = () => ;
}>
Website: [qonto.com](https://qonto.com/fr)\
Software type: Solution as a Software (Saas)\
Geography: 🇪🇺 Europe
## Introduction
Qonto is a European business finance solution. It offers banking, financing, bookkeeping and spend management solutions to SMEs and Freelancers.
## Configure Qonto
**Prerequisite(s)**
* Register account on the [Qonto Developer Portal](https://developers.qonto.com/)
* Obtain a Client ID, secret, staging token from Qonto. **The connector requires an Oauth2** authentication, which needs to be configured by Qonto.
* Approval from Qonto is needed before going live (Production environment).
* Activate the Qonto integration on the Chift platform.
**Process**
**I. Obtain Sandbox Credentials (Client ID, Secret, Staging Token)**
To access Qonto's sandbox environment and test the integration with Chift, follow the steps below:
1. **Create an App on the Qonto Developer Portal**
* Go to the [Qonto Developer Portal](https://developers.qonto.com/).
* Sign up and create a new application to obtain your access credentials.
* This will give you the necessary credentials to authenticate with the Sandbox environment.
2. **Select the Integration Type**
* Choose the option: **"Connect your customers Qonto accounts to your platform."**
3. **Fill in Application Details**
* Upload your **logo**
* Enter the **application name**
* Add the **redirect URI**: `https://chift.app/oauth2/redirect`
4. **Select the Required Scopes**\
To ensure the Chift connector functions properly, request the following scopes:
| **Scope** | **Purpose** |
| :----------------------- | :------------------------------------ |
| `organization.read` | Access basic organization information |
| `client.read` | View existing customers |
| `client.write` | Create new customers |
| `client_invoices.read` | Access customer invoices |
| `client_invoices.write` | Create customer invoices |
| `supplier_invoice.read` | Access supplier invoices |
| `supplier_invoice.write` | Create supplier invoices *(optional)* |
5. **Get Your Sandbox Credentials**\
Once the app is created, Qonto will automatically generate and display your sandbox credentials:
* `client_id`
* `client_secret`
* `x-qonto-staging-token`
**II. Obtain Production Credentials**
> **Important:** You must first complete the sandbox setup before requesting production credentials.
1. **Request Production Access in the Developer Portal**
* In your Qonto app dashboard, switch to the **Production** tab.
* Click **“Release my app”** to begin the production access request.
2. **Reconfirm App Information**\
You will need to re-enter your application details:
* Logo
* Application name
* Redirect URI: `https://chift.app/oauth2/redirect`
3. **Approval Process by Qonto**\
Qonto will reach out to validate your application and understand your integration use case. This step is required before production access is granted.
4. **Receive Production Credentials**\
After approval, Qonto will send you a document containing your production credentials. This file will include:
* `client_id`
* `client_secret`
* `x-qonto-staging-token` *(if your request was initially made in the sandbox)*
Ensure the **redirect URIs** listed in their response exactly match the ones submitted in your app configuration.
## Connect Qonto
To activate a connexion with Qonto, users will have to go through the following steps.
* French article: [Help Center - Qonto FR](https://help.chift.app/fr/articles/9516388-qonto)
* English article: [Help Center - Qonto EN](https://help.chift.app/en/articles/9516388-qonto)
## Limitations & Exceptions
* Qonto does not really support the notion of suppliers.
### Qonto coverage
} horizontal>/contacts Live} horizontal>/contacts/\{contact\_id} Live} horizontal>/contacts Live} horizontal>/invoices Live} horizontal>/invoices/\{invoice\_id} Live} horizontal>/invoices Live} horizontal>/taxes/\{tax\_id} Live} horizontal>/taxes Live} horizontal>/upload-document Live} horizontal>/products On request} horizontal>/products On request} horizontal>/products/\{product\_id} On request} horizontal>/opportunities On request} horizontal>/opportunities/\{opportunity\_id} On request} horizontal>/payments On request} horizontal>/payment-methods On request
# Quickbooks
Source: https://docs.chift.eu/connectors/invoicing/quickbooks
export const PATCH = () => ;
export const DELETE = () => ;
export const POST = () => ;
export const GET = () => ;
}>
Website: [quickbooks.com](https://quickbooks.intuit.com/eu/)
Software type: Solution as a Software (Saas)
Geography: 🇪🇺Europe
## Introduction
QuickBooks allows you to keep track of financial functions like income and expenses, employee expenses and inventory in real-time and fulfill tax obligations hassle-free. Deliver the Quickbooks integration your customers want in no time.
## Configure Quickbooks
**Prerequisite(s)**
* Create an app on Quickbook
* Submit your app for approval (this step is only required if you want your app to be publicly available)
* Activate the Quickbooks integration on the Chift platform
**Process**
1. Create an account - [here](https://quickbooks.intuit.com/ca/free-trial/)
2. Create your APP in Quickbooks in the developer’s portal following these guidelines:
* 1. Log in to [Quickbooks](https://developer.intuit.com/app/developer/myapps)
* 2. Click on `CREATE AN APP`
* 3. Select `com.intuit.quickbooks.accounting` scope
* 4. Enter a unique name and fill [https://chift.app/oauth2/redirect](https://chift.app/oauth2/redirect) in the field `Redirection URLs`
* 5. Select all permissions
* 6. Click on `SAVE CHANGES`
* 7. Keep safe your `Client ID`, `Client Secret` because you won't be able to see it again.
* 8. You will need the `Client ID` and `Client Secret` afterwards

## Test Quickbooks
To test the software integration, a free account can be created on Quickbooks - [here](https://quickbooks.intuit.com/ca/free-trial/)
## Connect Quickbooks
To activate a connexion with Quickbooks, users will have to go through the following steps.
* French article: [Help Center - Quickbooks FR](https://help.chift.app/fr/articles/9023775-quickbooks)
* English article: [Help Center - Quickbooks EN](https://help.chift.app/en/articles/9023775-quickbooks)
## Limitations & Exceptions
* You can only connect to one of your companies per consumer (one consumer = one company)
* Draft invoices are not available
* Opportunities/deals are not present
### Quickbooks coverage
} horizontal>/contacts/\{contact\_id} Live} horizontal>/contacts Live} horizontal>/taxes Live} horizontal>/taxes/\{tax\_id} Live} horizontal>/products Live} horizontal>/products/\{product\_id} Live} horizontal>/invoices/\{invoice\_id} Live} horizontal>/invoices Live} horizontal>/invoices On request} horizontal>/products On request} horizontal>/opportunities On request} horizontal>/opportunities/\{opportunity\_id} On request} horizontal>/contacts On request} horizontal>/payments On request} horizontal>/payment-methods On request
# Sage 100 Gestion Commerciale
Source: https://docs.chift.eu/connectors/invoicing/sage100
export const PATCH = () => ;
export const DELETE = () => ;
export const POST = () => ;
export const GET = () => ;
}>
Website: [sage100.com](https://www.sage.com/fr-be/produits/sage-100/)\
Software type: On-premise (local agent to be installed)\
Geography: 🇫🇷 France\
Connector Status: Live
## Introduction
Sage 100 is designed for mid-sized companies. It offers a wider range of features and capabilities than Sage 50, including more robust financial management, inventory management, and customer relationship management (CRM) capabilities. Deliver the Sage 100 integration your customers want in no time.
### Sage 100 Gestion Commerciale coverage
} horizontal>/contacts Live} horizontal>/contacts/\{contact\_id} Live} horizontal>/invoices/\{invoice\_id} Live} horizontal>/invoices Live} horizontal>/taxes/\{tax\_id} Live} horizontal>/taxes Live} horizontal>/products/\{product\_id} Live} horizontal>/products Live} horizontal>/invoices On request} horizontal>/products On request} horizontal>/opportunities On request} horizontal>/opportunities/\{opportunity\_id} On request} horizontal>/contacts On request} horizontal>/payments On request} horizontal>/payment-methods On request
# Sellsy
Source: https://docs.chift.eu/connectors/invoicing/sellsy
export const PATCH = () => ;
export const DELETE = () => ;
export const POST = () => ;
export const GET = () => ;
}>
Website: [sellsy.com](https://go.sellsy.com/)\
Software type: Solution as a Software (Saas)\
Geography: 🇫🇷 France
## Introduction
Sellsy is a comprehensive CRM solution. It manages every point of the sales process from prospecting to payment. Deliver the Sellsy integration your customers want in no time.
## Configure Sellsy
**Prerequisite(s)**
* Create an app on Sellsy
* Submit your app for approval (this has to be done when you want to use the Sellsy connector with your customers)
* Activate the Sellsy integration on the Chift platform
**Process**
1. Create an account - [here](https://www.sellsy.com/onboarding/quicktrial?lang=fr)
2. Create a public OAuth2 app on your demo account from this webpage (all scopes)
1. Log in to [Sellsy](https://www.sellsy.fr/developer/api-v2)
2. Click on `Create API access` in the 'API V2' tab
3. Select `Public`
4. Enter a unique name and fill [https://chift.app/oauth2/redirect](https://chift.app/oauth2/redirect) in the field `Redirection URLs`
5. Select all permissions
6. Click on `Save`
7. Keep safe your `Client ID`, `Client Secret` because you won't be able to see it again.
8. You will need the `Client ID` and `Client Secret` to encode these logins in your Chift App -> Connectors
## Test Sellsy
To test the software integration, you can create your demo account [here](https://www.sellsy.com/onboarding/quicktrial).
## Connect Sellsy
To activate a connexion with Sellsy, users will have to go through the following steps.
* French article: [Help Center - Sellsy FR](https://help.chift.app/fr/articles/9023779-sellsy)
* English article: [Help Center - Sellsy EN](https://help.chift.app/en/articles/9023779-sellsy)
## Limitations & Exceptions
* Invoices of type `supplier_refund` and `supplier_invoice` are not present.
### Sellsy coverage
} horizontal>/payment-methods Live} horizontal>/contacts Live} horizontal>/invoices Live} horizontal>/products Live} horizontal>/invoices Live} horizontal>/invoices/\{invoice\_id} Live} horizontal>/contacts/\{contact\_id} Live} horizontal>/contacts Live} horizontal>/products Live} horizontal>/products/\{product\_id} Live} horizontal>/taxes/\{tax\_id} Live} horizontal>/taxes Live} horizontal>/opportunities Live} horizontal>/opportunities/\{opportunity\_id} Live} horizontal>/payments On request
# Teamleader
Source: https://docs.chift.eu/connectors/invoicing/teamleader
export const PATCH = () => ;
export const DELETE = () => ;
export const POST = () => ;
export const GET = () => ;
}>
Website: [teamleader.eu](https://www.teamleader.eu/)\
Software type: Solution as a Software (Saas)\
Geography: 🇪🇺Europe
## Introduction
Teamleader removes the daily hassle of running a business. It lets you sell, bill and organise work in one place. It provides a perfect overview of ongoing sales opportunities, projects and payments, and a deep insight into how your business is really performing. Deliver the Teamleader integration your customers want in no time.
## Configure Teamleader:
**Prerequisite(s)**
* Create an app on Teamleader (and obtain a Client ID & secret)
* Submit your app for approval (this has to be done when you want to use the Teamleader connector with your customers)
* Activate the Teamleader integration on the Chift platform
**Process**
1. Create an account [here](https://signup.focus.teamleader.eu/?country=BE\&lang=fr)
2. Create an OAuth2 app on your demo account by following these guidelines (application must be approved by Teamleader)
1. Log in to [Teamleader](https://marketplace.focus.teamleader.eu/be/en/build/integrations)
2. Click on `CREATE NEW INTEGRATION`
3. Select `Public`
4. Enter a unique name and fill [https://chift.app/oauth2/redirect](https://chift.app/oauth2/redirect) in the field `Redirection URLs`
5. Select the relevant permissions (see picture bellow)
6. Click on `SAVE CHANGES`
7. Keep safe your `Client ID`, `Client Secret` because you won't be able to see it again.
8. You will need the `Client ID` and `Client Secret` afterwards

## Test Teamleader
To test the software integration, you can create your demo account [here](https://signup.focus.teamleader.eu/?country=BE\&lang=fr).
## Connect Teamleader
To activate a connexion with Teamleader, users will have to go through the following steps.
* French article: [Help Center - Teamleader FR](https://help.chift.app/fr/articles/9023785-teamleader)
* English article: [Help Center - Teamleader EN](https://help.chift.app/en/articles/9023785-teamleader)
## Limitations & Exceptions
* Invoices of type `supplier_refund` and `supplier_invoice` are not present.
* Contacts of type `supplier` are not present and there is no difference between `prospect`and `customer`
### Teamleader coverage
} horizontal>/folders Live} horizontal>/taxes Live} horizontal>/taxes/\{tax\_id} Live} horizontal>/products/\{product\_id} Live} horizontal>/products Live} horizontal>/contacts/\{contact\_id} Live} horizontal>/contacts Live} horizontal>/invoices/\{invoice\_id} Live} horizontal>/invoices Live} horizontal>/opportunities/\{opportunity\_id} Live} horizontal>/opportunities Live} horizontal>/invoices On request} horizontal>/products On request} horizontal>/contacts On request} horizontal>/payments On request} horizontal>/payment-methods On request
# Vos Factures
Source: https://docs.chift.eu/connectors/invoicing/vosfactures
export const PATCH = () => ;
export const DELETE = () => ;
export const POST = () => ;
export const GET = () => ;
}>
Website: [vosfactures.fr](https://vosfactures.fr/)\
Software type: Solution as a Software (Saas)\
Geography: 🌍 Worldwide
## Introduction
A comprehensive online invoicing solution with features for stock, payment, and reporting management. Deliver the Vos factures integration your customers want in no time.
## Configure Vos Factures
**Prerequisite(s)**\
There are no prerequisite to enable the connector.
**Process**\
Activate the connector in one click on the connector section in your Chift account.
## Test Vos Factures
To test the software integration, you can create your demo account [here](https://app.vosfactures.fr/signup).
## Connect Vos Factures
To activate a connexion with Vos Factures, users will have to go through the following steps.
* French article: [Help Center - Fos Factures FR](https://help.chift.app/fr/articles/9215603-vosfactures)
* English article: [Help Center - Vos Factures EN](https://help.chift.app/en/articles/9215603-vosfactures)
### Vosfactures coverage
} horizontal>/invoices Live} horizontal>/invoices/\{invoice\_id} Live} horizontal>/contacts/\{contact\_id} Live} horizontal>/contacts Live} horizontal>/products/\{product\_id} Live} horizontal>/products Live} horizontal>/taxes Live} horizontal>/invoices On request} horizontal>/taxes/\{tax\_id} On request} horizontal>/products On request} horizontal>/opportunities On request} horizontal>/opportunities/\{opportunity\_id} On request} horizontal>/contacts On request} horizontal>/payments On request} horizontal>/payment-methods On request
# Zoho One
Source: https://docs.chift.eu/connectors/invoicing/zoho
export const PATCH = () => ;
export const DELETE = () => ;
export const POST = () => ;
export const GET = () => ;
}>
Website: [zoho.com](https://www.zoho.com/fr/)\
Software type: Solution as a Software (Saas)\
Geography: 🌍 Worldwide
## Introduction
Zoho CRM acts as a single repository to bring your sales, marketing, and customer support activities together, and streamline your process, policy, and people in one platform. Deliver the Zoho integration your customers want in no time.
## Configure Zoho One
**Prerequisite(s)**
* You need an Oauth 2 application to enable the connector.
* Activate the Zoho One integration on the Chift platform.
**Process**
1. Create an account [here](https://www.zoho.com/fr/signup.html)
2. Create an OAuth2 app and following this [guide](https://www.zoho.com/accounts/protocol/oauth-setup.html) (Server-based application)
## Test Zoho One
To test the software integration, you can create your demo account [here](https://www.zoho.com/fr/signup.html).
## Connect Zoho One
To activate a connexion with Zoho One, users will have to go through the following steps.
* French article: [Help Center - Zoho One FR](https://help.chift.app/fr/articles/9023798-zoho-one)
* English article: [Help Center - Zoho One EN](https://help.chift.app/en/articles/9023798-zoho-one)
### Zoho Invoice coverage
} horizontal>/folders Live} horizontal>/invoices Live} horizontal>/invoices/\{invoice\_id} Live} horizontal>/products/\{product\_id} Live} horizontal>/products Live} horizontal>/contacts/\{contact\_id} Live} horizontal>/contacts Live} horizontal>/taxes Live} horizontal>/taxes/\{tax\_id} Live} horizontal>/invoices On request} horizontal>/products On request} horizontal>/opportunities On request} horizontal>/opportunities/\{opportunity\_id} On request} horizontal>/contacts On request} horizontal>/payments On request} horizontal>/payment-methods On request
# Payments API - Coverage
Source: https://docs.chift.eu/connectors/payments/coverage
## Coverage of endpoints by connector
| Route | Payplug | Sumup | Paypal\_payments | Mollie | Gocardless | Stripe |
| ---------------------------- | ------- | ----- | ---------------- | ------ | ---------- | ------ |
| GET /balances | ✅ | ✅ | ✅ | ✅ | ✅ | ✅ |
| GET /payments | ✅ | ✅ | ✅ | ✅ | ✅ | ✅ |
| GET /payments/\{payment\_id} | ✅ | ✅ | ✅ | ✅ | ✅ | ✅ |
| GET /refunds | ✅ | ✅ | ✅ | ✅ | ✅ | ✅ |
| GET /transactions | ✅ | ❌ | ❌ | ✅ | ❌ | ❌ |
# Mollie
Source: https://docs.chift.eu/connectors/payments/mollie
export const PATCH = () => ;
export const DELETE = () => ;
export const POST = () => ;
export const GET = () => ;
}>
Website: [Mollie](https://www.mollie.com/)\
Software type: Solution as a Software (Saas)\
Geography: 🇪🇺 Europe
Documentation coming soon
### Mollie coverage
} horizontal>/payments Live} horizontal>/payments/\{payment\_id} Live} horizontal>/refunds Live} horizontal>/balances Live} horizontal>/transactions Live
# Payments connectors overview
Source: https://docs.chift.eu/connectors/payments/overview
| Connector | Geography | Partner Approval | Status |
| ---------- | ------------ | ---------------- | ----------------- |
| Mollie | 🇪🇺 Europe | ✅ Yes | 🔒 Live (Private) |
| Paypal | 🌎 Worldwide | ✅ Yes | ✅ Live |
| Stripe | 🌎 Worldwide | ✅ Yes | ✅ Live |
| GoCardLess | 🌎 Worldwide | ✅ Yes | ✅ Live |
| SumUp | 🌎 Worldwide | ✅ Yes | ✅ Live |
# Stripe
Source: https://docs.chift.eu/connectors/payments/stripe
{/* import Coverage from '/snippets/coverage/stripe.mdx' */}
}>
Website: [Stripe](https://www.stripe.com/)\
Software type: Solution as a Software (Saas)\
Geography: 🌎 Worldwide
## Introduction
Stripe is a financial infrastructure platform that helps businesses accept payments, send payouts, and manage their revenue globally. It supports a wide range of payment methods and currencies, making it easier for companies to scale and operate internationally.
## Configure Stripe
**Prerequisite(s)**\
There are no prerequisites to enable Stripe in your Chift App. However, the user must be a Stripe client in order to retrieve the necessary credentials.
## Connect Stripe
**Process**\
There are two connection methods available depending of your use of Stripe:
To activate a connection with Stripe, the user must follow the appropriate flow based on their integration type:
1. **Via an App - OAuth2 Connection is required**\
This method is used when the user is connecting through a Stripe Application.\
In this case, you must create an app in your Stripe Developer dashboard.
* **Client ID** – Found under `Settings → Extensions → Onboarding Options`.
* **Client Secret** – This is your **Secret key**, available on the Developer Dashboard.
* You must also configure the **redirect URI** correctly during app setup.
2. **Access Token via the Stripe dashboard**\
When the integration is done via website without using an app, a direct connection using an **Access Token** (i.e., Secret key) is possible. This token is generated on the Developer interface.
**Help Articles**
* French: [Help Center - Stripe - FR](**insertstripelink**)
* English: [Help Center - Stripe - EN](**insertstripelink**)
## Test Stripe
You can use **Sandbox mode** to test your integration in a safe environment.
* [How to create a Stripe Sandbox account](https://stripe.com/docs/testing)
* [How to create a Stripe Production account](https://dashboard.stripe.com/register)
## Endpoints
The following endpoints are available for Stripe integration:
1. `GET /payments`
2. `GET /payment`
3. `GET /balances`
4. `GET /refunds`
5. `GET /transactions`
# PMS API - Coverage
Source: https://docs.chift.eu/connectors/pms/coverage
## Coverage of endpoints by connector
| Route | Mews | Noovy |
| ------------------------------ | ---- | ----- |
| GET /orders | ✅ | ✅ |
| GET /invoices | ✅ | ✅ |
| GET /customers | ❌ | ✅ |
| GET /locations | ✅ | ✅ |
| GET /payments | ✅ | ✅ |
| GET /payment-methods | ✅ | ✅ |
| GET /accounting-categories | ✅ | ✅ |
| GET /closures/\{date} | ✅ | ✅ |
| GET /taxes | ❌ | ✅ |
| GET /customers/\{customer\_id} | ❌ | ❌ |
# Mews
Source: https://docs.chift.eu/connectors/pms/mews
export const PATCH = () => ;
export const DELETE = () => ;
export const POST = () => ;
export const GET = () => ;
}>
Website: [mews.com](https://www.mews.com)\
Software type: Solution as a Software (Saas)\
Geography: 🌍 Worldwide
# Introduction
Mews POS is a point-of-sale system integrated within the Mews hospitality platform, designed to streamline operations for hotels, hostels, and other accommodation providers. It offers features such as seamless billing, real-time inventory management, and guest service integration, all aimed at enhancing the guest experience.
## Configure Mews
**Prerequisite(s)**
* Obtain a client token from Mews to set up the connector.
* Activate the Mews integration on the Chift platform
**Process**
* To set up Mews and collect a client token, you must go through a partner certification process [here](https://www.mews.com/en/partnerships).
## Test Mews
To test the software integration, Mews has publicly available demo accounts. You can find them [here](https://mews-systems.gitbook.io/connector-api/guidelines/environments)
## Connect Mews
To activate a connexion with Mews, users will have to go through the following steps.
French article: [Help Center - Mews FR](https://help.chift.app/fr/articles/9576536-mews)
English article: [Help Center - Mews EN](https://help.chift.app/en/articles/9576536-mews)
### Mews coverage
} horizontal>/payments Live} horizontal>/locations Live} horizontal>/payment-methods Live} horizontal>/closures/\{date} Live} horizontal>/accounting-categories Live} horizontal>/orders Live} horizontal>/invoices Live} horizontal>/customers On request} horizontal>/customers/\{customer\_id} On request} horizontal>/taxes On request
# Noovy
Source: https://docs.chift.eu/connectors/pms/noovy
export const PATCH = () => ;
export const DELETE = () => ;
export const POST = () => ;
export const GET = () => ;
}>
Website: [noovy.com](https://noovy.com/)
Software type: Solution as a Software (Saas)\
Geography: 🌍 Worldwide
# Introduction
Noovy is a property management system (PMS) designed for small to medium-sized hospitality businesses such as independent hotels, B\&Bs, and inns. It offers a cloud-based platform that consolidates various operational functions, including reservations, guest communications, billing, housekeeping coordination, and revenue management.
The system features tools like a booking engine, channel manager, and mobile app.
## Configure Noovy
**Prerequisite(s)**
* Get the username and password combination of an account with API access to Noovy.
* Activate the Noovy integration on the Chift platform.
**Process**
* Chift can encode generic API access credentials for your account.
## Connect Noovy
To activate a connexion with Noovy, users will have to go through the following steps.
French article: [Help Center - Noovy FR](https://help.chift.app/fr/articles/????-noovy)
English article: [Help Center - Noovy EN](https://help.chift.app/en/articles/????-noovy)
### Noovy coverage
} horizontal>/orders Live} horizontal>/invoices Live} horizontal>/customers Live} horizontal>/locations Live} horizontal>/payments Live} horizontal>/payment-methods Live} horizontal>/accounting-categories Live} horizontal>/closures/\{date} Live} horizontal>/taxes Live} horizontal>/customers/\{customer\_id} On request
# PMS connectors overview
Source: https://docs.chift.eu/connectors/pms/overview
| Connector | Geography | Partner Approval | Status |
| --------- | ------------ | ---------------- | ------------------- |
| Mews | 🌎 Worldwide | ✅ Yes | 🚧 In developpement |
| Noovy | 🌎 Worldwide | ✅ Yes | 🚧 In developpement |
# Abill
Source: https://docs.chift.eu/connectors/pos/abill
export const PATCH = () => ;
export const DELETE = () => ;
export const POST = () => ;
export const GET = () => ;
}>
Website: [addictill](https://www.monetiqueetservices.com/121-caisse-android)\
Software type: Solution as a Software (Saas)\
Geography: 🇫🇷 France
## Introduction
Abill software offers a multitude of functions, whatever your trade (restaurant, bakery, retail outlet, wine merchant, bar, nightclub, grocery shop). Our cash register system is remarkably mobile for use at trade fairs, exhibitions and even markets.
## Configure Abill
**Prerequisite(s)**
* Obtain a partner ID
* Activate the abill integration on the Chift platform.
**Process**
Chift can encode a generic partner ID for your account.
## Test Abill
To test the software integration, Chift can share a demo account upon request.
## Connect Abill
To activate a connexion with Abill, users will have to go through the following steps.
* French article: [Help Center - Abill FR](https://help.chift.app/fr/articles/10101808-abill)
* English article: [Help Center - Abill EN](https://help.chift.app/en/articles/10101808-abill)
### Abill coverage
} horizontal>/products Live} horizontal>/payments Live} horizontal>/locations Live} horizontal>/payment-methods Live} horizontal>/product-categories Live} horizontal>/closures/\{date} Live} horizontal>/orders/\{order\_id} Live} horizontal>/sales Live} horizontal>/accounting-categories Live} horizontal>/orders Live} horizontal>/orders/\{order\_id} On request} horizontal>/customers On request} horizontal>/customers On request} horizontal>/customers/\{customer\_id} On request} horizontal>/objectives On request
# Addictill
Source: https://docs.chift.eu/connectors/pos/addictill
export const PATCH = () => ;
export const DELETE = () => ;
export const POST = () => ;
export const GET = () => ;
}>
Website: [addictill](https://www.addictgroup.fr/)\
Software type: Solution as a Software (Saas)\
Geography: 🇫🇷 France
## Introduction
Addictill, developed by Addict group, is a French point-of-sale (POS) software tailored for the retail and hospitality sectors. It offers tools for managing sales, inventory, and customer relationships, with a focus on ease of use and seamless integration. The software helps businesses streamline operations and enhance customer service.
## Configure Addictill
**Prerequisite(s)**
* Obtain a partner ID
* Activate the Addictill integration on the Chift platform.
**Process**\
Chift can encode a generic partner ID for your account.
## Test Addictill
To test the software integration, Chift can share a demo account upon request.
## Connect Addictill
To activate a connexion with Addictill, users will have to go through the following steps.
* French article: [Help Center - Addictill FR](https://help.chift.app/fr/articles/9054828-addictill)
* English article: [Help Center - Addictill EN](https://help.chift.app/en/articles/9054828-addictill)
### Addictill coverage
} horizontal>/locations Live} horizontal>/payment-methods Live} horizontal>/product-categories Live} horizontal>/closures/\{date} Live} horizontal>/orders/\{order\_id} Live} horizontal>/sales Live} horizontal>/accounting-categories Live} horizontal>/orders Live} horizontal>/products Live} horizontal>/payments Live} horizontal>/orders/\{order\_id} On request} horizontal>/customers On request} horizontal>/customers On request} horizontal>/customers/\{customer\_id} On request} horizontal>/objectives On request
# Apitic
Source: https://docs.chift.eu/connectors/pos/apitic
export const PATCH = () => ;
export const DELETE = () => ;
export const POST = () => ;
export const GET = () => ;
}>
Website: [Apitic](https://www.apitic.com//)
Software type: Software as a Service (Saas)
Geography: 🇫🇷 France
## Introduction
Apitic is a POS application for restaurants
## Configure Apitic
**Prerequisite(s)**
* Activate the Apitic integration on the Chift platform by choosing either Staging or Production environnment.
**Process**
Activation is made in one click in the Chift Back Office.
## Test Apitic
To test the software integration, Chift can share a demo account upon request.
## Connect Apitic
To activate a connexion with Apitic, users will have to go through the following steps.
* French article: [Help Center - Apitic](https://help.chift.app/FR/articles/10511026-apitic)
* English article: [Help Center - Apitic](https://help.chift.app/en/articles/10511026-apitic)
### Apitic coverage
} horizontal>/products Live} horizontal>/payments Live} horizontal>/locations Live} horizontal>/payment-methods Live} horizontal>/product-categories Live} horizontal>/closures/\{date} Live} horizontal>/orders/\{order\_id} Live} horizontal>/sales Live} horizontal>/accounting-categories Live} horizontal>/orders Live} horizontal>/orders/\{order\_id} On request} horizontal>/customers On request} horizontal>/customers On request} horizontal>/customers/\{customer\_id} On request} horizontal>/objectives On request
# BDP
Source: https://docs.chift.eu/connectors/pos/bdp
export const PATCH = () => ;
export const DELETE = () => ;
export const POST = () => ;
export const GET = () => ;
}>
Website: [BDP](https://www.bdpcenter.com/)
Software type: Solution as a Software (Saas)
Geography: 🇪🇸Spain
## Introduction
BDP Net is a POS software for restaurants that provides tools to manage all aspects of food service operations, helping owners streamline operations, increase efficiency, and drive growth.
## Configure BDP
**Prerequisite(s)**
* You must obtain an Integrator Code to be able to use the connector. This needs to be requested to BDP.
**Process**\
Activate the connector in one click using the Integrator Code on the connector section in your Chift account.
## Test BDP
To test the software integration, you can contact BDP's support team for a sandbox environment. Chift can also share its own demo account for client tests.
## Connect Test
To activate a connexion with BDP, users will have to go through the following steps. Note that this activation often involves the resellor or IT partner of the end-users.
* English article: [Help Center - BDP EN](https://help.chift.app/en/articles/11183671-bdp)
### BDP coverage
} horizontal>/orders Live} horizontal>/orders/\{order\_id} Live} horizontal>/locations Live} horizontal>/payments Live} horizontal>/sales Live} horizontal>/payment-methods Live} horizontal>/customers Live} horizontal>/product-categories Live} horizontal>/products Live} horizontal>/accounting-categories Live} horizontal>/orders/\{order\_id} On request} horizontal>/customers On request} horizontal>/customers/\{customer\_id} On request} horizontal>/closures/\{date} On request} horizontal>/objectives On request
# Cashmag
Source: https://docs.chift.eu/connectors/pos/cashmag
export const PATCH = () => ;
export const DELETE = () => ;
export const POST = () => ;
export const GET = () => ;
}>
Website: [cashmag.fr](https://www.cashmag.fr/)\
Software type: Solution as a Software (Saas)\
Geography: 🇫🇷 France
## Introduction
Cashmag is a French company specializing in point-of-sale (POS) systems for the retail and hospitality industries. Their solutions offer comprehensive tools for managing sales, inventory, and customer interactions, designed to enhance operational efficiency. Cashmag is known for its robust, user-friendly systems that integrate seamlessly with various business environments.
## Configure Cashmag
**Prerequisite(s)**
* Obtain a partner ID
* Activate the Cashmag integration on the Chift platform.
**Process**\
Chift can encode a generic partner ID for your account.
## Test Cashmag
To test the software integration, Chift can share a demo account upon request.
## Connect Cashmag
To activate a connexion with Cashmag , users will have to go through the following steps.
* French article: [Help Center - Cashmag FR](https://intercom.help/chift/fr/articles/9055390-cashmag)
* English article: [Help Center - Cashmag EN](https://intercom.help/chift/en/articles/9055390-cashmag)
### Cashmag coverage
} horizontal>/closures/\{date} Live} horizontal>/locations Live} horizontal>/orders/\{order\_id} Live} horizontal>/payment-methods Live} horizontal>/orders Live} horizontal>/sales Live} horizontal>/products Live} horizontal>/product-categories Live} horizontal>/payments Live} horizontal>/accounting-categories Live} horizontal>/orders/\{order\_id} On request} horizontal>/customers On request} horizontal>/customers On request} horizontal>/customers/\{customer\_id} On request} horizontal>/objectives On request
# Cashpad
Source: https://docs.chift.eu/connectors/pos/cashpad
export const PATCH = () => ;
export const DELETE = () => ;
export const POST = () => ;
export const GET = () => ;
}>
Website: [cashpad.io](https://www.cashpad.io/)\
Software type: Solution as a Software (Saas)\
Geography: 🇫🇷 France
## Introduction
Cashpad is a French point-of-sale (POS) software solution designed for the hospitality industry, including restaurants and cafes. It offers features for managing orders, payments, and inventory, with a focus on speed and ease of use. Cashpad is known for its ability to streamline operations and improve customer service through its intuitive interface and reliable performance.
## Configure Cashpad
**Prerequisite(s)**\
No prerequisite to enable the connector.
**Process**\
Activate the connector in one click on the connector section in your Chift account.
## Test Cashpad
To test the software integration, Chift is unaware of a way to get a test account from Cashpad.
If you need to test Cashpad specifically, we advise you to identify a beta tester in your clients that is willing to allow you to use the client’s Cashpad account for you to conduct some tests.
## Connect Cashpad
To activate a connexion with Cashpad, users will have to go through the following steps.
* French article: [Help Center - Cashpad FR](https://help.chift.app/fr/articles/9005405-cashpad)
* English article: [Help Center - Cashpad EN](https://help.chift.app/en/articles/9005405-cashpad)
## Limitations & Exceptions
* You can retrieve orders on a maximum period of 3 days as the Cashpad API is too slow to retrieve more orders
> This results in a 400 HTTP ERROR - "The difference in days must be smaller than 3 for Cashpad"
* You can only retrieve closed orders
> Requesting open orders will return an empty list
### Cashpad coverage
} horizontal>/closures/\{date} Live} horizontal>/locations Live} horizontal>/orders/\{order\_id} Live} horizontal>/payment-methods Live} horizontal>/orders Live} horizontal>/sales Live} horizontal>/products Live} horizontal>/product-categories Live} horizontal>/payments Live} horizontal>/accounting-categories Live} horizontal>/orders/\{order\_id} On request} horizontal>/customers On request} horizontal>/customers On request} horizontal>/customers/\{customer\_id} On request} horizontal>/objectives On request
# Clyo Systems
Source: https://docs.chift.eu/connectors/pos/clyosystems
export const PATCH = () => ;
export const DELETE = () => ;
export const POST = () => ;
export const GET = () => ;
}>
Website: [clyosystems.com](https://www.clyosystems.com/)\
Software type: On-premise (local agent to be installed)\
Geography: 🇫🇷 France
## Introduction
Clyo Systems is a French company that provides point-of-sale (POS) software solutions specifically for the hospitality industry, including restaurants, bars, and hotels. Their software offers features for managing orders, payments, and inventory, with a focus on enhancing operational efficiency and improving customer service. Clyo Systems is recognized for its adaptable and reliable solutions that cater to the unique needs of hospitality businesses.
## Configure Clyo Systems
**Prerequisite(s)**\
No prerequisite to enable the connector.
**Process**\
Activate the connector in one click on the connector section in your Chift account.
## Test Clyo Systems
To test the software integration, Chift can share a demo account upon request.
## Connect Clyo Systems
To activate a connexion with Clyo Systems, users will have to go through the following steps.
* French article: [Help Center - Clyo Systems FR](https://help.chift.app/fr/articles/9000297-clyo-systems)
* English article: [Help Center - Clyo Systems EN](https://help.chift.app/en/articles/9000297-clyo-systems)
## Limitations & Exceptions
* You can only retrieve closed orders
> Requesting open orders will return an empty list
* One consumer can be linked to one or multiple location
### Clyo Systems coverage
} horizontal>/closures/\{date} Live} horizontal>/locations Live} horizontal>/orders/\{order\_id} Live} horizontal>/payment-methods Live} horizontal>/orders Live} horizontal>/sales Live} horizontal>/products Live} horizontal>/product-categories Live} horizontal>/payments Live} horizontal>/accounting-categories Live} horizontal>/orders/\{order\_id} On request} horizontal>/customers On request} horizontal>/customers On request} horizontal>/customers/\{customer\_id} On request} horizontal>/objectives On request
# Connectill
Source: https://docs.chift.eu/connectors/pos/connectill
export const PATCH = () => ;
export const DELETE = () => ;
export const POST = () => ;
export const GET = () => ;
}>
Website: [connectill.com](https://www.connectill.com/fr/)\
Software type: Solution as a Software (Saas)\
Geography: 🇫🇷 France
## Introduction
ConnectIl is a POS (point of sale) tool that allows users to manage and process transactions in real-time. With ConnectiIl, users can accept and process payments from multiple payment methods, manage inventory and orders, and generate reports to help them analyze their business operations. It is a flexible and user-friendly tool that can help businesses of all sizes streamline their sales and payment processes.
## Configure Connectill
**Prerequisite(s)**
* Obtain a partner ID
* Activate the Connectill integration on the Chift platform.
**Process**\
Chift can encode a generic partner ID for your account.
## Test Connectill
To test the software integration, Chift can share a demo account upon request.
## Connect Connectill
To activate a connexion with Connectill, users will have to go through the following steps.
* French article: [Help Center - Connectill FR](https://intercom.help/chift/fr/articles/9055437-connectill)
* English article: [Help Center - Connectill EN](https://intercom.help/chift/en/articles/9055437-connectill)
### Connectill coverage
} horizontal>/closures/\{date} Live} horizontal>/locations Live} horizontal>/orders/\{order\_id} Live} horizontal>/payment-methods Live} horizontal>/orders Live} horizontal>/sales Live} horizontal>/products Live} horizontal>/product-categories Live} horizontal>/payments Live} horizontal>/accounting-categories Live} horizontal>/orders/\{order\_id} On request} horizontal>/customers On request} horizontal>/customers On request} horizontal>/customers/\{customer\_id} On request} horizontal>/objectives On request
# POS API - Coverage
Source: https://docs.chift.eu/connectors/pos/coverage
## Coverage of endpoints by connector
| Route | Popina | Hiboutik | Zettle | Cashpad | Odoo\_pos | Fulleapps | Lightspeed | Zelty | Jalia | Square | Cashmag | Trivec | Apitic | Restomax | Innovorder | Clyosystems | Addictill | Tiller | Abill | Planity | Connectill | Hellocash | Laddition | Bdp | Tactilpad | Synapsy | Lastapp | Leo2 |
| ------------------------------ | ------ | -------- | ------ | ------- | --------- | --------- | ---------- | ----- | ----- | ------ | ------- | ------ | ------ | -------- | ---------- | ----------- | --------- | ------ | ----- | ------- | ---------- | --------- | --------- | --- | --------- | ------- | ------- | ---- |
| GET /orders | ✅ | ✅ | ✅ | ✅ | ✅ | ✅ | ✅ | ✅ | ✅ | ✅ | ✅ | ✅ | ✅ | ✅ | ✅ | ✅ | ✅ | ✅ | ✅ | ✅ | ✅ | ✅ | ✅ | ✅ | ✅ | ✅ | ✅ | ✅ |
| GET /locations | ✅ | ✅ | ✅ | ✅ | ✅ | ✅ | ✅ | ✅ | ✅ | ✅ | ✅ | ✅ | ✅ | ✅ | ✅ | ✅ | ✅ | ✅ | ✅ | ✅ | ✅ | ✅ | ✅ | ✅ | ✅ | ✅ | ✅ | ✅ |
| GET /payments | ✅ | ✅ | ✅ | ✅ | ✅ | ✅ | ✅ | ❌ | ✅ | ✅ | ✅ | ✅ | ✅ | ✅ | ✅ | ✅ | ✅ | ✅ | ✅ | ✅ | ✅ | ✅ | ✅ | ✅ | ✅ | ✅ | ✅ | ✅ |
| GET /sales | ✅ | ✅ | ✅ | ✅ | ✅ | ✅ | ✅ | ✅ | ✅ | ✅ | ✅ | ✅ | ✅ | ✅ | ✅ | ✅ | ✅ | ✅ | ✅ | ✅ | ✅ | ✅ | ✅ | ✅ | ✅ | ✅ | ✅ | ✅ |
| GET /payment-methods | ✅ | ✅ | ✅ | ✅ | ✅ | ✅ | ✅ | ✅ | ✅ | ✅ | ✅ | ✅ | ✅ | ✅ | ✅ | ✅ | ✅ | ✅ | ✅ | ✅ | ✅ | ✅ | ✅ | ✅ | ✅ | ❌ | ✅ | ✅ |
| GET /product-categories | ✅ | ✅ | ✅ | ✅ | ✅ | ✅ | ✅ | ✅ | ✅ | ✅ | ✅ | ✅ | ✅ | ✅ | ✅ | ✅ | ✅ | ✅ | ✅ | ✅ | ✅ | ✅ | ✅ | ✅ | ✅ | ❌ | ✅ | ✅ |
| GET /products | ✅ | ✅ | ✅ | ✅ | ✅ | ✅ | ✅ | ✅ | ✅ | ✅ | ✅ | ✅ | ✅ | ✅ | ✅ | ✅ | ✅ | ✅ | ✅ | ✅ | ✅ | ✅ | ✅ | ✅ | ✅ | ✅ | ✅ | ✅ |
| GET /accounting-categories | ✅ | ✅ | ✅ | ✅ | ✅ | ✅ | ✅ | ✅ | ✅ | ✅ | ✅ | ✅ | ✅ | ✅ | ✅ | ✅ | ✅ | ✅ | ✅ | ✅ | ✅ | ✅ | ✅ | ✅ | ✅ | ❌ | ✅ | ✅ |
| GET /closures/\{date} | ✅ | ✅ | ✅ | ✅ | ✅ | ✅ | ✅ | ✅ | ✅ | ✅ | ✅ | ✅ | ✅ | ✅ | ✅ | ✅ | ✅ | ✅ | ✅ | ✅ | ✅ | ✅ | ✅ | ❌ | ✅ | ✅ | ✅ | ✅ |
| GET /orders/\{order\_id} | ✅ | ✅ | ✅ | ✅ | ✅ | ✅ | ✅ | ✅ | ✅ | ✅ | ✅ | ✅ | ✅ | ✅ | ✅ | ✅ | ✅ | ✅ | ✅ | ✅ | ✅ | ✅ | ✅ | ✅ | ✅ | ✅ | ✅ | ❌ |
| PATCH /orders/\{order\_id} | ❌ | ❌ | ❌ | ❌ | ❌ | ❌ | ❌ | ✅ | ❌ | ❌ | ❌ | ❌ | ❌ | ❌ | ❌ | ❌ | ❌ | ❌ | ❌ | ❌ | ❌ | ❌ | ❌ | ❌ | ❌ | ❌ | ❌ | ❌ |
| GET /customers | ❌ | ❌ | ❌ | ❌ | ❌ | ❌ | ❌ | ❌ | ❌ | ❌ | ❌ | ❌ | ❌ | ✅ | ❌ | ❌ | ❌ | ❌ | ❌ | ❌ | ❌ | ✅ | ❌ | ✅ | ❌ | ✅ | ❌ | ❌ |
| POST /customers | ❌ | ❌ | ❌ | ❌ | ❌ | ❌ | ❌ | ❌ | ❌ | ❌ | ❌ | ❌ | ❌ | ❌ | ❌ | ❌ | ❌ | ❌ | ❌ | ❌ | ❌ | ❌ | ❌ | ❌ | ❌ | ❌ | ❌ | ❌ |
| GET /customers/\{customer\_id} | ❌ | ❌ | ❌ | ❌ | ❌ | ❌ | ❌ | ❌ | ❌ | ❌ | ❌ | ❌ | ❌ | ❌ | ❌ | ❌ | ❌ | ❌ | ❌ | ❌ | ❌ | ❌ | ❌ | ❌ | ❌ | ❌ | ❌ | ❌ |
| GET /objectives | ❌ | ❌ | ❌ | ❌ | ❌ | ❌ | ❌ | ❌ | ❌ | ❌ | ❌ | ❌ | ❌ | ❌ | ❌ | ❌ | ❌ | ❌ | ❌ | ❌ | ❌ | ✅ | ❌ | ❌ | ❌ | ✅ | ❌ | ❌ |
# Fülle
Source: https://docs.chift.eu/connectors/pos/fulleapps
export const PATCH = () => ;
export const DELETE = () => ;
export const POST = () => ;
export const GET = () => ;
}>
Website: [fülle.com](https://fulleapps.com/)\
Software type: Solution as a Software (Saas)\
Geography: 🇫🇷 France
## Introduction
Fülle helps retailers to digitalise their points of sale by offering them an entire ecosystem of applications designed and developed to launch, manage and grow their business. Deliver the Fülle integration your customers want in no time.
## Configure Fülle
**Prerequisite(s)**
* Obtain a partner ID
* Activate the Fülle integration on the Chift platform.
**Process**\
Chift can encode a generic partner ID for your account.
## Test Fülle
To test the software integration, Chift can share a demo account upon request.
## Connect Fülle
To activate a connexion with Fülle, users will have to go through the following steps.
* French article: [Help Center - Fülle FR](https://intercom.help/chift/fr/articles/8985011-fulle)
* English article: [Help Center - Fülle EN](https://intercom.help/chift/en/articles/8985011-fulle)
## Limitations & Exceptions
* You can only retrieve orders for a period of 7 days
* Open orders can be retrieved and will have a NULL value on the closing\_date
### Fulleapps coverage
} horizontal>/closures/\{date} Live} horizontal>/locations Live} horizontal>/orders/\{order\_id} Live} horizontal>/payment-methods Live} horizontal>/orders Live} horizontal>/sales Live} horizontal>/products Live} horizontal>/product-categories Live} horizontal>/payments Live} horizontal>/accounting-categories Live} horizontal>/orders/\{order\_id} On request} horizontal>/customers On request} horizontal>/customers On request} horizontal>/customers/\{customer\_id} On request} horizontal>/objectives On request
# helloCash
Source: https://docs.chift.eu/connectors/pos/hellocash
export const PATCH = () => ;
export const DELETE = () => ;
export const POST = () => ;
export const GET = () => ;
}>
Website: [helloCash.fr](https://hellocash.fr/)\
Software type: Solution as a Software (Saas)\
Geography: 🇫🇷 France
## Introduction
HelloCash is an application which serves as a complete retail POS system. The application runs directly in a browser without installation. Deliver the Hellocash integration your customers want in no time.
## Configure helloCash
**Prerequisite(s)**\
No prerequisite to enable the connector.
**Process**\
Activate the connector in one click on the connector section in your Chift account.
## Test helloCash
To test the software integration, a sandbox can be created for free [here](https://myhellocash.com/)
## Connect helloCash
To activate a connexion with helloCash, users will have to go through the following steps.
* French article: [Help Center - helloCash FR](https://help.chift.app/fr/articles/9023719-hellocash)
* English article: [Help Center - helloCash EN](https://help.chift.app/en/articles/9023719-hellocash)
## Limitations & Exceptions
* You can only retrieve closed orders
> Requesting open orders will return an empty list
### HelloCash coverage
} horizontal>/orders Live} horizontal>/orders/\{order\_id} Live} horizontal>/locations Live} horizontal>/payments Live} horizontal>/sales Live} horizontal>/payment-methods Live} horizontal>/customers Live} horizontal>/product-categories Live} horizontal>/products Live} horizontal>/accounting-categories Live} horizontal>/closures/\{date} Live} horizontal>/objectives Live} horizontal>/orders/\{order\_id} On request} horizontal>/customers On request} horizontal>/customers/\{customer\_id} On request
# Hiboutik
Source: https://docs.chift.eu/connectors/pos/hiboutik
export const PATCH = () => ;
export const DELETE = () => ;
export const POST = () => ;
export const GET = () => ;
}>
Website: [hiboutik.com](https://www.hiboutik.com)\
Software type: Solution as a Software (Saas)\
Geography: 🇫🇷 France
## Introduction
An online point of sale management software that helps businesses manage their sales operations, inventory, customers, and finances. Deliver the Hiboutik integration your customers want in no time.
## Configure Hiboutik
**Prerequisite(s)**\
No prerequisite to enable the connector.
**Process**\
Activate the connector in one click on the connector section in your Chift account.
## Test Hiboutik
To test the software integration, a free account can be created on Hiboutik - [here](https://www.hiboutik.com/fr/creez_un_compte/)
## Connect Hiboutik
To activate a connexion with Hiboutik, users will have to go through the following steps.
* French article: [Help Center - Hiboutik FR](https://help.chift.app/fr/articles/9023733-hiboutik)
* English article: [Help Center - Hiboutik EN](https://help.chift.app/en/articles/9023733-hiboutik)
### Hiboutik coverage
} horizontal>/closures/\{date} Live} horizontal>/locations Live} horizontal>/orders/\{order\_id} Live} horizontal>/payment-methods Live} horizontal>/orders Live} horizontal>/sales Live} horizontal>/products Live} horizontal>/product-categories Live} horizontal>/payments Live} horizontal>/accounting-categories Live} horizontal>/orders/\{order\_id} On request} horizontal>/customers On request} horizontal>/customers On request} horizontal>/customers/\{customer\_id} On request} horizontal>/objectives On request
# Innovorder
Source: https://docs.chift.eu/connectors/pos/innovorder
export const PATCH = () => ;
export const DELETE = () => ;
export const POST = () => ;
export const GET = () => ;
}>
Website: [innovorder.com](https://www.innovorder.com/)
Software type: Solution as a Software (Saas)
Geography: 🇫🇷 France
## Introduction
Innovorder is a French software designed for the hospitality industry, including restaurants, cafes, and food service providers. It offers an all-in-one platform that includes point-of-sale (POS) systems, online ordering, inventory management, and customer engagement tools.
## Configure Innovorder
**Prerequisite(s)**\
No prerequisite to enable the connector.
**Process**\
Activate the connector in one click on the connector section in your Chift account.
## Test Innovorder
To test the software integration, Chift can share a demo account upon request.
## Connect Innovorder
To activate a connexion with Innovorder, users will have to go through the following steps.
* French article: [Help Center - Innovorder FR](https://help.chift.app/fr/articles/9023747-innovorder)
* English article: [Help Center - Innovorder EN](https://help.chift.app/en/articles/9023747-innovorder)
## Limitations & Exceptions
* You can only retrieve closed orders
> Requesting open orders will return an empty list
### Innovorder coverage
} horizontal>/closures/\{date} Live} horizontal>/locations Live} horizontal>/orders/\{order\_id} Live} horizontal>/payment-methods Live} horizontal>/orders Live} horizontal>/sales Live} horizontal>/products Live} horizontal>/product-categories Live} horizontal>/payments Live} horizontal>/accounting-categories Live} horizontal>/orders/\{order\_id} On request} horizontal>/customers On request} horizontal>/customers On request} horizontal>/customers/\{customer\_id} On request} horizontal>/objectives On request
# Jalia JDC
Source: https://docs.chift.eu/connectors/pos/jalia
export const PATCH = () => ;
export const DELETE = () => ;
export const POST = () => ;
export const GET = () => ;
}>
Website: [jalia.com](https://www.jdc.fr/caisse-enregistreuse)\
Software type: Solution as a Software (Saas)\
Geography: 🇫🇷 France
## Introduction
Jalia is a cash register system for iPad, developed by JDC SA, offering over 300 features and connected accessories. The software is particularly well-suited for environments like restaurants, bars, and retail stores, providing a comprehensive and adaptable solution for managing sales, inventory, and customer interactions.
## Configure Jalia
**Prerequisite(s)**\
No prerequisite to enable the connector.
**Process**\
Activate the connector in one click on the connector section in your Chift account.
## Test Jalia
To test the software integration, Chift can share a demo account upon request.
## Connect Jalia
To activate a connexion with Jalia, users will have to go through the following steps.
* French article: [Help Center - Jalia FR](https://help.chift.app/fr/articles/9023752-jalia)
* English article: [Help Center - Jalia EN](https://help.chift.app/en/articles/9023752-jalia)
### Jalia - JDC coverage
} horizontal>/closures/\{date} Live} horizontal>/locations Live} horizontal>/orders/\{order\_id} Live} horizontal>/payment-methods Live} horizontal>/orders Live} horizontal>/sales Live} horizontal>/payments Live} horizontal>/accounting-categories Live} horizontal>/product-categories Live} horizontal>/products Live} horizontal>/orders/\{order\_id} On request} horizontal>/customers On request} horizontal>/customers On request} horizontal>/customers/\{customer\_id} On request} horizontal>/objectives On request
# L'Addition
Source: https://docs.chift.eu/connectors/pos/laddition
export const PATCH = () => ;
export const DELETE = () => ;
export const POST = () => ;
export const GET = () => ;
}>
Website: [l'addition.com](https://www.laddition.com)
Software type: Solution as a Software (Saas)
Geography: 🇫🇷 France
## Introduction
L'Addition is a French point-of-sale (POS) software specifically designed for the hospitality industry, including restaurants, cafes, and bars. It offers a comprehensive set of features such as order management, payment processing, table management, and real-time sales tracking.
## Configure L’addition
**Prerequisite(s)**
* Obtain a bearer token from l’addition
* Activate the L’addition integration on the Chift platform.
**Process**\
Chift can encode a generic partner ID in your APP.
## Test L’addition
To test the software integration, Chift can share a demo account upon request.
## Connect L’addition
To activate a connexion with L’addition, users will have to go through the following steps.
* French article: [Help Center - L'addition FR](https://intercom.help/chift/fr/articles/9273061-l-addition)
* English article - [Help Center - L'addition EN](https://help.chift.app/en/articles/9273061-l-addition)
### L'addition coverage
} horizontal>/products Live} horizontal>/payments Live} horizontal>/locations Live} horizontal>/payment-methods Live} horizontal>/product-categories Live} horizontal>/closures/\{date} Live} horizontal>/orders/\{order\_id} Live} horizontal>/sales Live} horizontal>/accounting-categories Live} horizontal>/orders Live} horizontal>/orders/\{order\_id} On request} horizontal>/customers On request} horizontal>/customers On request} horizontal>/customers/\{customer\_id} On request} horizontal>/objectives On request
# LastApp
Source: https://docs.chift.eu/connectors/pos/lastapp
export const PATCH = () => ;
export const DELETE = () => ;
export const POST = () => ;
export const GET = () => ;
}>
Website: [last.app](https://www.last.app/)
Software type: Solution as a Software (Saas)
Geography: 🇪🇸Spain
## Introduction
Last.app is a restaurant POS software that helps restaurateurs fully manage their restaurants. A technological product, integrations with other platforms being one of our pillars, allowing us to unify and automate work.
## Configure Last.APP
**Prerequisite(s)**\
No prerequisite to enable the connector.
**Process**\
Activate the connector in one click on the connector section in your Chift account.
## Test Last.APP
To test the software integration, you can contact LastApp’s support team here for a sandbox environment requesting some specific access to Last.app’s support team. Chift can also share its own demo account for client tests.
## Connect Last.APP
To activate a connexion with Last.APP, users will have to go through the following steps.
* French article: [Help Center - LastAPP FR](https://help.chift.app/fr/articles/9546002-last-app)
* English article: [Help Center - LastAPP EN](https://help.chift.app/en/articles/9546002-last-app)
### Limitations & Exceptions
* Last.app has a quite strict rate limit (up to 100 each 10 minutes). Because of this, you can expect request with big date ranges to fail if the amount of data to load is too big. To help limit the amount of data loaded, we encourage you to enable the post connection configuration.
### Last.app coverage
} horizontal>/products Live} horizontal>/payments Live} horizontal>/locations Live} horizontal>/payment-methods Live} horizontal>/product-categories Live} horizontal>/closures/\{date} Live} horizontal>/orders/\{order\_id} Live} horizontal>/sales Live} horizontal>/accounting-categories Live} horizontal>/orders Live} horizontal>/orders/\{order\_id} On request} horizontal>/customers On request} horizontal>/customers On request} horizontal>/customers/\{customer\_id} On request} horizontal>/objectives On request
# Leo2
Source: https://docs.chift.eu/connectors/pos/leo2
export const PATCH = () => ;
export const DELETE = () => ;
export const POST = () => ;
export const GET = () => ;
}>
Website: [leo2.fr](https://www.leo2.fr/)
Software type: Solution as a Software (Saas)\
Geography: 🇫🇷 France
## Introduction
Leo2 is a modern, touch-screen POS (point of sale) for shops and restaurants, offering real-time transaction management, inventory and customer data. 100% customisable, every feature can be adjusted and modulated to suit the business perfectly. An ultra-intuitive interface means you can make changes to the software quickly. Complete checkout solution with over 250 integrated functions (loyalty, note sharing, click & collect, stock management, QR Code, order terminal, robot, etc.). LEO2 can handle a large production run, a rush in a large establishment.
## Configure Leo2
**Prerequisite(s)**\
No prerequisite to enable the connector.
**Process**\
Activate the connector in one click on the connector section in your Chift account.
## Test Leo2
Chift can share its own demo account for client tests.
## Connect Leo2
To activate a connexion with Leo2, users will have to go through the following steps.
* French article: [Help Center - Leo2 FR](https://help.chift.app/fr/articles/10843705-leo2)
* English article: [Help Center - Leo2 EN](https://help.chift.app/en/articles/10843705-leo2)
### Leo2 coverage
} horizontal>/orders Live} horizontal>/locations Live} horizontal>/payments Live} horizontal>/sales Live} horizontal>/payment-methods Live} horizontal>/product-categories Live} horizontal>/products Live} horizontal>/accounting-categories Live} horizontal>/closures/\{date} Live} horizontal>/orders/\{order\_id} On request} horizontal>/orders/\{order\_id} On request} horizontal>/customers On request} horizontal>/customers On request} horizontal>/customers/\{customer\_id} On request} horizontal>/objectives On request
# Lightspeed
Source: https://docs.chift.eu/connectors/pos/lightspeed
export const PATCH = () => ;
export const DELETE = () => ;
export const POST = () => ;
export const GET = () => ;
}>
Website: [lightspeed.fr](https://www.lightspeedhq.fr)\
Software type: Solution as a Software (Saas)\
Geography: 🇫🇷 France
## Introduction
Lightspeed is a cloud-based Point of Sale (POS) and e-commerce platform for retail businesses. It provides a range of features to manage sales, inventory, customers, and employees. The platform integrates with a variety of payment processors and also provides robust reporting and analytics tools. Deliver the Lightspeed integration your customers want in no time.
> ⚠️ To be able to use the Lightspeed connector through Chift, explicit approval of Lightspeed is needed.
## Configure LightSpeed
**Prerequisite(s)**
* ️ obtain Lightspeed’s approval to set up the connector via Chift
* ️ obtain a dedicated Client ID & Client Secret, with Oauth2 application
* Activate the LightSpeed integration on the Chift platform.
**Process**
1. You will need to request through the support team of Lightspeed to obtain a client id and client secret. Note that it's important that you use the following redirect url: **[https://chift.app/oauth2/redirect](https://chift.app/oauth2/redirect)**
2. Keep a copy of the client id and the client secret to encode them in your Chift account, when configuring the connector.
## Test LightSpeed
To test the software integration, you must ask lightspeed for a sandbox account.
## Connect LightSpeed
To activate a connexion with LightSpeed, users will have to go through the following steps.
* French article: [Help Center - LightSpeed FR](https://help.chift.app/fr/articles/9023754-lightspeed)
* English article: [Help Center - LightSpeed EN](https://help.chift.app/en/articles/9023754-lightspeed)
## Limitations & Exceptions
* You can only retrieve closed orders
> Requesting open orders will return an empty list
### Lightspeed (POS) coverage
} horizontal>/closures/\{date} Live} horizontal>/locations Live} horizontal>/orders/\{order\_id} Live} horizontal>/payment-methods Live} horizontal>/orders Live} horizontal>/sales Live} horizontal>/products Live} horizontal>/product-categories Live} horizontal>/payments Live} horizontal>/accounting-categories Live} horizontal>/orders/\{order\_id} On request} horizontal>/customers On request} horizontal>/customers On request} horizontal>/customers/\{customer\_id} On request} horizontal>/objectives On request
# Odoo POS
Source: https://docs.chift.eu/connectors/pos/odoo_pos
export const PATCH = () => ;
export const DELETE = () => ;
export const POST = () => ;
export const GET = () => ;
}>
Website: [odoo.com](https://www.odoo.com/fr_FR)\
Software type: Solution as a Software (Saas)\
Geography: 🌍 Worldwide\
Connector Status: Live
## Introduction
Odoo POS ( Odoo Point Of Sale ) is an all-in-one solution when it comes to handling your shops, restaurants, accounting, and sales. It is a comprehensible, user-friendly interface & is used in iPods, tablets, or laptops. Deliver the Odoo integration your customers want in no time.
### Odoo POS coverage
} horizontal>/products Live} horizontal>/payments Live} horizontal>/locations Live} horizontal>/payment-methods Live} horizontal>/product-categories Live} horizontal>/closures/\{date} Live} horizontal>/orders/\{order\_id} Live} horizontal>/sales Live} horizontal>/accounting-categories Live} horizontal>/orders Live} horizontal>/orders/\{order\_id} On request} horizontal>/customers On request} horizontal>/customers On request} horizontal>/customers/\{customer\_id} On request} horizontal>/objectives On request
# POS connectors overview
Source: https://docs.chift.eu/connectors/pos/overview
| Connector | Geography | Partner Approval | Status |
| --------------- | ------------------------------------------ | ---------------- | ------------------- |
| Abill | 🇫🇷 (FR) | ✅ Yes | ✅ Live |
| Addictil | 🇫🇷 (FR) | ✅ Yes | ✅ Live |
| Apitic | 🇫🇷 (FR) | ✅ Yes | ✅ Live |
| BDP | 🇪🇸 (ES) | ✅ Live | ✅ Live |
| Cashmag | 🇫🇷 (FR) | ✅ Yes | ✅ Live |
| Cashpad | 🇫🇷 (FR) | ❌ No | ✅ Live |
| Clyo Systems | 🇫🇷 (FR) | ❌ No | ✅ Live |
| Connectill | 🇫🇷 (FR) | ✅ Yes | ✅ Live |
| Fülleapps | 🇫🇷 (FR) | ✅ Yes | ✅ Live |
| HelloCash | 🇫🇷 (FR) | ❌ No | ✅ Live |
| Hiboutik | 🇫🇷 (FR) | ❌ No | ✅ Live |
| Innovorder | 🇫🇷 (FR) | ❌ No | ✅ Live |
| Jalia JDC | 🇫🇷 (FR) | ❌ No | ✅ Live |
| L’addition | 🇫🇷 (FR) | ✅ Yes | ✅ Live |
| LastApp | 🇪🇸 (ES) | ❌ No | ✅ Live |
| Lightspeed | 🇫🇷 (FR) | ✅ Yes | 🔒 Live (Private) |
| Odoo POS | 🇧🇪 (BE), 🇨🇭 (CH), 🇫🇷 (FR), 🇱🇺 (LU) | ❌ No | ✅ Live |
| Popina | 🇫🇷 (FR) | ❌ No | ✅ Live |
| Restomax | 🇧🇪 (BE), 🇫🇷 (FR) | ❌ No | ✅ Live |
| Simphony POS | 🌎 Worldwide | | 🚧 In developpement |
| Square | 🌎 Worldwide | ✅ Yes | ✅ Live |
| Synapsy | 🇫🇷 (FR) | ❌ No | ✅ Live |
| Tiller | 🇪🇸 (ES), 🇫🇷 (FR) | ✅ Yes | ✅ Live |
| Trivec | 🇪🇺 Europe | ✅ Yes | ✅ Live |
| Zelty | 🇫🇷 (FR) | ❌ No | ✅ Live |
| Zettle (Paypal) | 🌎 Worldwide | ✅ Yes | ✅ Live |
# Popina
Source: https://docs.chift.eu/connectors/pos/popina
export const PATCH = () => ;
export const DELETE = () => ;
export const POST = () => ;
export const GET = () => ;
}>
Website: [popia.com](https://www.popina.com/)\
Software type: Solution as a Software (Saas)\
Geography: 🇫🇷 France
## Introduction
Popina is a robust and versatile POS software solution designed to streamline sales operations, inventory management, customer management, and financial management for businesses of all sizes. Deliver the Popina integration your customers want in no time.
## Configure Popina
**Prerequisite(s)**\
No prerequisite to enable the connector. However Popina wants to be informed of Chift’s client activation of the connector with Popina.
**Process**\
Activate the connector in one click on the connector section in your Chift account and notify a member of Chift (Customer or Technical teams).
## Test Popina
To test the software integration, Chift can share a demo account upon request.
## Connect Popina
To activate a connexion with Popina, users will have to go through the following steps.
* French article: [Help Center - Popina FR](https://help.chift.app/fr/articles/9023774-popina)
* English article: [Help Center - Popina EN](https://help.chift.app/en/articles/9023774-popina)
## Limitations & Exceptions
* You can only retrieve closed orders
> Requesting open orders will return an empty list
### Popina coverage
} horizontal>/closures/\{date} Live} horizontal>/locations Live} horizontal>/orders/\{order\_id} Live} horizontal>/payment-methods Live} horizontal>/orders Live} horizontal>/sales Live} horizontal>/products Live} horizontal>/product-categories Live} horizontal>/payments Live} horizontal>/accounting-categories Live} horizontal>/orders/\{order\_id} On request} horizontal>/customers On request} horizontal>/customers On request} horizontal>/customers/\{customer\_id} On request} horizontal>/objectives On request
# Restomax
Source: https://docs.chift.eu/connectors/pos/restomax
export const PATCH = () => ;
export const DELETE = () => ;
export const POST = () => ;
export const GET = () => ;
}>
Website: [restomax.be](https://restomax.be/en/)\
Software type: Solution as a Software (Saas)\
Geography:🇧🇪 Belgium / 🇫🇷 France
## Introduction
Restomax is a restaurant management software that provides a comprehensive suite of tools for managing various aspects of a food service operation. It is designed to help restaurant owners and managers streamline their operations, increase efficiency, and drive growth.
## Configure Restomax
**Prerequisite(s)**\
No prerequisite to enable the connector.
On activation, a language can be selected. For example, when you retrieve products, you will get them in the chosen language.
**Process**\
Activate the connector in one click on the connector section in your Chift account.
## Test Restomax
To test the software integration, Chift can share a demo account upon request.
## Connect Restomax
To activate a connexion with Restomax, users will have to go through the following steps.
* French article: [Help Center - Restomax FR](https://help.chift.app/fr/articles/11146349-restomax)
* English article: [Help Center - Restomax EN](https://help.chift.app/en/articles/11146349-restomax)
### Restomax coverage
} horizontal>/orders Live} horizontal>/orders/\{order\_id} Live} horizontal>/locations Live} horizontal>/payments Live} horizontal>/sales Live} horizontal>/payment-methods Live} horizontal>/customers Live} horizontal>/product-categories Live} horizontal>/products Live} horizontal>/accounting-categories Live} horizontal>/closures/\{date} Live} horizontal>/orders/\{order\_id} On request} horizontal>/customers On request} horizontal>/customers/\{customer\_id} On request} horizontal>/objectives On request
# Square
Source: https://docs.chift.eu/connectors/pos/square
export const PATCH = () => ;
export const DELETE = () => ;
export const POST = () => ;
export const GET = () => ;
}>
Website: [square.com](https://squareup.com/fr/fr)\
Software type: Solution as a Software (Saas)\
Geography: 🌍 Worldwide
# Introduction
Square streamlines the checkout process, allowing businesses to accept payments and manage their transactions within a single platform. It also provides real-time updates, enhancing the accuracy of inventory and financial data. Deliver the Square integration your customers want in no time.
## Configure Square
**Prerequisite(s)**
* Obtain an application ID and secret from Square (Note that in order to use the integration, you must be located in a market that is supported by Square (e.g. France))
* Activate the Square integration on the Chift platform.
**Process**
1. Follow this [documentation](https://developer.squareup.com/docs/get-started/create-account-and-application) to setup your developer account. Link to developer portal: [here](https://developer.squareup.com)
2. To activate the connector in the Back-Office you will need a ApplicationId and SecretID of your app. We describe bellow the steps to follow to set up your App's activations :
* **Sign in to the Square Developer Portal**\
Go to the Square [developer portal](https://developer.squareup.com) and sign in with your Square account.
* **Create Your Application**\
Navigate to the "Applications" page: [Applications](https://developer.squareup.com/apps) \
Click **Create your first application** (or **New Application**) and give your app a name.
* **Open Your Application**\
After creating the app, you’ll be redirected to the app settings. If not, return to the Applications page and click on the app to open it.
* **Activate the Sandbox App**\
Before enabling the connector in Chift, you must activate your Sandbox app:
* Go to the [Sandbox Test Accounts page](https://developer.squareup.com/console/en/sandbox-test-accounts)
* Click on the name of your test account
* Click the **Open in Square Dashboard** button at the top right\
This step activates your Sandbox environment in Square.
* **Configure OAuth Settings**\
In your app settings, click on **OAuth** in the left-hand menu.\
Under **Redirect URLs**, add:\
[**https://chift.app/oauth2/redirect**](https://chift.app/oauth2/redirect)\
This is the **same redirect URL** for both Sandbox and Production environments.
* **Retrieve Your Credentials**\
Still under the OAuth section, copy the following values:
* **Application ID**
* **Application Secret**\
Enter these credentials on the Square connector activation page in Chift's back office to complete the activation.\
Start by connecting the **Sandbox** app with Chift for testing, then repeat the exact same steps using the **Production** app credentials when you're ready to go live.
## Test Square
To test the software integration:
1. With your developer account, you can have a few sandbox test accounts to test out the integration.
2. Follow this [link](https://developer.squareup.com/docs/devtools/sandbox/overview) to understand how to use the test account to generate test data & test the integration
## Connect Square
To activate a connexion with Square, users will have to go through the following steps.
* French article: [Help Center - Square FR](https://intercom.help/chift/fr/articles/9023782-square)
* English article: [Help Center - Square EN](https://intercom.help/chift/en/articles/9023782-square)
### Square coverage
} horizontal>/locations Live} horizontal>/orders/\{order\_id} Live} horizontal>/payment-methods Live} horizontal>/orders Live} horizontal>/sales Live} horizontal>/products Live} horizontal>/product-categories Live} horizontal>/payments Live} horizontal>/closures/\{date} Live} horizontal>/accounting-categories Live} horizontal>/orders/\{order\_id} On request} horizontal>/customers On request} horizontal>/customers On request} horizontal>/customers/\{customer\_id} On request} horizontal>/objectives On request
# Synapsy
Source: https://docs.chift.eu/connectors/pos/synapsy
export const PATCH = () => ;
export const DELETE = () => ;
export const POST = () => ;
export const GET = () => ;
}>
Website: [synapsy.fr](https://synapsy.fr/)\
Software type: Solution as a Software (Saas)\
Geography: 🇫🇷 France
## Introduction
Synapsy offers a complete solution for cash collection and management dedicated to the food industry. In addition to cashiering, it can be used to manage the activity of your point of sale: invoicing, dashboards, and accounting. Deliver the Synapsy integration your customers want in no time.
## Configure Synapsy
**Prerequisite(s)**\
No prerequisite to enable the connector.
**Process**\
Activate the connector in one click on the connector section in your Chift account.
## Test Synapsy
To test the software integration, Chift can share a demo account upon request.
## Connect Synapsy
To activate a connexion with Synapsy, users will have to go through the following steps.
* French article: [Help Center - Synapsy FR](https://help.chift.app/fr/articles/9023783-synapsy)
* English article: [Help Center - Synapsy EN](https://help.chift.app/en/articles/9023783-synapsy)
## Limitations & Exceptions
* You can only retrieve closed orders
> Requesting open orders will return an empty list
### Synapsy coverage
} horizontal>/orders Live} horizontal>/orders/\{order\_id} Live} horizontal>/locations Live} horizontal>/payments Live} horizontal>/sales Live} horizontal>/customers Live} horizontal>/products Live} horizontal>/closures/\{date} Live} horizontal>/objectives Live} horizontal>/orders/\{order\_id} On request} horizontal>/payment-methods On request} horizontal>/customers On request} horizontal>/customers/\{customer\_id} On request} horizontal>/product-categories On request} horizontal>/accounting-categories On request
# Tactilpad
Source: https://docs.chift.eu/connectors/pos/tactilpad
export const PATCH = () => ;
export const DELETE = () => ;
export const POST = () => ;
export const GET = () => ;
}>
Website: [tactilpad.com](https://www.tactilpad.com/)\
Software type: Solution as a Software (Saas)\
Geography: 🇫🇷 France
## Introduction
TactilPad offers 360° payment solutions with its high-performance cash register software, specially designed to meet the needs of businesses. Combining simplicity, reliability, and efficiency, our solutions help you manage your sales, inventory, and payments with complete peace of mind.
## Configure Tactilpad
**Prerequisite(s)**
* Obtain a partner ID
* Activate the Tactilpad integration on the Chift platform.
**Process**\
Chift can encode a generic partner ID for your account.
## Test Tactilpad
To test the software integration, Chift can share a demo account upon request.
## Connect Tactilpad
To activate a connexion with Tactilpad , users will have to go through the following steps.
* French article: [Help Center - Tactilpad FR](https://intercom.help/chift/fr/articles/9055390-tactilpad)
* English article: [Help Center - Tactilpad EN](https://intercom.help/chift/en/articles/9055390-tactilpad)
### Tactilpad coverage
} horizontal>/products Live} horizontal>/payments Live} horizontal>/locations Live} horizontal>/payment-methods Live} horizontal>/product-categories Live} horizontal>/closures/\{date} Live} horizontal>/orders/\{order\_id} Live} horizontal>/sales Live} horizontal>/accounting-categories Live} horizontal>/orders Live} horizontal>/orders/\{order\_id} On request} horizontal>/customers On request} horizontal>/customers On request} horizontal>/customers/\{customer\_id} On request} horizontal>/objectives On request
# Tiller
Source: https://docs.chift.eu/connectors/pos/tiller
export const PATCH = () => ;
export const DELETE = () => ;
export const POST = () => ;
export const GET = () => ;
}>
Website: [tiller.com](https://www.tillersystems.com)\
Software type: Solution as a Software (Saas)\
Geography: 🇫🇷 France, 🇪🇸 Spain
# Introduction
Tiller is a point-of-sale (POS) software designed specifically for the hospitality industry, including restaurants, cafes, and bars. It offers a range of features such as order management, payment processing, inventory control, and sales analytics. The company is part of the SumUP group.
## Configure Tiller
**Prerequisite(s)**
* Obtain a client ID and secret for a sandbox account with an Oauth2 authentication application
* Obtain a provider token with an Oauth2 authentication mechanism.
* Activate the Tiller integration on the Chift platform.
**Process**\
You will have to go through this process [here](https://www.sumup.com/en-gb/partner/) to get partner keys.
## Test Tiller
To test the software integration, you will have to go through this process here to get partner keys.
## Connect Tiller
To activate a connexion with Tiller, users will have to go through the following steps.
* French article: [Help Center - Tiller FR](https://help.chift.app/fr/articles/9546962-tiller)
* English article: [Help Center - Tiller EN](https://help.chift.app/en/articles/9546962-tiller)
### Tiller coverage
} horizontal>/products Live} horizontal>/payments Live} horizontal>/locations Live} horizontal>/payment-methods Live} horizontal>/product-categories Live} horizontal>/closures/\{date} Live} horizontal>/orders/\{order\_id} Live} horizontal>/sales Live} horizontal>/accounting-categories Live} horizontal>/orders Live} horizontal>/orders/\{order\_id} On request} horizontal>/customers On request} horizontal>/customers On request} horizontal>/customers/\{customer\_id} On request} horizontal>/objectives On request
# Trivec
Source: https://docs.chift.eu/connectors/pos/trivec
export const PATCH = () => ;
export const DELETE = () => ;
export const POST = () => ;
export const GET = () => ;
}>
Website: [trivec.com](https://trivecgroup.com/)\
Software type: Solution as a Software (Saas)\
Geography: 🇪🇺Europe
# Introduction
Trivec is a renowned European supplier of cash registers and beverage ordering systems for the hospitality industry. Their solutions facilitate the payment and management of restaurants, bars, hotels and casinos. Deliver the Trivec integration your customer wants in no time.
## Configure Trivec
**Prerequisite(s)**
* ️ obtain an APP ID to configure the connector.
**Process**\
Trivec needs to be informed that you use Chift and give its approval as for each integration they need to do a manual step to setup the API. Ask Chift to introduce you to our contact.
## Test Trivec
To test the software integration, Chift can you share a sandbox account
## Connect Trivec
To activate a connexion with Trivec, users will have to go through the following steps.
* French article: [Help Center - Trivec FR](https://help.chift.app/fr/articles/9023788-trivec)
* English article: [Help Center - Trivec EN](https://help.chift.app/en/articles/9023788-trivec)
### Trivec coverage
} horizontal>/closures/\{date} Live} horizontal>/locations Live} horizontal>/orders/\{order\_id} Live} horizontal>/payment-methods Live} horizontal>/orders Live} horizontal>/sales Live} horizontal>/products Live} horizontal>/product-categories Live} horizontal>/payments Live} horizontal>/accounting-categories Live} horizontal>/orders/\{order\_id} On request} horizontal>/customers On request} horizontal>/customers On request} horizontal>/customers/\{customer\_id} On request} horizontal>/objectives On request
# Zelty
Source: https://docs.chift.eu/connectors/pos/zelty
export const PATCH = () => ;
export const DELETE = () => ;
export const POST = () => ;
export const GET = () => ;
}>
Website: [zelty.fr](https://www.zelty.fr/en)\
Software type: Solution as a Software (Saas)\
Geography: 🇫🇷 France
## Introduction
Zelty is a cash register solution designed for multi-site use and built around the iPad cash register. In addition to the cash register solution, the Zelty suite includes many other features such as online reservations, KDS screens, Click n collect, and delivery management. Deliver the Zelty integration your customers want in no time.
## Configure Zelty
**Prerequisite(s)**\
No prerequisite to enable the connector.
**Process**\
Activate the connector in one click on the connector section in your Chift account.
## Test Zelty
To test the software integration, Chift can share a demo account upon request.
## Connect Zelty
To activate a connexion with Zelty, users will have to go through the following steps.
* French article: [Help Center - Zelty FR](https://help.chift.app/fr/articles/9023796-zelty)
* English article: [Help Center - Zelty EN](https://help.chift.app/en/articles/9023796-zelty)
### Zelty coverage
} horizontal>/closures/\{date} Live} horizontal>/locations Live} horizontal>/orders/\{order\_id} Live} horizontal>/payment-methods Live} horizontal>/orders Live} horizontal>/sales Live} horizontal>/products Live} horizontal>/product-categories Live} horizontal>/accounting-categories Live} horizontal>/orders/\{order\_id} Live} horizontal>/payments On request} horizontal>/customers On request} horizontal>/customers On request} horizontal>/customers/\{customer\_id} On request} horizontal>/objectives On request
# Zettle
Source: https://docs.chift.eu/connectors/pos/zettle
export const PATCH = () => ;
export const DELETE = () => ;
export const POST = () => ;
export const GET = () => ;
}>
Website: [zettle.com](https://www.zettle.com)\
Software type: Solution as a Software (Saas)\
Geography: 🌍Worldwide
# Introduction
Zettle, a part of PayPal, is a point-of-sale (POS) system designed for small businesses, offering tools for managing payments, sales, and inventory. It features an easy-to-use card reader, mobile app, and software that allow businesses to accept various payment methods, track sales in real time, and manage their inventory efficiently.
## Configure Zettle
**Prerequisite(s)**
✔ Obtain a client ID & Client secret from Zettle to set up the connector.
Process:
* First, you need a developer account on the Developer Portal, if you don’t have it you can create it [here](https://developer.zettle.com/).
* Then, you need to create an app on the developer’s portal. You can follow this [user-guide](https://developer.zettle.com/docs/get-started/user-guides/create-app-credentials/create-credentials-partner-hosted-app) to do the process. Note that in order to use the integration, you must be located in a market that is supported by Zettle (e.g. France)
* Create a public API credentials
* the redirect URL is [https://chift.app/oauth2/redirect](https://chift.app/oauth2/redirect)
* Copy and save your client ID and secret provided
* Last, you need to encode your app credentials in the connector on Chift’s back office.
## Test Zettle
To test the software integration, as far as Chift knows, Zettle is unable to provide a sandbox account.
If you need to test Zettle specifically, Chift’s advice is to identify a beta tester in your clients that is willing to allow you to use the client’s Zettle account for you to conduct some tests.
## Connect Zettle
To activate a connexion with Zettle, users will have to go through the following steps.
French article: [Help Center - Zettle FR](https://help.chift.app/fr/articles/9023797-zettle)
English article: [Help Center - Zettle EN](https://help.chift.app/en/articles/9023797-zettle)
## Limitations & exceptions
* You can only retrieve closed orders> Requesting open orders will return an empty list
### Zettle coverage
} horizontal>/locations Live} horizontal>/orders/\{order\_id} Live} horizontal>/payment-methods Live} horizontal>/orders Live} horizontal>/sales Live} horizontal>/products Live} horizontal>/product-categories Live} horizontal>/payments Live} horizontal>/closures/\{date} Live} horizontal>/accounting-categories Live} horizontal>/orders/\{order\_id} On request} horizontal>/customers On request} horizontal>/customers On request} horizontal>/customers/\{customer\_id} On request} horizontal>/objectives On request
# Idempotency
Source: https://docs.chift.eu/developer-guides/advanced/idempotency
To prevent duplicate resource creation and depending on your use case, you can include in your POST request (such as one that creates an invoice) a unique value in the X-Chift-Client-RequestId header.
This ensures that each POST request is processed exactly once by our API.
Uniquely identifying POST requests that create new resources is particularly crucial when the response outcome is uncertain due to temporary service disruptions, such as server timeouts or network failures.
In such cases, the client application can safely retry the request without the risk of duplicate operations.\
API endpoints that guarantee a request is processed only once, regardless of how many times it is retried with the same unique identifier, are referred to as idempotent.
### How to use it?
Include in your request to Chift, the following header:
`x-chift-client-requestid: 123456`
123456 is a unique identifier that is managed at your side
### What can you expect?
You can expect a 409 error code in case you request was processed (REQUEST\_ALREADY\_PROCESSED) or currently in processing (REQUEST\_IN\_PROCESS):
E.g.
```
{
"status": "error",
"message": "Request already processed: 200",
"detail": "Request with same client request id {client_request_id} was already successfully processed",
"error_code": "REQUEST_ALREADY_PROCESSED"
}
```
```
{
"status": "error",
"message": "Request is in processing",
"detail": "Request with same client request id {client_request_id} is currently processed",
"error_code": "REQUEST_IN_PROCESS"
}
```
# null
Source: https://docs.chift.eu/developer-guides/authentication
### Summary
Chift's API is protected by a JWT Token.
You can obtain your JWT token by making use of your clientId, clientSecret and accountId that you can create for your account (see below how to get an access token).
This JWT Token can then be used in the requests linked to consumers as a BEARER token.
> An API key created in the sandbox environment will be automatically linked to consumers in the sandbox environment. Same applies for the production environment. This means you must create different api keys for each environment.
### Where can you obtain a client id and a client secret ?
1. Click on the `API Keys`menu
2. On this page, you can create a new API key. Copy and keep the `client id` and `client secret` in a safe place. This is the only time where you will be able to see the `client secret`.
3. Note that you can optionally limit the scopes of an API key to one or more consumers.
### Where can I see the GUID of my account ?
1. Click on the `API Keys`menu
2. On the top left, you can find your acccount ID
### How to obtain the JWT Token/Bearer token?
See the [Create a token](/api-reference/endpoints/general/get-access-token) endpoint that can be used to retrieve the BEARER token with client id, client secret and account id.
### How to use the JWT Token/Bearer token in the other API requests ?
Include the generated access token in the 'Authorization' header of your API requests.
> `Authorization: BEARER {accessToken}`
# Create API Key
Source: https://docs.chift.eu/developer-guides/create-api-key
API keys are required to authenticate your requests to Chift's APIs. This guide explains how to create and manage API keys for your account.
## Creating an API Key
1. Navigate to the [API Keys page](https://chift.app/api-keys)
2. Click the "Add API key" button
3. Fill in the required information:
* **Name**: A descriptive name for your API key
* **Consumer** (optional): If you want to restrict the API key to a specific consumer
4. Click "Save" to generate the key
5. Copy both your account id, the client id and client secret immediately - the secret will only be shown once. You need those to receive a BEARER token.

The API Key is only related to the environment you are using. You won't be able to use a sandbox API key for production's consumers.
The Client Secret will only be displayed once during creation. Make sure to copy and store it securely. If you lose the secret, you'll need to create a new API key.
## Consumer-Specific API Keys
When creating an API key, you can optionally scope it to a specific consumer:
1. Select a consumer from the dropdown menu during key creation
2. The API key will only be able to access data for that specific consumer
3. This provides an additional layer of security and isolation depending on your use case
Consumer-scoped API keys are useful when you want to limit access to specific customer data or when implementing customer-specific integrations.
## Managing API Keys
* View all your API keys in the API Keys list
* Delete keys that are no longer needed
* Create new keys if you need to rotate credentials
## Next Steps
With your API key created, you can:
* Integrate with our [API endpoints](/api-reference)
* Set up [webhooks](/developer-guides/webhooks) for real-time updates
* Review our [authentication guide](/developer-guides/authentication) for implementation details
# null
Source: https://docs.chift.eu/developer-guides/errors
## Introduction
This document describes how you can expect chift errors and list as well the errors that you can expect from our different APIs.
### Chift Error
A chift error is always composed of the following elements:
* status: "error"
* message: "message explaining the error"
* error\_code: "unique error code to describe the error"
* detail: "additional details explaining the error" (optional)
The errors are always returned with an HTTP error code (4XX, 5XX).
Note that the combination of the message and the error\_code is not always unique.
Example of an error message:
```json
{
"message": "The resource GET - /order is not supported by Cashpad",
"status": "error",
"error_code": "ERROR_RESOURCE_NOT_SUPPORTED"
}
```
### Specific errors
Even if it's the goal to only use generic errors whenever possible, there are use case where the raised errors are specific to the connectors. In such case, those errors are described in the related connector documentation.
### List of errors
| Error code | HTTP Status | Error Description | Used by APIs | Resoltution |
| ------------------------------------------------------------ | ----------- | ----------------------------------------------------------------------------------------------------------------------------------------------------------------------------------------------------------------------------------------------------------- | ------------ | ---------------------------------------------------------------------------------------------------------------------------------- |
| ERROR\_CHIFT\_AUTHENTICATION\_ERROR | 401 | Error with the provided Chift token or combination of clientId,clientSecret en accountId | All | |
| ERROR\_CONNECTOR\_AUTHENTICATION | 401 | Error related to the authentication to the connector (wrong credentials, ...) | All | Please check the credentials used in the connector configuration |
| ERROR\_CONNECTOR\_CONFIGURATION | 400 | Error related to the configuration of the connector not related to Chift (e.g. no license, connector not active, needs to be restarted, ...) | All | |
| ERROR\_CONFIGURATION\_SYNC | 400 | Error in the configuration of the sync | All | The sync is not correctly configured for that consumer. Make sure that it was correctly configured and activated. |
| ERROR\_NO\_ACTIVE\_CONNECTION | 400 | No active connection/integration for this API are configured | All | |
| ERROR\_CONFIGURATION\_CONNECTION | 400 | Error related to the configuration of the connection (e.g. more than one connection is active, ...) | All | |
| ERROR\_API\_RESOURCE\_NOT\_FOUND | 400 | The route that was called does not exist. Make sure that you use the routes as specified in the documentation. | All | |
| ERROR\_WEBHOOK\_NOT\_SUPPORTED | 405 | This webhook type is not supported for this integration | All | |
| ERROR\_UNKNOWN | 400 | An unknown error occurred during the call. Please contact Chift team. | All | |
| ERROR\_INVALID\_BODY | 422 | One of the input field of the body is invalid | All | |
| ERROR\_INVALID\_QUERY\_PARAMETER | 422 | One of the query parameters is invalid | All | |
| ERROR\_INVALID\_PATH\_PARAMETER | 422 | One of the path parameters is invalid | All | |
| ERROR\_INVALID\_RESPONSE | 422 | The response could not be built. Our support should be contacted. | All | |
| ERROR\_RESOURCE\_NOT\_SUPPORTED | 405 | The requested resource is not supported by this connector. | All | |
| ERROR\_TECHNICAL\_MAPPING | 400 | There is a technical error while processing the request. We are already alerted and working on this. Please contact support if needed. | All | There is a technical error. Please contact support if needed. |
| ERROR\_INTEGRATION\_INVALID | 400 | The specified integration is invalid or could not be found | Connections | |
| ERROR\_CONNECTION\_INFO\_EMPTY | 400 | A field in the connection is not filled in. | All | |
| ERROR\_ORDER\_NOT\_FOUND | 404 | The given order could not be retrieved | POS | |
| ERROR\_CUSTOMER\_NOT\_FOUND | 404 | The given customer could not be retrieved | POS | |
| ERROR\_LOCATION\_NOT\_FOUND | 404 | The given location could not be found | POS | |
| ERROR\_CONFIGURATION\_LOCALAGENT | 502 | Impossible to connect to the specified local agent (e.g. not configured, ...) | All | |
| ERROR\_GATEWAY\_TIMEOUT | 504 | Impossible to connect to a remote application (for local agent) | All | |
| ERROR\_BACKEND\_FORBIDDEN | 403 | Impossible to retrieve data due to a permission issue | All | Please authorize the access to the connector again |
| REQUEST\_ALREADY\_PROCESSED | 409 | Request with same client request id was already successfully processed | All | |
| REQUEST\_IN\_PROCESS | 409 | Request with same client request id is currently processed | All | |
| ERROR\_RATE\_LIMIT | 429 | The rate limit has been reached for this connector. Please try again later. | All | |
| ERROR\_BACKEND\_NOT\_FOUND | 504 | Impossible to connect to the specified backend (url, host, unique identifier,... might be incorrect or the backend is down) | POS | |
| ERROR\_BACKEND\_FORBIDDEN | 403 | Impossible to retrieve data due to a permission issue | POS | |
| ERROR\_INVALID\_PERIOD | 400 | The given period is not valid (based on date\_from & date\_to parameters) | POS | |
| ERROR\_INVALID\_HOST | 400 | The given host is not valid and the backend cannot be reached | POS | |
| ERROR\_INVALID\_VAT\_FORMAT | 422 | The VAT number doesn't seem to be correct. Please remove dots and whitespaces. The expected format is the following: BE0784930037 | Accounting | |
| ERROR\_INVALID\_LANGUAGE\_FORMAT | 422 | The language format is not correct. Please use the ISO 639-1 codes. | Accounting | |
| ERROR\_INVALID\_CURRENCY\_FORMAT | 422 | The currency format is not correct. Please use the ISO 4217 codes. | Accounting | |
| ERROR\_INVALID\_COUNTRY\_FORMAT | 422 | The country format is not correct. Please use the ISO 3166-1 codes. | Accounting | |
| ERROR\_INVALID\_FINANCIAL\_PERIOD\_FORMAT | 422 | The forced financial period must be 6 numbers (e.g. 02 for february and 2022 => 022022). | Accounting | |
| ERROR\_BOOKS\_FROZEN | 422 | The books are frozen in the accounting tool. | Accounting | |
| ERROR\_NO\_INVOICE\_LINE | 400 | The invoice must contain at least one invoice line. | Accounting | |
| ERROR\_ZERO\_INVOICE | 400 | You cannot create an invoice with an untaxed amount of 0. | Accounting | |
| ERROR\_ZERO\_LINE | 400 | You cannot create entries/invoices with a line equal to zero. | Accounting | |
| ERROR\_NO\_OPERATION\_LINE | 400 | The miscellaneous operation must contain at least one line. | Accounting | |
| ERROR\_INVALID\_OPERATION\_LINE\_TYPE | 400 | A line of type 'customer\_account' or 'supplier\_account' must have a 'partner\_id' filled in. | Accounting | |
| ERROR\_OPERATION\_NOT\_BALANCED | 400 | The operation is not balanced. The sum of the lines must be zero. | Accounting | |
| ERROR\_NOT\_ENOUGH\_MATCHING\_ENTRIES | 400 | Matching is only possible with at least 2 entries. | Accounting | |
| ERROR\_ANALYTIC\_ACCOUNTING\_NOT\_ACTIVE | 405 | Analytic accounting is not active on this connection. | Accounting | |
| ERROR\_ANALYTIC\_ACCOUNTING\_PLAN\_NOT\_CONFIGURED | 405 | A default analytic plan must be configured to use this endpoint. | Accounting | |
| ERROR\_ANALYTIC\_ACCOUNT\_ALREADY\_EXISTS | 400 | An analytic account already exists with the same code in the accounting system. | Accounting | |
| ERROR\_ANALYTIC\_ACCOUNT\_NOT\_FOUND | 404 | The analytic account doesn't exist in the accounting system. | Accounting | |
| ERROR\_ANALYTIC\_PLAN\_NOT\_FOUND | 404 | The analytic plan doesn't exist in the accounting system. | Accounting | |
| ERROR\_INVALID\_ANALYTIC\_DISTRIBUTION | 400 | There is an error with the analytic distribution. This error can come from an anlytic plan or account being more than once in the analytic distribution; from a percentage not being between 1 and 100 or from an analytic plan not having a 100% coverage. | Accounting | |
| ERROR\_INVALID\_ANALYTIC\_DISTRIBUTION\_ACCOUNTS | 400 | Each analytic plan in the analytic distribution of an invoice line must contain at least one analytic account. | Accounting | |
| ERROR\_INVALID\_ANALYTIC\_DISTRIBUTION\_ACCOUNTS\_PERCENTAGE | 400 | Analytic accounts of each analytic plan in the analytic distribution of an invoice line must cover 100% of the amount of the invoice line. | Accounting | |
| ERROR\_INVOICE\_AMOUNTS\_DO\_NOT\_MATCH | 400 | The amounts of the invoice are not correct. | Accounting | |
| ERROR\_LINE\_AMOUNTS\_DO\_NOT\_MATCH | 400 | The amounts in one invoice line are not correct. | Accounting | Please make sure that tax amount and tax rate are correct. If not issue is detected, please to contact Chift. |
| ERROR\_TAX\_RATE\_NOT\_CORRESPONDING | 400 | The tax rate doesn't match the tax rate linked to the tax code in the accounting system. | Accounting | Please modify the mapping of that tax rate with a vat code of the same rate |
| ERROR\_MULTIPLE\_GL\_ACCOUNTS | 400 | The entries have different receivable/payable accounts. | Accounting | |
| ERROR\_MULTIPLE\_PARTNER\_ACCOUNTS | 400 | A sale/purchase entry cannot be linked to multiple partner accounts. | Accounting | |
| ERROR\_ACCOUNT\_NUMBER\_NOT\_CONFIGURED | 400 | The account number is not configured to be used in entries. It cannot be imputed. | Accounting | |
| ERROR\_ENTRY\_HAS\_INVALID\_STATUS | 400 | The entry doesn't have the correct status to be matched. | Accounting | |
| ERROR\_ENTRY\_HAS\_NO\_ACCOUNT\_RECEIVABLE\_PAYABLE | 400 | The entry doesn't have a receivable/payable account. | Accounting | |
| ERROR\_ENTRY\_NOT\_LINKED\_TO\_PARTNER | 400 | The entry is not linked to partner mentionnend in the matching body. | Accounting | |
| ERROR\_ENTRY\_ALREADY\_RECONCILED | 400 | The entry is already reconciled in the accounting system. | Accounting | |
| ERROR\_ENTRY\_ALREADY\_PARTIALLY\_MATCHED | 400 | An entry is already partially matched with another entry in the accounting system. | Accounting | |
| ERROR\_JOURNAL\_NOT\_GOOD\_SCOPE | 400 | The journal cannot be used for this scope. | Accounting | The provided journal is not valid for the scope of the invoice. Please adapt it in your input or in your mapping (if using a sync) |
| ERROR\_JOURNAL\_NOT\_CONFIGURED | 400 | The journal is not configured for a used functionnality. | Accounting | |
| ERROR\_TAX\_CODE\_NOT\_GOOD\_SCOPE | 400 | The tax code cannot be used for this type of invoices. | Accounting | Please adapt the tax code or update the mapping (if using a sync) |
| ERROR\_MULTIPLE\_JOURNALS | 404 | Multiple journals were found. Please indicate the wanted journal in the request. | Accounting | |
| ERROR\_JOURNAL\_NOT\_FOUND\_FOR\_SCOPE | 404 | Please indicate the wanted journal in the request. No journal has been found for this scope. | Accounting | |
| ERROR\_INVOICE\_NUMBER\_ALREADY\_USED | 400 | The invoice number is already used in the accounting system. | Accounting | |
| ERROR\_INVOICE\_ALREADY\_EXISTS | 400 | The invoice already exists in the accounting system. | Accounting | |
| ERROR\_PDF\_NOT\_APPLICABLE\_TO\_DRAFT\_INVOICE | 400 | You cannot upload a PDF when creating a draft invoice. | Accounting | |
| ERROR\_TAX\_CODE\_NOT\_FOUND | 404 | The tax code doesn't exist in the accounting system. | Accounting | Please setup the tax code in the accounting system or adapt the tax code in the mapping (if using a sync) |
| ERROR\_TAX\_CODE\_NOT\_CONFIGURED | 400 | The tax code is not configured to be used with this type of invoice. | Accounting | Please set up a payable account on the tax code in the accounting system |
| ERROR\_ACCOUNT\_NUMBER\_NOT\_FOUND | 404 | The account number doesn't exist in the accounting system. | Accounting | Please create the ledger account in the accounting system |
| ERROR\_OPERATION\_NOT\_FOUND | 404 | The operation doesn't exist in the accounting system. | Accounting | |
| ERROR\_OPERATION\_NUMBER\_ALREADY\_USED | 400 | The operation number is already used in the accounting system. | Accounting | |
| ERROR\_WRONG\_ACCOUNT\_TYPE | 400 | The account cannot be used for this type of line of a miscellaneous operation. | Accounting | |
| ERROR\_BOOKYEAR\_NOT\_FOUND | 400 | The accounting system is not set up for this date. | Accounting | Create a fiscal year in the accounting system including the date of the invoice or verify why the fiscal year is not set up |
| ERROR\_PERIOD\_CLOSED | 400 | The accounting period is closed in the accounting system. | Accounting | |
| ERROR\_JOURNAL\_LOCKED | 400 | The journal is locked in the accounting system. | Accounting | Please unlock the journal in the accounting system |
| ERROR\_INVALID\_FIELD\_FORMAT\_BANK\_ACCOUNT | 422 | The bank account/iban is not valid. | Accounting | |
| ERROR\_INVALID\_FIELD\_FORMAT\_ANALYTIC\_ACCOUNT | 422 | The code of the analytic account doesn't follow the format of the corresponding accounting system. | Accounting | |
| ERROR\_INVALID\_FIELD\_FORMAT\_ANALYTIC\_PLAN | 422 | The format of the field 'analytic\_plan' doesn't follow the format of the corresponding accounting system. | Accounting | |
| ERROR\_INVALID\_FIELD\_FORMAT\_JOURNAL\_ID | 422 | The format of the field 'journal\_id' doesn't follow the format of the corresponding accounting system. | Accounting | |
| ERROR\_INVALID\_FIELD\_FORMAT\_TAX\_CODE | 422 | The format of the field 'tax\_code' doesn't follow the format of the corresponding accounting system. | Accounting | |
| ERROR\_INVALID\_FIELD\_FORMAT\_ENTRIES | 422 | The format of the IDs entries doesn't follow the format of the corresponding accounting system. | Accounting | |
| ERROR\_JOURNAL\_ALREADY\_OPEN | 400 | The entry couldn't be created in the accounting system. The journal is already open. | Accounting | |
| ERROR\_INVALID\_FIELD\_FORMAT\_ID | 422 | The format of the ID doesn't follow the format of the corresponding accounting system. | Accounting | |
| ERROR\_INVALID\_FIELD\_FORMAT\_PARTNER\_ID | 422 | The format of the field 'partner\_id' doesn't seem to be correct for the corresponding accounting system. | Accounting | |
| ERROR\_INVALID\_FIELD\_FORMAT\_COMPANY\_ID | 422 | The format of the field 'company\_id' doesn't seem to be correct for the corresponding accounting system. | Accounting | |
| ERROR\_MISSING\_FIRST\_NAME | 400 | The field 'first\_name' must be filled in when the client/supplier is an individual. | Accounting | |
| ERROR\_MISSING\_LAST\_NAME | 400 | The field 'last\_name' must be filled in when the client/supplier is an individual. | Accounting | |
| ERROR\_PARTNER\_ALREADY\_EXISTS | 400 | A client/supplier already exists with the same code/id in the accounting system. | Accounting | |
| ERROR\_JOURNAL\_NOT\_FOUND | 404 | The journal doesn't exist in the accounting system. | Accounting | |
| ERROR\_PARTNER\_NOT\_FOUND | 404 | The client/supplier doesn't exist in the accounting system. | Accounting | Make sure that the client/supplier is correctly created in the accounting system |
| ERROR\_ENTRY\_NOT\_FOUND | 404 | The entry doesn't exist in the accounting system. | Accounting | |
| ERROR\_DUPLICATE\_ENTRIES | 400 | Entries cannot contain duplicates. | Accounting | |
| ERROR\_INVOICE\_NOT\_FOUND | 404 | The invoice doesn't exist in the accounting system. | Accounting | |
| ERROR\_MISCELLANEOUS\_OPERATION\_NOT\_FOUND | 404 | The miscellaneous operation doesn't exist in the accounting system. | Accounting | |
| ERROR\_LANGUAGE\_NOT\_FOUND | 404 | The specified language doesn't exist or is not active in the accounting system. | Accounting | |
| ERROR\_CURRENCY\_NOT\_FOUND | 404 | The currency doesn't exist or is not active in the accounting system. | Accounting | |
| ERROR\_NEGATIVE\_INVOICE | 400 | An invoice must be positive. The invoice type determines the sign of the invoice. | Accounting | |
| ERROR\_ACCOUNT\_NUMBER\_NOT\_ACTIVE | 400 | An account number used in an invoice line is not active. | Accounting | Activate the ledger account in the accounting system |
| ERROR\_PARTNER\_NOT\_ACTIVE | 400 | The used client/supplier is not active. | Accounting | |
| ERROR\_ACCOUNT\_NUMBER\_NOT\_GOOD\_SCOPE | 400 | The account number cannot be used in this scope. | Accounting | |
| ERROR\_INVALID\_INVOICE\_DATE | 400 | The period containing the invoice date is already locked. | Accounting | |
| ERROR\_WRONG\_ENTRY\_TYPE | 400 | You can only create entries in a sale or purchase journal. | Accounting | |
| ERROR\_MAX\_DIFFERENCE\_MONTHS | 400 | You can retrieve maximum 3 months of data at once. The difference between 'date\_from' and 'date\_to' is at maximum 3 months. | Accounting | |
| ERROR\_ATTACHMENT\_ALREADY\_EXISTS | 400 | An attachment already exists for this invoice. | Accounting | |
| ERROR\_INVALID\_BASE64\_STRING | 400 | The document is not a valid base64 string representing a PDF. | Accounting | |
| ERROR\_INVALID\_DUE\_DATE | 422 | The due date must be after the invoice date. | Accounting | |
| ERROR\_CHARGE\_PRODUCT\_ACCOUNT\_MISSING | 422 | Please provide at least one charge/product account. | Accounting | |
| ERROR\_COLLECTIVE\_ACCOUNT\_MISSING | 422 | Please provide a client/supplier collective account. | Accounting | |
| ERROR\_PARTNER\_ACCOUNT\_MISSING | 422 | Please provide a client/supplier account in the partner\_id field. | Accounting | |
| ERROR\_ANALYTIC\_ACCOUNT\_ARCHIVED | 400 | The analytic account is archived. | Accounting | |
| ERROR\_INVALID\_FIELD\_FORMAT\_INVOICE\_NUMBER | 422 | The format of the invoice number doesn't follow the format of the corresponding accounting system (e.g. too long) | Accounting | |
| ERROR\_INVALID\_FIELD\_FORMAT\_OPERATION\_NUMBER | 422 | The format of the operation number doesn't follow the format of the corresponding accounting system (e.g. too long) | Accounting | |
| ERROR\_INVALID\_FIELD\_FORMAT\_NUMBER | 422 | The format of the number doesn't follow the format of the corresponding accounting system (e.g. too long) | Accounting | |
| ERROR\_ANALYTIC\_ACCOUNT\_NUMBER\_PLAN\_NOT\_ACTIVE | 400 | The account number cannot be used (is not configured) with an analytic account of the specified analytic plan | Accounting | |
| ERROR\_LEDGER\_ACCOUNT\_ALREADY\_EXISTS | 400 | A ledger account already exists with the same number in the accounting system. | Accounting | |
| ERROR\_NUMBER\_ALREADY\_USED | 400 | The number of the invoice is already used in the accounting system. | Accounting | |
| ERROR\_COUNTERPART\_ACCOUNT\_NUMBER\_NOT\_GOOD\_SCOPE | 400 | The counterpart account number cannot be used in this scope. | Accounting | |
| ERROR\_COUNTERPART\_ACCOUNT\_NOT\_FOUND | 400 | The counterpart account doesn't exist in the accounting system. | Accounting | |
| ERROR\_COLLECTIVE\_ACCOUNT\_NOT\_CONFIGURED | 400 | The collective account is not set up for customer/supplier. | Accounting | |
| ERROR\_JOURNAL\_ALREADY\_EXISTS | 400 | A journal already exists with the same code in the accounting system. | Accounting | |
| ERROR\_COUNTERPART\_ACCOUNT\_ALREADY\_USED | 400 | The counterpart account is already linked to another journal. | Accounting | |
| ERROR\_LEDGER\_ACCOUNT\_ALREADY\_EXISTS | 400 | A ledger account already exists with the same number in the accounting system. | Accounting | |
| ERROR\_COUNTERPART\_ACCOUNT\_NOT\_ALLOWED | 400 | You can only specify a counterpart account on Bank and Cash journals. | Accounting | |
| ERROR\_MISSING\_COUNTERPART\_ACCOUNT | 400 | You must specify a counterpart account on Bank and Cash journals. | Accounting | |
| ERROR\_PERIOD\_BLOCKED | 400 | The accounting period is currently blocked due a revision. | Accounting | |
| ERROR\_PDF\_MUST\_BE\_UNIQUE | 400 | The pdf already exists in the accounting system. | Accounting | The invoice that you are trying to create already exists in the target tool. It must be unique. |
| ERROR\_ENTRY\_ITEMS | 400 | You need to push at least 2 entry items. | Accounting | |
| ERROR\_BANK\_ACCOUNT\_NUMBER\_ALREADY\_EXISTS | 400 | The bank account number already exists in the accounting system. | Accounting | |
| ERROR\_CUSTOMER\_NOT\_FOUND | 404 | The customer doesn't exist. | eCommerce | |
| ERROR\_PRODUCT\_NOT\_FOUND | 404 | The product doesn't exist. | eCommerce | |
| ERROR\_VARIANT\_NOT\_FOUND | 404 | The variant doesn't exist. | eCommerce | |
| ERROR\_LOCATION\_NOT\_FOUND | 404 | The location doesn't exist. | eCommerce | |
| ERROR\_ORDER\_NOT\_FOUND | 404 | The order doesn't exist. | eCommerce | |
| ERROR\_SHOPIFY\_CUSTOMER\_DATA\_ACCESS | 403 | The Shopify app is not configured to have access to customer data. See Shopify documentation. | eCommerce | |
| ERROR\_PHONE\_INVALID | 422 | The phone number doesnt seem to be valid. The number must begin with the country code. | eCommerce | |
| ERROR\_PHONE\_ALREADY\_USED | 422 | The phone number is already used by another client. | eCommerce | |
| ERROR\_INVALID\_FIELD\_FORMAT | 422 | The date format of the query parameter 'Date From' or 'Date To' is not valid. The expected format is the following: YYYY-MM-DD. | eCommerce | |
| ERROR\_NO\_ORDER\_LINE | 400 | New orders must have at least one line. | eCommerce | |
| ERROR\_INVALID\_CURRENCY\_FORMAT | 422 | The currency format is not correct. Please use the ISO 4217 codes. | eCommerce | Please use the ISO 4217 codes. |
| ERROR\_INVALID\_COUNTRY\_FORMAT | 422 | The country format is not correct. Please use the ISO 3166-1 codes. | eCommerce | |
| ERROR\_OPPORTUNITY\_NOT\_FOUND | 404 | The opportunity doesn't exist. | Invoicing | |
| ERROR\_PRODUCT\_NOT\_FOUND | 404 | The product doesn't exist. | Invoicing | |
| ERROR\_TAX\_NOT\_FOUND | 404 | The tax doesn't exist. | Invoicing | |
| ERROR\_INVOICE\_NOT\_FOUND | 404 | The invoice doesn't exist. | Invoicing | |
| ERROR\_OPPORTUNITY\_NOT\_CREATED | 400 | The opportunity was not created. | Invoicing | |
| ERROR\_PRODUCT\_NOT\_CREATED | 400 | The product was not created. | Invoicing | |
| ERROR\_TAX\_NOT\_CREATED | 400 | The tax was not created. | Invoicing | |
| ERROR\_INVOICE\_NOT\_CREATED | 400 | The invoice was not created. | Invoicing | |
# null
Source: https://docs.chift.eu/developer-guides/implementation/connections
### Summary
This document gives you more information about connections. It explains the lifecycle of a connection from the creation until the possible deletion.
#### What are connections ?
Connections make the link between consumers and the software. Each consumer can have multiple connections but only one connection per integration (Odoo, Sage, ...) A connection is represented by a `name`, a `link to a specific software` and `link to a specific Chift API`. A connection will for example represent the credentials to connect to an Odoo instance for a specific consumer.
> The API can be used to retrieve the list of active connections for consumers and as well to get a public URL that consumers can use to configure their connections. Optionally for specific integrations you can as well pass the credentials required when creating the connection allowing you to create connections for your customers; this can be useful for specific use cases.
#### How do you manage connections ?
There are two ways of managing connections:
1. You can manage connections through Chift's platform. This is easy to help you onboarding your clients or when you are in an exploration phase. Through the platform, you can create a consumer and you can access the link that can be used to create a connection. The connection will be created behind the scene for you. Once created, you will see on the consumer the connected software and you will be able to use our unified APIs.
2. You can manage connections through our API. This is the preferred way to build a fully embedded experience in your software. The API gives you the possibility to:
* Create a connection for a consumer: you will receive a link that you can share with your customers so that they can enter their credentials to create the connection. You can optionally pass a `country` code to [filter the list of connectors](/developer-guides/implementation/filtering-connectors-by-country) shown to the user. For some integrations, you can also pass the credentials directly, allowing you to create the connection for your customers.
> You can only have one connection per type of integration (Odoo, Sage, ...) for the same consumer.
* Update a connection for a consumer: same as above but for a connection that is already existing.
* Get connections for a consumer: retrieve the list of existing connections for an existing consumer
* Delete a connection: delete a specific connection for a consumer
#### Multiple connections on same consumer for same API
One consumer can have multiple connections for the same API but only one connection for the same integration/connector (e.g. Odoo).
When you want to support multiple connections for the same API, you will have to pass a specific header in the HTTP requests as otherwise we will not be able to know which connection to use. This is only needed when you want to work with multiple connections for the same API and for the same consumer.
For this specific use case, you can use one of the following two headers that you can pass in your HTTP requests when making requests on the unified API:
* X-Chift-Integrationid: code of the integrations (you can get the list of codes through the [Get integrations request](/api-reference/endpoints/integrations/get-list-of-integrations)
* X-Chift-Connectionid: guid of the connection on which you want to process your request
#### Connection lifecyle
The diagram below explains the different phases and statuses of connections. It's important to understand that a connection can be 'active' or 'inactive'. Only when the connection is 'active', you will be able to use it to process requests through the unified APIs. The status of a connection is managed behind the scene for you and should evolve automatically through the correct lifecycle based on the input of your customers. This is the job we help you to not worry about. Next to that we give you through our API and the webhooks all the possibilities to have a detailed view on the status of your connections in order for you to build the best experience for your customers.

Notes:
* Local agent is a small executable that needs to be installed to make the bridge between Chift and on-premise applications. This is needed for some softwares. For those connections, additional webhooks are sent out to give you a better understanding on when the agent is up or down. If you make a request on a connection for which the local agent is down you will receive as well a specific error message.
* Post-connections are inputs that are asked through the configuration of credentials (authentication pages) for your customers. It's asked after the credentials as the inputs are based on the information that is extracted from the connection (e.g. choose the POS location, choose the accounting folder, ...) Some post-connections are mandatory and some post-connections can be activated through the connectors' settings dependent on your implementation and what you want to outsource to Chift.
# Example of Unified API implementation
Source: https://docs.chift.eu/developer-guides/implementation/example-unifiedapi
###### The following steps are an example of how you could use Chift API to retrieve a list of clients on the accounting software (Odoo) of one of your client/consumer.
1. Activate `Odoo` as an available integration for your clients
2. Get a BEARER token so that you can perform requests on our API. [See the authentication section.](/developer-guides/authentication)
3. Create a consumer by using the UI interface or by using the [Create consumer](/api-reference/endpoints/consumers/create-new-consumer) endpoint.
4. If you use the API, you will receive the consumerid as response. If you use the UI, you will be able to see the consumerid by clicking on the eye icon.
5. Configure an Odoo connection, either by using the UI to navigate to the connection page, or by retrieving the connection page URL and sharing it with your client by using the [Add a new connection](/api-reference/endpoints/connections/add-new-connection) endpoint.
6. This step is normally performed by your "clients": Open the Connection page and click on Connect new to enter your Odoo credentials to be able to connect to Odoo.

7. Once your connection is created, you can use the [Get active connections](/api-reference/endpoints/connections/get-connections) to verify that the connection is active for your client.
8. Now, you can for example use the [Accounting - Get clients](/api-reference/endpoints/accounting/get-clients) endpoint with the `consumerid` to retrieve a list of clients on the Odoo of your consumer/client.
> We achieved the goal of this demonstration. You can test other endpoints of the [Accounting API](/api-reference/endpoints/accounting) to enjoy the power of Chift!
# null
Source: https://docs.chift.eu/developer-guides/implementation/filtering-connectors-by-country
When generating connection or sync links for your consumers, you can restrict the list of available connectors to those relevant to a specific country.
By default, all the connectors you've enabled will be shown, regardless of their availability in the consumer's region. Since not all connectors support all countries, this can lead to confusion or unusable options.
To filter the connectors by country, include the optional `country` parameter in your request to the [**Add new connection**](/api-reference/endpoints/connections/add-new-connection) or [**Retrieve the url of a sync for a specific consumer**](/api-reference/endpoints/consumers/retrieve-the-url-of-a-sync-for-a-specific-consumer) endpoint. This parameter should be an ISO 3166-1 alpha-2 code (for example, `"BE"`, `"FR"`, `"ES"`).
When provided, the generated URL will only show connectors available in the specified country. If omitted, all enabled connectors will be shown.
# null
Source: https://docs.chift.eu/developer-guides/implementation/implementations
On this page, we describe the usual implementations done by our clients.
1. Authentication workflow
2. Easy way - you do the work
3. Lazy way - we do it for you
Those are example of implementations that can of course vary between the use cases of our customers. We do not limit ourselves to those use cases.
## Authentication workflow

1. From your software, you can initiate the integration for one of your customer.
2. The consumerId is the link between your customer and Chift. You keep this in your database to be able to make requests to our API when required by your business case.
3. Based on your consumerId, you receive a link that you can share with your customer to initiate a connection.
4. Your users are redirected to Chift's authentication page where they can connect to the softwares of your choice.
5. Once the initial connection is setup, you can activate a webhook to receive asynchronously an event or your user can be redirected to the URL of your choice.
6. Now you are ready to request our unified APIs.
## Unifed API model

Our customers usually choose this approach. The authentication of their customers is managed as specified above. After the authentication of their customers/consumers is done, they can connect to our unified APIs to leverage the power of being instantly connected to multiple softwares.
## Sync model

For customers that do not have the time to do the implementation themselves, we can help you by using our integration platform to build your synchronization in Chift. This helps you to leverage the magic of integrations without having to worry about building and maintaining any integration.
#### If you are interested or if you have questions, do not hesitate to [contact us.](https://www.chift.eu/contact)
# SDK
Source: https://docs.chift.eu/developer-guides/sdk
At Chift, our goal is to help companies to scale their integrations.
Therefore, we want to ease the development for our clients that use our API.
We have build a few SDKs that can help you to connect to our API in a few minutes.
## Python
See [Chift-Python-SDK](https://github.com/chift-oneapi/chift-python-sdk)
## NodeJS
See [Chift-NodeJS-SDK](https://github.com/chift-oneapi/chift-nodejs-sdk)
## Other
*In case you are using another development language, please let us know which SDK you would like to see coming by emailing us at [support@chift.eu](mailto:support@chift.eu)*
# null
Source: https://docs.chift.eu/developer-guides/webhooks
### Summary
Chift's webhooks can be used to create custom applications that can react on specific events of the platform and of the unified APIs.
#### How can I manage my webhooks ?
* Webhooks can be managed through the UI in your account settings
* Webhooks can be managed through the API
#### Technical specifications
* On a specific event, a POST http request is sent to the webhook's url
* It will contain a JSON payload with at least these attributes:
```
- accountid: guid of your Chift's account
- event: name of the event
- consumerid: guid of the consumer on which the event occurred
- created: timestamp (in sec) of the webhook event
```
* In the header it will contain as well the following attributes:
```
- X-Chift-Signature: encrypted signature of your body payload
```
#### X-Chift-Signature
X-Chift-Signature attribute can be used to make sure that incoming calls on your webhook endpoint are coming from Chift.
The X-Chift-Signature is generated based on the signing secret that you can optionally add when you create or update a webhook. It is based on the HMAC authentication method that relies on two keys. One is the signing secret that only you know and the second is the request body.
Most programming languages support HMAC hashes.
An example in NodeJS is the following:
```javascript
const hash = crypto
.createHmac("sha256", encryption.decrypt(SIGNING_SECRET).toString())
.update(JSON.stringify(REQUEST_BODY), "utf-8")
.digest("hex");
```
An example in Python is the following:
```python
import hmac
import hashlib
import json
json_data = json.dumps(REQUEST_BODY, separators=(',', ':'))
h = hmac.new(SIGNING_SECRET.encode(), json_data.encode(), hashlib.sha256)
hash = h.hexdigest()
```
By computing the hash on your endpoint, you can compare it whith the X-Chift-Signature attribute of the header to make sure that the request originated from Chift.
#### List of events
The table below describes the different webhook events that can be emitted on Chift. The additional payload in addition with the above attributes is what will be sent as part of the body to the webhook url.
Please refer as well to the [Connection lifecycle](/developer-guides/implementation/connections#connection-lifecyle) section to have a better uderstand on when the connection webhooks are sent.
| Event name | Description | One API | Adiditional payload (in addition to above mandatory attributes) |
| -------------------------- | ------------------------------------------------------------------------------------------------------------------------------ | ------- | ----------------------------------------------------------------------------------------------------------------------------------------------------------------------------------------------------------------------------------------------------------------------------------------------------------------------------------- |
| account.connection.created | Event on the creation of a new consumer's connection (you receive this event only when the connection was successfuly created) | / | `{"connectionid": "guid of the connection on which the event occurred"}` |
| account.connection.updated | Event on the update of a consumer's connection | / | `{"connectionid": "guid of the connection on which the event occurred", "status": "active/inactive"}` |
| account.connection.deleted | Event on the deletion of a consumer's connection | / | `{"connectionid": "guid of the connection on which the event occurred"}` |
| account.connection.up | Event when a local agent is correctly setup | / | `{"connectionid": "guid of the connection on which the event occurred"}` |
| account.connection.down | Event when a local agent did not send any ping since 15 minutes | / | `{"connectionid": "guid of the connection on which the event occurred"}` |
| account.flow\.enabled | Event on the activation of a flow for a specific consumer | / | `{"flowid": "guid of the flow on which the event occurred", "syncid": "guid of the sync on which the event occurred"}` |
| account.flow\.disabled | Event on the deactivation of a flow for a specific consumer | / | `{"flowid": "guid of the flow on which the event occurred", "syncid": "guid of the sync on which the event occurred"}` |
| account.flow\.executed | Event on full execution of a flow (one event per consumer) | / | `{"flowid": "guid of the flow on which the event occurred", "syncid": "guid of the sync on which the event occurred", "status": "success/error", "executionid": "guid of the execution of the consumer flow", "parentexecutionid": "guid of the execution of the parent flow"}` |
| pos.order.completed | Event when an order was completed | POS | `{"order_id": "guid of the order on which the event occurred", "device_id": "guid of the device on which the order was completed (optional)", "customer_id": "guid of the customer that has made the order (optional)", "location_id": "guid of the location on which te order was completed", "updated_at": "time of completion"}` |
| pos.order.updated | Event when the status of an order was updated | POS | `{"order_id": "guid of the order on which the event occurred", "device_id": "guid of the device on which the order was completed (optional)", "customer_id": "guid of the customer that has made the order (optional)", "location_id": "guid of the location on which te order was completed", "updated_at": "time of completion"}` |
# Local agents
Source: https://docs.chift.eu/docs/advanced/local-agent
Local agents are used for on-premise connectors that cannot be accessed through the cloud.
Chift has developed a local agent that can be run on on-premise connectors' servers and that will act as a proxy between your the server and Chift's infrastructure making it possible to expose an API on top of those connectors.\
This is typically used for connectors like Winbooks, Sage 100, Sage 50, etc.
## How it works
The local agent does not require any specific network configuration. It will connect to Chift's cloud infrastructure and it will not expose any port to the internet.
## Setting up a local agent
Typically the process to set up a local agent is the following:
1. The consumer visits the public connexion page of a connector and clicks on "Connect".
2. The consumer will have the possibility to download a zip file or send a link to this zip file to another person (useful when the installation needs to be done by a third-party)

3. At this moment the consumer will have a connexion which not yet operational.

4. The consumer or his technical contact will have to extract the zip file and install the `Setup.exe`file (alongside a settings.json file containing the information related to this specific connexion).
This is will install a Windows service on the server on which the connector is running that will act as a bridge with Chift.
5. Once the service is installed, the connexion will become green on the consumer's dashboard and you will be able to execute requests.
6. At any time, you can see the status of the local agent and see his latest heartbeat. Webhooks can be configured as well to be notified of the status of the local agent.
For every connector, you will find specific documentation in the connector's documentation and as well in the end-user connector's documentation to ease the process of installation.
## Monitoring a local agent
Through the Chift's dashboard, you will be able to see the status of the local agent and see his latest heartbeat (sent every 15-20 minutes).\
On a consumer's page, you will see wheter the agent is:
* Online and operational: green
* Offline: orange (it's installed but not running currently)
* Offline: red (the service is not installed)
As a local agent might be down, it's advised to use retry mechanism or to implement webhooks.
## Local agent updater
# Webhooks
Source: https://docs.chift.eu/docs/advanced/webhooks
Webhooks allow you to receive real-time notifications when specific events occur in your Chift account.\
This enables you to build fully embedded workflows and keep your systems in sync with changes happening in Chift.
See this [guide](/api-reference/endpoints/webhooks) for more information about the working of webhooks.
This guide will only cover how to create and manage webhooks in the Chift platform.
## Creating a webhook
1. Go to the [webhooks page](https://chift.app/webhooks)
2. Click on "Add webhook"
3. Fill in the required fields:
* Webhook url: The URL where the webhook will be sent to.
* Webhook type: The type of webhook you want to create (See the [guide](/api-reference/endpoints/webhooks) for more information)
* Webhook signing secret: The secret used to verify the authenticity of the webhook. This is optional and can be used to verify the webhook request. (See the [guide](/api-reference/webhooks) for more information)
4. Click on "Save

## Manage webhooks
1. Go to the [webhooks page](https://chift.app/webhooks)
2. Open a webhook from the list
3. You will see the details of the webhook and the ability to edit or delete it.
4. On the section below you can see the recent webhook requests and their status.

# Activate Connector
Source: https://docs.chift.eu/docs/getting-started/activate-connector
To enable integrations for your consumers, you first need to activate the connectors you want to use. This guide will walk you through the connector activation process.
## Access the Connectors Page
1. Log in to your Chift account
2. Navigate to the [Connectors page](https://chift.app/connectors) on the environment you want to activate the connector for
3. You'll see a list of all available connectors organized by category (Accounting, eCommerce, POS, etc.)

Specific connectors might not be available for your account. Please contact
your customer success manager if you need help.
## Activate a Connector
1. Find the connector you want to activate in the list
2. Click on "View connector" to open its details
3. At the top of the connector page, you’ll see a “View documentation” link. It opens a separate page with detailed instructions and context about the connector. We recommend checking it before continuing configuration.
4. On the same page, you’ll also find the following configuration sections:
| Section | Description |
| ---------------------------- | ---------------------------------------------------------------------------------------------------------------------------------------------------------------------------------------------------------------------------------------------------------------------------------------------------------------------------------------------------------------------------------------------------------------------------------------------------------------------------- |
| General | Choose whether you want your end-user to enter a name for the connection. This is a free field that can help you and your end-user to identify the connection. This is optional.
You can also provide a **Help URL**, which will be shown to the end-user when activating the connector. If you leave it empty, we will display Chift’s default documentation for the connector. |
| Preconfigure fields | Some fields can (and must) be configured at connector level. Typically those fields are partner specific and must not be entered by the end-user. |
| Oauth2 | If the connector uses OAuth2, you will have to preconfigure the client id and client secret. We connect through your app to let end-users authorize your app to access their data. |
| Post-connexion configuration | Post-connexion configuration can be used to let the end-user select some options after authentication. For example, this is helpful to let the end-user select the accounting folder or location they want to connect. Some post-connexions are mandatory. Some are optional and activation might depend on your implementation and what you want to offload to Chift. When post-connexions are used, data is automatically filtered based on the selection of the end-user. |
5. Click the "Activate" button to enable the connector
Example of an OAuth2 connector:

Example of a connector with partner key and post-connexion:

Connectors need to be activated separately for each environment you're working
in (Sandbox, Production). This allows you to test integrations in a sandbox
environment before deploying to production.
## Managing Active Connectors
* You can view all your activated connectors through the "Show Active" filter
* You can search for a connector by name or filter by Unified API
* To deactivate a connector, you can use the toggle button on the connector card. Note that you can only deactivate connectors that are not currently connected to any consumer.
## Next Steps
Once you've activated your desired connectors, you can:
* [Create consumers](/docs/getting-started/create-consumer) who will use these connectors
* [Generate API keys](/docs/getting-started/create-api-key) to access the APIs
* Start building integrations using our [API documentation](/api-reference)
Make sure to activate connectors as well in your production environment when
you are ready to go live. Your credentials for the production environment
might be different from your sandbox credentials.
# API Explorer
Source: https://docs.chift.eu/docs/getting-started/api-explorer
The API Explorer is a powerful tool that allows you to test and validate Chift's API endpoints directly from your browser.\
Next to that you can use as well to directly re-run existing transactions.\
This guide will show you how to use the API Explorer effectively.
## Accessing the API Explorer
1. Navigate to the consumer of your choice
2. Click on the `API Explorer` button
3. You'll be able to select the endpoint you want to test from a list of all available API endpoints

4. Once you selected the endpoint and the consumer (by default the current consumer is selected), you can enter additional parameters or a body if needed
5. Once you're ready, click on the `Execute` button to execute the API call (be careful, if you execute a POST request on production, it will really execute the request)
6. The response will be displayed in the `Response` section
This gives you a perfect overview of the data you can retrieve or modify for a specific connexion and endpoint.
## Re-running transactions
1. Navigate to the consumer of your choice
2. In the `Transactions` section, you'll be able to re-run any transaction of your choice by clicking on the "Zoom" icon on the right of the transaction of your choice

3. The transaction will be opened in the API Explorer, you will be able to see what was the request and the response in case of error (we do not keep data in case of success)

4. Click on the "Run again" button to re-run the transaction
5. You will be able to see the request, change parameters if needed and execute the request
The API Explorer is available in both sandbox and production environments. Make sure you're testing in the appropriate environment.
## Next Steps
After familiarizing yourself with the API Explorer, you can:
* [Create API keys](/docs/getting-started/create-api-key) for your applications
* Integrate Chift APIs into your application
* Review our [API Reference](/api-reference) for detailed endpoint documentation
# Configure Account
Source: https://docs.chift.eu/docs/getting-started/configure-account
Setting up your Chift account is the first step to leveraging our unified APIs and building powerful integrations. This guide will walk you through the initial configuration process.
It will help you to:
* Setup your personal information and language
* Invite team members
* Configure the public pages of your organization
* Configure automatic email reminders (See [Email Reminders](/docs/user-onboarding/email-reminders))
To start, you will need to enter the "Settings" [menu](https://chift.app/settings).\
As a new user, you can as well follow our "Getting Started" onboarding in the sidebar.
## Setup your personal information and language
In this section you can setup your personal information and default language.
Next to that you can as well update your password if required.

## Add Team Members
You can invite team members to collaborate on your Chift account:
1. Go to the 'Members' section
2. Click "Add user"
3. Enter their email address and assign appropriate roles (see [Roles](/docs/platform/roles))
4. They will receive an invitation email to join your organization
Next to that you can also manage your team members and their roles.

## Configure the public pages of your organization
In this section you can configure the branding of your organization on chift's public pages.

You can setup the logo, the main color and the button color.\
E.g. for the example above, the configuration will look like this for the activation of Hiboutik:

By using your colors and your logo, you can make sure that your customers feel at home when they visit your public pages.
You can as well select the default language of those public pages.
## Default redirection URL
You can configure a default redirection URL for each environment.\
This URL will be used to redirect the customer to a specific page after they have completed the connexion process.

## Next Steps
Once your account is configured, you can:
* [Activate connectors](/docs/getting-started/activate-connector) for your integrations
* [Set up consumers](/docs/getting-started/create-consumer) for your applications
* [Create API keys](/docs/getting-started/create-api-key) to access our APIs
* Explore our [API documentation](/api-reference) to start building
For any questions during the setup process, don't hesitate to contact our support team at [support@chift.eu](mailto:support@chift.eu)
# Create API Key
Source: https://docs.chift.eu/docs/getting-started/create-api-key
export default function RedirectPage() {
if (typeof window !== "undefined") {
window.location.href = "/developer-guides/create-api-key";
}
return null;
}
# Create Consumer
Source: https://docs.chift.eu/docs/getting-started/create-consumer
A consumer represents an end-user or organization that will connect to third-party services (or connectors) through your Chift's Unified APIs.\
his guide explains how to create and manage consumers in your Chift account.
## What is a Consumer?
A consumer is an entity (typically one of your customers) that will use the connectors you've activated to integrate with various services.\
Each consumer can have multiple connections to different services (accounting, pos, ecommerce, invoicing, ...).
Each consumer is represented by a `GUID` and by a `name`.
A internal reference can as well be added (Feature available upon request).
## Creating a Consumer
1. Navigate to the [Consumers page](https://chift.app/consumers)
2. Click the "Add consumer" button
3. Fill in the required information:
* **Name**: An identifier for the consumer (free text, up to you to choose if you want to use a guid or something more readable)
* **Redirection url** (optional): The url to redirect the consumer after authentication
* **Email** (optional): Contact email for the consumer. If filled in, this email will be used to send reminders and notifications (if activated in the account settings: [Email Reminders](/docs/user-onboarding/email-reminders))
4. Click "Save" to create
5. Once created, you will be able to copy the connexion url or to navigate directly to the consumer's connexion page

In production, you will typically create a consumer through the API.
## Activation of a connexion
Connections make the link between consumers and software. Each consumer can have multiple connections. A connection is represented by a `name`, a `link to a specific software` and `link to a specific Chift API`. A connection will for example represent the credentials to connect to an Odoo instance for a specific consumer.
1. Navigate to the [Consumers page](https://chift.app/consumers)
2. Click on the three dots on the right of the consumer you want to activate a connexion for and select "Get consumer link"
3. Navigate to the connexion page, choose the connector you want to connect to and click on "Connect"
In production, you will typically skip this page and let your users navigate directly to the connexion page of connectors.
4. You will have to fill in the required information and click on "Connect" to initiate the connexion
5. If successful, you wil be redirected to the consumers's redirection url or back to the marketplace
In production, you will typically activate a connexion through the API. You will be able to retrieve the connexion url for a consumer and share it with him.
## Managing Consumers
Once created, you can:
* View all your consumers in the consumers list
* Search for specific consumers using the global search bar
* Export the list of consumers to a CSV file
* Filter consumers based on their status or connections
* Edit consumer details by clicking on a consumer in the list
## Next Steps
After creating a consumer and activating a connexion, you can:
* Use the [API Explorer](/docs/getting-started/api-explorer) to test the APIs
* [Create API keys](/docs/getting-started/create-api-key) to access our APIs
* Use our [API endpoints](/api-reference) to manage consumer data
* Monitor consumer activities and connection status
# null
Source: https://docs.chift.eu/docs/introduction/glossary
Integrations can be complex to understand at first. This glossary will help you understand the main concepts to make your journey as smooth as possible.
### Integrations / Connectors
In Chift's platform, you can select which integrations you activate for your clients. For example, thanks to the integration with Chift Accounting API, you can activate the `Odoo connector`in one click. This will allow your users to connect their software to your application. This can be done in your account configuration.
### Consumers
Consumers represent instances of your clients that want to benefit from the integrations offered by Chift. Each consumer is represented by a `GUID` and by a `name`. This `GUID` can be used in almost all API requests ([see according documentation](/docs/getting-started/create-consumer)) to represent the consumer you want to interact with.
> The API can be used to automatically create, update, retrieve or delete consumers. This can be done manually through the UI.
### Connections
Connections make the link between consumers and their software. Each consumer can have multiple connections. A connection is represented by a `name`, a `link to a specific software` and `link to a specific Chift API`. A connection will for example represent the credentials to connect to an Odoo instance for a specific consumer.
> The API can be used to retrieve the list of active connections for consumers and as well to get a public URL that consumers can use to configure their connections.
### Sync
A sync is the definition of connecting multiple APIs or connectors inside Chift.
One or more flows can be created to create automations for a sync.
A flow can be triggered by an event or by a timer (e.g. each night at 4AM). A flow contains a process (e.g. get invoices and inject into accounting) that will be executed for each of the consumers linked to the sync.
### Mappings
While defining a sync, you can add mappings to the onboarding process of your end-users. E.g. mapping of tax rates between POS and Accounting softwares.
# null
Source: https://docs.chift.eu/docs/introduction/syncs
Syncs can be used to create easy and scalable automations between two or more of Chift's unified APIs.\
It can for example be used to create an automation workflow between the Invoicing API (or one specific connector inside the Invoicing API) and the Accounting API (or one specific connector inside the Accounting API).\
Through the sync, the end-users can select their invoicing and accounting software and can activate the workflow(s).\
As you can imagine, it creates a multitude of automations opportunities without you having to worry about connectivity, monitoring, scalability, maintenance, ...

Main features and benefits offered by our Unified APIs:
* Full to semi-embedded & native experience with white labeling for your customers
* You don't need to develop anything; we do everything from you. No roadmap issues anymore.
* Connectors can be activated in one-click from your account (see [activate connector](/docs/getting-started/activate-connector))
* Advanced user onboarding and support (see [user onboarding](/docs/user-onboarding/overview) and [support](/docs/support/overview))
* Advanced features to scale your integrations (see our documentation)
* Different ways to trigger the sync (event-based or timer-basedr)
* [Different ways to expose syncs to end-users](/syncs/expose-overview)
## Explore our ready-to-use syncs
Explore our Invoices Sync
Explore our E-commerce Sync
Explore our POS Sync
Explore our PMS Sync
Explore our Payments Sync
## Explore other possibilites
Through our Unified APIs, we can also create other types of syncs for you, e.g.:
* Sync of expenses to accounting
* Sync of transactions to accounting
* Sync of pos data to ERP
* ...
Do not hesitate to [contact us](https://chift.eu/contact) if you need help with that.
# Unified APIs
Source: https://docs.chift.eu/docs/introduction/unifiedapis
Use our Unified APIs to access a family of connectors by developing only one integration.\
Our Unified APIs let you have embedded & white labeled connectors within your product.

View our [API documentation](/api-reference) for details about the endpoints and the data models.
This will let you:
* Save time by not having to develop and maintain a connector for each new integration
* Reduce costs by not having to maintain a dedicated team for connector development
* Provide a wide coverage of integrations with only one integration
Main features and benefits offered by our Unified APIs:
* One common data model for each Unified API (see [data entities](/unified-apis/overview) and our [documentation](/api-reference))
* Single easy and secure way to authenticate to the API (see [authentication guide](/developer-guides/authentication))
* Embedded & native experience with white labeling for your customers
* Business logic stays in your application but you can count on Chift's team to help you with the expertise of financial connectors
* Connectors can be activated in one-click from your account (see [activate connector](/docs/getting-started/activate-connector))
* Explore and test endpoints directly in the API Explorer (see [API Explorer](/docs/getting-started/api-explorer))
* Advanced user onboarding and support (see [user onboarding](/docs/user-onboarding/overview) and [support](/docs/support/overview))
* Advanced features to scale your integrations (see our documentation)
## Explore our Unified APIs
Explore our Accounting API
Explore our Point of Sale API
Explore our eCommerce API
Explore our Invoicing API
Explore our Banking API
Explore our Payment API
Explore our Property Management System API
# null
Source: https://docs.chift.eu/docs/introduction/welcome
Chift's Unified APIs help software vendors to quickly build and embed native integrations within their software. By being connected to one single future proof API, the software can be connected with multiple tools in a few clicks. It drastically decreases the development and maintenance cost for software vendors and their integrations become scalable. By using Chift APIs (Accounting, POS, eCommerce, Invoicing, Payment, PMS), your software is easily connected to your clients stack.
Learn more about our unified APIs
Learn more about our syncs
Setup your account and explore the possibilities offered by Chift
Explore our API documentation
# Support for multiple environments
Source: https://docs.chift.eu/docs/platform/multi-environment
By default, we support one sandbox and one production environment allowing you to separate your consumers used for development and testing with your production’s consumers.
To match all needs of our customers, we have as well the possibility to add sub-environments under Production and Sandbox allowing to work with as many environments as you want.\
This can be really helpful fur use cases such as :
* Manage connectors’ credentials in multiple environments
* Match your app’s environments with Chift’s environments (Local, Test, QA, …) and separate your access keys for each of those environments
* Environment-based reporting
* …

This feature is available upon request only
# null
Source: https://docs.chift.eu/docs/platform/roles
# Introduction
This document describes the different roles that you can assign to your users on Chift's platform. Based on users' feedback, we have created a set of roles with a set of permissions so that you can easily give the right roles to your the right teammembers. Don't hesitate to contact us if it should not match your expectations.
### Roles' description
The table below highlights the different roles with a brief explanation.
| Role | Description |
| ---------- | -------------------------------------------------------------------------------------------------------------------------------------------------- |
| Admin | Can manage the account, invite new members and manage the accesses. Moreover he can do everything on the platform. |
| Developer | Same as admin but cannot manage members. |
| Onboarding | Can create, update and send connection links of consumers. Moreover, he has the same rights as the support role. |
| Support | Same as reporter but het can as well view datastore data, transactions and as well execute GET transactions through the API Explorer.. |
| Reporter | Can only view data of consumers, connectors & syncs. Cannot view transactions, datastore data and cannot manage the account or invite new members. |
### Roles' permissions matrix
The table below gives a detailed overview of the permissions assigned to each role.
| Permission | Admin | Developer | Onboarding | Support | Reporter |
| ------------------------------------- | -------------------------------------- | -------------------------------------- | -------------------------------------- | -------------------------------------- | -------------------------------------- |
| Create consumers | | | | | |
| Read consumers | | | | | |
| Update consumers | | | | | |
| Delete consumers | | | | | |
| Setup new connections (generate link) | | | | | |
| Create API keys | | | | | |
| Read API keys | | | | | |
| Update API keys | | | | | |
| Delete API keys | | | | | |
| Activate/Deactivate connectors | | | | | |
| Read connectors | | | | | |
| Create webhooks | | | | | |
| Read webhooks | | | | | |
| Update webhooks | | | | | |
| Delete webhooks | | | | | |
| Create syncs | | | | | |
| Read syncs | | | | | |
| Update syncs | | | | | |
| Delete syncs | | | | | |
| Execute GET transactions | | | | | |
| Execute ALL transactions | | | | | |
| Read transactions | | | | | |
| Read datastores | | | | | |
| Delete datastores | | | | | |
| Execute flows | | | | | |
| Update account (logo, colors, ...) | | | | | |
| Manage members | | | | | |
| Create marketplace | | | | | |
| Update marketplace | | | | | |
| Delete marketplace | | | | | |
| Create environment | | | | | |
| Update environment | | | | | |
| Delete environment | | | | | |
# Contact Support
Source: https://docs.chift.eu/docs/support/contact-support
There are two ways to get in touch with Chift's support team when you need assistance:
## Platform bot (Recommended)
The preferred way to contact support is through the platform's built-in messenger. This allows us to:
* Have direct access to your account context
* Provide faster and more accurate support

You can:
* Start a conversation to chat with our support team
* See all your existing messages
* Quick link to the [ticket portal](/docs/support/ticket-portal)
To use the messenger:
1. Click on the chat icon in the bottom right corner of any page on the platform
2. Type your message describing the issue you're experiencing and providing as much context as possible (click on Start a conversation)
3. By creating the message on a specific consumer, it will automatically be assigned to this consumer
4. Our support team will get back to you as soon as possible
## Email Support
You can also reach out to our support team via email at [support@chift.eu](mailto:support@chift.eu)
When emailing support, please include:
* Your account name
* A detailed description of your issue
* The consumer(s) you are experiencing the issue with
* Any relevant screenshots or error messages
For faster resolution, we recommend using the platform messenger as it provides us with more context about your account and usage.
# Overview
Source: https://docs.chift.eu/docs/support/overview
This section covers the two main aspects about the support that is provided to you:
* How to create a new ticket through our platform
* How to use the ticket portal to manage your tickets accross your team
# Ticket Portal
Source: https://docs.chift.eu/docs/support/ticket-portal
The ticket portal allows you to manage and track all support tickets across your consumers.
There are two ways to access ticket information:
## At consumer level
Each consumer has a dedicated "Tickets" tab that shows all tickets related to that specific consumer. This view allows you to:
* Quickly findtickets specific to that consumer
* Track the status of existing tickets

## Ticket Portal
The [ticket portal](https://chift.app/ticket-portal) provides a comprehensive view of all tickets across your account:
### Features
* View all tickets across all consumers in one place
* Filter tickets by:
* Status
* Sort tickets by different criteria
* Quick access to ticket details and history

You can as well access the intercom portal ticket through this page but it will not contain a link to the consumers.
This centralized system helps you and your team keep track of all support communication.
# Email Reminders
Source: https://docs.chift.eu/docs/user-onboarding/email-reminders
Email reminders can be used to help you to remind your consumers to complete the activation process in an automated way.
Two types of emails are available:
* Consumer with inactive connection: sent to consumers that have no active connection
* Consumer with incomplete sync: sent to consumers that have a sync but the connexion or the mappings are not correctly set (only if you are using syncs)
Consumer with inactive connection will only be sent if the consumer has no sync.\
Otherwise, consumer with incomplete sync will be used.
Email reminders are only sent to consumers that have an email address.\
You can setup an email address for your consumers when you create them throug the UI or the API.\
If your consumers are exposed through a public marketplace, they will always have an email address.
## Email Settings
You have the flexibility in how these emails are delivered to your consumers. Through the settings page, you can customize two key aspects:
1. Set when reminder emails should be sent by choosing an interval of 1, 3, or 5 days between each email.
2. Specify how many reminder emails a consumer should receive in total by selecting either None, one, two, or three reminders.

Next to each email type, an eye icon allows clients to preview the email content sent to consumers. The logo and colors used in these emails can be customized in the [“Consumer Page” tab](/docs/getting-started/configure-account#configure-the-public-pages-of-your-organization).

## Email Dispatch
Every day at 6:00 UTC (7:00 Belgium time), our system runs a dispatch job that processes each type of email separately.
Emails are sent from [`support@chift.eu`](mailto:support@chift.eu).
We also create a consumer log entry when an email is dispatched, which appears in the corresponding consumer or sync log page.
## Email Types
### Consumers with inactive connection
For consumers without syncs, we check their connection status:
* No Connection: Proceed with a generic reminder email.
* Pending Connection: Proceed with a customized email that includes the connector name and a link to the connector help page.
Once we've determined a consumer should receive an email, we check if the configured interval has passed since their last communication before dispatching either their first email or next reminder.

### Consumer with incomplete sync
For each consumer, we check their connection and mapping status.
The consumer can be in the following statuses:
* No connection
* Pending connection
* No mapping completed
* Pending mapping
* Missing configuration
Each status appears in the email with its own message. If a documentation url is present for the sync for your users, it will display as a help link alongside the sync.

Transactional emails are only dispatched for the **production environment** of the client’s account.\
Consumers in the sandbox environment will not receive any transactional emails.
# External Invitations
Source: https://docs.chift.eu/docs/user-onboarding/external-invitation
During an onboarding process, the person that is trying to connect a software is not always the as the person that has the access to the software.
Moreover, when you are trying to connect multiple softwares, it might involve multiple people.
External invitation can be used to invite external people to connect during the activation process of a consumer.
This feature is available upon request only.
Once this feature is enabled, your consumers will be able to invite external people to connect during the activation process of a consumer.
### For connexions:
1. The consumer invites an external person throug the "Invite user" button on the public connexion page
2. The consumer fills the form with the external person's information and his message to him

3. An email is sent to the external person with a temporary (valid for 7 days) and secure link to the connexion page

4. The external person clicks on the link and is redirected to the connexion page
5. The external person is able to connect the software
6. The connexion is created and the consumer is notified (if the consumer has an email address)
Through the connexion logs, you will be able to see that the connexion has been activated by an external person.
### For syncs (only if you are using syncs):
1. The consumer invites an external person throug the "Invite user" button on the public sync page
2. The consumer fills the form with the external person's information and his message to him

He can also choose to invite the external person to connect only to a specific connexion of the sync so that he does not have access to other settings (e.g. useful for accountants that request access to their clients' software)
3. An email is sent to the external person with a temporary (valid for 7 days) and secure link to the sync page
4. The process is then the same as for a connexion.
# Help Center
Source: https://docs.chift.eu/docs/user-onboarding/help-center
For each connector available on Chift, we maintain detailed help articles in our Intercom knowledge base to assist your consumers with:
* Finding their credentials
* Completing the connection process
* Troubleshooting common issues
These help articles are easily accessible directly from the connection pages. When your consumers are trying to connect, they'll see a help link that takes them to the relevant documentation for that specific connector.

The help articles provide step-by-step instructions with screenshots to guide users through:
* Where to find their credentials in the source system
* Required permissions and settings
* Common error messages and their solutions
The help articles are regularly updated to reflect any changes in the connector interfaces or authentication processes.
# Issues
Source: https://docs.chift.eu/docs/user-onboarding/issues
Chift provides a comprehensive overview of the issues that might arise when trying to activate a consumer.
This feature is available upon request only.
## List of issues
This page gives you a list of all the issues found during the activation process for your consumers.\
The goal is to help you identify the root cause of the issue and to help you resolve it.

You have the option to get the consumer/sync link to give more details about the issue or to send directly an email to the consumer to help them troubleshoot the issue.
You can as well open a ticket to get in touch with our support team (see [Contact Support](/docs/support/contact-support)).
You filter the issue by issue types:
* No connexion (no connexion process was initiated)
* Connexion error (error during the connexion process)
* Connexion required (required connexions are missing)
* Sync mapping required (some mappings were not correctly set)
* Sync not configured (the sync was not correctly configured and not activated)
* Sync disabled (the sync was disabled by the consumer)
### Send email reminder
Through the menu next to each consumer, you can choose to "Send email to a consumer".
This allows you to send manually a reminder email to a consumer to activate a connexion.

# Monitoring
Source: https://docs.chift.eu/docs/user-onboarding/monitoring
Chift provides comprehensive overview to help you track and manage your consumers' connections.
This guide explains how to effectively monitor connection statuses and troubleshoot any issues that may arise.
## Overview of connexions
The main dashboard gives you a clear view of all your consumers' connections.
It will give you an overview of the number of active consumers.
A consumer is considered as active if there is at least one active connection.

Next to the number of active consumers, you will see the number of active connections.
One consumer can have multiple connections.
Pending connexions are connexions that were initiated but not finished.
Failed connexions are connexions that failed to authenticate due to an authentication error (e.g. wrong credentials, permissions issues, ...).
The rest of the page will give you an overview of the connectors used by your clients.

You can drill down to see more details about each Unified API or connector.
## Overview of syncs
Only when you are using syncs.
If you are using Chift's syncs, this overview will give you an overview of the active syncs of your consumers.\
It's not because a connexion is active that a sync is activated.\
The most important metric for you to track is the number of active syncs.
A sync is considered as active for one consumer if the configuration was successfully completed.

The rest of the page will give you an overview of the activation rate of your syncs.

You can drill down to see more details about each step of the sync and where it might have failed.
## List of consumers (by connexions)
Navigate to the [Consumers page](https://chift.app/consumers) and you will see a list of all your consumers.

You have filters to select the active consumers or to filter by specific connectors.
At any time you can search for a specific consumer by name or by consumerid by using the global search bar.
You can download the list of consumers visible on your screen by clicking on the 'Download CSV' button.
In the issue column, you will see what might have failed for a consumer:
* Connexion failed (name of connector)
* Nothing: no connexion process was initiated
Click on the three dots and click on "Get consumer link" to get a link to the consumer's connexion page.
This can give you more details about what might have failed.
Through the three dots, you can also edit or delete the consumer.
## List of consumers (by syncs)
Only when you are using syncs.
Navigate to the [Consumers page](https://chift.app/consumers), choose the "By syncs" tab and you will see a list of all the consumers for which you tried to activate a sync.

Different filters are available to help you identify the consumers that failed to activate a sync (e.g. by sync, by connector, ...)
In the issue column, you will see what might have failed during the sync activation for a consumer:
* Connexion failed (name of connector)
* No connexion: required connexions are missing
* Mapping incomplete: some mappings were not correctly set
* Configuration incomplete: the configuration was not completed and the sync was not activated
Click on the three dots and click on "Get sync link" to get a link to the consumer's connexion page for the sync.
This can give you more details about what might have failed.
Through the three dots, you can also edit or delete the consumer.
## Next Steps
* Learn about [Issues Management](/docs/user-onboarding/issues)
* Set up [Email Reminders](/docs/user-onboarding/email-reminders)
* Explore the [Help Center](/docs/user-onboarding/help-center) for troubleshooting guides
# Overview
Source: https://docs.chift.eu/docs/user-onboarding/overview
Chift is built based on the belief that the onboarding experience is a crucial part of the integration process.
We developed a set of tools to help you onboard your users and manage their activations.
Here's what you'll find in the following pages:
## Monitoring
Learn how to track and monitor your consumers' connections. This includes viewing connection statuses, filtering by connector, and identifying potential issues early.
## Issues Management
In this section, you'll find a list of issues found during the activation process.
This feature is available upon request only.
## Help center for end-users
For each connector, you'll find a help center that you can use to guide your consumers through the activation process.
## External Invitation
Discover how to invite external users to connect their software through Chift.
This feature is available upon request only.
## Email Reminders
Explore how to set up and manage automated email reminders for your consumers. This helps ensure they complete necessary setup steps without you having to do it manually.
This feature is available upon request only.
These tools and features are designed to help you provide a smooth onboarding experience for your users while maintaining visibility and control over the integration process.
# eCommerce sync
Source: https://docs.chift.eu/syncs/ecommerce-sync
This sync will allow you to sync ecommerce orders and payments with accounting software.

### Default scope:
This integration aims to automate e-commerce site accounting to replace manual exports.
This integration flow will allow sales entries to be imported into accounting.\
The integration doesn't retrieve all invoices individually but creates aggregated entries to report revenue and VAT in accounting.
The integration supports the management of:
* different payment methods
* different product categories
* different delivery countries
* different VAT rates
* gift vouchers
Note that this is the default scope, based on your requirements this can be modified.
### Mappings
Mappings are the way to map the data from the ecommerce software to the accounting software.
Note that this is are the default mappings, based on your requirements these can be modified.
This step allows you to specify the accounting journal in which to create accounting entries generated based on sales from your e-commerce software.
This step allows user to connect its eCommerce tool through apikey, credentials or oauth2.
This step allows user to connect its accounting tool through apikey, credentials or oauth2.
This step allows you to specify whether entries are made in a sales or purchase journal.
*Reproduce this step by using the following API call(s) :* GET journals
This step allows you to choose the accounting account for each payment method (credit card, cash, etc.) to be used as debit in the generated accounting entries.\
If no match is found for a payment method (for example: a new payment method is added and not configured in the synchronization settings), then account X is used as the default account.
*Reproduce this step by using the following API call(s) :* GET all payment methods GET chart of accounts
*(Filter on class 4 and 5 accounts)*
Note that this is not for all clients like this. For example, for Inqom (software where this concept of VAT codes doesn't exist), it's not VAT codes that we select on the right but directly the VAT accounting account to use in the entries. Currently, only Pennylane works as shown here
Choose the country that corresponds to the VAT rates detected in the e-commerce software. This step will ensure the correct VAT codes are used in the generated entries.
*Reproduce this step by using the following API call(s) :* GET all taxe rates GET chart of accounts
*(Filter on class 4 accounts)*
This step allows you to define the accounting accounts to use for recording revenue in accounting.
The amounts excluding VAT can be allocated in two different ways:
* **via product categories**: the accounting account is determined based on the category linked to the sold product
* **via the order's delivery country**: the accounting account is determined based on the order's delivery country. If the country is not defined in the delivery address, then the billing address is considered
If the accounting account cannot be determined because the product isn't linked to any category or the order isn't linked to any country, then the accounting account indicated as the default sales account (excluding VAT) in step 7 (default values) of the integration configuration is used.
*Reproduce this step by using the following API call(s) :* GET all products categories
*(Filter with “only\_parents” = “True”)* GET chart of accounts
*(Filter on class 7 accounts)*
Choose accounting accounts to record specific cases. In this step, you can also indicate the default sales account mentioned in step 6 above.
*Reproduce this step by using the following API call(s) :* GET all products categories
*(Filter with “only\_parents” = “True”)* GET chart of accounts
*(Filter on class 4, 5, 6 and 7 accounts)*
When activating synchronization, you can choose to account for the sale of gift vouchers. If this option is activated, the revenue (amount excluding VAT) from gift voucher sales will be recorded in the indicated account. If this option is not activated, gift voucher sales will not be included in the generated accounting entries. Note that this option is separate from the processing of gift vouchers as a payment method, which will always be taken into account for all orders. This refers to the sale of a gift voucher that can then be used as a payment method in a subsequent order.
*Reproduce this step by using the following API call(s) :* GET chart of accounts
*(Filter on class 4, 5, 6 and 7 accounts)*
This step allows you to specify whether entries are made in a account for discounts, rebates and debates ; it is an optionnal step.
*Reproduce this step by using the following API call(s) :* GET chart of accounts
*(Filter on class 6 and 7 accounts)*
### Configuration
1. Synchronization Trigger
Orders can be synchronized in 2 distinct ways:
* Once per day
* Once per month
2. From what date do we retrieve orders?
The synchronization start date determines from when orders will be integrated into accounting.
Only orders created from this date will be synchronized.\
It's important to distinguish between Shopify and other e-commerce platforms:
* Shopify: a change made to an order (for example, adding a product) created before this date will be included in the synchronization only if the order elements are recorded at the date of each modification. This is detailed in the question "Do you want to record changes to an already synchronized order at the date of modification?"
* Other e-commerce: a change made to an order (for example, adding a product) created before this date will NOT be included in the synchronization. This is because e-commerce platform APIs don't provide the creation date for each order element. It's therefore impossible to determine what was modified if the order wasn't previously synchronized.\
However, refunds made on an order created before the synchronization start date will be synchronized at the refund date, provided it's after the synchronization start date.
3. Should we group orders and refunds?
This step determines if and how to group orders and refunds. There are three options:
* No, create an entry per order and refund → a specific entry will be created in accounting for each order and refund.
* Yes, create one entry per day → all orders from the same day will be grouped into a single accounting entry. Similarly, all refunds from the same day will be grouped into a single accounting entry.
* Yes, create one entry per month → all orders from the same month will be grouped into a single accounting entry. Similarly, all refunds from the same month will be grouped into a single accounting entry.
4. When do you want to synchronize orders?
This step determines the status from which orders are eligible for synchronization and the date at which order elements are recorded. There are five options:
* as soon as the order is confirmed, all order elements are recorded at the order creation date.
* as soon as the order is confirmed, each order element is recorded at the date when the element was added to the order.
* as soon as the order is delivered, all order elements are recorded at the order creation date.
* as soon as the order is delivered, each order element is recorded at the date when the element was added to the order.
* as soon as the order is delivered, all order elements are recorded at the order delivery date.
An order is considered confirmed according to the following criteria:
* Shopify: All orders that aren't drafts.
* WooCommerce: from payment.
* Prestashop: from payment.
For Shopify, the information about the date each element was added is 100% accurate. However, for other e-commerce platforms, we rely on the date of the last order modification.
5. Which address do you want to use to define the order country?
This step determines the order country. There are two options:
* delivery address
* billing address
6. Do you want to refund cancelled orders that haven't been refunded?
Do you want to create a refund for cancelled orders that don't yet have a refund in the e-commerce software? This option allows generating an accounting "refund" entry for cancelled orders even if there's no refund in e-commerce. Here are the possible options:
* No (default value): refunds are only created for cancelled orders if they already have refunds in e-commerce
* Yes, but only for previously synchronized orders: refunds are created only if the order was created after the start of synchronization
* Yes, all orders: refunds are created for all cancelled orders, regardless of their creation date
7. Do you have orders that should NOT be synchronized?
If so, please indicate the tag(s) (separated by commas) to identify these orders.
This option allows you to associate a tag with orders you don't want to include in the synchronization.\
For example: If you want to create internal orders to track stock directly in your e-commerce store
You can then associate a tag with these orders you want to exclude from synchronization. A concrete example of a tag could be "StockTracking" for orders used to track stock movements in your e-commerce store for internal purposes. If you want to create multiple tags, the answer to this question would be:
"StockTracking, Stock Management, AnyTagYouWant". Any order associated with one of these three tags will be ignored during synchronization execution.
If this doesn't apply, you can leave this option empty.
For WooCommerce, it's necessary to define a custom field. For this, in the custom fields section, you need to create an "order\_tags" field and enter as values the different tags you want to associate with an order. These tags that you will have created in the order will then be used to filter or not filter an order during synchronization.
# null
Source: https://docs.chift.eu/syncs/embedded
Through the embedded model, you will be able to choose how and when you want to:
* Expose the configuration of the sync to your end-users
* Trigger the sync from your app
* Manage the executions of the sync from your app
* Show logs to your end-users in your app
You decide how you want to integrate the sync in your app.\
In the "embedded" model, you will have to do a minimum development on your side to manage consumers and connections, as well as sharing the activation of syncs to your end-users.
You will call our APIs to obtain the URL that you can share with your end-users (protected page by a token)
This gives you the possibility to choose how and where to do it your app.
# How can syncs be exposed to end-users
Source: https://docs.chift.eu/syncs/expose-overview
We have developed different ways to expose syncs to your end-users.\
The choice of the method depends on your needs and constraints.\
From something fully embedded in your app to something that is listed in our marketplace, we have you covered.
Syncs can be exposed to end-users in different ways:
* [Embedded](/syncs/embedded)
* [Pre-oauth2 sync](/syncs/pre-oauth2-sync)
* [Marketplace](/syncs/marketplace)
The difference are highlighted below and are explained in more details in the dedicated pages.
| Property | Embedded | Pre-oauth2 sync | Marketplace |
| ------------------------------- | -------- | --------------- | ----------- |
| Requires dev on your side | ++ | + | + |
| Embedded in your app | +++ | ++ | + |
| White-label | +++ | ++ | + |
| End-users can manage consumers | + | + | +++ |
| End-users can manage executions | + | + | +++ |
# How does it work
Source: https://docs.chift.eu/syncs/how-does-it-work
Syncs are powered by connecting our Unified APIs to your software.
We have a set of [pre-built syncs](/syncs/overview#explore-our-ready-to-use-syncs) that you can use as a starting point, but we can also build custom syncs for you depending on your needs.\
Together with you, we define the data that needs to be synced, the frequency of the syncs and the triggers that will start the syncs.\
The syncs are fully managed by us, so you don't have to worry about the underlying infrastructure.
#### Requirements
* You have an API for your software
* You want to connect your software to one of our [Unified APIs](/unified-apis/overview)
#### How
* We define the scope together
* We build the sync for you
* We define the trigger based on your requirements (e.g. event-based or timer-based)
* We define how you want to expose the sync to your end-users (see [overview](/syncs/expose-overview))
#### What can you do ?
Based on your requirements, you can use our APIs for which you will have different endpoints that will give you the full control over the sync.\
Next to the same routes to manage consumers and connections as for the Unified APIs, you will have dedicated endpoints for the syncs.
For the activation:
* Share the configuration page a sync for a consumer (see [share sync](/api-reference/endpoints/consumers/retrieve-the-url-of-a-sync-for-a-specific-consumer))
* Get the status of a sync for a consumer (see [get status of a sync](/api-reference/endpoints/consumers/get-sync-information-for-one-consumer))
* Activate the sync for a consumer (see [activate sync](/api-reference/endpoints/syncs/enable-a-flow-for-a-specific-consumer))
* Update settings of the sync for a consumer (see [update sync settings](/api-reference/endpoints/syncs/update-flow-settings-for-a-specific-consumer))
For the execution status:
* Get list of executions (see [get executions](/api-reference/endpoints/consumers/get-executions-information-for-one-consumerflowsync))
* Get information about one executions (see [get executions](/api-reference/endpoints/syncs/get-execution-startend-timestamp))
* Get data of executions (see [get data of executions](/api-reference/endpoints/consumers/get-executions-information-for-one-consumerflowsync))
Trigger a sync:
* Trigger a sync (see [trigger a sync](/api-reference/endpoints/syncs/send-a-custom-event-for-a-specific-flow))
# Invoices sync
Source: https://docs.chift.eu/syncs/invoices-sync
This sync will allow you to sync invoices from invoicing software to accounting software.

### Default scope:
This integration sync will allow:
* automatic synchronization of **sales and/or purchase invoices (with attachment)** from an invoicing software to an accounting tool.
* synchronization of **customers and suppliers (third parties):**
* if the third party doesn't yet exist in accounting, the flow will try to find a match based on the following criteria:
1. auxiliary accounting account vs. auxiliary account entered in the invoicing software
2. VAT number
3. company/SIRET number
4. auxiliary accounting account vs. customer/supplier name
* if no match is found, then a new customer/supplier is automatically created in the accounting system
Note that this is the default scope, based on your requirements this can be modified.
### Mappings
Mappings are the way to map the data from the invoicing software to the accounting software.
Note that this is are the default mappings, based on your requirements these can be modified.
This step allows user to connect its invoicing tool through apikey, credentials or oauth2.
This step allows user to connect its accounting tool through apikey, credentials or oauth2.
This step allows you to specify the VAT code to use in accounting for each sales VAT rate existing in the invoicing software.
*Reproduce this step by using the following API call(s) :* GET folders GET vat codes GET retrieve all taxes
This step allows you to specify the VAT code to use in accounting for each sales VAT rate existing in the invoicing software.
*Reproduce this step by using the following API call(s) :* GET vat codes GET retrieve all taxes
Select the VAT codes to use for possible rounding differences.
*Reproduce this step by using the following API call(s) :* GET vat codes
This step allows you to specify whether entries are made in a sales or purchase journal.
*Reproduce this step by using the following API call(s) :* GET journals
1. Sales Account (products): This step allows you to specify the accounting account to use in sales invoice lines if the information is missing in the invoicing software OR if the account mentioned in the invoicing software doesn't exist or is not active in accounting.
2. Purchase Account (expenses): This step allows you to specify the accounting account to use in purchase invoice lines if the information is missing in the invoicing software OR if the account mentioned in the invoicing software doesn't exist or is not active in accounting.
3. Customer Collective Account: This step allows you to specify the accounting account that serves as the customer collective in accounting. Generally, this is account 411
4. Supplier Collective Account: This step allows you to specify the accounting account that serves as the customer collective in accounting. Generally, this is account 401
5. Account to use for possible credit rounding: In some invoicing software, the sum of lines doesn't always equal the invoice total due to VAT rounding. If the sum of lines is less than the invoice total, then a line is added to the invoice to balance this in accounting. Generally, this is account 758
6. Account to use for possible debit rounding: In some invoicing software, the sum of lines doesn't always equal the invoice total due to VAT rounding. If the sum of lines is greater than the invoice total, then a line is added to the invoice to balance this in accounting. Generally, this is account 658
*Reproduce this step by using the following API call(s) :* GET chart of accounts
*(Filter on class 4, 6 and 7 accounts)*
This step allows you to specify whether discounts need to be specified in a separated account for discounts, rebates and debates ; it is an optionnal step. If not activated the discounted amount is directly deduced from the product/charges account.
*Reproduce this step by using the following API call(s) :* GET chart of accounts
*(Filter on class 6 and 7 accounts)*
### Configuration
1. Synchronization Start Date: choice of the date from which invoices will be synchronized.
💡Synchronization starts automatically each night.
2. Do you want to create entries as draft/pending?\
This option allows creation of "pending" accounting entries in the accounting software. This means the accountant must validate each entry before it is recorded. Some accountants prefer this approach for better control. Note that this is not supported by all accounting tools.
3. Do you want to synchronize invoices without attachment?\
Do you want invoices to be synchronized to accounting when the PDF/attachment is missing in the invoicing software? If you select "no", then sales and purchase invoices without PDF/attachment will not be synchronized until the PDF/attachment is provided.
4. What do you want to synchronize?\
You can specify the integration scope: purchase and sales invoices, sales invoices only, or purchase invoices only.
5. Label Settings\
This step allows you to define how accounting entry labels are composed. An accounting label is a description associated with an accounting entry that helps clarify each accounting entry.
Four options are available:
* The line linked to a customer/supplier account has the customer/supplier name as label / Other lines have the description from invoicing software as label
* Customer/supplier name on all lines
* Customer/supplier name + description of invoice lines on all lines
* Customer/supplier name + invoice number on all lines
### Troubleshooting
| Error Code | Error description | Resolution |
| ---------------------------------------------------- | --------------------------------------------------------------------- | ------------------------------------------------------------------------------------------------------------------------------------------------------------------------------------------------------------------------------------------------------------------------------------------------------------------- |
| ERROR\_SYNC\_INVOICE\_ACCOUNT\_NUMBER\_NOT\_FOUND | The account number doesn't exist in the accounting system. | The account number of one of the items in the invoice is not found in the accounting system. See [appendix 1](#appendix-1) for more information. |
| ERROR\_SYNC\_INVOICE\_ACCOUNT\_NUMBER\_NOT\_ACTIVE | The account number is not active in the accounting system. | The account number of one of the items in the invoice is not active in the accounting system. See [appendix 1](#appendix-1) for more information. |
| ERROR\_SYNC\_INVOICE\_PARTNER\_NOT\_FOUND | The partner doesn't exist in the accounting system. | The client/supplier referenced in the invoice is not found in the accounting system. See [appendix 2](#appendix-2) for more information. |
| ERROR\_SYNC\_INVOICE\_AMOUNT\_VALIDATION | The invoice amounts (totals, taxes or untaxed amounts) are not valid. | Please check the invoice and evaluate why the totals are not valid. If the amounts are correct in the invoicing tool, please contact Chift's support. |
| ERROR\_SYNC\_INVOICE\_CONTACT\_NOT\_FOUND | The contact doesn't exist in the invoicing tool. | The contact referenced on the invoice is not found in the invoicing tool. Please check the invoice and evaluate why the contact is not found. If the contact exists in the invoicing tool, please contact Chift's support. |
| ERROR\_SYNC\_INVOICE\_JOURNAL\_NOT\_LINKED | The invoice is not linked to a journal in the invoicing tool. | The invoice is not linked to a journal in the invoicing tool. Please check the invoice and evaluate why the journal is not linked. Make sure that every invoice has a journal linked. If the journal is linked in the invoicing tool, please contact Chift's support. |
| ERROR\_SYNC\_INVOICE\_LINE\_VALIDATION | The invoice line is not valid. | The invoice line is not valid. There is a missing tax code or tax rate in one of the invoice lines. Please check the invoice and evaluate why the invoice line is not valid. If the invoice line is valid in the invoicing tool, please contact Chift's support. |
| ERROR\_SYNC\_INVOICE\_MAPPING\_TAX\_RATE\_NOT\_FOUND | The tax rate of one of the invoice is not mapped in the sync. | The tax rate is not mapped in the sync. Please configure the mapping of the sync. |
| ERROR\_SYNC\_INVOICE\_PARTNER\_VALIDATION | The partner of one of the invoice is not configured. | It's impossible to sync the invoice because it's missing a partner\_id. If the partner does exist on the invoice, please contact Chift's support. |
| ERROR\_SYNC\_INVOICE\_PDF | There is an issue while retrieving the pdf of the invoice. | The invoice has no PDF/attachment or there is an issue while retrieving the PDF/attachment of the invoice from the invoicing software. Please check the invoice and evaluate why the PDF/attachment is missing / not valid. If the PDF/attachment is present in the invoicing tool, please contact Chift's support. |
| ERROR\_SYNC\_INVOICE\_MAPPING\_JOURNAL\_NOT\_FOUND | The journal of one of the invoice is not mapped in the sync. | The journal is not mapped in the sync. Please configure the mapping of the sync. Note that this is only applicable when journals from the invoicing software are mapped with accounting journals |
### Appendix
#### Appendix 1: The account number doesn't exist or is not active in the accounting system.
The account number of one of the items in the invoice is not found or is not active in the accounting system.
If you have this error, it means that the account number used to create the invoice does not exist or is not active in the accounting system.
The sync is working as follows:
1. If avalailabe, we use the account number specified in the invoicing tool for the items of the invoice.
2. We try to create the invoice with those account numbers in the accounting system.
3. If the account number does not exist or is not active in the accounting system, we retry with the default account number specified in the mapping (Default account number for products & expenses).
4. If the account number still does not exist or is not active in the accounting system, we raise an error. The invoice is not created in the accounting system.
This issue can happen in 2 cases:
* the account number specified on the invoicing software doesn't exist or is not active in the accounting tool
* the default account number specified in the mapping doesn't exist anymore in the accounting tool OR is not active in the accounting tool
What you can do:
* Use a correct and valid account number in the invoicing tool for the items of the invoice or create and activate the account number in the accounting system.
* Make sure the the default account number in the mapping does exist or create the account number in the accounting system.
#### Appendix 2: The partner doesn't exist in the accounting system.
The client/supplier referenced in the invoice is not found in the accounting system.
If you have this error, it means that the client/supplier referenced in the invoice was created in the accounting system but does not exist anymore.
This can happen if the accountant has deleted the client/supplier in the accounting system.
What you can do:
* Check if the client/supplier exists in the accounting system.
* If the client/supplier does not exist, create a new one in the accounting system.
* Contact Chift's support to re-sync the client/supplier in the invoicing tool.
# Marketplace
Source: https://docs.chift.eu/syncs/marketplace
In the marketplace model, we expose your syncs through a full marketplace where your users will authenticate and create an account in Chift.
The authentication process is very smooth and done by a magic link to avoid any friction.
On their first login, they will have to create an account by providing the name of their company.
They will be able to:
* Invite other users to their account
* Activate one or more integrations for one or multiple consumers (organizations or entities)
* Manage their integrations (configure, deactivate or delete)
* View the logs of the executions of the syncs and detect errors if any
Through this model, you won't have to develop anything on your side and you will provide a seamless experience to your end-users.
This way of working is very appreciated by accountants as they can collaborate with their clients in a seamless and automated way.
# null
Source: https://docs.chift.eu/syncs/overview
Syncs can be used to create easy and scalable automations between two or more of Chift's unified APIs.\
It can for example be used to create an automation workflow between the Invoicing API (or one specific connector inside the Invoicing API) and the Accounting API (or one specific connector inside the Accounting API).\
Through the sync, the end-users can select their invoicing and accounting software and can activate the workflow(s).\
As you can imagine, it creates a multitude of automations opportunities without you having to worry about connectivity, monitoring, scalability, maintenance, ...

Main features and benefits offered by our Unified APIs:
* Full to semi-embedded & native experience with white labeling for your customers
* You don't need to develop anything; we do everything from you. No roadmap issues anymore.
* Connectors can be activated in one-click from your account (see [activate connector](/docs/getting-started/activate-connector))
* Advanced user onboarding and support (see [user onboarding](/docs/user-onboarding/overview) and [support](/docs/support/overview))
* Advanced features to scale your integrations (see our documentation)
* Different ways to trigger the sync (event-based or timer-basedr)
* [Different ways to expose syncs to end-users](/syncs/expose-overview)
## Explore our ready-to-use syncs
Explore our Invoices Sync
Explore our E-commerce Sync
Explore our POS Sync
Explore our PMS Sync
Explore our Payments Sync
## Explore other possibilites
Through our Unified APIs, we can also create other types of syncs for you, e.g.:
* Sync of expenses to accounting
* Sync of transactions to accounting
* Sync of pos data to ERP
* ...
Do not hesitate to [contact us](https://chift.eu/contact) if you need help with that.
# Payment sync
Source: https://docs.chift.eu/syncs/payment-sync
This sync will allow you to sync payments from payment software (e.g. Mollie, Stripe, Paypal, etc.) with accounting software.

Default scope:
* Retrieve transactions by balance (each balance is linked to transactions in a specific currency)
* These transactions can be synchronised with the accounting system in 2 different ways:
* One accounting entry for each transaction
* One accounting entry grouped by transaction type and period
It can be triggered daily, weekly or monthly.
### Configuration of the sync & mappings
Mappings are the way to map the data from the payment software to the accounting software.
This step allows user to connect its payment tool through api key, credentials or oauth2.
This step allows user to connect its accounting tool through api key, credentials or oauth2.
This step allows you to specify which balances you want to synchronise.
*Reproduce this step by using the following API call(s) :* GET Retrieve all balances
Here you are going to select your accounting journals for the synchronisation.
*Reproduce this step by using the following API call(s) :* GET journals
Here you are going to select default accounting accounts (client account, bank account, expense account, ...) for the synchronisation.
*Reproduce this step by using the following API call(s) :* GET chart of accounts
### Configuration
1. This final step allows you to specify the synchronization start date: choice of the date from which payments will be synchronized.
Synchronization starts automatically but you can choose:
* Each night (at 1 AM)
* Each monday (at 1 AM)
* Each first day of the month (at 1 AM)
2. Choose between one aggregated entry per period or one entry per invoice
# PMS sync
Source: https://docs.chift.eu/syncs/pms-sync
This sync will allow you to sync pms orders and payments with accounting software.

### Default scope:
This integration sync will automate PMS accounting (also called Property Management System), making manual exports unnecessary.
The integration will import sales and payments entries into accounting on the frequency defined in the configuration (daily, weekly or monthly).
The integration supports management of different payment methods, product categories and/or VAT rates.
The accounting entries will be created in the accounting journal specified in the configuration.
You can choose wheter to have:
* a single entry per period
* a single entry per invoice
Specific period will only be imported if the period is closed (max 7 days or defined in the configuration of the software)
### Mappings
Mappings are the way to map the data from the pos software to the accounting software.
This step allows user to connect its accounting tool through apikey, credentials or oauth2.
This step allows user to connect its property management system tool through apikey, credentials or oauth2.
This step allows you to specify the accounting journal in which to create accounting entries
*Reproduce this step by using the following API call(s) :* GET journals
* When you create one entry per period, this will be the client account you will use to balance your accounting entries.
* When you create one entry per invoice, this will be the default client account you will use for your invoices if the account is not specified in the client's invoice (configuration to be done in the PMS software).
*Reproduce this step by using the following API call(s) :* GET chart of accounts
*(Filter on class 4 accounts)*
This step allows you to choose the accounting account for each payment method (credit card, cash, etc.)
*Reproduce this step by using the following API call(s) :* GET Payment methodsGET chart of accounts
*(Filter on class 4 and 5 accounts)*
This step allows you to define how revenue is classified.\
You have to select an accounting account next to each accounting category.
*Reproduce this step by using the following API call(s) :* GET Accounting categoriesGET chart of accounts
*(Filter on class 4 and 7 accounts)*
### Configuration
1. This final step allows you to specify the synchronization start date: choice of the date from which Z tickets will be synchronized.
Synchronization starts automatically each night (at 6 AM).
1. Choose between one aggregated entry per period or one entry per invoice
# POS sync
Source: https://docs.chift.eu/syncs/pos-sync
This sync will allow you to sync pos orders and payments with accounting software.

### Default scope:
This integration sync will automate cash register accounting (also called Point of Sale or POS), making manual exports unnecessary.
The integration will import daily sales and payments entries into accounting (Z ticket or cash register Z report).
The integration supports management of different payment methods, product categories and/or VAT rates.
The integration also supports management of tips and complimentary items.
Note that this is the default scope, based on your requirements this can be modified.
### Mappings
Mappings are the way to map the data from the pos software to the accounting software.
Note that this is are the default mappings, based on your requirements these can be modified.
This step allows user to connect its accounting tool through apikey, credentials or oauth2.
This step allows user to connect its POS software tool through apikey, credentials or oauth2.
This step allows you to specify the accounting journal in which to create closing entries
*Reproduce this step by using the following API call(s) :* GET journals
This step allows you to choose the accounting account for each payment method (credit card, cash, etc.)\
If no match is found for a payment method (for example: a new payment method is added and not configured in the synchronization configuration), then account X is used.
*Reproduce this step by using the following API call(s) :* GET payment methods GET chart of accounts
*(Filter on class 4 and 5 accounts)*
This step allows you to define how revenue is classified, the amounts excluding VAT can be allocated in 2 different ways:
* By product categories: the accounting account is determined based on the category linked to the product being sold. If the product is not linked to any category, then the accounting account indicated in the last option (=other) of this step's configuration is used
* By VAT rates: the accounting account is determined based on the VAT rate associated with the amount excluding VAT
*Reproduce this step by using the following API call(s) :* GET accounting categories GET chart of accounts
*(Filter on class 4 and 7 accounts)*
Choose accounting accounts to record specific cases. In this step, you can also indicate the default sales account mentioned in step 6 above.
*Reproduce this step by using the following API call(s) :* GET accounting categories GET chart of accounts
This step allows you to choose the accounting account for tips.\
This account will then be used when creating accounting entries to record the day's tips.
*Reproduce this step by using the following API call(s) :* GET accounting categories GET chart of accounts
This step involves indicating whether you want to create an additional entry for complimentary items:
* If the option is not activated, anything given away for free is not shown in the generated accounting entries.
* If you activate this option, you'll need to indicate an account to use for debit and credit. When creating accounting entries, these two accounts will be used to indicate the amount given away during each day. Generally, this involves a `class 7 account` for credit and a `class 6 account` for debit.
*Reproduce this step by using the following API call(s) :* GET chart of accounts
*(Filter on class 6 and 7 accounts)*
This step allows you to specify whether entries are made in a account for discounts, rebates and debates ; it is an optionnal step.
*Reproduce this step by using the following API call(s) :* GET chart of accounts
*(Filter on class 6 and 7 accounts)*
### Configuration
1. This final step allows you to specify the synchronization start date: choice of the date from which Z tickets will be synchronized.
💡 Synchronization starts automatically each night (at 6 AM).
2. Rounding default values
Indicate the allowance that you tolerate for rounding errors (e.g. 1.00).
# Pre-oauth2 sync
Source: https://docs.chift.eu/syncs/pre-oauth2-sync
In the pre-oauth2 sync, we do the same as the embedded sync, but you don't have to do any development on your side (you can if you want to retrieve statuses of executions, ...).
The requirement is that you have an OAuth2 authentication flow in your software.
You will only have to share one URL for each app that you want to connect to your end-users.
This URL is protected by your OAuth2 authentication flow (only people with an account in your software can access this URL).
Based on this authentication, we will create the consumer and the associated connection.
If the user comes back to this configuration page, we will re-use the existing consumer and connection.
This gives you the possibility to embed the configuration page of the sync in your software while not having to develop anything and delivering a fully white-labeled and smooth experience to your end-users.
# Connectors
Source: https://docs.chift.eu/unified-apis/accounting/connectors
## Accounting
}>
Explore ACD
}>
Explore AFAS Software
}>
Explore Cegid Loop
}>
Explore Cegid Quadra
}>
Explore Datev
}>
Explore Dynamics 365 Business Central
}>
Explore e-Boekhouden
}>
Explore VISMA eAccounting
}>
Explore Exact Online
}>
Explore Fulll
}>
Explore Holded
}>
Explore Horus
}>
Explore Inqom
}>
Explore Minox
}>
Explore MyUnisoft
}>
Explore Netsuite
}>
Explore Octopus
}>
Explore Odoo
}>
Explore Pennylane
}>
Explore Reviso
}>
Explore Sage 50 FR
}>
Explore Sage 100 FR
}>
Explore Sage Bob 50
}>
Explore Sage Generation Expert
}>
Explore SnelStart
}>
Explore Tiime
}>
Explore Twinfield
}>
Explore Yuki
}>
Explore Winbooks
# Accounting API - Coverage
Source: https://docs.chift.eu/unified-apis/accounting/coverage
## Coverage of endpoints by connector
| Route | Myunisoft | Sage100fr | Yuki | Holded | Pennylane | Exactonline | Snelstart | Winbiz | Exactonlinefr | Tiime | Fulll | Exactonlinenl | Odoo | Visma\_eaccounting | Sagege | Eboekhouden | Minox | Businesscentral | Cegidloop | Inexweb | Bob50 | Sage50uk | Winbooksclassic | Inqom | Octopus | Netsuite | Sage50fr | Horus | Acd |
| ---------------------------------------------------------------------------------------- | --------- | --------- | ---- | ------ | --------- | ----------- | --------- | ------ | ------------- | ----- | ----- | ------------- | ---- | ------------------ | ------ | ----------- | ----- | --------------- | --------- | ------- | ----- | -------- | --------------- | ----- | ------- | -------- | -------- | ----- | --- |
| GET /bookyears | ✅ | ❌ | ✅ | ❌ | ❌ | ✅ | ✅ | ❌ | ✅ | ✅ | ✅ | ✅ | ✅ | ✅ | ✅ | ✅ | ❌ | ❌ | ❌ | ✅ | ❌ | ❌ | ❌ | ✅ | ❌ | ✅ | ❌ | ❌ | ✅ |
| POST /accounts | ✅ | ❌ | ❌ | ✅ | ✅ | ✅ | ✅ | ❌ | ✅ | ❌ | ✅ | ✅ | ❌ | ✅ | ❌ | ✅ | ✅ | ❌ | ✅ | ❌ | ❌ | ❌ | ❌ | ✅ | ✅ | ❌ | ❌ | ✅ | ✅ |
| GET /export-fec | ✅ | ❌ | ❌ | ❌ | ❌ | ❌ | ❌ | ❌ | ❌ | ❌ | ❌ | ❌ | ❌ | ❌ | ❌ | ❌ | ❌ | ❌ | ❌ | ❌ | ❌ | ❌ | ❌ | ❌ | ❌ | ❌ | ❌ | ❌ | ✅ |
| GET /folders | ❌ | ✅ | ✅ | ❌ | ❌ | ✅ | ✅ | ❌ | ✅ | ✅ | ✅ | ✅ | ✅ | ✅ | ✅ | ✅ | ✅ | ❌ | ✅ | ✅ | ✅ | ❌ | ✅ | ✅ | ✅ | ✅ | ❌ | ❌ | ❌ |
| GET /analytic-plans | ❌ | ✅ | ✅ | ❌ | ❌ | ✅ | ✅ | ❌ | ✅ | ❌ | ✅ | ✅ | ❌ | ✅ | ✅ | ✅ | ✅ | ❌ | ✅ | ✅ | ✅ | ❌ | ✅ | ✅ | ✅ | ✅ | ✅ | ❌ | ❌ |
| POST /clients | ❌ | ✅ | ✅ | ✅ | ❌ | ✅ | ✅ | ✅ | ✅ | ❌ | ✅ | ✅ | ❌ | ✅ | ✅ | ✅ | ✅ | ❌ | ✅ | ✅ | ✅ | ❌ | ✅ | ✅ | ✅ | ✅ | ❌ | ❌ | ❌ |
| GET /clients | ❌ | ✅ | ✅ | ✅ | ❌ | ✅ | ✅ | ✅ | ✅ | ✅ | ✅ | ✅ | ❌ | ✅ | ✅ | ✅ | ✅ | ❌ | ✅ | ✅ | ✅ | ✅ | ✅ | ✅ | ✅ | ✅ | ✅ | ❌ | ❌ |
| PATCH /clients/\{client\_id} | ❌ | ✅ | ✅ | ✅ | ❌ | ✅ | ✅ | ✅ | ❌ | ❌ | ❌ | ❌ | ❌ | ✅ | ❌ | ✅ | ✅ | ❌ | ✅ | ❌ | ✅ | ❌ | ✅ | ✅ | ✅ | ❌ | ❌ | ❌ | ❌ |
| GET /clients/\{client\_id} | ❌ | ✅ | ✅ | ✅ | ❌ | ✅ | ✅ | ✅ | ✅ | ✅ | ✅ | ✅ | ❌ | ✅ | ✅ | ✅ | ✅ | ❌ | ✅ | ✅ | ✅ | ✅ | ✅ | ✅ | ✅ | ✅ | ✅ | ❌ | ❌ |
| POST /suppliers | ❌ | ✅ | ✅ | ✅ | ❌ | ✅ | ✅ | ✅ | ✅ | ❌ | ✅ | ✅ | ❌ | ✅ | ✅ | ✅ | ✅ | ❌ | ✅ | ✅ | ✅ | ❌ | ✅ | ✅ | ✅ | ✅ | ❌ | ❌ | ❌ |
| GET /suppliers | ❌ | ✅ | ✅ | ✅ | ❌ | ✅ | ✅ | ✅ | ✅ | ✅ | ✅ | ✅ | ❌ | ✅ | ✅ | ✅ | ✅ | ❌ | ✅ | ✅ | ✅ | ✅ | ✅ | ✅ | ✅ | ✅ | ✅ | ❌ | ❌ |
| GET /suppliers/\{supplier\_id} | ❌ | ✅ | ✅ | ✅ | ❌ | ✅ | ✅ | ✅ | ✅ | ✅ | ✅ | ✅ | ❌ | ✅ | ✅ | ✅ | ✅ | ❌ | ✅ | ✅ | ✅ | ✅ | ✅ | ✅ | ✅ | ✅ | ✅ | ❌ | ❌ |
| PATCH /suppliers/\{supplier\_id} | ❌ | ✅ | ✅ | ✅ | ❌ | ✅ | ✅ | ✅ | ❌ | ❌ | ❌ | ❌ | ❌ | ✅ | ❌ | ✅ | ✅ | ❌ | ✅ | ❌ | ✅ | ❌ | ✅ | ✅ | ✅ | ❌ | ❌ | ❌ | ❌ |
| POST /invoices | ❌ | ✅ | ✅ | ✅ | ❌ | ✅ | ✅ | ✅ | ✅ | ✅ | ✅ | ✅ | ❌ | ✅ | ✅ | ✅ | ✅ | ✅ | ✅ | ✅ | ✅ | ❌ | ✅ | ✅ | ✅ | ✅ | ❌ | ❌ | ❌ |
| POST /invoices/multi-analytic-plans | ❌ | ❌ | ✅ | ✅ | ❌ | ❌ | ❌ | ❌ | ❌ | ❌ | ❌ | ❌ | ❌ | ❌ | ❌ | ❌ | ❌ | ✅ | ❌ | ❌ | ❌ | ❌ | ❌ | ❌ | ❌ | ✅ | ❌ | ❌ | ❌ |
| GET /invoices/type/\{invoice\_type} | ❌ | ✅ | ✅ | ✅ | ❌ | ✅ | ✅ | ✅ | ✅ | ❌ | ✅ | ✅ | ❌ | ✅ | ✅ | ✅ | ✅ | ❌ | ✅ | ✅ | ✅ | ✅ | ✅ | ✅ | ✅ | ✅ | ✅ | ❌ | ❌ |
| GET /invoices/multi-analytic-plans/type/\{invoice\_type} | ❌ | ❌ | ✅ | ✅ | ❌ | ❌ | ❌ | ❌ | ❌ | ❌ | ❌ | ❌ | ❌ | ❌ | ❌ | ❌ | ❌ | ❌ | ❌ | ❌ | ❌ | ❌ | ❌ | ❌ | ❌ | ✅ | ❌ | ❌ | ❌ |
| GET /invoices/\{invoice\_id} | ❌ | ✅ | ✅ | ✅ | ❌ | ✅ | ✅ | ✅ | ✅ | ❌ | ✅ | ✅ | ❌ | ✅ | ✅ | ✅ | ❌ | ❌ | ✅ | ✅ | ✅ | ❌ | ✅ | ✅ | ✅ | ✅ | ❌ | ❌ | ❌ |
| GET /invoices/multi-analytic-plans/\{invoice\_id} | ❌ | ❌ | ✅ | ✅ | ❌ | ❌ | ❌ | ❌ | ❌ | ❌ | ❌ | ❌ | ❌ | ❌ | ❌ | ❌ | ❌ | ❌ | ❌ | ❌ | ❌ | ❌ | ❌ | ❌ | ❌ | ✅ | ❌ | ❌ | ❌ |
| POST /bank-accounts | ❌ | ❌ | ❌ | ❌ | ❌ | ✅ | ❌ | ❌ | ✅ | ❌ | ❌ | ✅ | ❌ | ❌ | ❌ | ❌ | ❌ | ✅ | ❌ | ❌ | ❌ | ❌ | ❌ | ❌ | ❌ | ❌ | ❌ | ❌ | ❌ |
| POST /analytic-accounts | ❌ | ✅ | ✅ | ❌ | ❌ | ✅ | ❌ | ✅ | ✅ | ❌ | ❌ | ✅ | ❌ | ❌ | ❌ | ❌ | ✅ | ❌ | ✅ | ❌ | ✅ | ❌ | ✅ | ✅ | ✅ | ❌ | ❌ | ❌ | ❌ |
| GET /analytic-accounts | ❌ | ✅ | ✅ | ❌ | ❌ | ✅ | ✅ | ✅ | ✅ | ❌ | ✅ | ✅ | ❌ | ✅ | ❌ | ✅ | ✅ | ❌ | ✅ | ✅ | ✅ | ❌ | ✅ | ✅ | ✅ | ✅ | ✅ | ❌ | ❌ |
| POST /analytic-accounts/multi-analytic-plans/\{analytic\_plan} | ❌ | ✅ | ✅ | ❌ | ❌ | ✅ | ❌ | ❌ | ✅ | ❌ | ❌ | ✅ | ❌ | ❌ | ❌ | ❌ | ✅ | ❌ | ✅ | ❌ | ✅ | ❌ | ✅ | ✅ | ✅ | ❌ | ❌ | ❌ | ❌ |
| PATCH /analytic-accounts/\{analytic\_account\_id} | ❌ | ✅ | ✅ | ❌ | ❌ | ✅ | ✅ | ✅ | ✅ | ❌ | ❌ | ✅ | ❌ | ✅ | ❌ | ✅ | ✅ | ❌ | ❌ | ❌ | ✅ | ❌ | ✅ | ❌ | ✅ | ❌ | ❌ | ❌ | ❌ |
| GET /analytic-accounts/\{analytic\_account\_id} | ❌ | ✅ | ✅ | ❌ | ❌ | ✅ | ✅ | ✅ | ✅ | ❌ | ✅ | ✅ | ❌ | ✅ | ❌ | ✅ | ✅ | ❌ | ✅ | ✅ | ✅ | ❌ | ✅ | ✅ | ✅ | ✅ | ✅ | ❌ | ❌ |
| PATCH /analytic-accounts/\{analytic\_account\_id}/multi-analytic-plans/\{analytic\_plan} | ❌ | ✅ | ✅ | ❌ | ❌ | ✅ | ✅ | ❌ | ✅ | ❌ | ❌ | ✅ | ❌ | ✅ | ❌ | ✅ | ✅ | ❌ | ❌ | ❌ | ✅ | ❌ | ✅ | ❌ | ✅ | ❌ | ❌ | ❌ | ❌ |
| GET /analytic-accounts/\{analytic\_account\_id}/multi-analytic-plans/\{analytic\_plan} | ❌ | ✅ | ✅ | ❌ | ❌ | ✅ | ✅ | ❌ | ✅ | ❌ | ✅ | ✅ | ❌ | ✅ | ❌ | ✅ | ✅ | ❌ | ✅ | ✅ | ✅ | ❌ | ✅ | ✅ | ✅ | ✅ | ✅ | ❌ | ❌ |
| GET /analytic-accounts/multi-analytic-plans | ❌ | ✅ | ✅ | ❌ | ❌ | ✅ | ✅ | ❌ | ✅ | ❌ | ✅ | ✅ | ❌ | ✅ | ✅ | ✅ | ✅ | ❌ | ✅ | ✅ | ✅ | ❌ | ✅ | ✅ | ✅ | ✅ | ✅ | ❌ | ❌ |
| GET /journal/entries | ❌ | ✅ | ✅ | ✅ | ❌ | ✅ | ✅ | ❌ | ✅ | ❌ | ✅ | ✅ | ✅ | ✅ | ✅ | ✅ | ❌ | ❌ | ✅ | ✅ | ✅ | ❌ | ✅ | ✅ | ✅ | ✅ | ✅ | ❌ | ❌ |
| POST /journal/entries | ❌ | ✅ | ❌ | ✅ | ❌ | ❌ | ❌ | ❌ | ❌ | ❌ | ❌ | ❌ | ❌ | ❌ | ❌ | ❌ | ❌ | ❌ | ❌ | ❌ | ❌ | ❌ | ❌ | ❌ | ✅ | ❌ | ❌ | ❌ | ❌ |
| GET /journal/entries/multi-analytic-plans | ❌ | ❌ | ❌ | ✅ | ❌ | ❌ | ❌ | ❌ | ❌ | ❌ | ❌ | ❌ | ✅ | ❌ | ✅ | ❌ | ❌ | ❌ | ❌ | ❌ | ❌ | ❌ | ❌ | ❌ | ❌ | ✅ | ❌ | ❌ | ❌ |
| GET /journal/entries/\{journal\_entry\_id} | ❌ | ❌ | ❌ | ✅ | ❌ | ❌ | ❌ | ❌ | ❌ | ❌ | ❌ | ❌ | ❌ | ❌ | ❌ | ❌ | ❌ | ❌ | ❌ | ❌ | ❌ | ❌ | ❌ | ❌ | ❌ | ❌ | ❌ | ❌ | ❌ |
| POST /journal-entries | ❌ | ✅ | ❌ | ✅ | ❌ | ✅ | ✅ | ❌ | ✅ | ✅ | ✅ | ✅ | ❌ | ✅ | ✅ | ✅ | ✅ | ❌ | ✅ | ✅ | ❌ | ❌ | ❌ | ✅ | ❌ | ✅ | ❌ | ❌ | ❌ |
| GET /invoices/id/\{invoice\_id}/payments | ❌ | ✅ | ❌ | ❌ | ❌ | ✅ | ❌ | ✅ | ✅ | ❌ | ❌ | ✅ | ❌ | ❌ | ❌ | ❌ | ❌ | ❌ | ❌ | ❌ | ✅ | ❌ | ✅ | ❌ | ✅ | ❌ | ❌ | ❌ | ❌ |
| GET /journals | ❌ | ✅ | ✅ | ✅ | ❌ | ✅ | ✅ | ✅ | ✅ | ✅ | ✅ | ✅ | ✅ | ✅ | ✅ | ✅ | ✅ | ✅ | ✅ | ✅ | ✅ | ❌ | ✅ | ✅ | ✅ | ✅ | ✅ | ❌ | ❌ |
| POST /journal | ❌ | ❌ | ❌ | ✅ | ❌ | ✅ | ✅ | ❌ | ❌ | ❌ | ❌ | ✅ | ❌ | ✅ | ❌ | ✅ | ✅ | ❌ | ✅ | ❌ | ❌ | ❌ | ❌ | ✅ | ✅ | ❌ | ❌ | ❌ | ❌ |
| GET /vat-codes | ❌ | ✅ | ✅ | ✅ | ❌ | ✅ | ✅ | ✅ | ✅ | ✅ | ✅ | ✅ | ✅ | ✅ | ✅ | ✅ | ✅ | ✅ | ✅ | ✅ | ✅ | ❌ | ✅ | ✅ | ✅ | ✅ | ❌ | ✅ | ❌ |
| POST /miscellaneous-operation | ❌ | ❌ | ✅ | ❌ | ❌ | ✅ | ❌ | ❌ | ✅ | ❌ | ❌ | ✅ | ❌ | ❌ | ❌ | ❌ | ❌ | ❌ | ❌ | ❌ | ✅ | ❌ | ✅ | ❌ | ✅ | ❌ | ❌ | ❌ | ❌ |
| GET /miscellaneous-operation | ❌ | ❌ | ❌ | ❌ | ❌ | ✅ | ❌ | ❌ | ✅ | ❌ | ❌ | ✅ | ❌ | ❌ | ❌ | ❌ | ✅ | ❌ | ❌ | ❌ | ✅ | ❌ | ✅ | ❌ | ✅ | ❌ | ❌ | ❌ | ❌ |
| GET /miscellaneous-operation/\{operation\_id} | ❌ | ❌ | ❌ | ❌ | ❌ | ✅ | ❌ | ❌ | ✅ | ❌ | ❌ | ✅ | ❌ | ❌ | ❌ | ❌ | ❌ | ❌ | ❌ | ❌ | ✅ | ❌ | ✅ | ❌ | ✅ | ❌ | ❌ | ❌ | ❌ |
| POST /matching | ❌ | ✅ | ❌ | ❌ | ✅ | ✅ | ❌ | ❌ | ✅ | ❌ | ❌ | ✅ | ❌ | ❌ | ❌ | ❌ | ❌ | ❌ | ❌ | ❌ | ✅ | ❌ | ✅ | ❌ | ✅ | ❌ | ❌ | ✅ | ❌ |
| POST /matching-multiple | ❌ | ❌ | ❌ | ❌ | ❌ | ✅ | ❌ | ❌ | ✅ | ❌ | ❌ | ✅ | ❌ | ❌ | ❌ | ❌ | ❌ | ❌ | ❌ | ❌ | ❌ | ❌ | ❌ | ❌ | ❌ | ❌ | ❌ | ❌ | ❌ |
| POST /invoices/pdf/\{invoice\_id} | ✅ | ✅ | ❌ | ✅ | ❌ | ✅ | ❌ | ✅ | ✅ | ❌ | ❌ | ✅ | ❌ | ❌ | ❌ | ❌ | ❌ | ❌ | ❌ | ❌ | ✅ | ❌ | ✅ | ❌ | ✅ | ❌ | ❌ | ❌ | ❌ |
| GET /attachments | ❌ | ✅ | ✅ | ✅ | ❌ | ✅ | ✅ | ❌ | ✅ | ❌ | ❌ | ✅ | ❌ | ✅ | ❌ | ✅ | ❌ | ✅ | ❌ | ❌ | ❌ | ❌ | ❌ | ✅ | ✅ | ❌ | ❌ | ❌ | ❌ |
| GET /chart-of-accounts | ❌ | ✅ | ✅ | ✅ | ✅ | ✅ | ✅ | ✅ | ✅ | ✅ | ✅ | ✅ | ❌ | ✅ | ✅ | ✅ | ✅ | ❌ | ✅ | ✅ | ✅ | ❌ | ✅ | ✅ | ✅ | ✅ | ✅ | ❌ | ❌ |
| POST /chart-of-accounts/balance | ❌ | ✅ | ✅ | ✅ | ❌ | ✅ | ✅ | ❌ | ✅ | ❌ | ❌ | ✅ | ❌ | ✅ | ❌ | ✅ | ❌ | ❌ | ❌ | ❌ | ✅ | ❌ | ✅ | ✅ | ✅ | ❌ | ❌ | ❌ | ❌ |
| GET /employees | ❌ | ✅ | ❌ | ✅ | ❌ | ❌ | ✅ | ❌ | ❌ | ✅ | ✅ | ❌ | ❌ | ✅ | ❌ | ✅ | ❌ | ❌ | ❌ | ✅ | ❌ | ❌ | ❌ | ❌ | ❌ | ✅ | ❌ | ❌ | ❌ |
| POST /financial-entry | ❌ | ❌ | ❌ | ❌ | ❌ | ❌ | ❌ | ❌ | ❌ | ❌ | ❌ | ❌ | ❌ | ❌ | ❌ | ❌ | ❌ | ❌ | ❌ | ❌ | ❌ | ❌ | ❌ | ❌ | ❌ | ❌ | ❌ | ✅ | ❌ |
| POST /financial-entries | ❌ | ✅ | ❌ | ❌ | ❌ | ✅ | ❌ | ❌ | ✅ | ❌ | ❌ | ✅ | ❌ | ❌ | ❌ | ❌ | ❌ | ❌ | ❌ | ❌ | ❌ | ❌ | ✅ | ❌ | ✅ | ❌ | ❌ | ❌ | ❌ |
| GET /outstandings | ❌ | ✅ | ✅ | ❌ | ❌ | ✅ | ✅ | ❌ | ✅ | ❌ | ❌ | ✅ | ❌ | ✅ | ❌ | ✅ | ❌ | ❌ | ❌ | ❌ | ❌ | ❌ | ❌ | ❌ | ✅ | ❌ | ❌ | ❌ | ❌ |
# Data types
Source: https://docs.chift.eu/unified-apis/accounting/datatypes
Clients
Suppliers
Invoices
Analytic accounts
Journal entries
Miscelleaneous operations
Attachments
Balance of accounts
Chart of accounts
VAT Codes
# Introduction to our Accounting APIs
Source: https://docs.chift.eu/unified-apis/accounting/overview
View our [API documentation](/api-reference/endpoints/accounting) for details about the accounting endpoints and the data models.
Our accounting APIs allows you to connect with multiple accounting software providers through a single interface.
This integration enables access to financial data, including expenses, journals, and invoices, from popular platforms like Cegid, Sage, etc.
By using our unified accounting API, you can focus on your business while enjoying a broad connectivity to accounting software and benefiting from the expertise of our team.
Typical use cases covered by our Unified APIs are the following:
Connect to various accounting software to be able to provide reporting to your end-users.
Connect your cash flow management platform to Chift's accounting API and sync open invoices from accounting software to access future cash operations.
Connect your debt recovery platform to Chift's accounting API and use account receivables data from accounting software to automate processes and save your users precious time.
Connect your digital lending platform to Chift's accounting API and sync data from your users' accounting tools to fully automate the loan eligibility assessment process.
Connect your ERP or invocing platform to Chift's accounting API and sync your data (e.g. invoices, orders, payments, transactions, ...) to accounting software.
Generate invoices from orders or turn invoices into accounting entries without having to worry about connectivity.
# Connectors
Source: https://docs.chift.eu/unified-apis/banking/connectors
## Banking
}>
Explore Ponto
# Banking API - Coverage
Source: https://docs.chift.eu/unified-apis/banking/coverage
## Coverage of endpoints by connector
| Route | Ponto |
| -------------------------------- | ----- |
| GET /counterparts | ✅ |
| GET /\{account\_id}/transactions | ✅ |
| GET /financial-institutions | ✅ |
| GET /accounts | ✅ |
# Data types
Source: https://docs.chift.eu/unified-apis/banking/datatypes
Financial institutions
Banking accounts
Financial accounts
Counterparts accounts
# Introduction to our Banking APIs
Source: https://docs.chift.eu/unified-apis/banking/overview
View our [API documentation](/api-reference/endpoints/banking) for details about the banking endpoints and the data models.
Our Banking API's simplifies integration with banks through external providers.
This API allows you to:
* Aggregate account information from multiple banks
* Access real-time transaction database
Typical use cases covered by our Payment APIs are the following:
Connect to your users' banks be able to provide reporting to your end-users.
Import automatically transactions into your tool to predict your future expenses.
Connect to Chift's Banking API to automate manual inputs of your accounting processes.
Write your customers' bank transaction data into your tool for reconcilliation.
# Connectors
Source: https://docs.chift.eu/unified-apis/ecommerce/connectors
## E-commerce
}>
Explore Prestashop
}>
Explore Shopify
}>
Explore Woocommerce
# E-commerce API - Coverage
Source: https://docs.chift.eu/unified-apis/ecommerce/coverage
## Coverage of endpoints by connector
| Route | Woocommerce | Magento | Shopify | Prestashop |
| ------------------------------------------- | ----------- | ------- | ------- | ---------- |
| GET /countries | ✅ | ❌ | ✅ | ✅ |
| GET /locations | ✅ | ✅ | ✅ | ✅ |
| GET /payment-methods | ✅ | ❌ | ✅ | ✅ |
| GET /product-categories | ✅ | ✅ | ✅ | ✅ |
| GET /products | ✅ | ✅ | ✅ | ✅ |
| GET /products/\{product\_id} | ✅ | ✅ | ✅ | ✅ |
| GET /orders | ✅ | ✅ | ✅ | ✅ |
| GET /orders/\{order\_id} | ✅ | ✅ | ✅ | ✅ |
| GET /variants/\{variant\_id} | ✅ | ✅ | ✅ | ✅ |
| GET /taxes | ✅ | ❌ | ✅ | ✅ |
| GET /customers | ❌ | ❌ | ❌ | ❌ |
| GET /customers/\{customer\_id} | ❌ | ❌ | ❌ | ❌ |
| POST /variants/set\_quantity/\{variant\_id} | ✅ | ✅ | ✅ | ❌ |
| POST /orders | ❌ | ❌ | ✅ | ❌ |
# Data types
Source: https://docs.chift.eu/unified-apis/ecommerce/datatypes
Customers
Products
Locations
Orders
Payment methods
Product categories
Tax rates
Countries
# Introduction to our eCommerce APIs
Source: https://docs.chift.eu/unified-apis/ecommerce/overview
View our [API documentation](/api-reference/endpoints/ecommerce) for details about the eCommerce endpoints and the data models.
Our eCommerce APIs offer a single point of integration for various online shopping platforms and marketplaces.
This enables businesses to manage product listings, orders, and customer data across multiple eCommerce channels, simplifying multi-channel selling and inventory management.
Typical use cases covered by our eCommerce APIs are the following:
Connect to various ecommerce software to be able to provide reporting to your end-users.
Connect your cash flow management platform to Chift's ecommerce API and sync orders to access future cash operations.
Connect to Chift's ecommerce API to automate manual inputs of your accounting processes.
# Connectors
Source: https://docs.chift.eu/unified-apis/invoicing/connectors
## Invoicing
}>
Explore Axonaut
}>
Explore Boondmanager
}>
Explore Chargebee
}>
Explore Evoliz
}>
Explore Factomos
}>
Explore Harvest
}>
Explore Odoo Invoicing
}>
Explore Paypal
}>
Explore Qonto
}>
Explore Quickbooks
}>
Explore Sage100 Invocing
}>
Explore Sellsy
}>
Explore Teamleader
}>
Explore Vos Factures
}>
Explore Zoho One
# Invoicing API - Coverage
Source: https://docs.chift.eu/unified-apis/invoicing/coverage
## Coverage of endpoints by connector
| Route | Factomos | Boondmanager | Chargebee | Fuga\_invoicing | Zoho | Pipedrive | Axonaut | Sage100frgc | Fattureincloud | Quickbooks | Organilog | Zenfacture | Teamleader | Hubspot | Harvest | Odoo\_invoicing | Paypal | Evoliz | Sellsy | Qonto | Vosfactures |
| ------------------------------------- | -------- | ------------ | --------- | --------------- | ---- | --------- | ------- | ----------- | -------------- | ---------- | --------- | ---------- | ---------- | ------- | ------- | --------------- | ------ | ------ | ------ | ----- | ----------- |
| GET /invoices | ✅ | ✅ | ✅ | ✅ | ✅ | ❌ | ✅ | ✅ | ✅ | ✅ | ✅ | ❌ | ✅ | ✅ | ✅ | ✅ | ✅ | ✅ | ✅ | ✅ | ✅ |
| GET /invoices/\{invoice\_id} | ✅ | ✅ | ✅ | ✅ | ✅ | ❌ | ✅ | ✅ | ✅ | ✅ | ✅ | ❌ | ✅ | ✅ | ✅ | ✅ | ✅ | ✅ | ✅ | ✅ | ✅ |
| GET /contacts/\{contact\_id} | ✅ | ✅ | ✅ | ✅ | ✅ | ❌ | ✅ | ✅ | ✅ | ✅ | ✅ | ❌ | ✅ | ✅ | ✅ | ✅ | ❌ | ✅ | ✅ | ✅ | ✅ |
| GET /contacts | ✅ | ✅ | ✅ | ✅ | ✅ | ❌ | ✅ | ✅ | ✅ | ✅ | ✅ | ❌ | ✅ | ✅ | ✅ | ✅ | ❌ | ✅ | ✅ | ✅ | ✅ |
| GET /products/\{product\_id} | ✅ | ✅ | ❌ | ✅ | ✅ | ❌ | ✅ | ✅ | ✅ | ✅ | ✅ | ❌ | ✅ | ✅ | ❌ | ✅ | ❌ | ✅ | ✅ | ❌ | ✅ |
| GET /products | ✅ | ✅ | ❌ | ✅ | ✅ | ❌ | ✅ | ✅ | ✅ | ✅ | ✅ | ❌ | ✅ | ✅ | ❌ | ✅ | ❌ | ✅ | ✅ | ❌ | ✅ |
| GET /taxes | ✅ | ✅ | ❌ | ✅ | ✅ | ❌ | ✅ | ✅ | ✅ | ✅ | ✅ | ❌ | ✅ | ✅ | ❌ | ✅ | ❌ | ✅ | ✅ | ✅ | ✅ |
| POST /invoices | ❌ | ❌ | ❌ | ❌ | ❌ | ❌ | ❌ | ❌ | ❌ | ❌ | ❌ | ❌ | ❌ | ❌ | ❌ | ❌ | ❌ | ✅ | ✅ | ✅ | ❌ |
| GET /taxes/\{tax\_id} | ✅ | ✅ | ❌ | ✅ | ✅ | ❌ | ✅ | ✅ | ✅ | ✅ | ✅ | ❌ | ✅ | ✅ | ❌ | ✅ | ❌ | ✅ | ✅ | ✅ | ❌ |
| POST /products | ❌ | ❌ | ❌ | ❌ | ❌ | ❌ | ❌ | ❌ | ❌ | ❌ | ❌ | ❌ | ❌ | ❌ | ❌ | ❌ | ❌ | ✅ | ✅ | ❌ | ❌ |
| GET /opportunities | ✅ | ✅ | ❌ | ❌ | ❌ | ❌ | ✅ | ❌ | ❌ | ❌ | ❌ | ❌ | ✅ | ✅ | ❌ | ✅ | ❌ | ❌ | ✅ | ❌ | ❌ |
| GET /opportunities/\{opportunity\_id} | ✅ | ✅ | ❌ | ❌ | ❌ | ❌ | ✅ | ❌ | ❌ | ❌ | ❌ | ❌ | ✅ | ✅ | ❌ | ✅ | ❌ | ❌ | ✅ | ❌ | ❌ |
| POST /contacts | ❌ | ❌ | ❌ | ❌ | ❌ | ❌ | ❌ | ❌ | ❌ | ❌ | ❌ | ❌ | ❌ | ❌ | ❌ | ❌ | ❌ | ✅ | ✅ | ✅ | ❌ |
| GET /payments | ❌ | ❌ | ❌ | ✅ | ❌ | ❌ | ❌ | ❌ | ❌ | ❌ | ❌ | ❌ | ❌ | ❌ | ❌ | ❌ | ❌ | ❌ | ❌ | ❌ | ❌ |
| GET /payment-methods | ❌ | ❌ | ❌ | ✅ | ❌ | ❌ | ❌ | ❌ | ❌ | ❌ | ❌ | ❌ | ❌ | ❌ | ❌ | ❌ | ❌ | ❌ | ✅ | ❌ | ❌ |
# Data types
Source: https://docs.chift.eu/unified-apis/invoicing/datatypes
Invoices
Taxes
Products
Opportunities
Contacts
# Introduction to our Invoicing APIs
Source: https://docs.chift.eu/unified-apis/invoicing/overview
View our [API documentation](/api-reference/endpoints/invoicing) for details about the invoicing endpoints and the data models.
Our invoicing APIs provides a standardized way to interact with multiple invoicing platforms.
This allows you to create, send, and manage invoices across different systems.
Typical use cases covered by our Invoicing APIs are the following:
Connect to various invoicing software to be able to provide reporting to your end-users.
Connect your cash flow management platform to Chift's invoicing API and sync open invoices to access future cash operations.
Connect your debt recovery platform to Chift's invoicing API and use invoices' statuses to automate processes and save your users precious time.
Connect your digital lending platform to Chift's invoicing API and sync data from your users' invoicing tools to fully automate the loan eligibility assessment process.
Connect to Chift's invoicing API to automate manual inputs of your accounting processes.
# Unified APIs
Source: https://docs.chift.eu/unified-apis/overview
Use our Unified APIs to access a family of connectors by developing only one integration.\
Our Unified APIs let you have embedded & white labeled connectors within your product.

View our [API documentation](/api-reference) for details about the endpoints and the data models.
This will let you:
* Save time by not having to develop and maintain a connector for each new integration
* Reduce costs by not having to maintain a dedicated team for connector development
* Provide a wide coverage of integrations with only one integration
Main features and benefits offered by our Unified APIs:
* One common data model for each Unified API (see [data entities](/unified-apis/overview) and our [documentation](/api-reference))
* Single easy and secure way to authenticate to the API (see [authentication guide](/developer-guides/authentication))
* Embedded & native experience with white labeling for your customers
* Business logic stays in your application but you can count on Chift's team to help you with the expertise of financial connectors
* Connectors can be activated in one-click from your account (see [activate connector](/docs/getting-started/activate-connector))
* Explore and test endpoints directly in the API Explorer (see [API Explorer](/docs/getting-started/api-explorer))
* Advanced user onboarding and support (see [user onboarding](/docs/user-onboarding/overview) and [support](/docs/support/overview))
* Advanced features to scale your integrations (see our documentation)
## Explore our Unified APIs
Explore our Accounting API
Explore our Point of Sale API
Explore our eCommerce API
Explore our Invoicing API
Explore our Banking API
Explore our Payment API
Explore our Property Management System API
# Connectors
Source: https://docs.chift.eu/unified-apis/payment/connectors
## Invoicing
}>
Explore GoCardLess
}>
Explore Mollie
}>
Explore Paypal
}>
Explore Stripe
}>
Explore SumUp
# Payment API - Coverage
Source: https://docs.chift.eu/unified-apis/payment/coverage
## Coverage of endpoints by connector
| Route | Payplug | Sumup | Paypal\_payments | Mollie | Gocardless | Stripe |
| ---------------------------- | ------- | ----- | ---------------- | ------ | ---------- | ------ |
| GET /balances | ✅ | ✅ | ✅ | ✅ | ✅ | ✅ |
| GET /payments | ✅ | ✅ | ✅ | ✅ | ✅ | ✅ |
| GET /payments/\{payment\_id} | ✅ | ✅ | ✅ | ✅ | ✅ | ✅ |
| GET /refunds | ✅ | ✅ | ✅ | ✅ | ✅ | ✅ |
| GET /transactions | ✅ | ❌ | ❌ | ✅ | ❌ | ❌ |
# Data types
Source: https://docs.chift.eu/unified-apis/payment/datatypes
Balances
Transactions
Payments
Refunds
# Introduction to our Payment APIs
Source: https://docs.chift.eu/unified-apis/payment/overview
View our [API documentation](/api-reference/endpoints/payment) for details about the payment endpoints and the data models.
Our Payment API's streamlines integration with payment processors, including popular providers like Mollie and Stripe.
This API enables you to:
* Retrieve transactions
* Retrieve balances
Typical use cases covered by our Payment APIs are the following:
Connect to various Payment software to be able to provide reporting to your end-users.
Connect to Chift's Payment API to automate manual inputs of your accounting processes.
# Connectors
Source: https://docs.chift.eu/unified-apis/pms/connectors
## PMS
}>
Explore Mews
}>
Explore Noovy
# PMS API - Coverage
Source: https://docs.chift.eu/unified-apis/pms/coverage
## Coverage of endpoints by connector
| Route | Mews | Noovy |
| ------------------------------ | ---- | ----- |
| GET /orders | ✅ | ✅ |
| GET /invoices | ✅ | ✅ |
| GET /customers | ❌ | ✅ |
| GET /locations | ✅ | ✅ |
| GET /payments | ✅ | ✅ |
| GET /payment-methods | ✅ | ✅ |
| GET /accounting-categories | ✅ | ✅ |
| GET /closures/\{date} | ✅ | ✅ |
| GET /taxes | ❌ | ✅ |
| GET /customers/\{customer\_id} | ❌ | ❌ |
# Data types
Source: https://docs.chift.eu/unified-apis/pms/datatypes
Orders
Payments
Invoices
Customers
Locations
Payment methods
Accounting categories
Closure
# Introduction to our PMS APIs
Source: https://docs.chift.eu/unified-apis/pms/overview
View our [API documentation](/api-reference/endpoints/property-management-system) for details about the PMS endpoints and the data models.
Our PMS APIs simplifies integration with property management systems..
This API allows you to:
* Access and manage property data seamlessly
* Retrieve reservations and bookings
* Integrate with various hospitality services
Typical use cases covered by our PMS APIs are the following:
Connect to various PMS software to be able to provide reporting to your end-users.
Connect to Chift's PMS API to automate manual inputs of your accounting processes.
# Connectors
Source: https://docs.chift.eu/unified-apis/pos/connectors
## POS
}>
Explore Abill
}>
Explore Addictill
}>
Explore BDP
}>
Explore Cashmag
}>
Explore Cashpad
}>
Explore Clyo Systems
}>
Explore Connectill
}>
Explore Fülle
}>
Explore helloCash
}>
Explore Hiboutik
}>
Explore Innovorder
}>
Explore Jalia (by JDC)
}>
Explore L'addition
}>
Explore LastApp
}>
Explore Leo2
}>
Explore Lightspeed
}>
Explore Odoo POS
}>
Explore Popina
}>
Explore Restomax
}>
Explore Square
}>
Explore Synapsy
}>
Explore Tactilpad
}>
Explore Tiller
}>
Explore Trivec
}>
Explore Zelty
}>
Explore Zettle
# POS API - Coverage
Source: https://docs.chift.eu/unified-apis/pos/coverage
## Coverage of endpoints by connector
| Route | Popina | Hiboutik | Zettle | Cashpad | Odoo\_pos | Fulleapps | Lightspeed | Zelty | Jalia | Square | Cashmag | Trivec | Apitic | Restomax | Innovorder | Clyosystems | Addictill | Tiller | Abill | Planity | Connectill | Hellocash | Laddition | Bdp | Tactilpad | Synapsy | Lastapp | Leo2 |
| ------------------------------ | ------ | -------- | ------ | ------- | --------- | --------- | ---------- | ----- | ----- | ------ | ------- | ------ | ------ | -------- | ---------- | ----------- | --------- | ------ | ----- | ------- | ---------- | --------- | --------- | --- | --------- | ------- | ------- | ---- |
| GET /orders | ✅ | ✅ | ✅ | ✅ | ✅ | ✅ | ✅ | ✅ | ✅ | ✅ | ✅ | ✅ | ✅ | ✅ | ✅ | ✅ | ✅ | ✅ | ✅ | ✅ | ✅ | ✅ | ✅ | ✅ | ✅ | ✅ | ✅ | ✅ |
| GET /locations | ✅ | ✅ | ✅ | ✅ | ✅ | ✅ | ✅ | ✅ | ✅ | ✅ | ✅ | ✅ | ✅ | ✅ | ✅ | ✅ | ✅ | ✅ | ✅ | ✅ | ✅ | ✅ | ✅ | ✅ | ✅ | ✅ | ✅ | ✅ |
| GET /payments | ✅ | ✅ | ✅ | ✅ | ✅ | ✅ | ✅ | ❌ | ✅ | ✅ | ✅ | ✅ | ✅ | ✅ | ✅ | ✅ | ✅ | ✅ | ✅ | ✅ | ✅ | ✅ | ✅ | ✅ | ✅ | ✅ | ✅ | ✅ |
| GET /sales | ✅ | ✅ | ✅ | ✅ | ✅ | ✅ | ✅ | ✅ | ✅ | ✅ | ✅ | ✅ | ✅ | ✅ | ✅ | ✅ | ✅ | ✅ | ✅ | ✅ | ✅ | ✅ | ✅ | ✅ | ✅ | ✅ | ✅ | ✅ |
| GET /payment-methods | ✅ | ✅ | ✅ | ✅ | ✅ | ✅ | ✅ | ✅ | ✅ | ✅ | ✅ | ✅ | ✅ | ✅ | ✅ | ✅ | ✅ | ✅ | ✅ | ✅ | ✅ | ✅ | ✅ | ✅ | ✅ | ❌ | ✅ | ✅ |
| GET /product-categories | ✅ | ✅ | ✅ | ✅ | ✅ | ✅ | ✅ | ✅ | ✅ | ✅ | ✅ | ✅ | ✅ | ✅ | ✅ | ✅ | ✅ | ✅ | ✅ | ✅ | ✅ | ✅ | ✅ | ✅ | ✅ | ❌ | ✅ | ✅ |
| GET /products | ✅ | ✅ | ✅ | ✅ | ✅ | ✅ | ✅ | ✅ | ✅ | ✅ | ✅ | ✅ | ✅ | ✅ | ✅ | ✅ | ✅ | ✅ | ✅ | ✅ | ✅ | ✅ | ✅ | ✅ | ✅ | ✅ | ✅ | ✅ |
| GET /accounting-categories | ✅ | ✅ | ✅ | ✅ | ✅ | ✅ | ✅ | ✅ | ✅ | ✅ | ✅ | ✅ | ✅ | ✅ | ✅ | ✅ | ✅ | ✅ | ✅ | ✅ | ✅ | ✅ | ✅ | ✅ | ✅ | ❌ | ✅ | ✅ |
| GET /closures/\{date} | ✅ | ✅ | ✅ | ✅ | ✅ | ✅ | ✅ | ✅ | ✅ | ✅ | ✅ | ✅ | ✅ | ✅ | ✅ | ✅ | ✅ | ✅ | ✅ | ✅ | ✅ | ✅ | ✅ | ❌ | ✅ | ✅ | ✅ | ✅ |
| GET /orders/\{order\_id} | ✅ | ✅ | ✅ | ✅ | ✅ | ✅ | ✅ | ✅ | ✅ | ✅ | ✅ | ✅ | ✅ | ✅ | ✅ | ✅ | ✅ | ✅ | ✅ | ✅ | ✅ | ✅ | ✅ | ✅ | ✅ | ✅ | ✅ | ❌ |
| PATCH /orders/\{order\_id} | ❌ | ❌ | ❌ | ❌ | ❌ | ❌ | ❌ | ✅ | ❌ | ❌ | ❌ | ❌ | ❌ | ❌ | ❌ | ❌ | ❌ | ❌ | ❌ | ❌ | ❌ | ❌ | ❌ | ❌ | ❌ | ❌ | ❌ | ❌ |
| GET /customers | ❌ | ❌ | ❌ | ❌ | ❌ | ❌ | ❌ | ❌ | ❌ | ❌ | ❌ | ❌ | ❌ | ✅ | ❌ | ❌ | ❌ | ❌ | ❌ | ❌ | ❌ | ✅ | ❌ | ✅ | ❌ | ✅ | ❌ | ❌ |
| POST /customers | ❌ | ❌ | ❌ | ❌ | ❌ | ❌ | ❌ | ❌ | ❌ | ❌ | ❌ | ❌ | ❌ | ❌ | ❌ | ❌ | ❌ | ❌ | ❌ | ❌ | ❌ | ❌ | ❌ | ❌ | ❌ | ❌ | ❌ | ❌ |
| GET /customers/\{customer\_id} | ❌ | ❌ | ❌ | ❌ | ❌ | ❌ | ❌ | ❌ | ❌ | ❌ | ❌ | ❌ | ❌ | ❌ | ❌ | ❌ | ❌ | ❌ | ❌ | ❌ | ❌ | ❌ | ❌ | ❌ | ❌ | ❌ | ❌ | ❌ |
| GET /objectives | ❌ | ❌ | ❌ | ❌ | ❌ | ❌ | ❌ | ❌ | ❌ | ❌ | ❌ | ❌ | ❌ | ❌ | ❌ | ❌ | ❌ | ❌ | ❌ | ❌ | ❌ | ✅ | ❌ | ❌ | ❌ | ✅ | ❌ | ❌ |
# Data types
Source: https://docs.chift.eu/unified-apis/pos/datatypes
Orders
Payments
Sales
Customers
Locations
Payment methods
Product categories
Products
Accounting categories
Closures
Objectives
# Introduction to our POS APIs
Source: https://docs.chift.eu/unified-apis/pos/overview
View our [API documentation](/api-reference/endpoints/point-of-sale) for details about the POS endpoints and the data models.
Our POS APIs facilitate integration with various point-of-sale systems, enabling businesses to retrieve sales data, inventory, and customer information across multiple POS platforms.
This unified approach simplifies the process of collecting and analyzing sales data from different retail locations or restaurants.
Typical use cases covered by our POS APIs are the following:
Connect to various POS software to be able to provide reporting to your end-users.
Connect to Chift's POS API to automate manual inputs of your accounting processes.
 We are moving away from the traditional email/password login method to support the following login methods:
* Log in through Google
* Log in with email (Magic link or OTP code)
Moreover we support as well SSO to better match with the needs of our customers and prospects.
### New login methods for our public marketplaces
For your end-users, we can as well offer now SSO capabilities to connect to your Chift's marketplace.
This offers huge benefits:
* Better user experience for end-user
* Streamline roles and accesses
* Automate account and consumer creation
### Email reminders
We are moving away from the traditional email/password login method to support the following login methods:
* Log in through Google
* Log in with email (Magic link or OTP code)
Moreover we support as well SSO to better match with the needs of our customers and prospects.
### New login methods for our public marketplaces
For your end-users, we can as well offer now SSO capabilities to connect to your Chift's marketplace.
This offers huge benefits:
* Better user experience for end-user
* Streamline roles and accesses
* Automate account and consumer creation
### Email reminders
 Email reminders can be used to help you to remind your consumers to complete the activation process in an automated way.
You can configure in your backoffice the intervals and type of reminders that you want to sent.
Email reminders can be used to help you to remind your consumers to complete the activation process in an automated way.
You can configure in your backoffice the intervals and type of reminders that you want to sent. 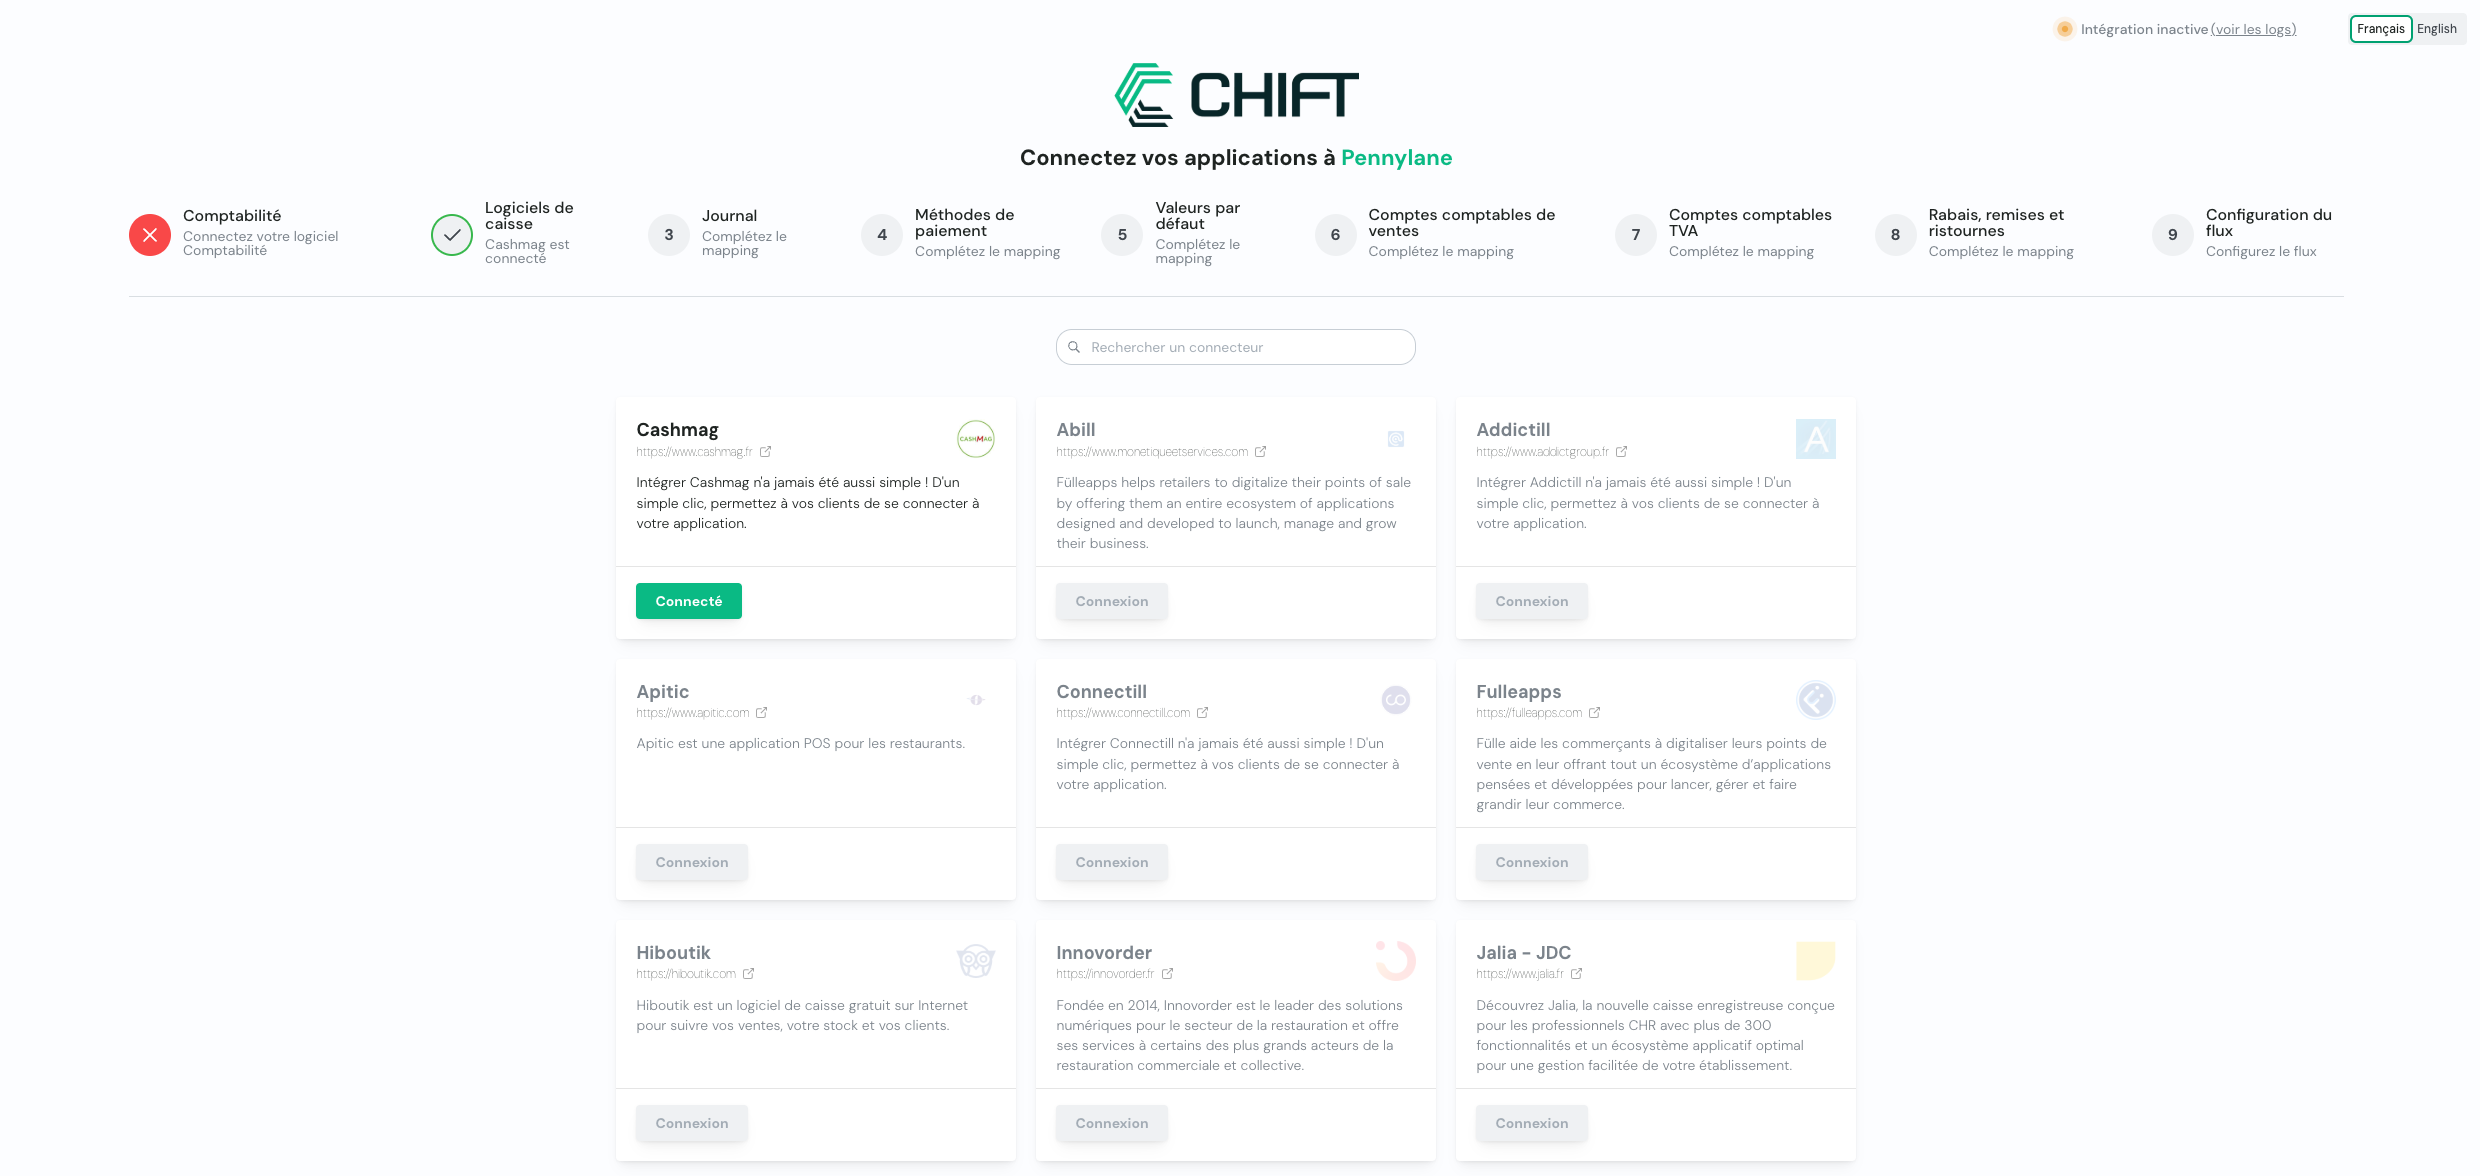 We now support the dynamic translations of syncs.
 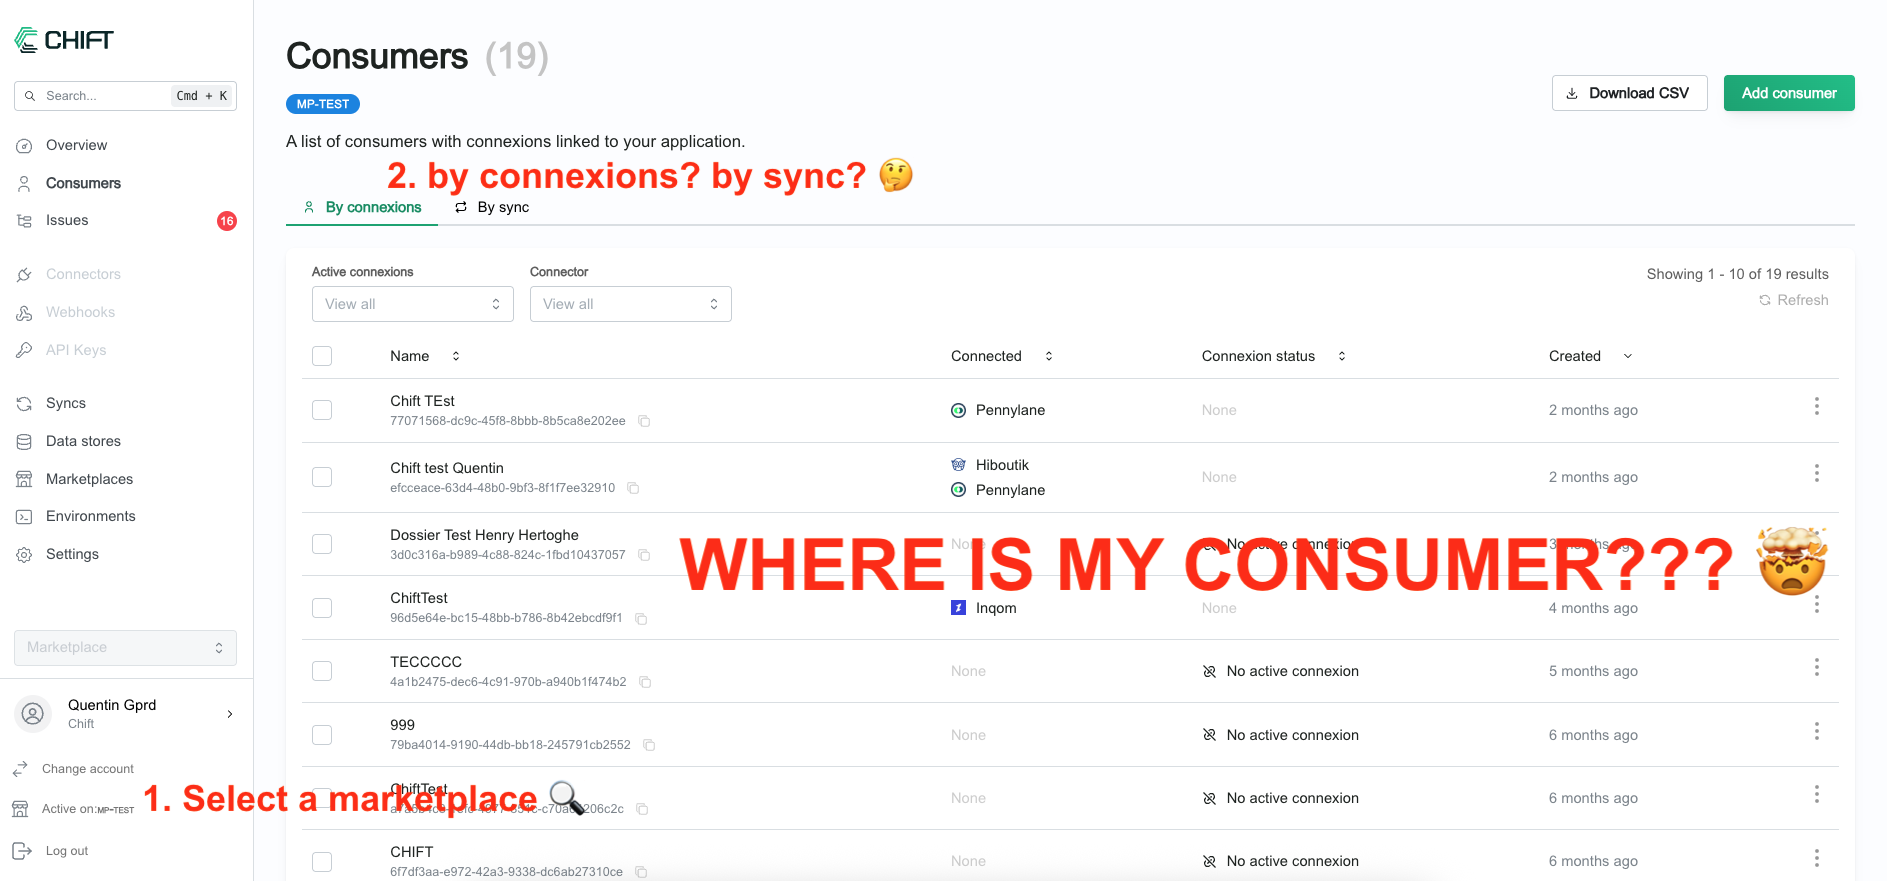 #### After
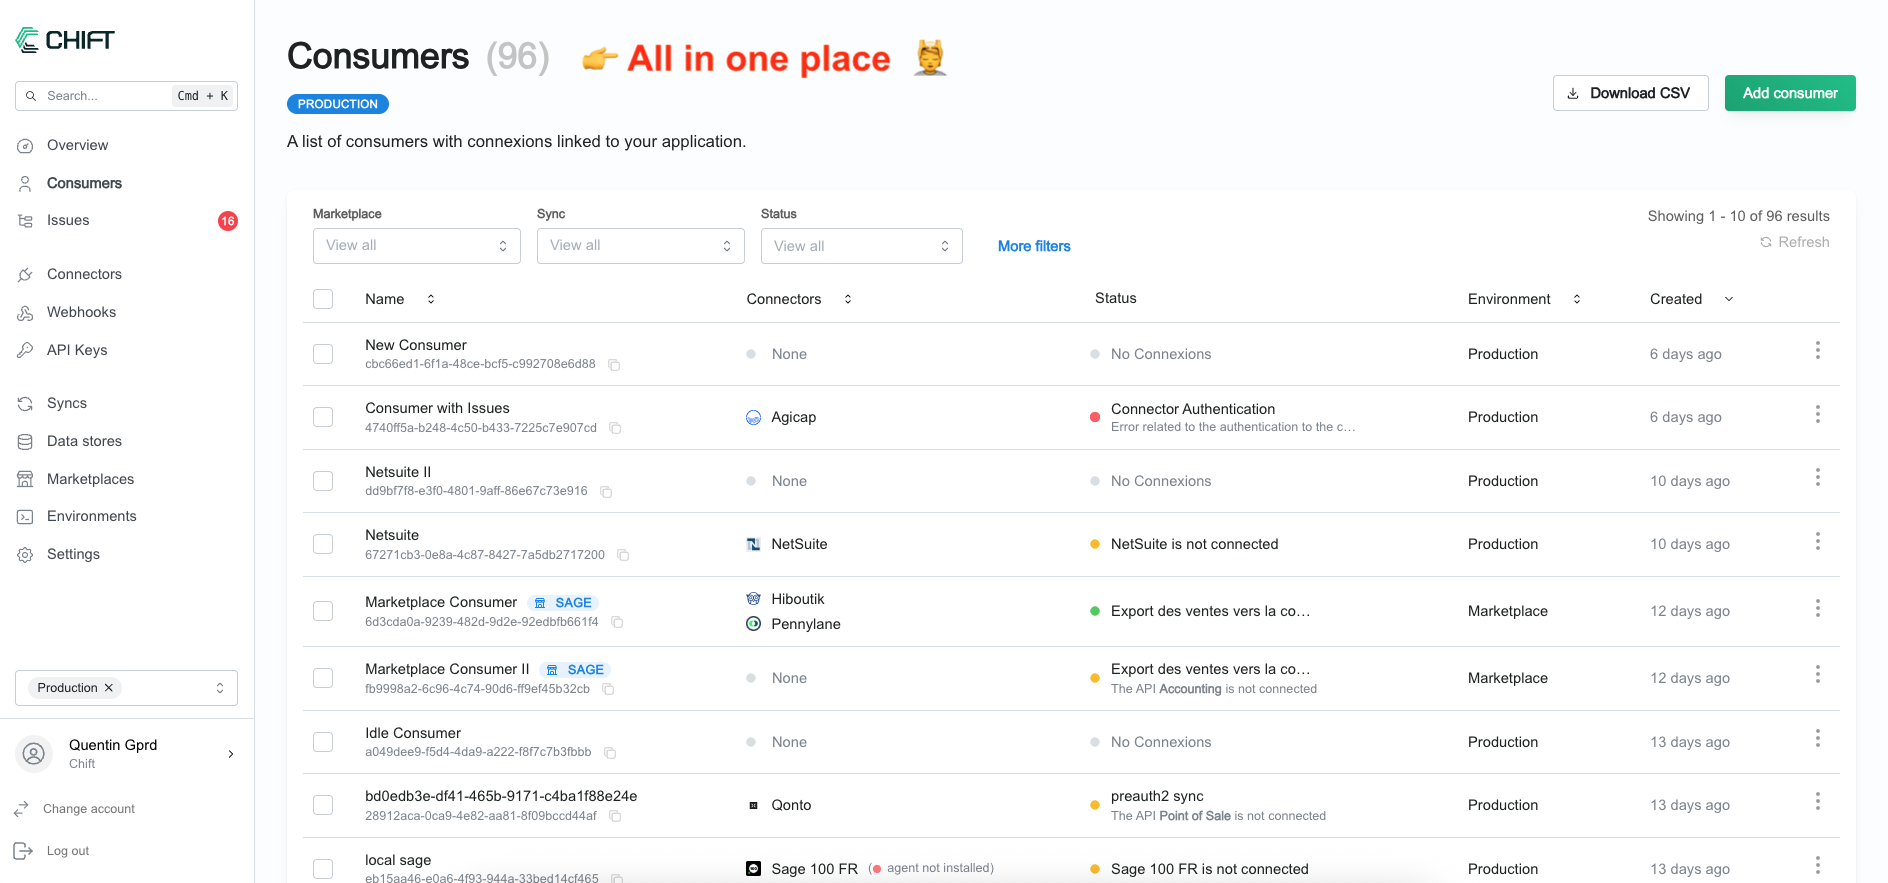 ### Added new translations for "Spain"
* Chift's backoffice is now available in Spanish.
* Spanish connectors are now available with Spanish translations.
# ACD
Source: https://docs.chift.eu/connectors/accounting/acd
export const PATCH = () => ;
export const DELETE = () => ;
export const POST = () => ;
export const GET = () => ;
### Added new translations for "Spain"
* Chift's backoffice is now available in Spanish.
* Spanish connectors are now available with Spanish translations.
# ACD
Source: https://docs.chift.eu/connectors/accounting/acd
export const PATCH = () => ;
export const DELETE = () => ;
export const POST = () => ;
export const GET = () => ;