> ## Documentation Index
> Fetch the complete documentation index at: https://docs.chift.eu/llms.txt
> Use this file to discover all available pages before exploring further.
# Procountor
> How to connect your Procountor account: what you need, how to prepare it, and how to connect.
# 🚨 Prerequisites
Before you start, make sure you have:
* an active Procountor account (Financials, Taloushallinto in Finnish)
* admin access to the company in Procountor: you create a dedicated user and an API key for it
* in Finland, the Procountor API add-on: €12.90 per month, plus €2.49 per month for each connected software, excl. VAT, with no opening fee. In Sweden, the API is included in every plan, with no opening fee. In both countries, entries created through the connection are billed like entries created in Procountor, per its price list. See Procountor's [Finnish price list](https://procountor.fi/wp-content/uploads/2025/11/Procountor_Taloushallinto_Hinnasto_01-01-2026.pdf) and [Swedish API page](https://procountor.se/bokforingsprogram/tillaggstjanster/procountor-api/)
One connection covers one Procountor company. If you manage several companies in Procountor, repeat these steps for each one.
# 🛠 Preparation
You create a dedicated Procountor user for the connection, then an API key for that user. Open the connection form first and keep it open: it shows the **Client ID** you need in step 4.
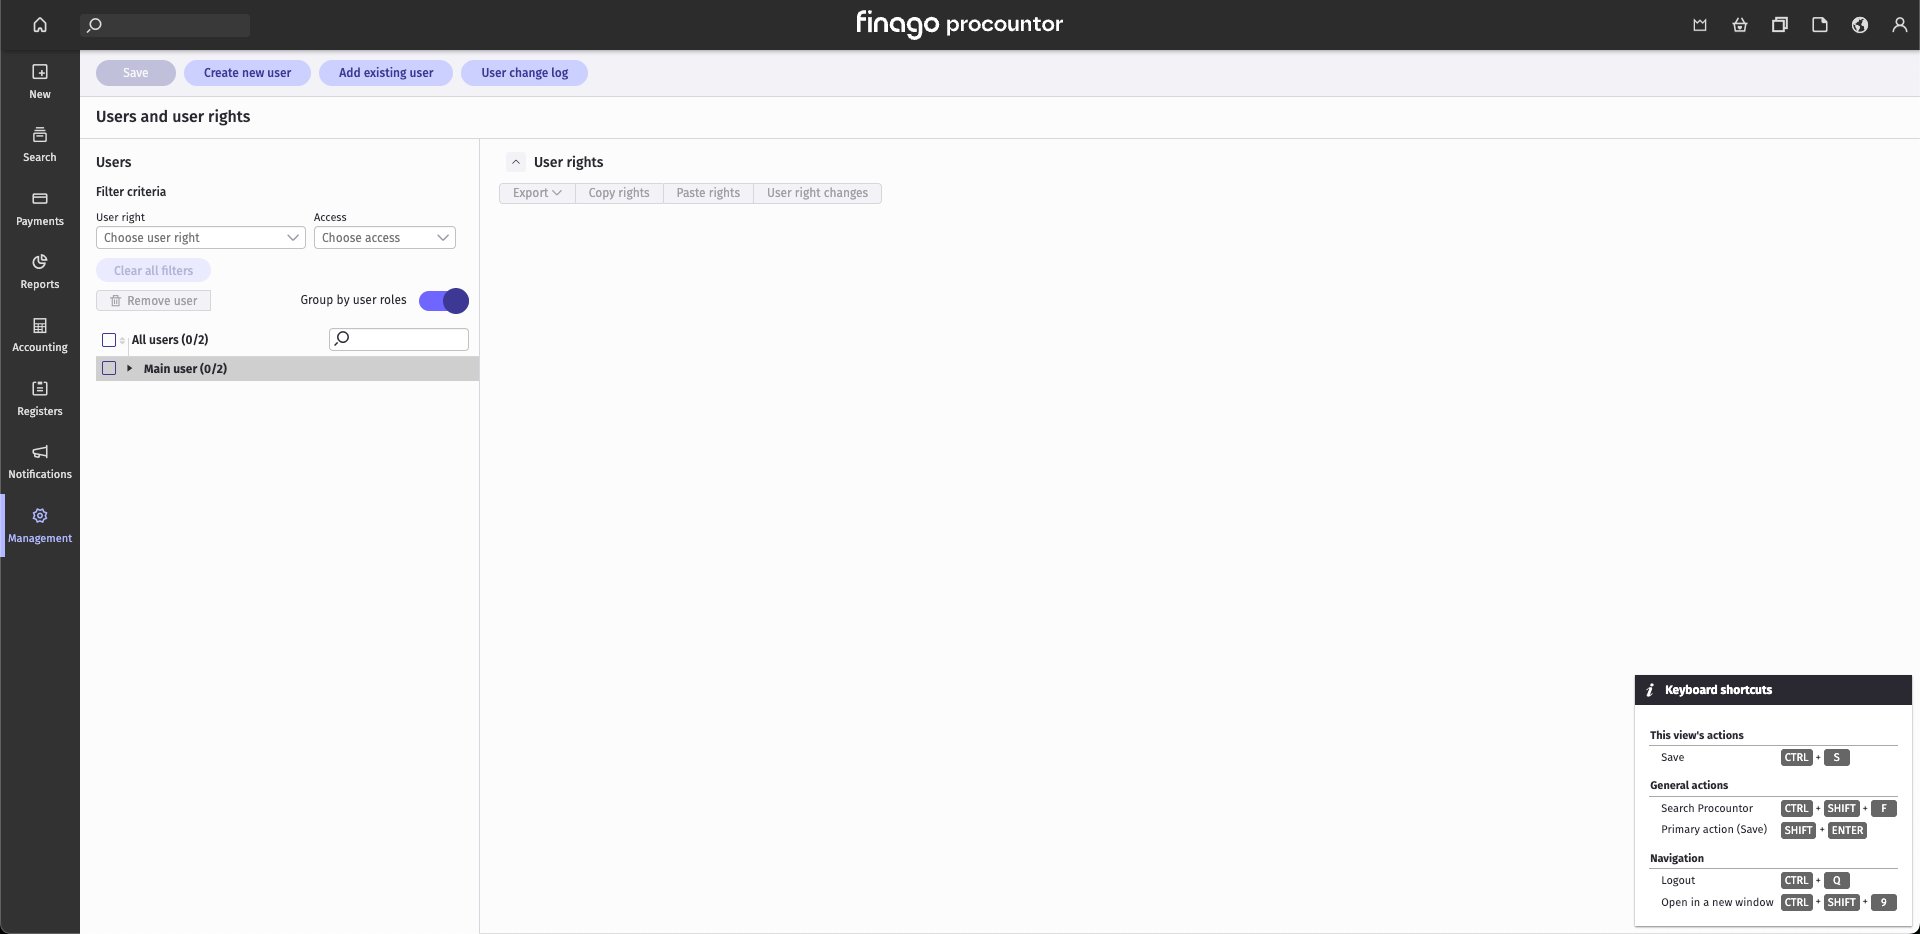
In Procountor, go to **Management** › **Users and user rights**, then click **Create new user**.
 Fill in the required fields. Under **Password**, select **Deliver to user personally** to see the password on screen straight away. Then click **Save**.
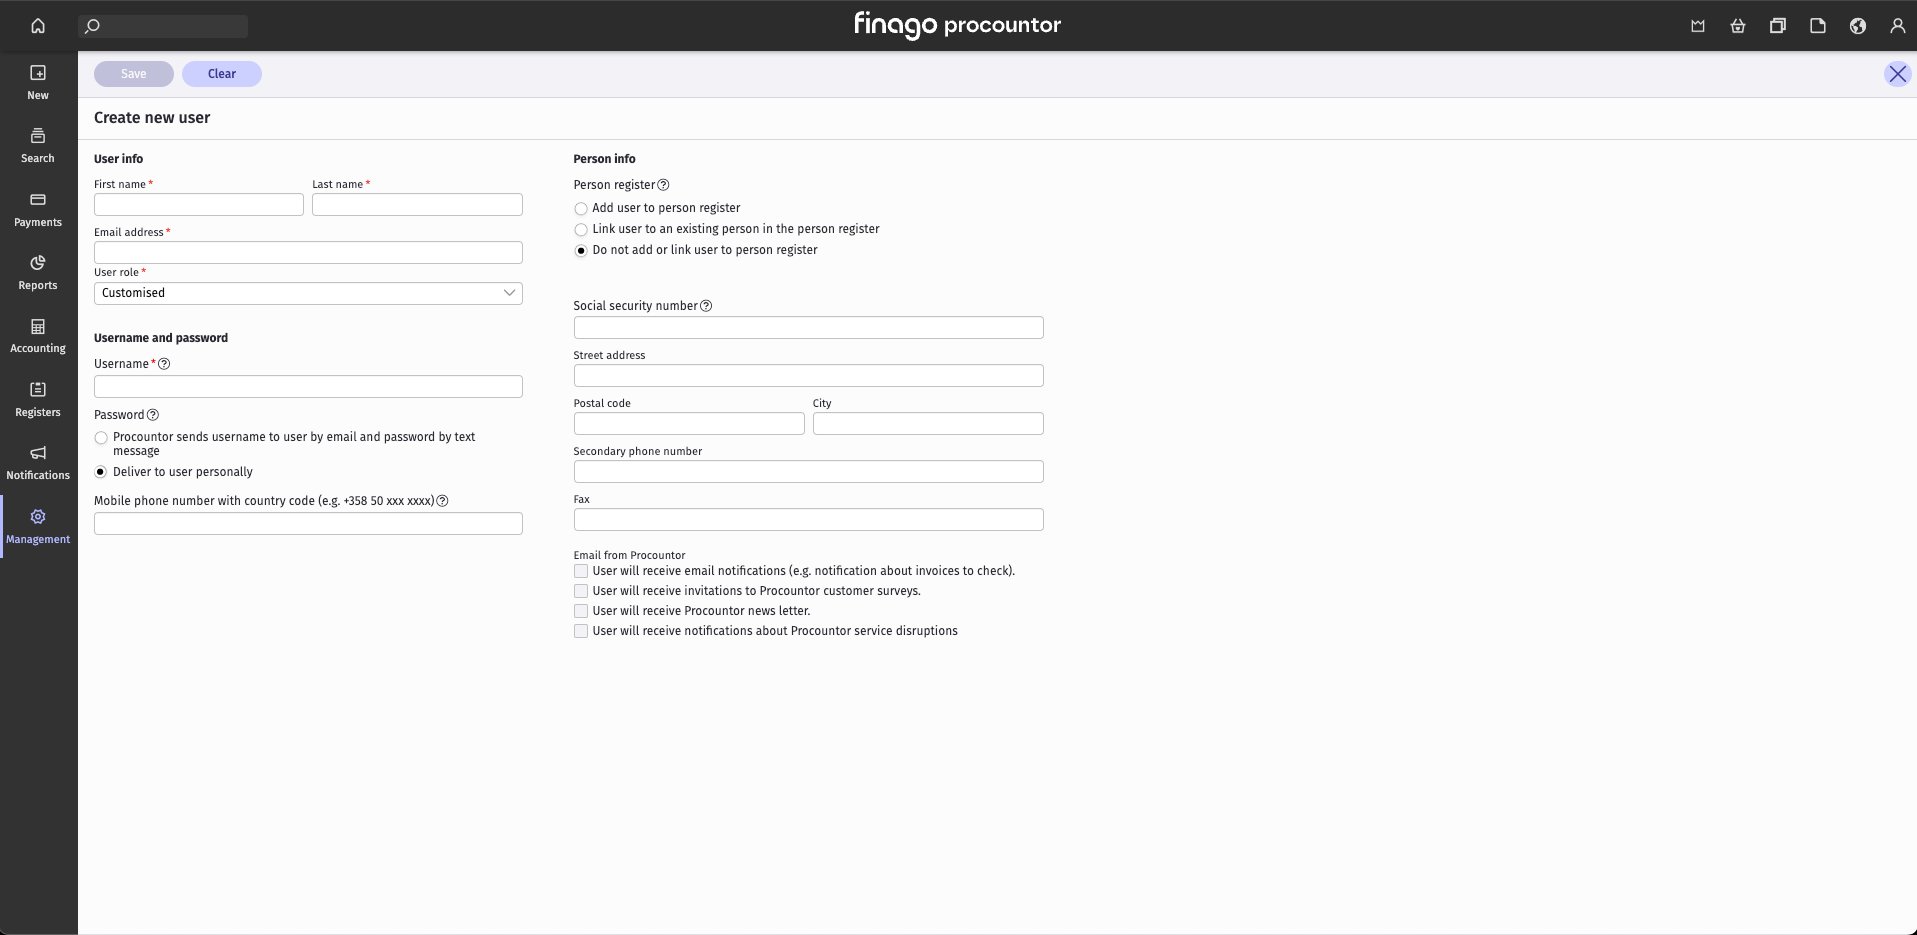 Use a dedicated user for this connection rather than a personal login.
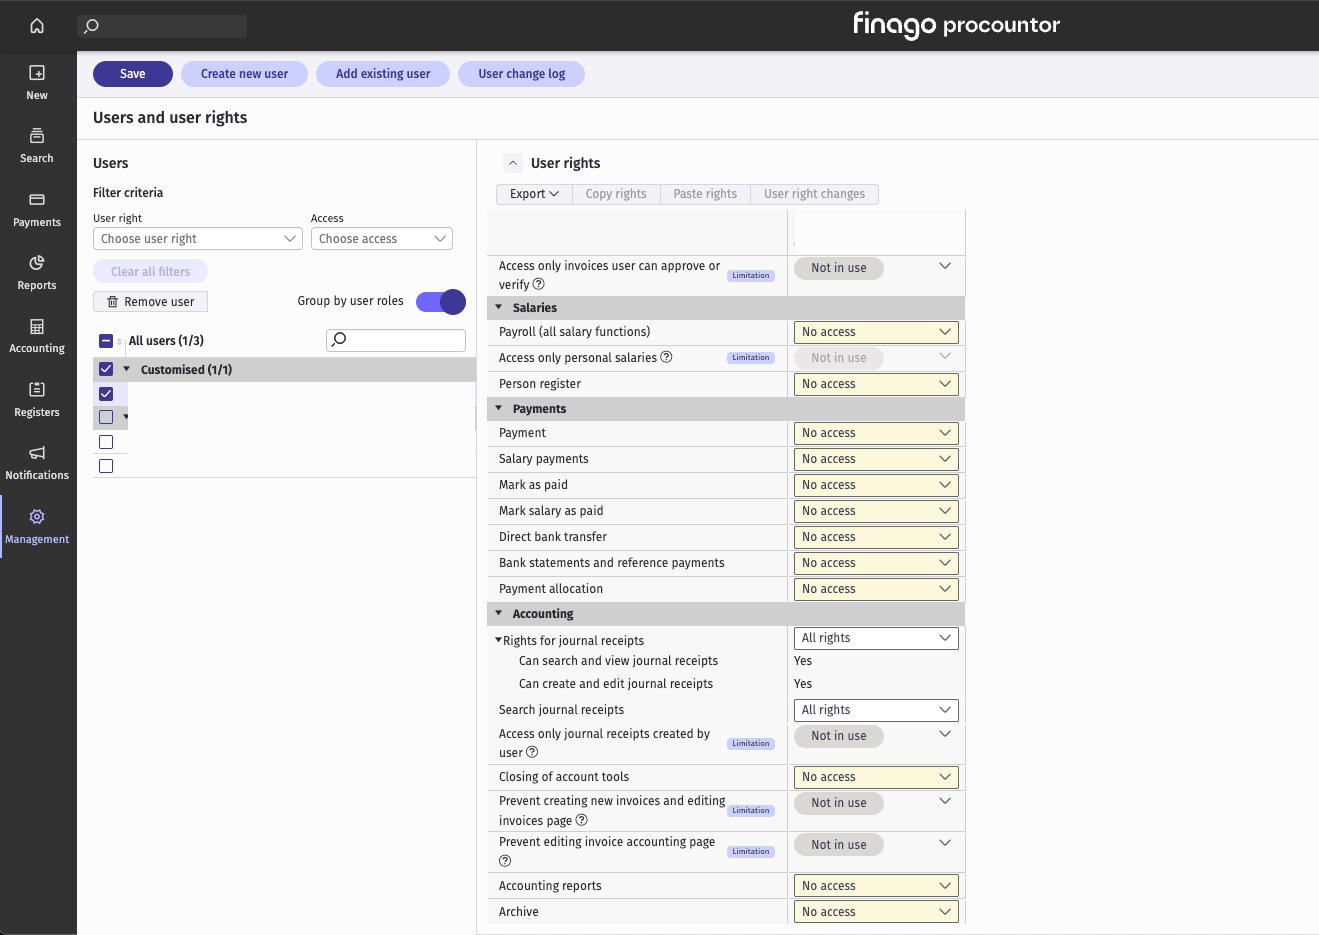
Select the user you just created. Under **Accounting**, set at least **Rights for journal receipts** and **Search journal receipts** to **All rights**, then click **Save**.
Use a dedicated user for this connection rather than a personal login.
Select the user you just created. Under **Accounting**, set at least **Rights for journal receipts** and **Search journal receipts** to **All rights**, then click **Save**.
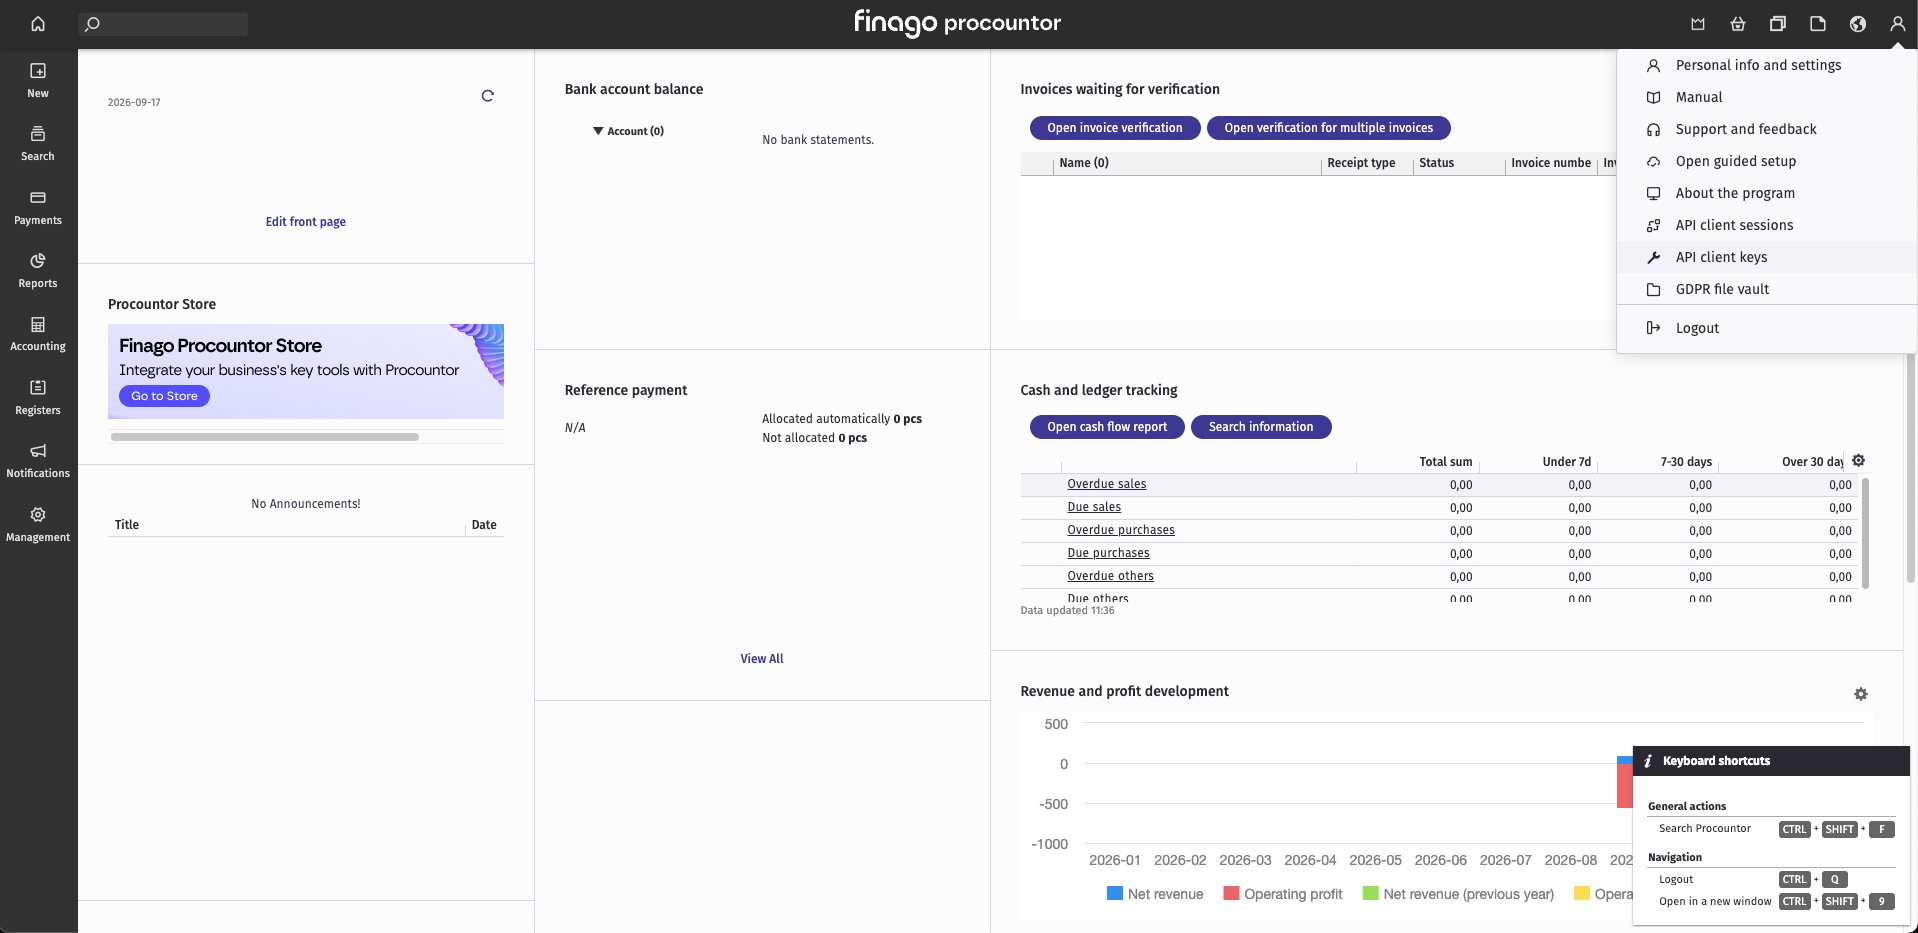
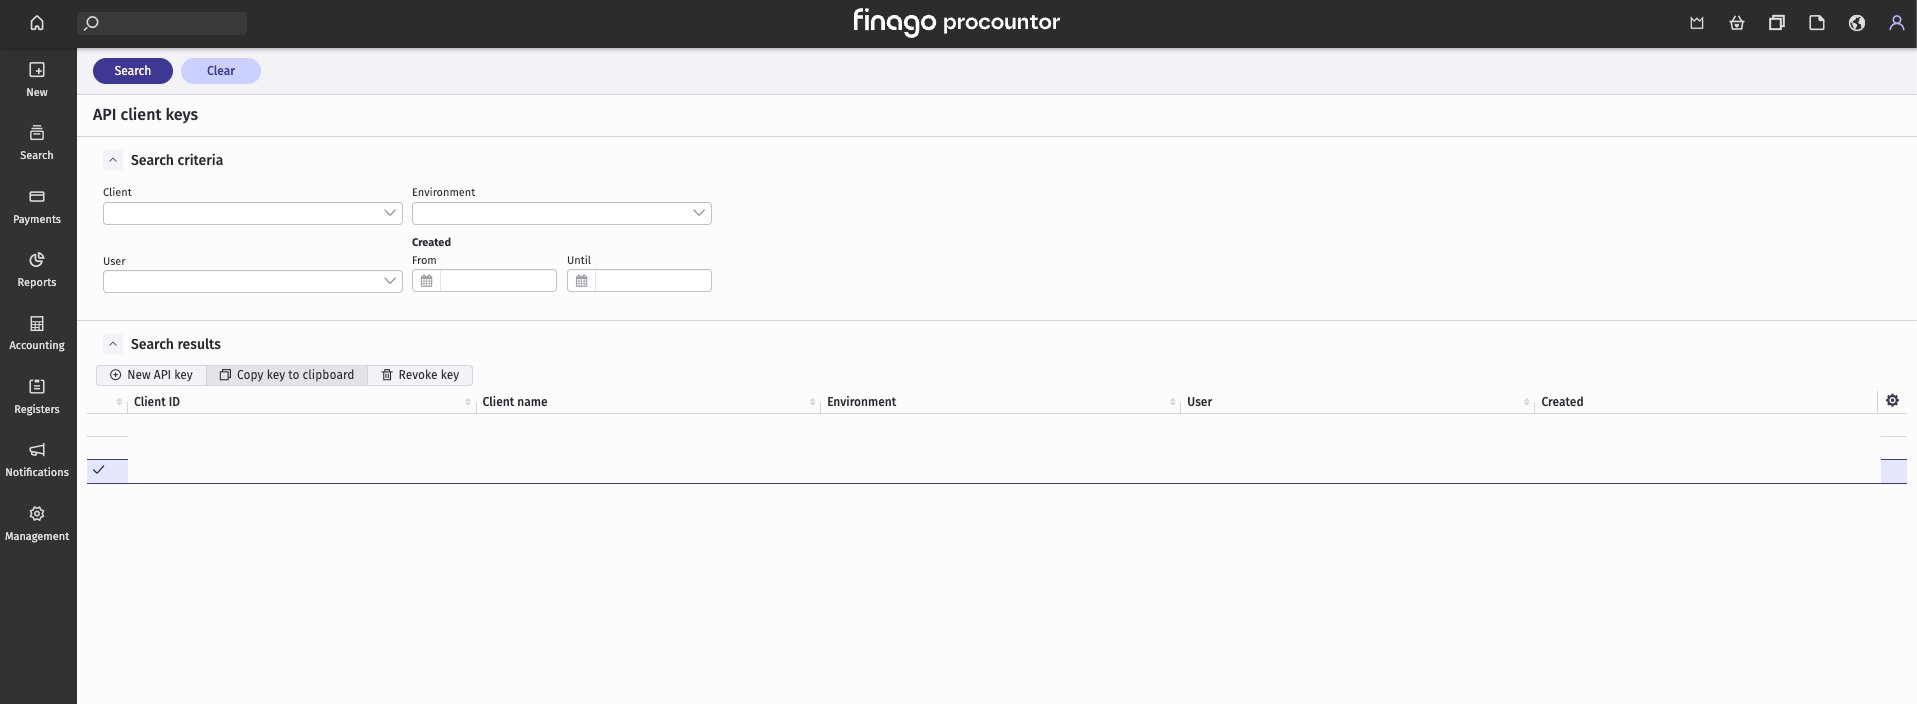
 At the top right, open the **Basics** menu (the person icon) and click **API client keys**.
 Click **New API key**.
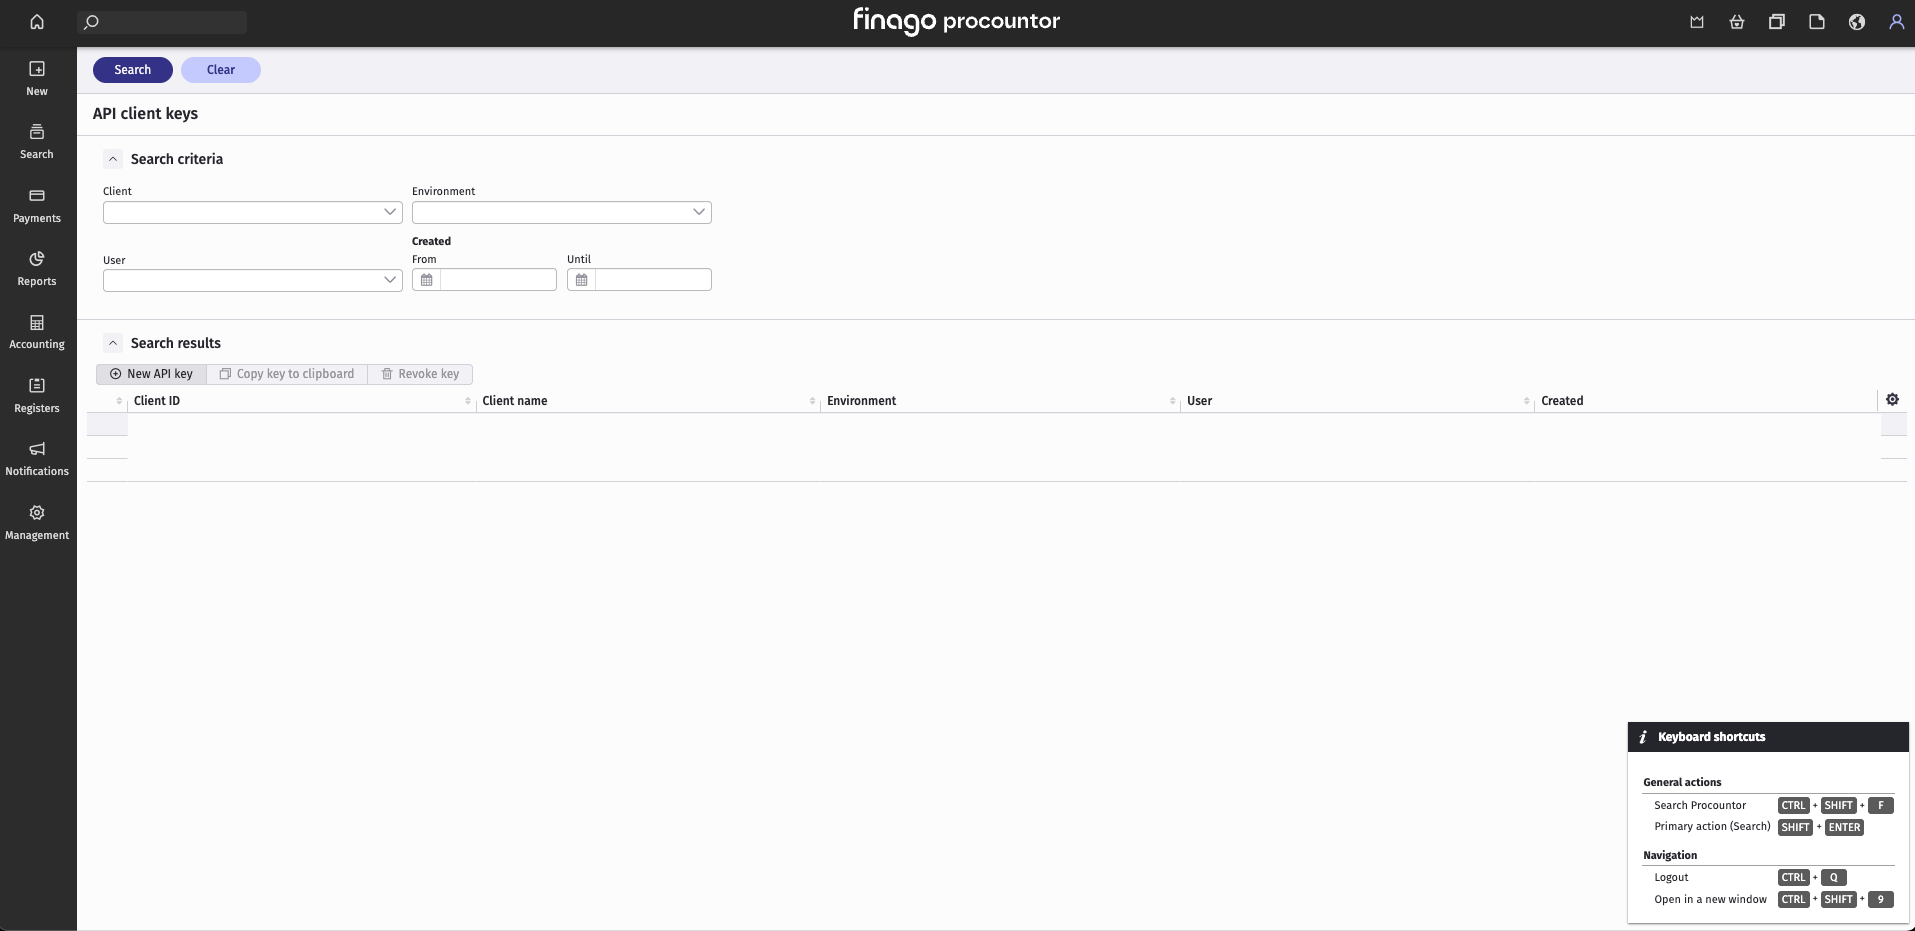 In the dialog, select the user you created in step 1. In **Client ID**, type the Client ID shown on the connection form, exactly as it appears. Check that **Environment** shows the company you want to connect, then click **Create**.
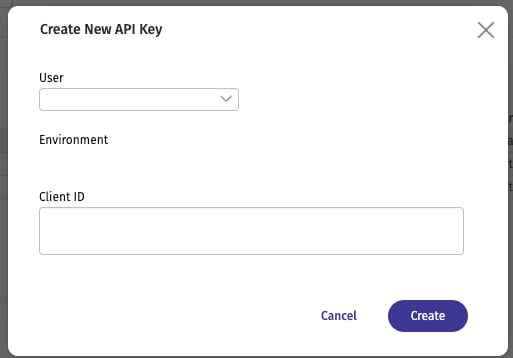 Select the new key in the list and click **Copy key to clipboard**. Keep it at hand: you paste it into the connection form next.
 # ⚡️ Connection
In **Name of connection**, enter a name you will recognize later.
| Field | What to enter |
| - | - |
| **Client ID** | Nothing: it is filled in for you. It is the value you typed in Procountor in Preparation, step 4 |
| **API key** | The key you copied in Preparation, step 5 |
# ⚡️ Connection
In **Name of connection**, enter a name you will recognize later.
| Field | What to enter |
| - | - |
| **Client ID** | Nothing: it is filled in for you. It is the value you typed in Procountor in Preparation, step 4 |
| **API key** | The key you copied in Preparation, step 5 |
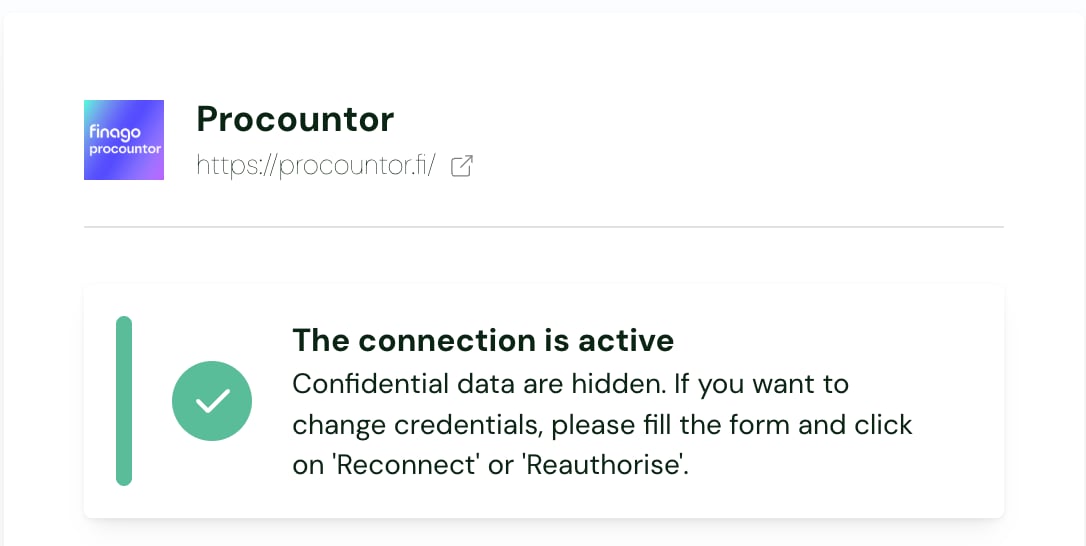
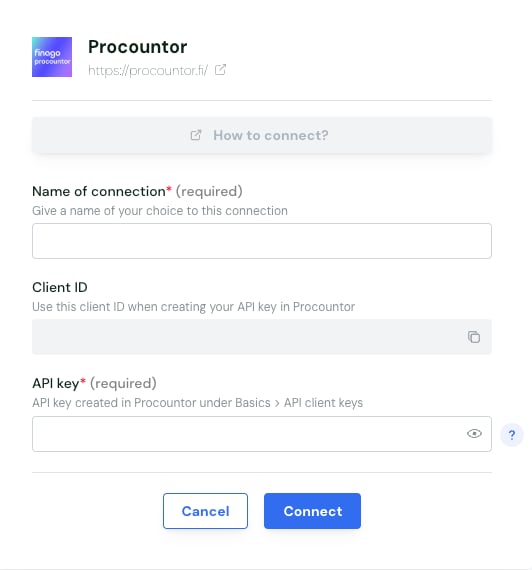 There is no consent screen: the connection is created straight away.
 # ⚙️ Setup
## Sending journal entries
To send journal entries to Procountor, the company must allow invoiceable API clients. A user with admin rights can turn this on:
1. Go to **Management** › **Company info** › **Usage settings** › **Integration settings** (in Finnish: **Hallinta** › **Yrityksen tiedot** › **Käyttöasetukset**).
2. Check **Allow the usage of invoiceable API clients** (in Finnish: **Salli laskutettavien rajapintojen käyttö**).
3. Save.
If you skip this, Procountor rejects the entries with the error *"Client is disabled in environment settings"*: the company has not enabled the use of invoiceable APIs.
## Sending entries with VAT
The VAT rate used in an entry must be a rate currently in use for the company, in Procountor's VAT settings.
If you skip this, the entry is rejected: no VAT code exists for that rate in the company.
## Sending entries for a given period
An open fiscal year must exist in Procountor for the date of each entry.
If you skip this, an entry dated in a closed fiscal year is rejected, with the message *"The accounting period is closed in the accounting system."*
## Entries with a client or supplier
When an entry line uses a client or supplier, it is booked on that partner's default receivable or payable account in Procountor. Set this default account on every client and supplier used in entries.
If you skip this, entries for that partner are rejected.
# ❓ Troubleshooting
The Client ID typed in Procountor when you created the key does not match the one on the connection form. The field is free text, so a typo is the most common cause.
Create a new API key in Procountor with the exact Client ID shown on the connection form, then paste the new key into the form. You can revoke the old key under **API client keys** › **Revoke key**.
The key was created in a different Procountor environment from the one the connection uses: a key from Procountor's test environment does not work in production, and the other way round.
Create the key in the environment you were asked to connect, then paste it into the form again.
The key was created for another company. Each connection covers one company: the one shown as **Environment** when you created the key.
Create a new key while logged in to the right company, then reconnect with it.
Your Procountor user may not have the rights to manage API keys.
Ask your Procountor admin to create the key, or to give you the rights.
The company has not enabled the use of invoiceable APIs.
A user with admin rights checks **Allow the usage of invoiceable API clients** under **Management** › **Company info** › **Usage settings** › **Integration settings**. See *Sending journal entries* above.
The VAT rate used in the entry is not a rate currently in use for the company in Procountor.
Check the company's VAT settings in Procountor, and use a VAT code that exists for the company.
The entry is dated in a fiscal year that is closed in Procountor.
Check the entry's date, or open a fiscal year that covers it in Procountor.
The client or supplier has no default receivable or payable account in Procountor.
Set a default account on that partner in Procountor, then send the entry again.
# ⚙️ Setup
## Sending journal entries
To send journal entries to Procountor, the company must allow invoiceable API clients. A user with admin rights can turn this on:
1. Go to **Management** › **Company info** › **Usage settings** › **Integration settings** (in Finnish: **Hallinta** › **Yrityksen tiedot** › **Käyttöasetukset**).
2. Check **Allow the usage of invoiceable API clients** (in Finnish: **Salli laskutettavien rajapintojen käyttö**).
3. Save.
If you skip this, Procountor rejects the entries with the error *"Client is disabled in environment settings"*: the company has not enabled the use of invoiceable APIs.
## Sending entries with VAT
The VAT rate used in an entry must be a rate currently in use for the company, in Procountor's VAT settings.
If you skip this, the entry is rejected: no VAT code exists for that rate in the company.
## Sending entries for a given period
An open fiscal year must exist in Procountor for the date of each entry.
If you skip this, an entry dated in a closed fiscal year is rejected, with the message *"The accounting period is closed in the accounting system."*
## Entries with a client or supplier
When an entry line uses a client or supplier, it is booked on that partner's default receivable or payable account in Procountor. Set this default account on every client and supplier used in entries.
If you skip this, entries for that partner are rejected.
# ❓ Troubleshooting
The Client ID typed in Procountor when you created the key does not match the one on the connection form. The field is free text, so a typo is the most common cause.
Create a new API key in Procountor with the exact Client ID shown on the connection form, then paste the new key into the form. You can revoke the old key under **API client keys** › **Revoke key**.
The key was created in a different Procountor environment from the one the connection uses: a key from Procountor's test environment does not work in production, and the other way round.
Create the key in the environment you were asked to connect, then paste it into the form again.
The key was created for another company. Each connection covers one company: the one shown as **Environment** when you created the key.
Create a new key while logged in to the right company, then reconnect with it.
Your Procountor user may not have the rights to manage API keys.
Ask your Procountor admin to create the key, or to give you the rights.
The company has not enabled the use of invoiceable APIs.
A user with admin rights checks **Allow the usage of invoiceable API clients** under **Management** › **Company info** › **Usage settings** › **Integration settings**. See *Sending journal entries* above.
The VAT rate used in the entry is not a rate currently in use for the company in Procountor.
Check the company's VAT settings in Procountor, and use a VAT code that exists for the company.
The entry is dated in a fiscal year that is closed in Procountor.
Check the entry's date, or open a fiscal year that covers it in Procountor.
The client or supplier has no default receivable or payable account in Procountor.
Set a default account on that partner in Procountor, then send the entry again.