> ## Documentation Index
> Fetch the complete documentation index at: https://docs.chift.eu/llms.txt
> Use this file to discover all available pages before exploring further.
# Horus
# PREPARATION
There are two ways to authenticate on Horus:
1. use a Horus user (normally an accountant's user), in which case there are no prerequisites.
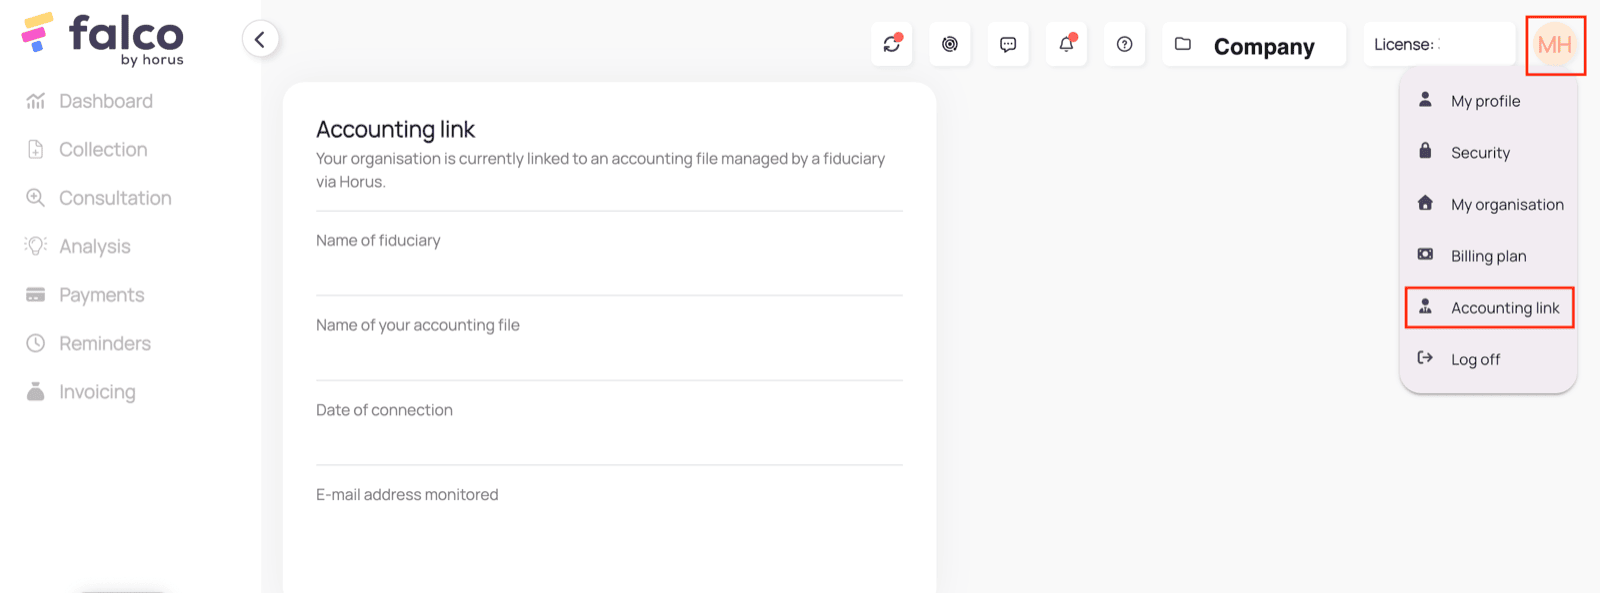
2. use a Falco user. This only works if the accounting link between Falco and Horus is enabled. Make sure the accounting link is enabled before proceeding with the authorisation process. This can be verified in the Falco settings:
 # CONNECTION
**Step 1:** Choose a name for your connection.
# CONNECTION
**Step 1:** Choose a name for your connection.
 **Step 2:** Choose if you want to enable analytical data to be transferred.
 **Step 3:** Select the default language of your Horus account.
 **Step 4:** Click "Authorise" to finalise the connection
 # AUTHENTICATION
**Step 1:** Enter your Horus credentials and connect.
# AUTHENTICATION
**Step 1:** Enter your Horus credentials and connect.
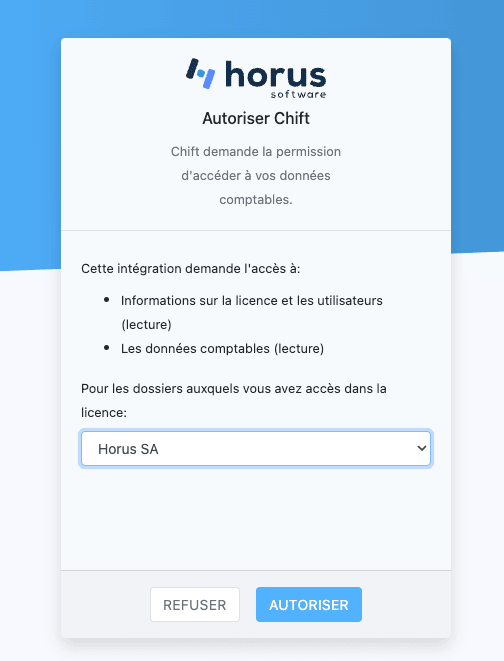
 **Step 2:** Select the file you want to connect the data exchange to and authorise. Based on the selected file, the related folders will be available for the connection.
 # CONFIGURATION
**Step 1:** Select the accounting folder to connect. If you do not see your accounting folder in the list, make sure that you selected the proper file in the previous step or that the link between your accounting folder in Horus and the related folder in Falco is properly configured.
# CONFIGURATION
**Step 1:** Select the accounting folder to connect. If you do not see your accounting folder in the list, make sure that you selected the proper file in the previous step or that the link between your accounting folder in Horus and the related folder in Falco is properly configured.
 **Step 2:** Click "Submit" to complete the configuration.