> ## Documentation Index
> Fetch the complete documentation index at: https://docs.chift.eu/llms.txt
> Use this file to discover all available pages before exploring further.
# DATEV (LocalAgent)
This guide explains how to activate your connection to DATEV using the local DATEVConnect API through a local agent installed on your machine. This method does not require exposing any URL, which is something only your integrator can technically handle—and in some cases may decline to do.
If you prefer not to use the Local Agent installation, and your integrator is willing to expose the URL, you can proceed with the alternative setup. In that case, please contact your software provider to be directed to the correct instructions.
The alternative method is explained in a separate article [**here**](/help/connectors/accounting/datev)
***
## 📋 Overview
This integration connects with two DATEV components:
* **DATEV Rechnungswesen** – On-premise accounting software (main data source)
* **DATEV Unternehmen Online (DUO)** – Cloud portal used only for sending attachments such as documents, invoices, or receipts
If you don’t plan to send attachments, DUO is not required.
**This connection requires installing a Local Agent** on the server where DATEV is running.
⏱ **Estimated time**: 5 minutes for a complete installation.
> (*Make sure to verify that your system meets all the conditions listed in the* ***Prerequisites*** *section below* 👇 *)*
***
# 🚨PREREQUISITES **(conditions to be met** prior to connection\*\*)\*\*
### 1. Licenses
| | |
| ------------------------------------------ | ----------------------------------------------------------------------------------------------------------------------------------------------------------- |
| Licences | Requirement descriptions |
| **DATEV Rechnungswesen licence** | Mandatory. Owned either by your company or provided through your accountant/tax advisor. |
| **DATEVConnect licence** | Mandatory. Enables API access. Usually already included in DATEV installations but must be activated. If missing, you can order it (free) via DATEV’s shop. |
| **DATEV Unternehmen Online (DUO) licence** | Only required if attachments (PDFs, invoices, receipts) will be sent to DATEV. |
**How to confirm licenses:**
* In DATEV Arbeitsplatz, go to **Licence Management (Lizenzverwaltung)** to view installed licences.
* Or request confirmation from your DATEV administrator, accountant (Steuerberater), or DATEV service partner.
***
### 2. User account requirements
You must provide the **Windows username and password** of a Windows user account that is **linked to a DATEV user** with the following permissions:
✔ Access to the relevant **mandate/company** in DATEV Rechnungswesen\
✔ Rights to use the **DATEVConnect service**\
✔ Sufficient rights to read/write accounting data (depending on integration scope)
DATEV requires that API authentication is conducted using a Windows login that is mapped to a DATEV user account. This mapping is configured in DATEV Benutzerverwaltung (User Management).
# ⚡️ CONNECTION
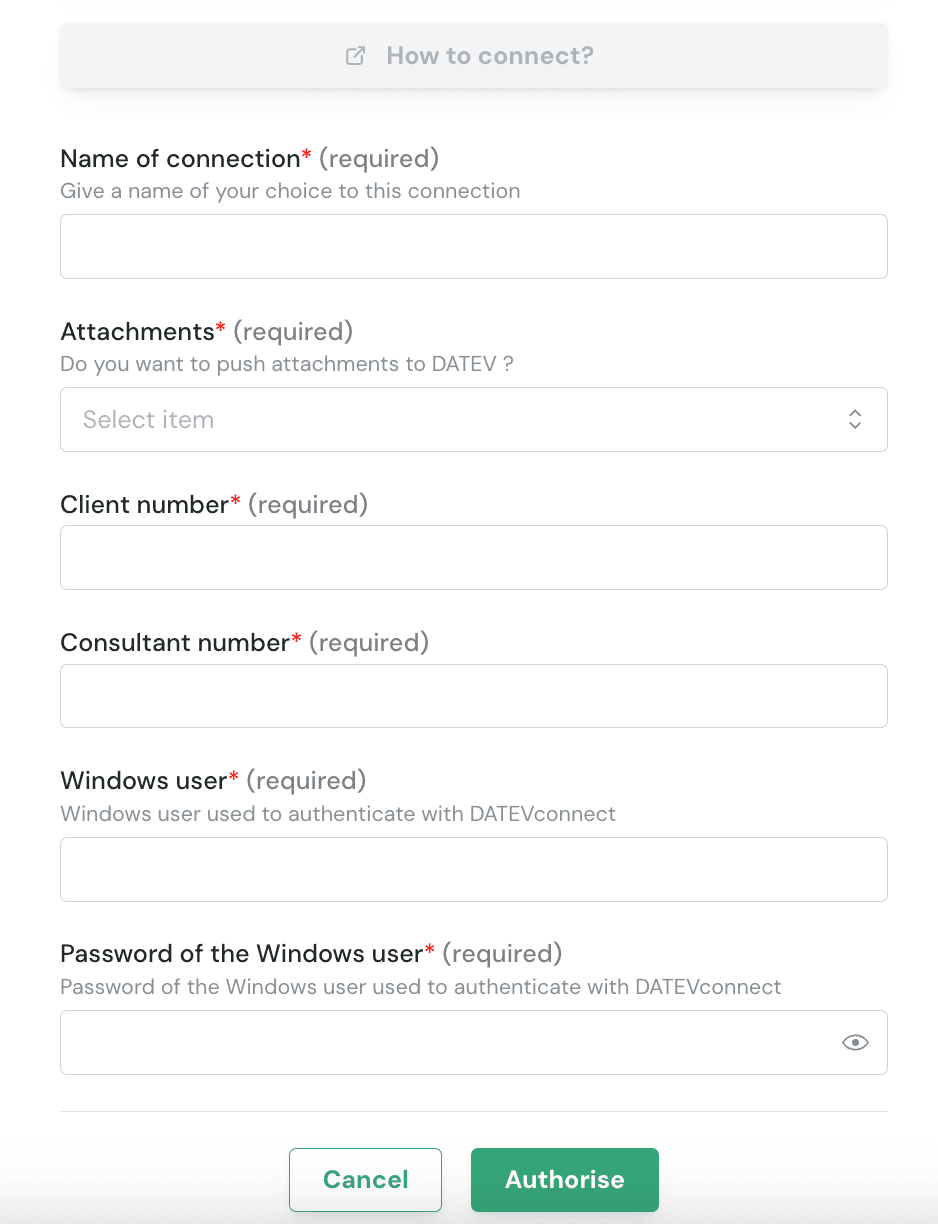 **Step 1:** Choose a name for your connection (If the connection name field isn’t visible, simply skip this step and continue)
 **Step 2 :** Choose whether you want to send attachments
If you don’t see this option, it means your software provider preset this setting for you.
**Step 2 :** Choose whether you want to send attachments
If you don’t see this option, it means your software provider preset this setting for you.
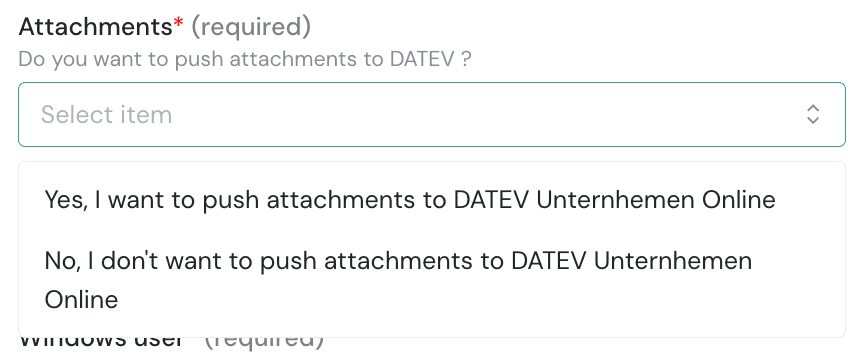 * If your integration needs to send PDF invoices, receipts, or supporting documents to DATEV, select **Yes** to enable attachments.
* This requires a valid **DATEV Unternehmen Online** licence (see above in prerequisites section)
**Step 3** : Enter your **Consultant Number** and **Client Number**.
* If your integration needs to send PDF invoices, receipts, or supporting documents to DATEV, select **Yes** to enable attachments.
* This requires a valid **DATEV Unternehmen Online** licence (see above in prerequisites section)
**Step 3** : Enter your **Consultant Number** and **Client Number**.
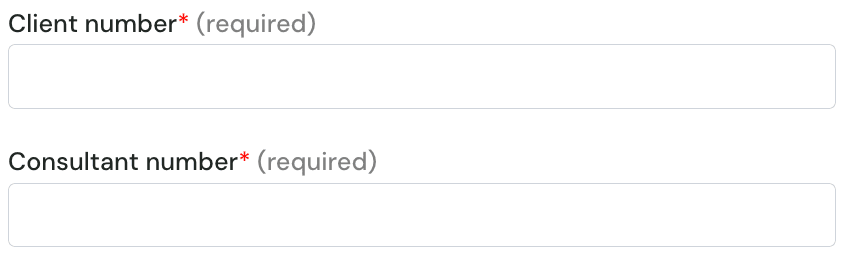 Enter your **Consultant Number** and **Client Number**.
Where to find them ? 👇
* Go to DUO sign-in page
* Click **Show document overview**
* The numbers are shown on the right, below *Settings*:
* First number = Consultant Number (5696507 in the example)
* Second number = Client Number (55003 in the example)
Enter your **Consultant Number** and **Client Number**.
Where to find them ? 👇
* Go to DUO sign-in page
* Click **Show document overview**
* The numbers are shown on the right, below *Settings*:
* First number = Consultant Number (5696507 in the example)
* Second number = Client Number (55003 in the example)
 **Step 4** : Fill in your Windows user and password linked to DATEV account
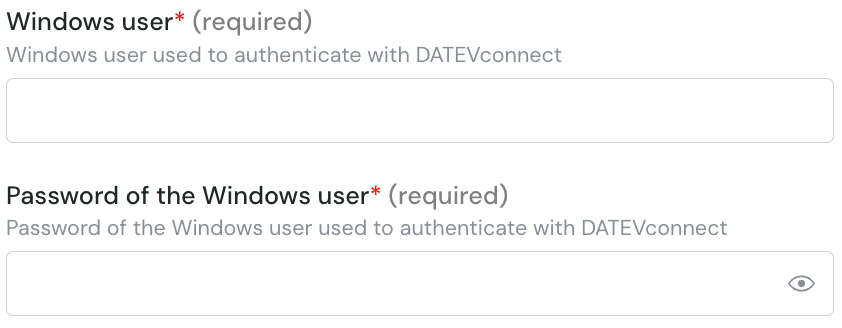 Enter the Windows username and password **of the user linked to the DATEV account**, as described in prerequisites.
**Step 5:** Click "Authorise" to finalise the connection.
Enter the Windows username and password **of the user linked to the DATEV account**, as described in prerequisites.
**Step 5:** Click "Authorise" to finalise the connection.
 Once you have clicked, a new dialog page will pop up to choose how you want to receive the installer to be installed on your DATEV machine. Installation takes 1 min and is explained in the next section
# 💿 INSTALLATION
Once you have clicked, a new dialog page will pop up to choose how you want to receive the installer to be installed on your DATEV machine. Installation takes 1 min and is explained in the next section
# 💿 INSTALLATION
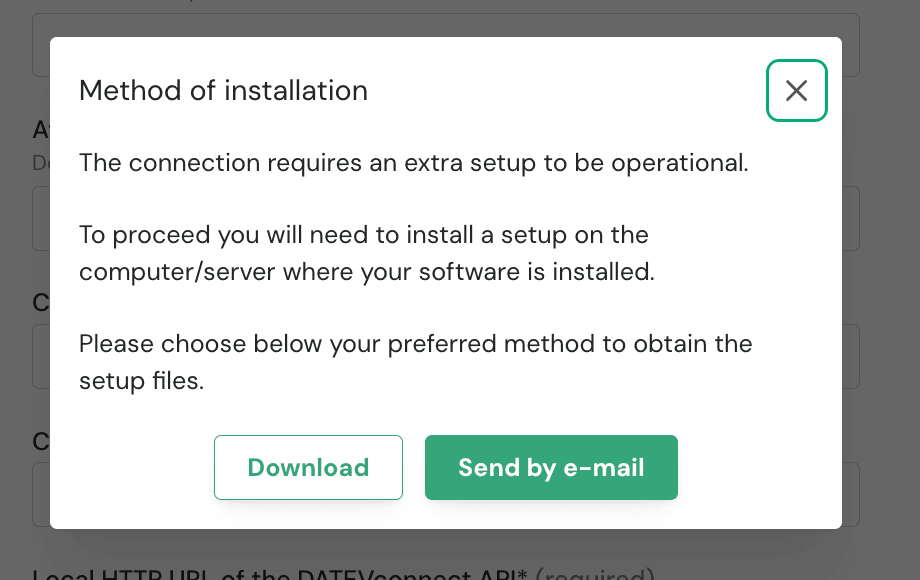 You have two options to download and install the local agent on the same server as your DATEV instance:
* If DATEV is hosted on your computer, you can directly download the program by clicking on **Download**.
* If DATEV is hosted on another server, you have the option to send the program via email (e.g to the person or company hosting DATEV so they can download and install it).
**Step 1:** You have the file named: “Setup.zip”. Extract the file to a folder “Setup” (click right, and do Extract All). It is important to first extract the zip before double clicking on it.
**Step 2:** Open the folder “Setup”. The folder should contain two files:
* settings.json : you do not have to edit this file, it contains the credentials needed to make the bridge to DATEV
* SetupLocalAPIService.exe: This is the file we need to make the installation
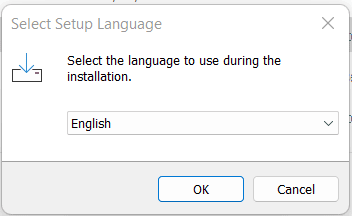
**Step 3:** Double click on “SetupLocalAPIService.exe” to start the installation. To complete the installation, you need to go through each step:
* Select the language of the installation screen
You have two options to download and install the local agent on the same server as your DATEV instance:
* If DATEV is hosted on your computer, you can directly download the program by clicking on **Download**.
* If DATEV is hosted on another server, you have the option to send the program via email (e.g to the person or company hosting DATEV so they can download and install it).
**Step 1:** You have the file named: “Setup.zip”. Extract the file to a folder “Setup” (click right, and do Extract All). It is important to first extract the zip before double clicking on it.
**Step 2:** Open the folder “Setup”. The folder should contain two files:
* settings.json : you do not have to edit this file, it contains the credentials needed to make the bridge to DATEV
* SetupLocalAPIService.exe: This is the file we need to make the installation
**Step 3:** Double click on “SetupLocalAPIService.exe” to start the installation. To complete the installation, you need to go through each step:
* Select the language of the installation screen
 * Select the installation type: "standard installation" is recommended
 * In this step, it’s important to select the settings.json extracted in the downloaded file. By default, it should already have selected that file.
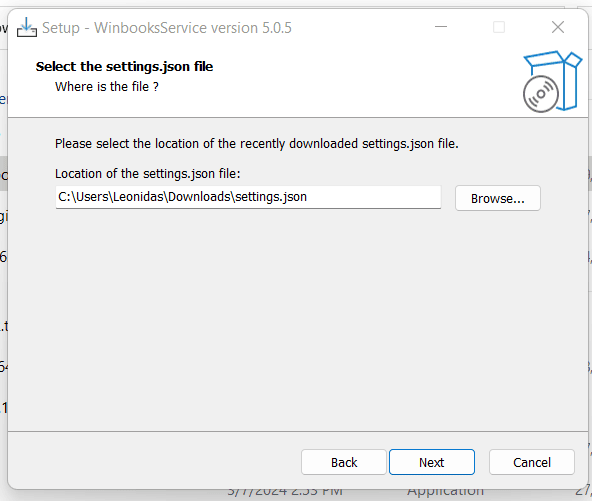 Continue through the different steps until you get a message saying that the installation is successful
Once done, **your connection to DATEV will be fully active**. 🎉 🕺
# VERIFICATION
How to check that the service was correctly installed ?
**Step 1:** Open the explorer menu and search for “Services”
**Step 2:** Open “Services”
**Step 3:** A new window will open with a list of services. You should find in this list a service called “LocalAPIService” with a status “Running”. If this is the case, you have successfully completed the connection with DATEV.
Continue through the different steps until you get a message saying that the installation is successful
Once done, **your connection to DATEV will be fully active**. 🎉 🕺
# VERIFICATION
How to check that the service was correctly installed ?
**Step 1:** Open the explorer menu and search for “Services”
**Step 2:** Open “Services”
**Step 3:** A new window will open with a list of services. You should find in this list a service called “LocalAPIService” with a status “Running”. If this is the case, you have successfully completed the connection with DATEV.