> ## Documentation Index
> Fetch the complete documentation index at: https://docs.chift.eu/llms.txt
> Use this file to discover all available pages before exploring further.
# AFAS
# 🚨 PREREQUISITES
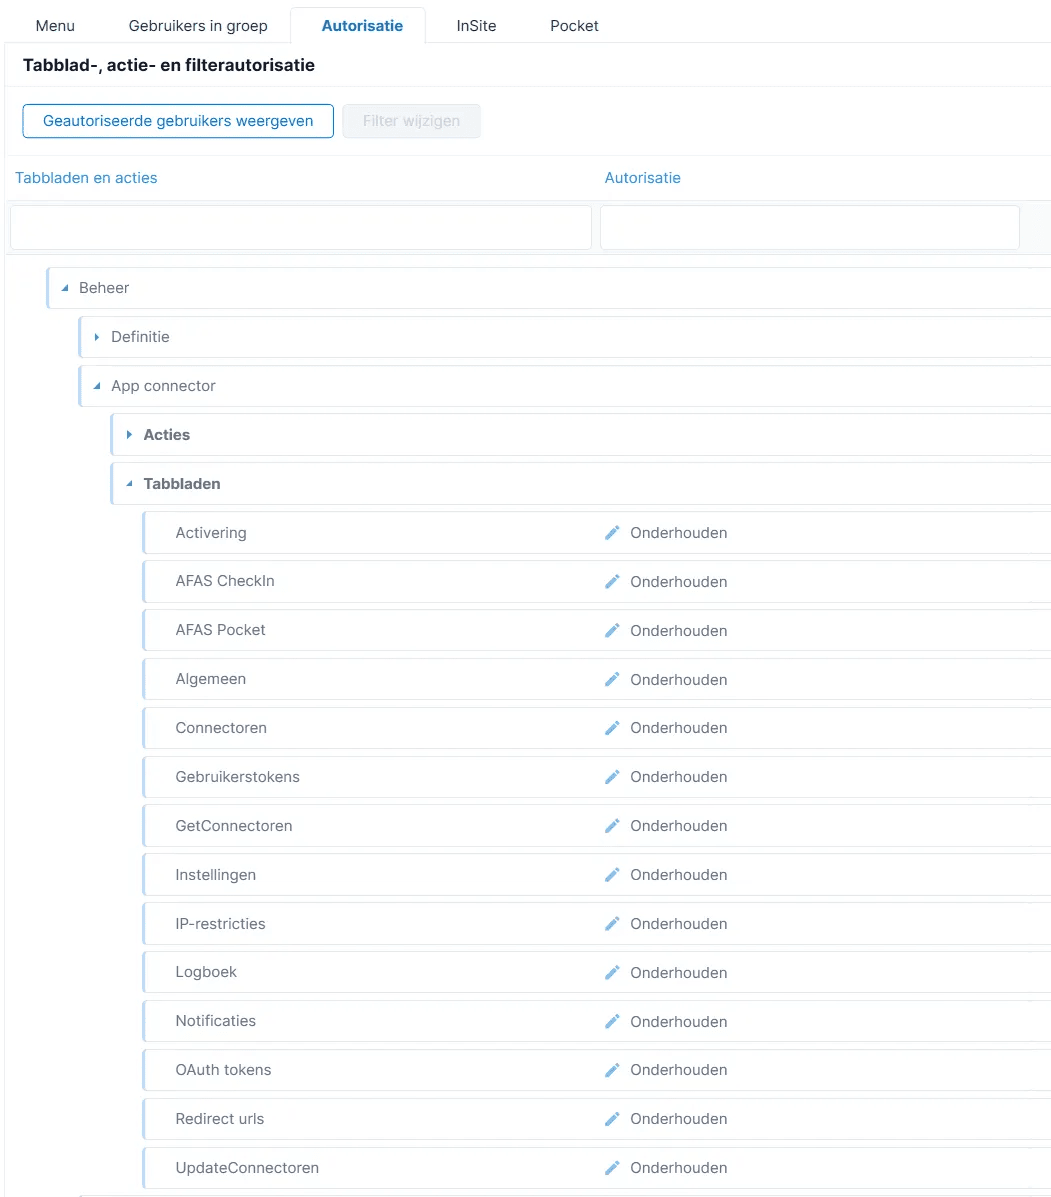
* Have an AFAS login with all admin rights listed in the above screenshot.
 * Have the zip file downloaded on your computer and unzipped.
[AFAS\_GetConnectors\_15122025.zip](/images/help/afas/1765813797282-AFAS_GetConnectors_15122025.zip)
* AFAS settings :
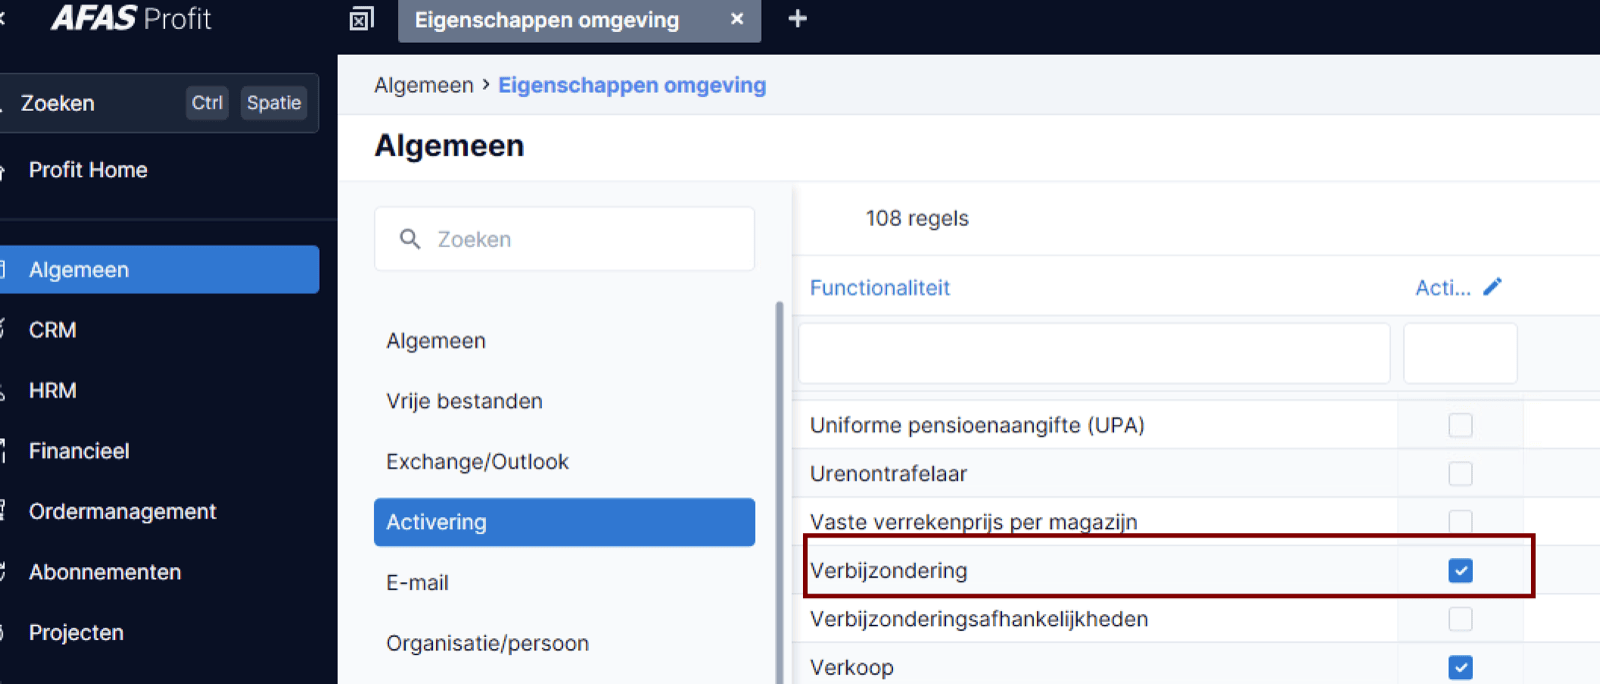
Make sure the “Verbijzonderingen” is activated :
* Have the zip file downloaded on your computer and unzipped.
[AFAS\_GetConnectors\_15122025.zip](/images/help/afas/1765813797282-AFAS_GetConnectors_15122025.zip)
* AFAS settings :
Make sure the “Verbijzonderingen” is activated :
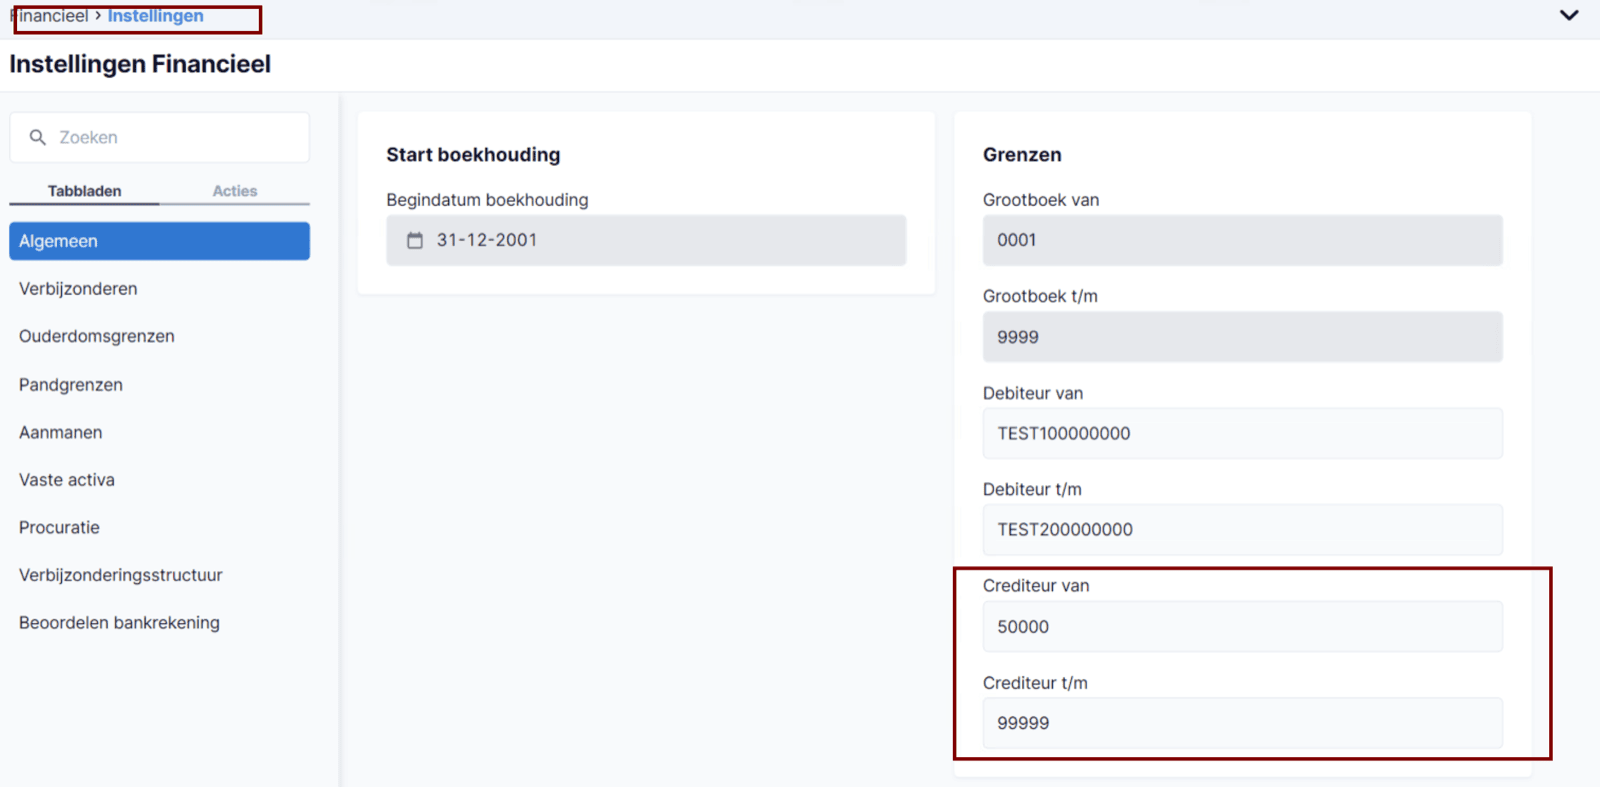
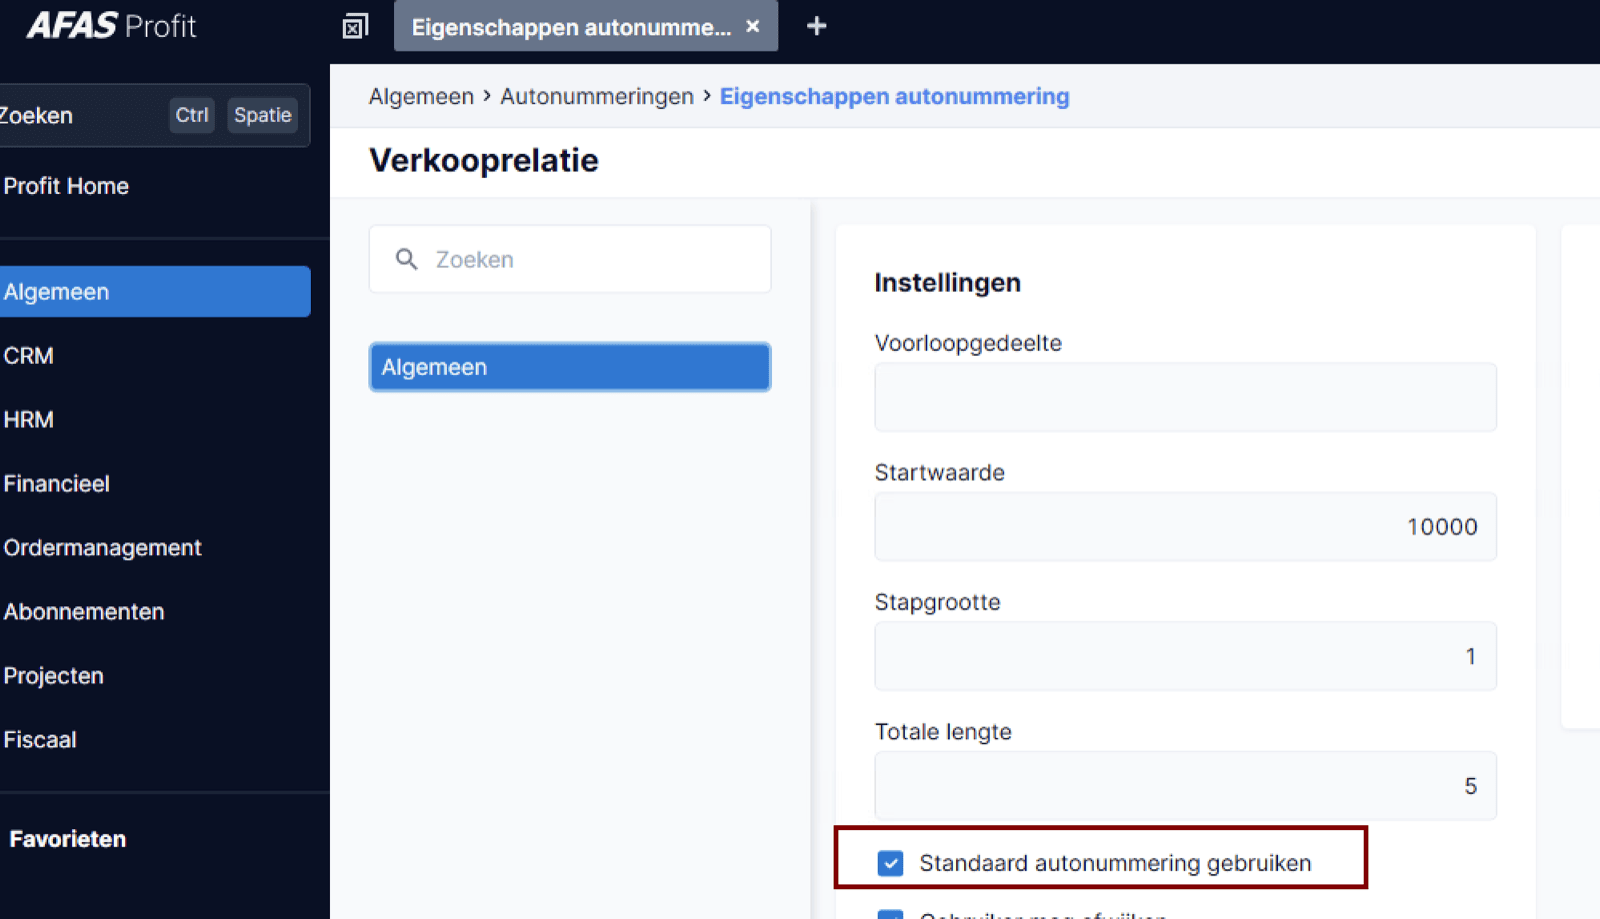
 To make use of the AFAS autoNumber logic :
Make sure the following boxes are filled in :
To make use of the AFAS autoNumber logic :
Make sure the following boxes are filled in :
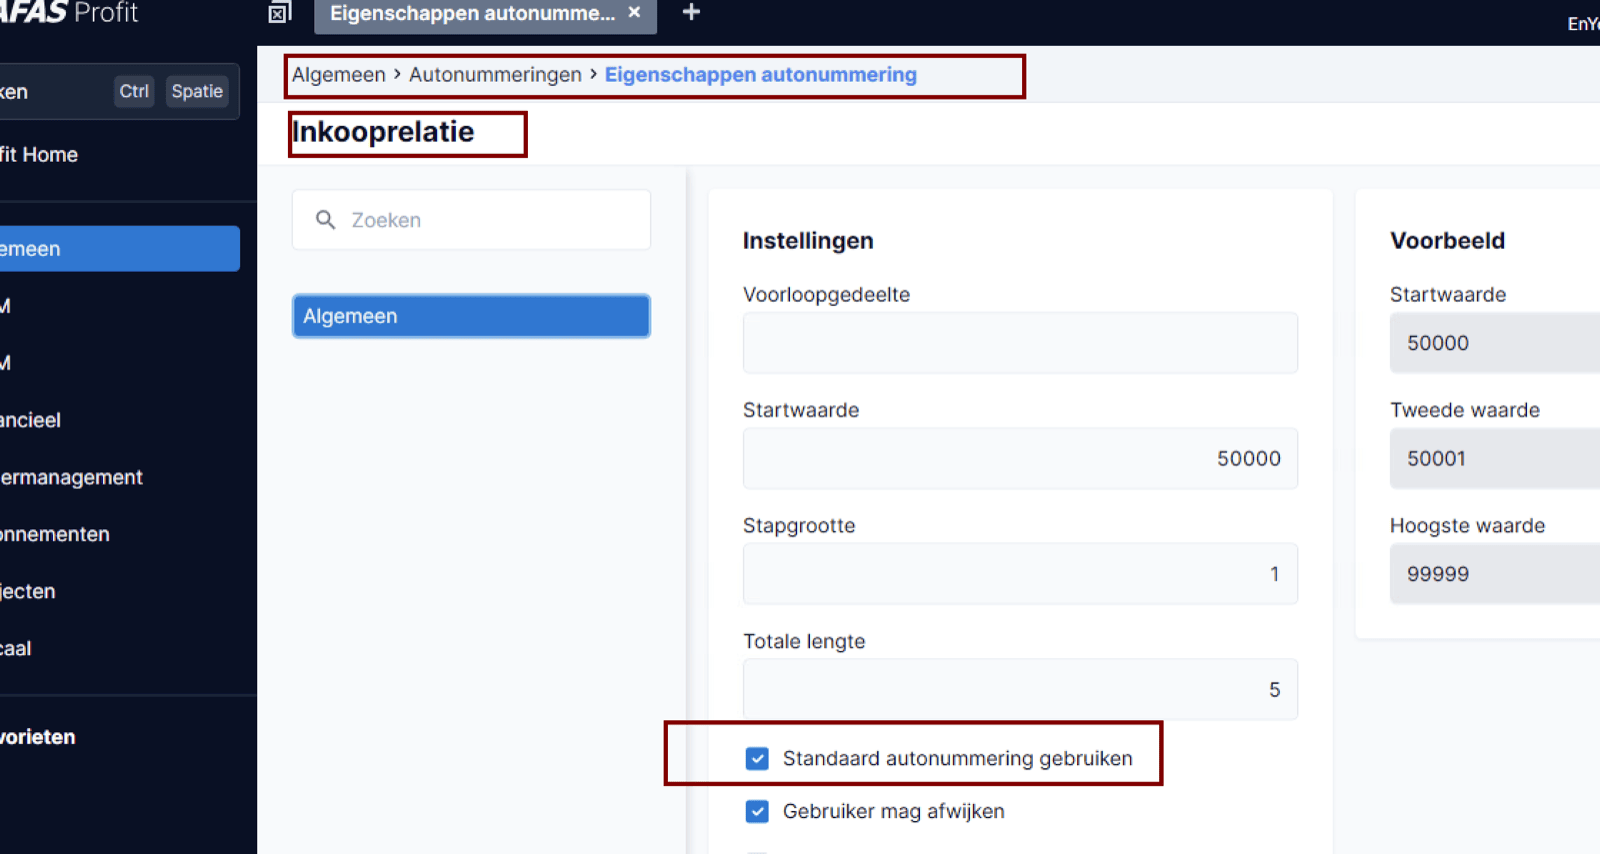
 Specify that autonumbering is activated for the debtors and creditors :
 &
&
 # 💪 PREPARATION
### Step 1 : Creating a Chift App :
Go to [AFAS Online Login](https://idp.afasonline.com/Account/Login?) and log in with your AFAS credentials.
⚠ **Important:** Use a Citrix session (not Citrix in the browser). You won’t be able to copy the credentials later. ⚠
# 💪 PREPARATION
### Step 1 : Creating a Chift App :
Go to [AFAS Online Login](https://idp.afasonline.com/Account/Login?) and log in with your AFAS credentials.
⚠ **Important:** Use a Citrix session (not Citrix in the browser). You won’t be able to copy the credentials later. ⚠
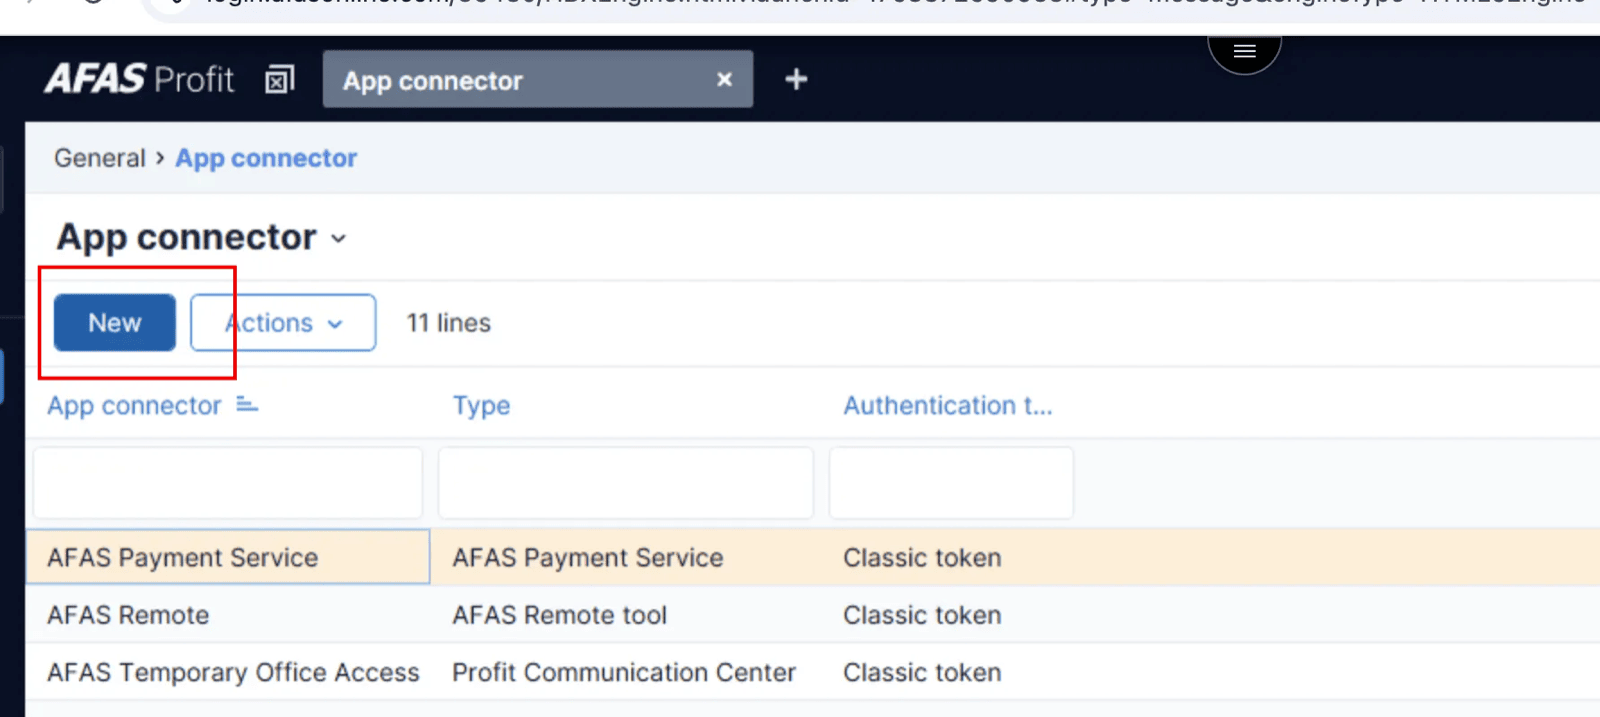
 Navigate to the **General** page and open **App connector**.
Create a new App connector.
Navigate to the **General** page and open **App connector**.
Create a new App connector.
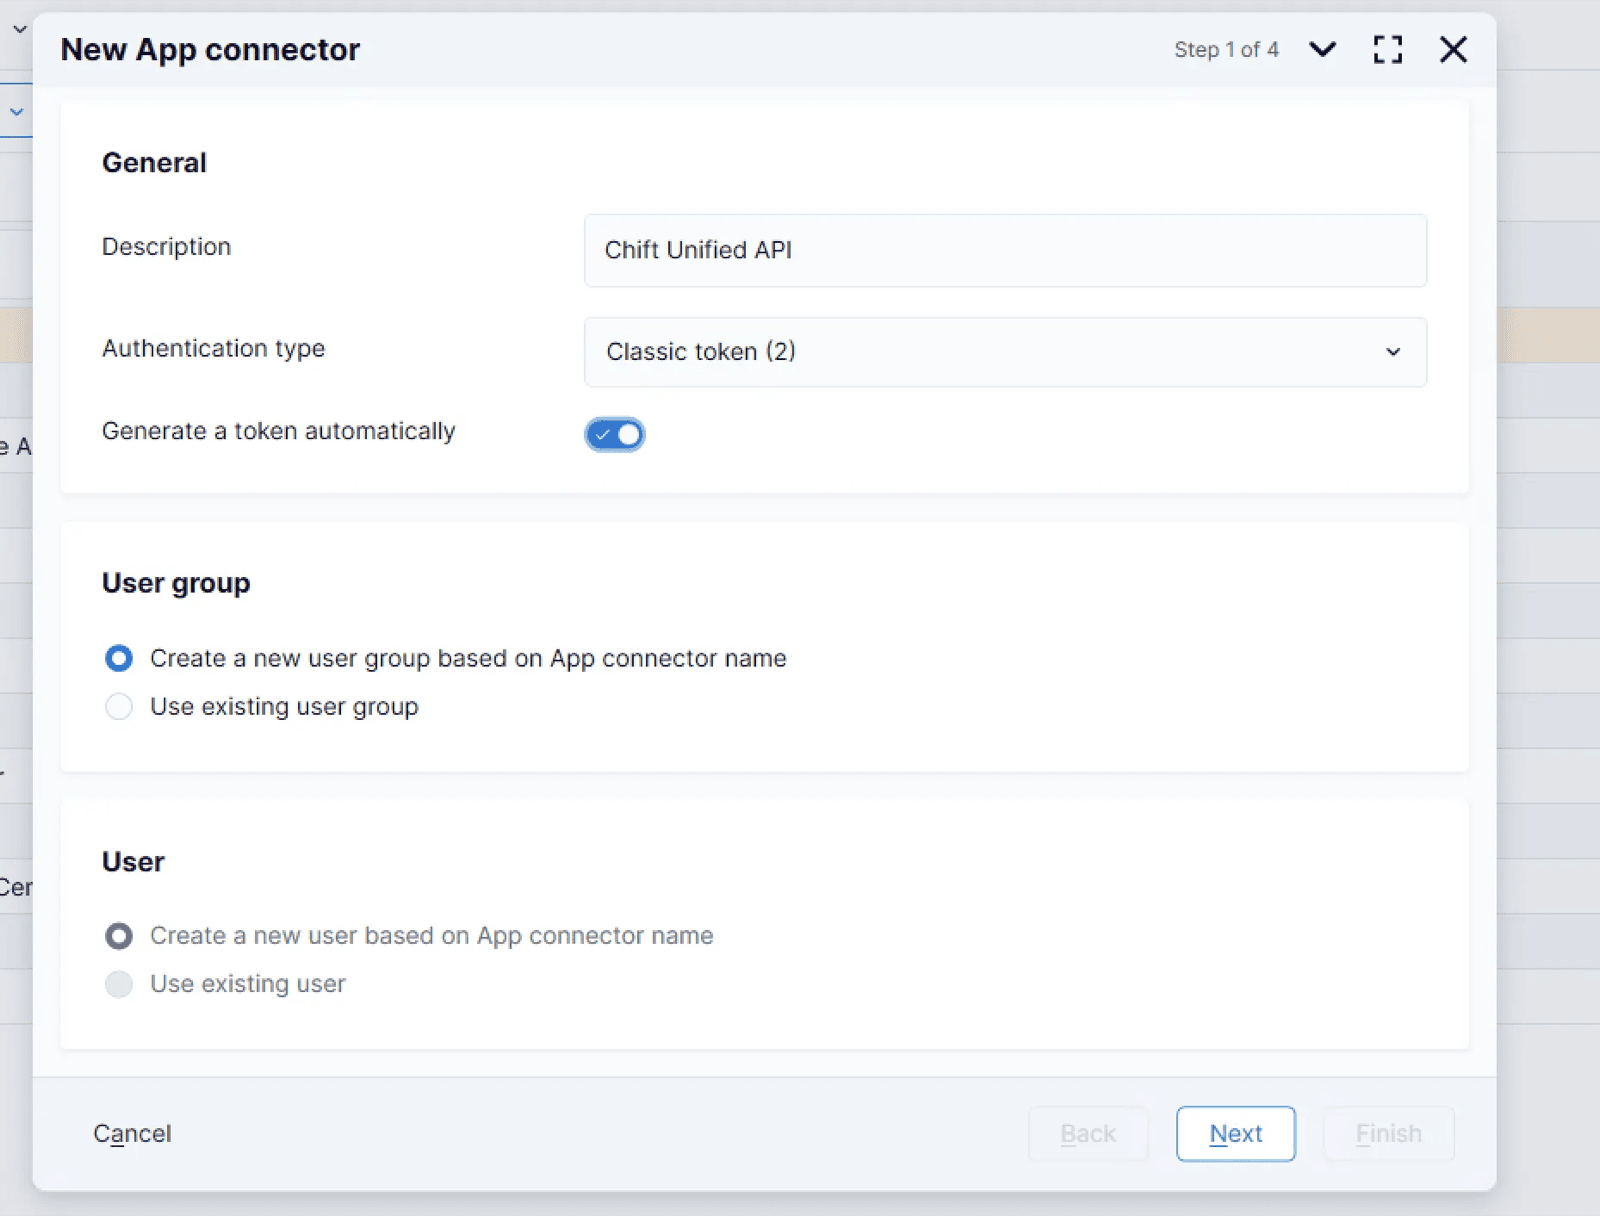
 Configure the App connector as shown in the following screenshot:
 ### Step 2: Add the Chift GetConnectors to your App
Use the import functionality to add the file below:
[AFAS\_GetConnectors\_15122025.zip](/images/help/afas/1765813857584-AFAS_GetConnectors_15122025.zip)
(download it and import it as illustrated in the screenshot below )
### Step 2: Add the Chift GetConnectors to your App
Use the import functionality to add the file below:
[AFAS\_GetConnectors\_15122025.zip](/images/help/afas/1765813857584-AFAS_GetConnectors_15122025.zip)
(download it and import it as illustrated in the screenshot below )
 1 - Save the zip file locally and extract it to a folder.
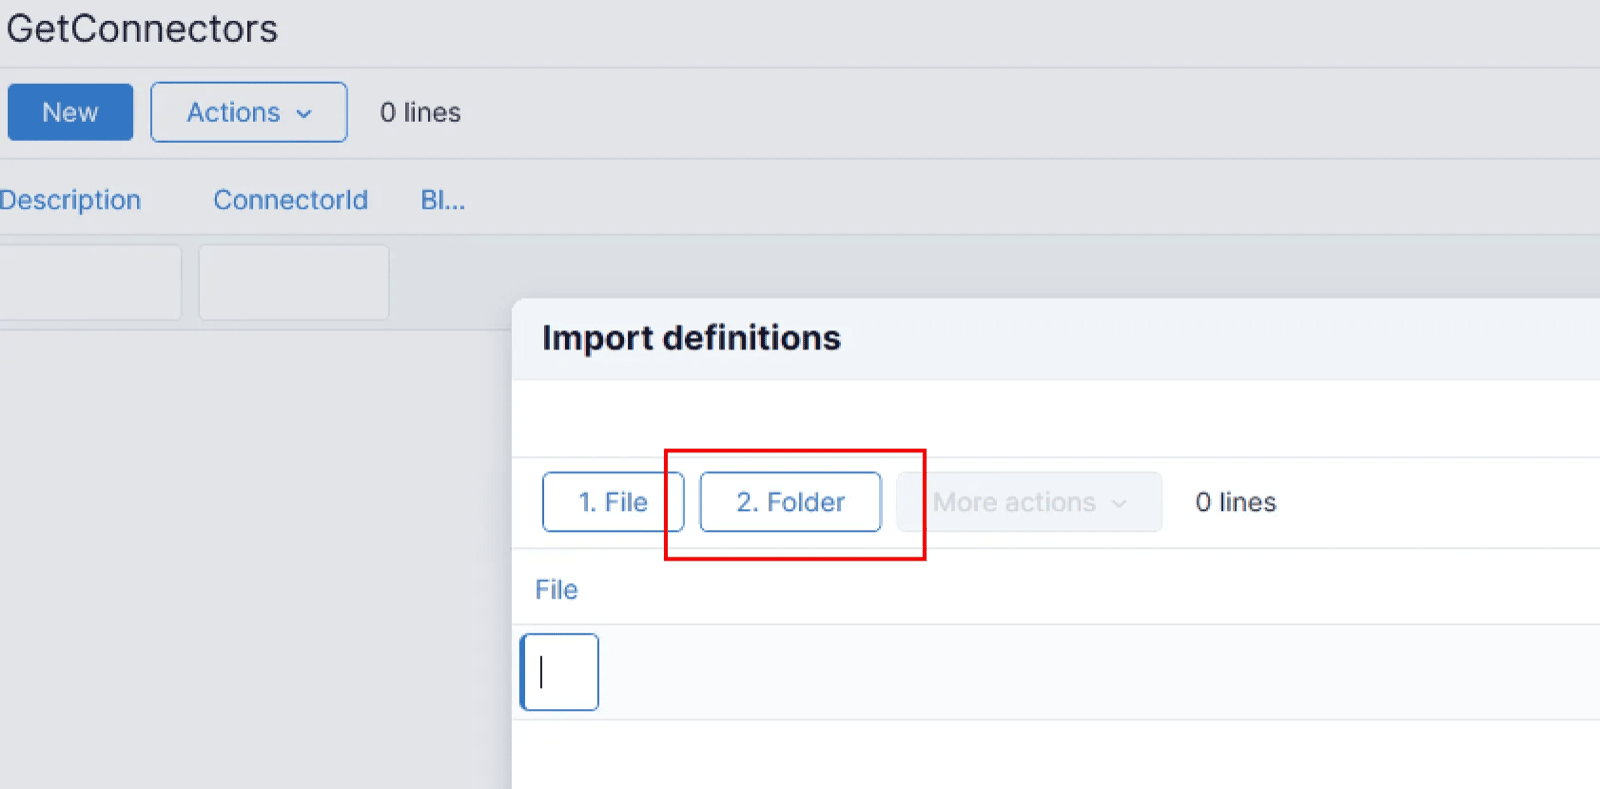 2- Select this folder from your machine and click **Finish**.
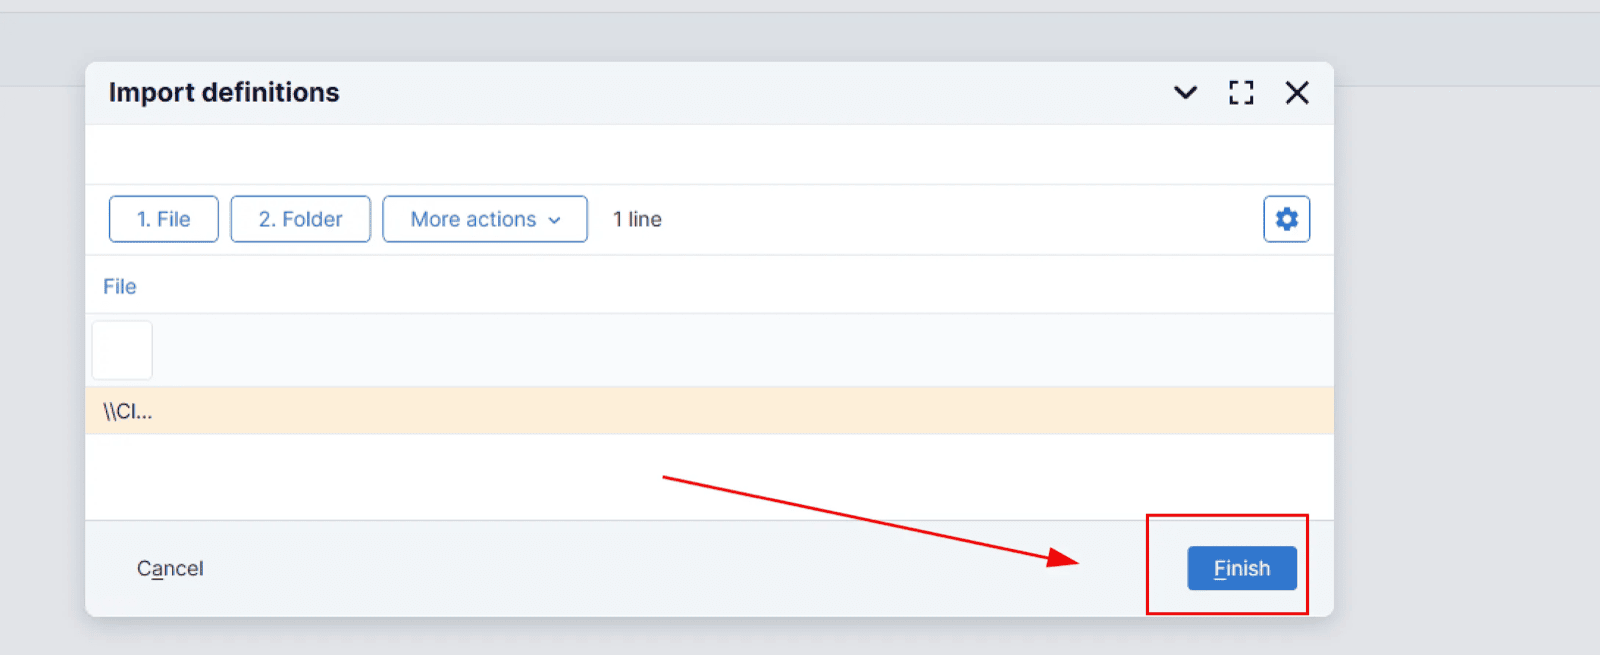 After accepting the warning message, AFAS will import the GetConnectors. Once done, select **Next** :
 ### Step 3: Add the UpdateConnectors
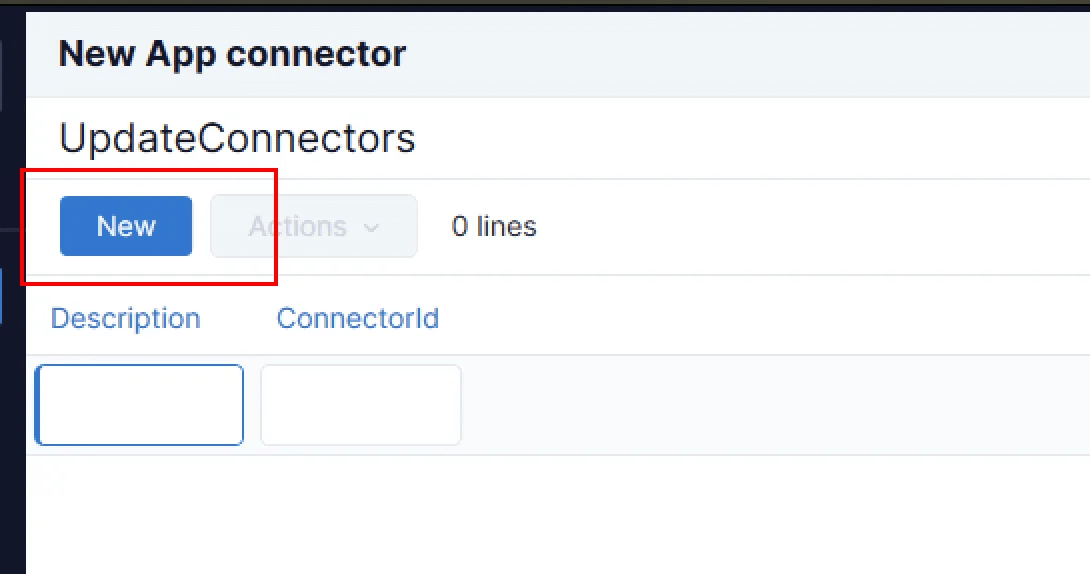 Use the search bar to find and add the following UpdateConnectors:
* Inkooprelatie organisatie - KnPurchaseRelationOrg
* Inkooprelatie persoon - KnPurchaseRealationPer
* Verkoopsrelatie organisatie - KnSalesRelationOrg
* Verkoopsrelatie persoon - KnSalesRelationPer
* Financiële mutaties - FiEntries
* Code verbijzondering - KnDimCode
Use the search bar to find and add the following UpdateConnectors:
* Inkooprelatie organisatie - KnPurchaseRelationOrg
* Inkooprelatie persoon - KnPurchaseRealationPer
* Verkoopsrelatie organisatie - KnSalesRelationOrg
* Verkoopsrelatie persoon - KnSalesRelationPer
* Financiële mutaties - FiEntries
* Code verbijzondering - KnDimCode
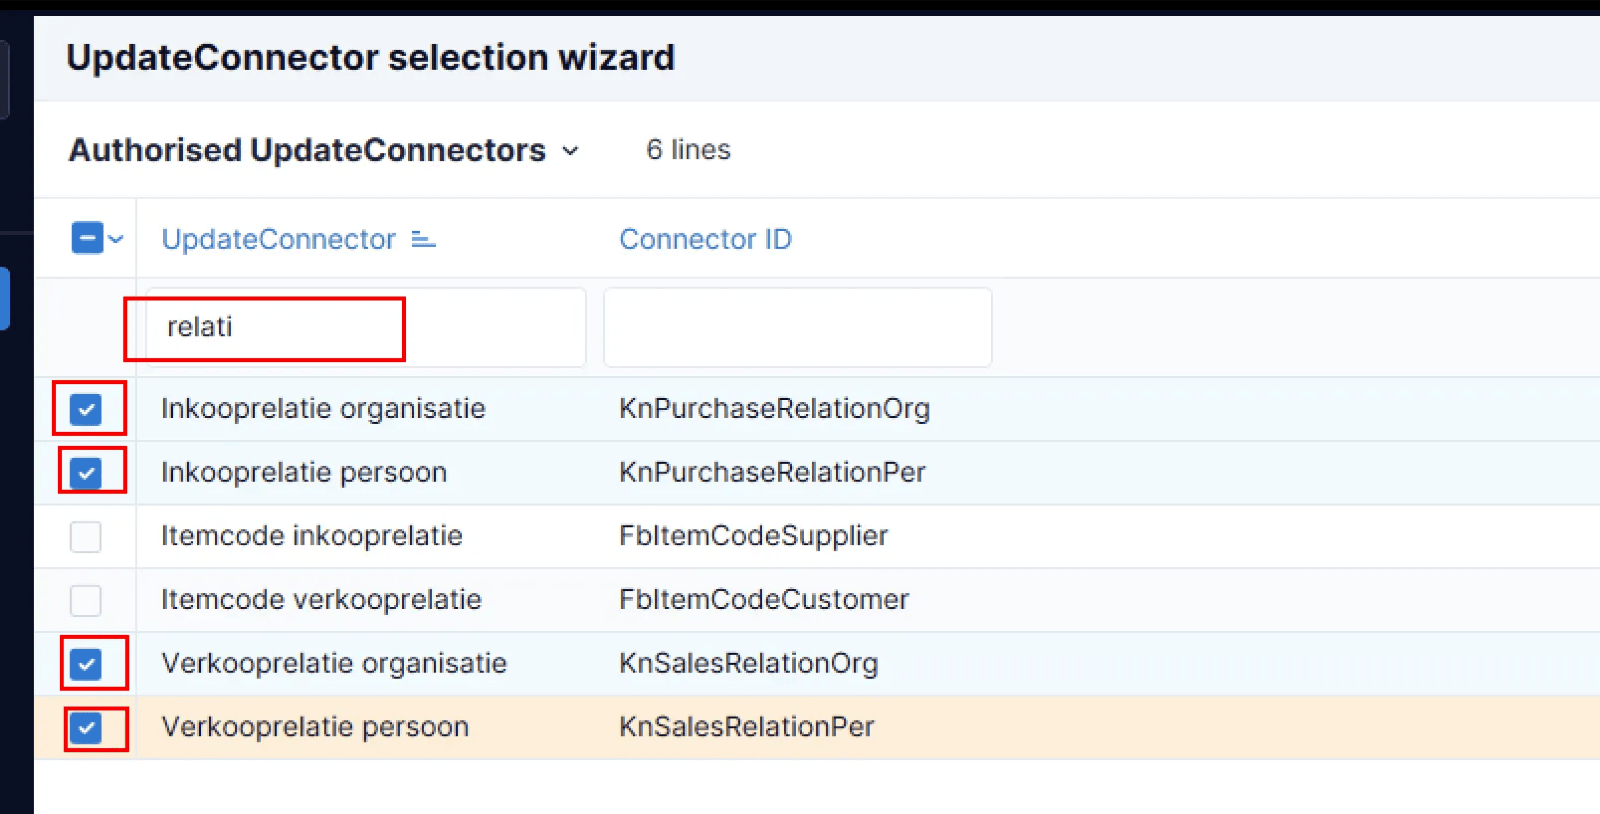 Check the boxes for each connector, click **Finish**, then click **New** to continue adding all connectors.
Once all UpdateConnectors are added, click **Next**.
Check the boxes for each connector, click **Finish**, then click **New** to continue adding all connectors.
Once all UpdateConnectors are added, click **Next**.
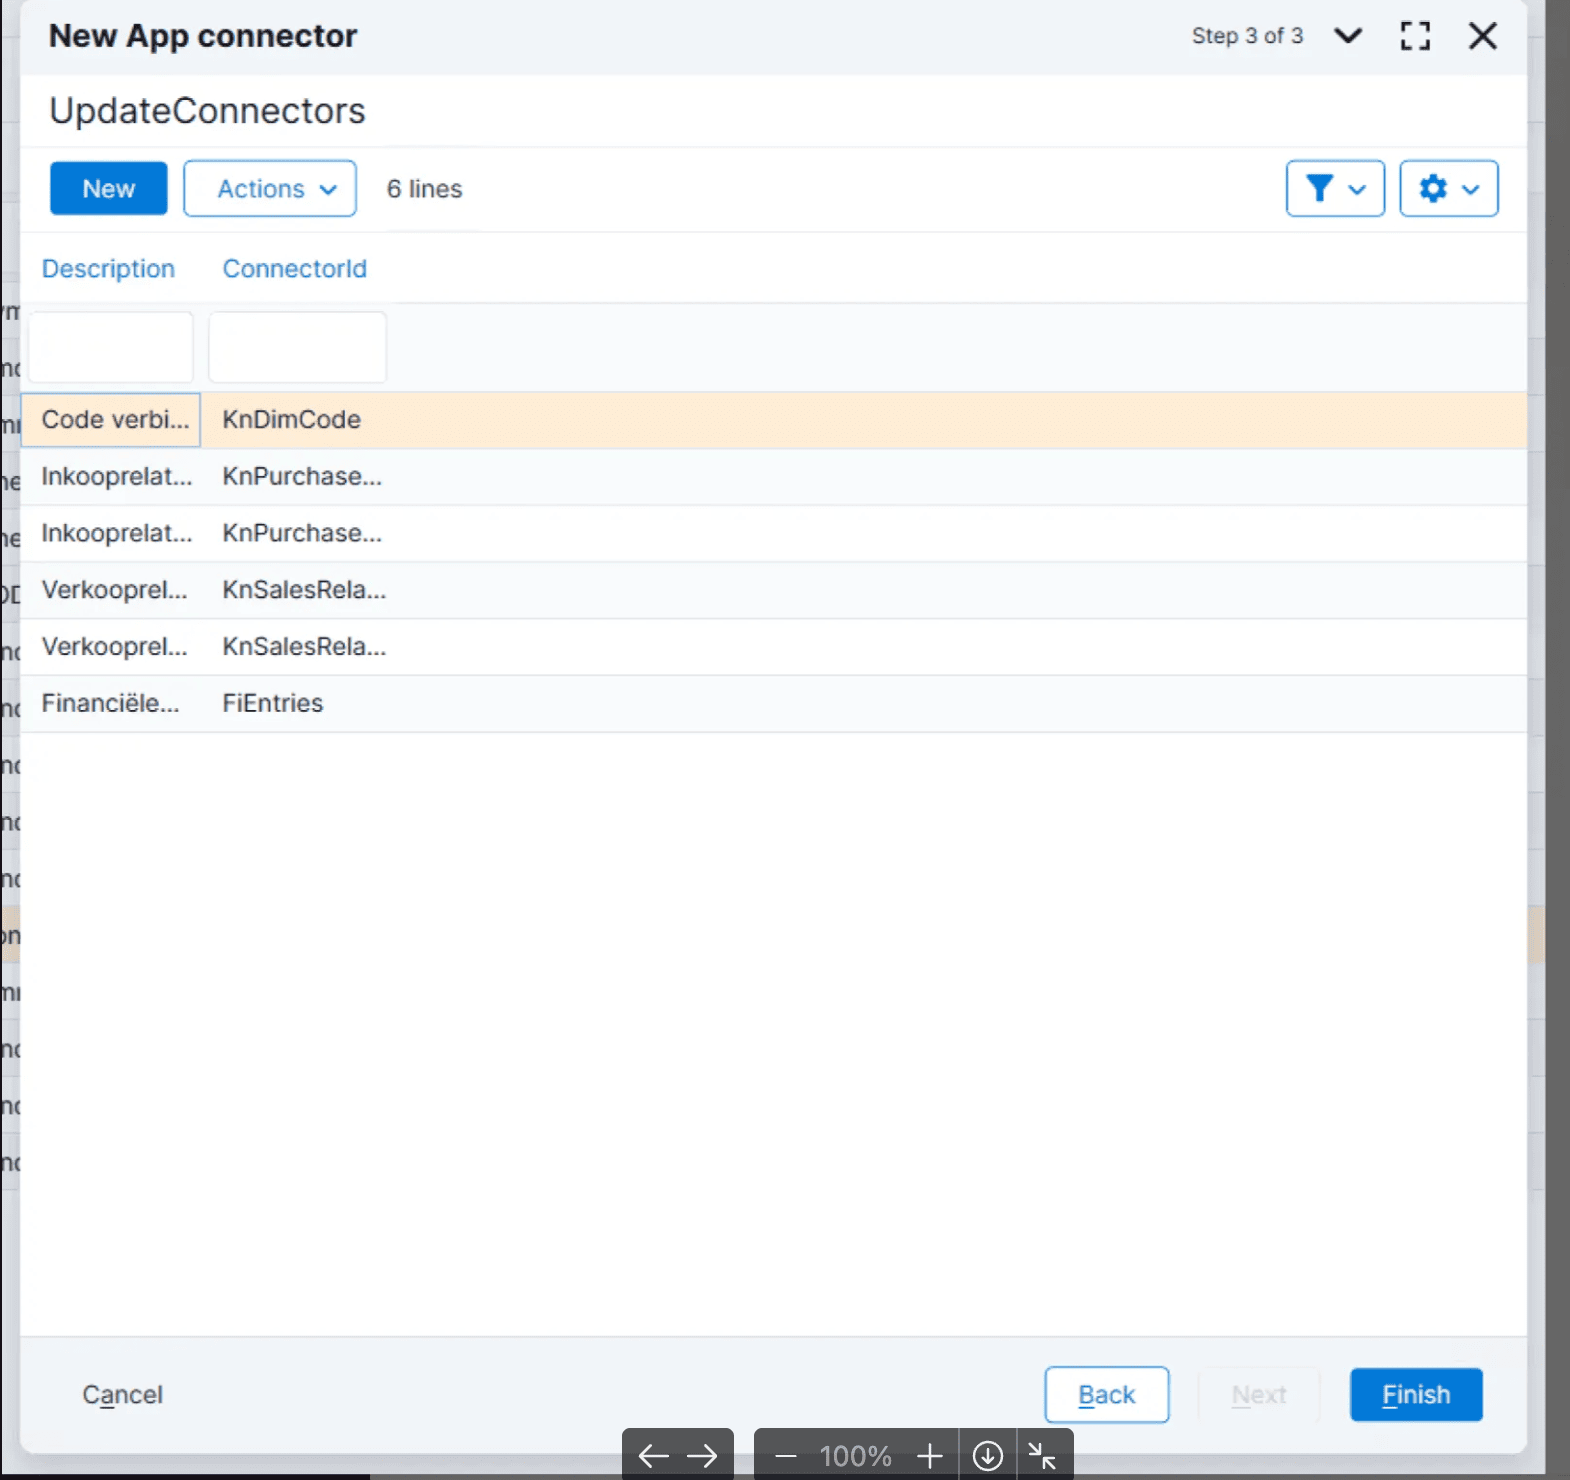 Click “Finish”
⚠ **Important:** Make sure to select all the GetConnectors and UpdateConnectors specified in the documentation. Even if a connector seems irrelevant to your use case, the integration will not work unless all connectors are activated. ⚠
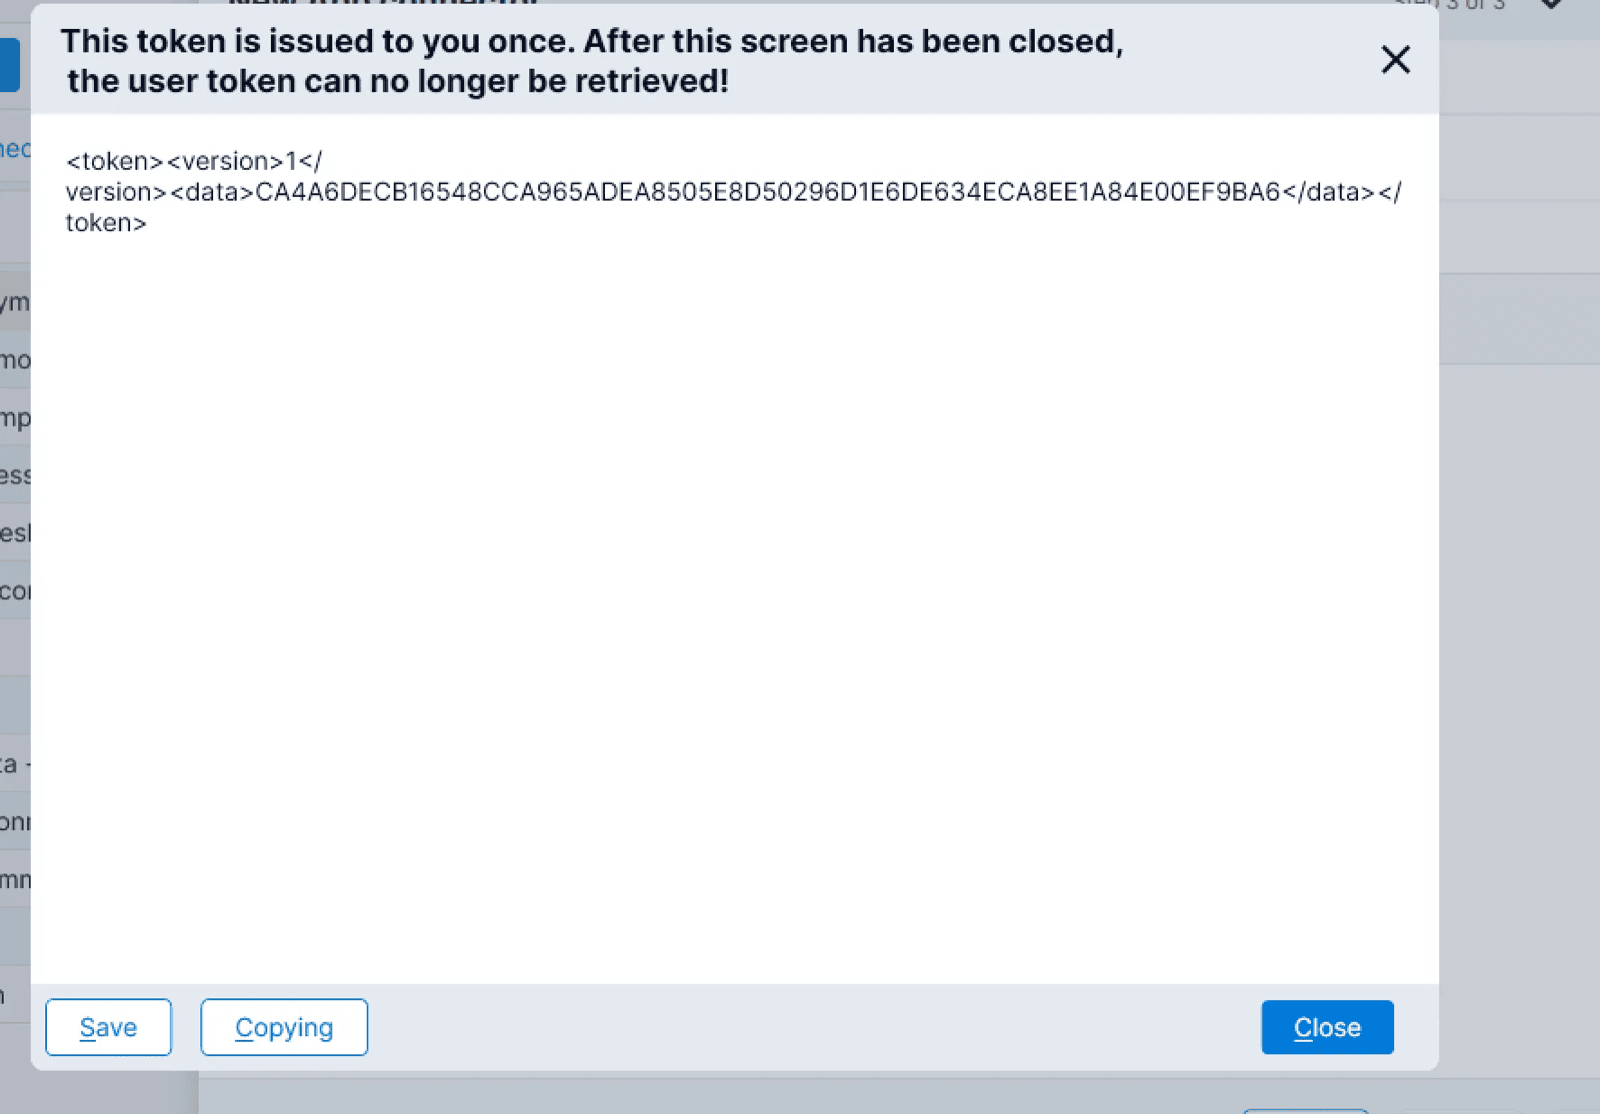
### Step 4: Save your API token
**AFAS will display the API token after completing the connector setup.**\
Save it securely, as you will need to fill it in during the activation of the connection described in the next section.
Click “Finish”
⚠ **Important:** Make sure to select all the GetConnectors and UpdateConnectors specified in the documentation. Even if a connector seems irrelevant to your use case, the integration will not work unless all connectors are activated. ⚠
### Step 4: Save your API token
**AFAS will display the API token after completing the connector setup.**\
Save it securely, as you will need to fill it in during the activation of the connection described in the next section.
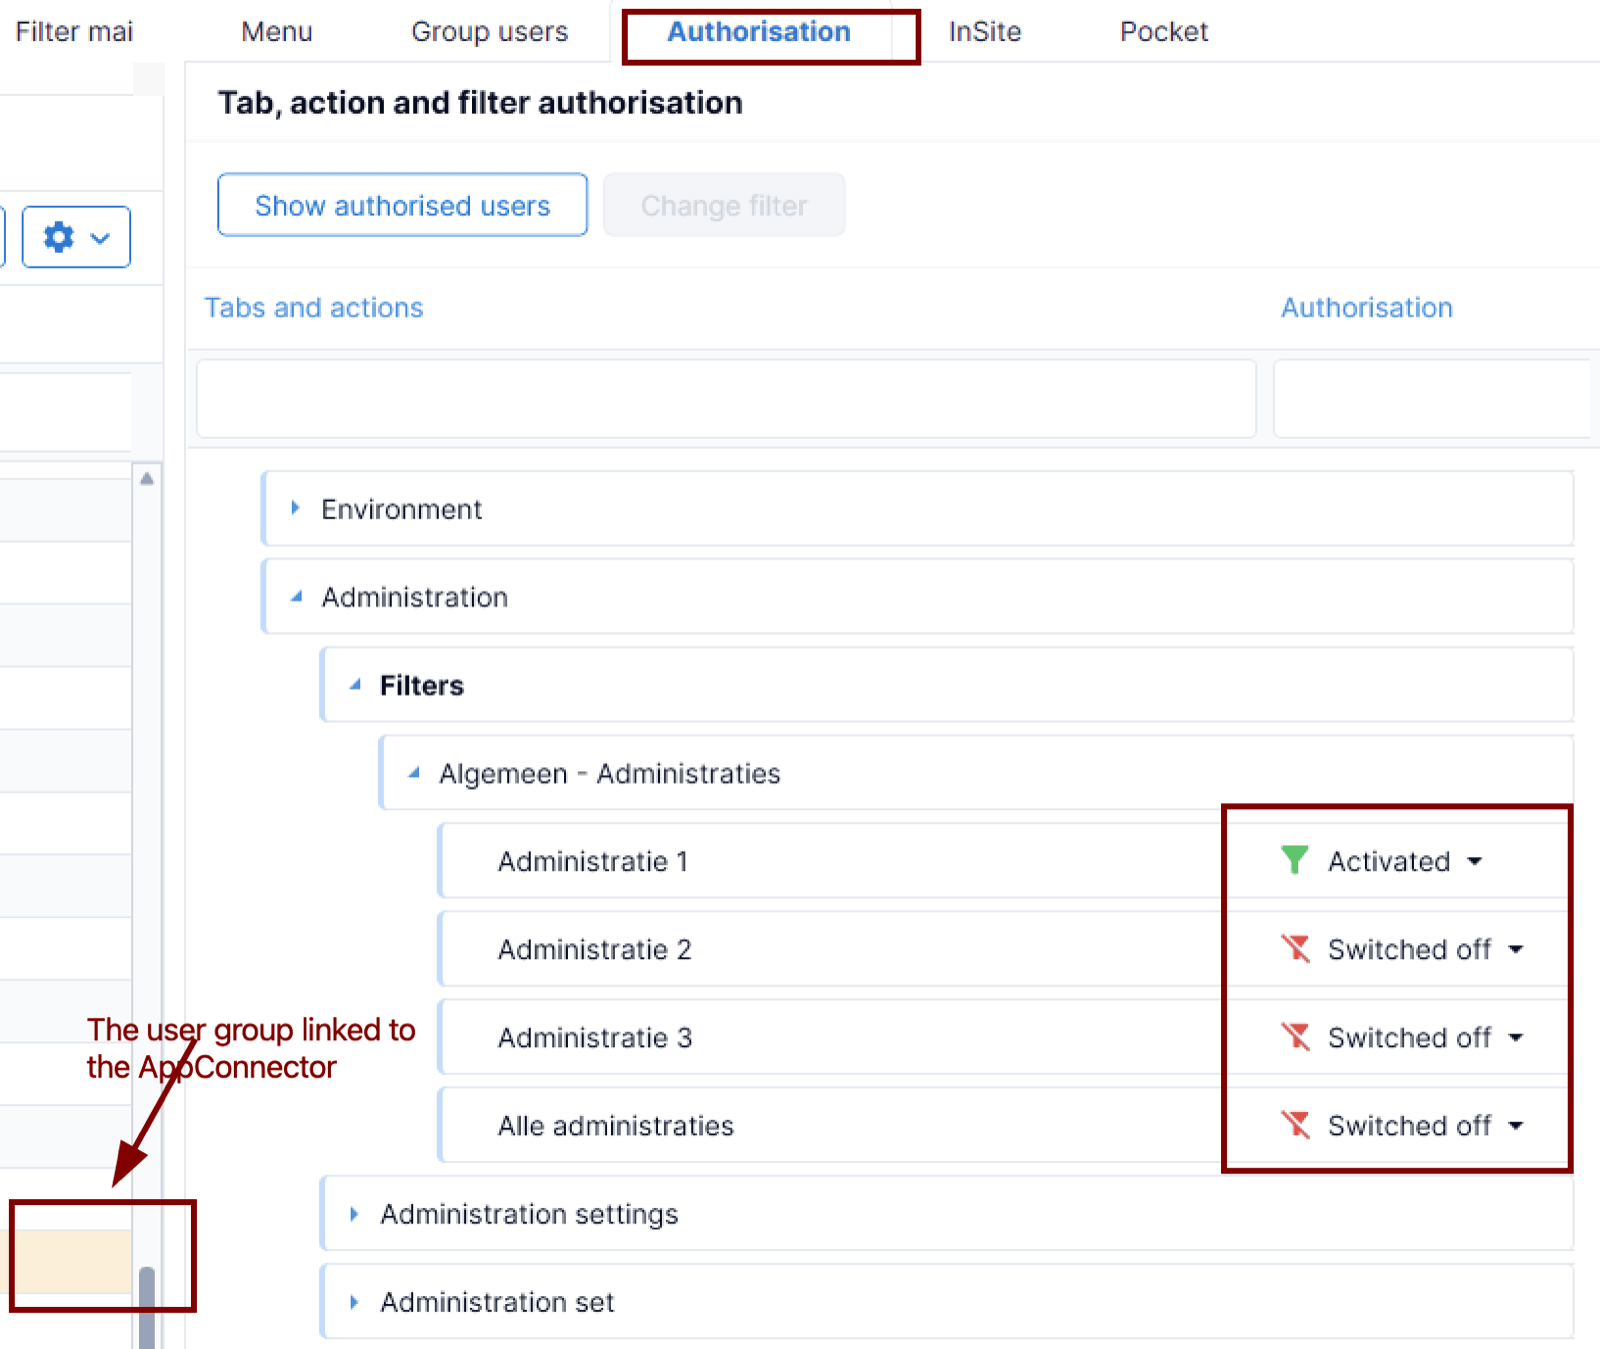
 This Chift App requires the "Algemeen - Adminstraties" authorisation filter. You can check this by going to the Authorisation tool, and finding the authorisation group that was automatically created as part of the App Connector process on the left hand side of the screen. When selected, find the authorisation filters in the "Authorisiation" tab and activate the relevant Administraties(folders), you want to use as part of the integration. In the example picture, only the Administratie 1 will be part of the scope.
 # ⚡️ CONNECTION
## ❶ CONNECT
# ⚡️ CONNECTION
## ❶ CONNECT
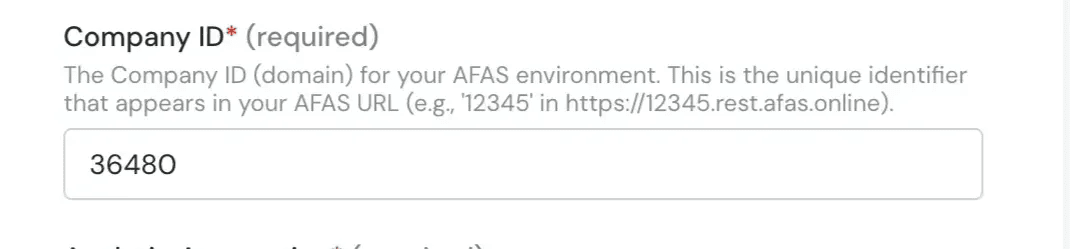
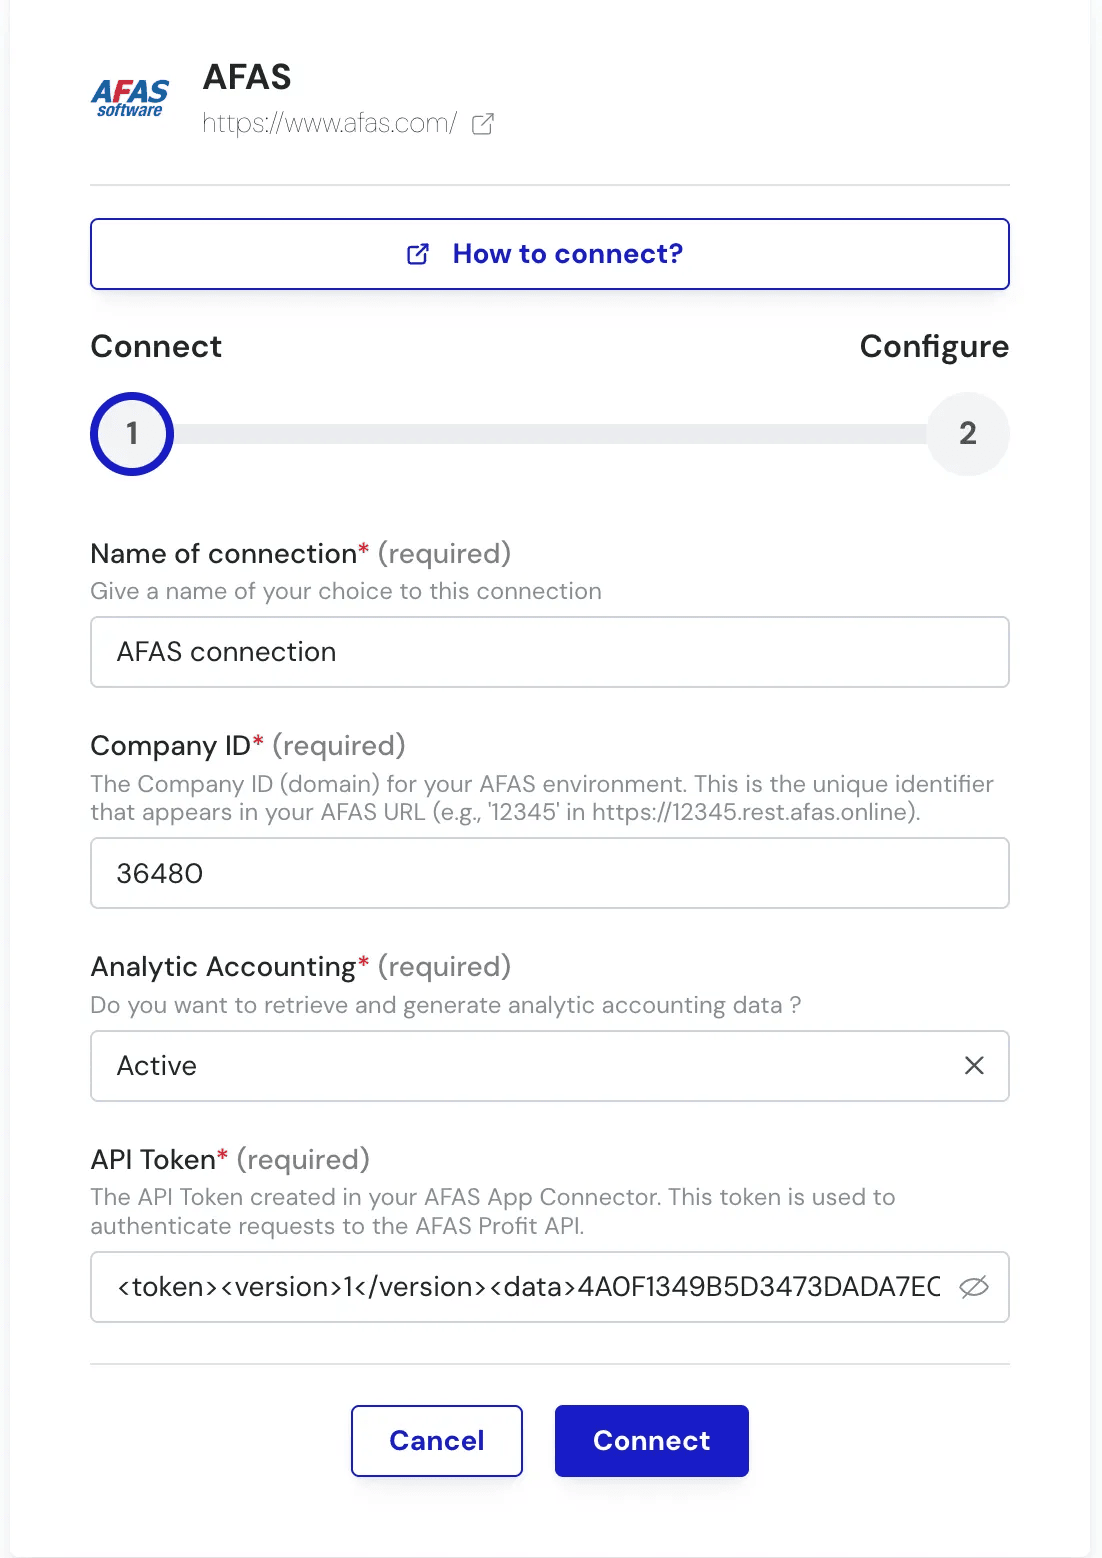 ### 1) Company ID :
 ***a) In the url :***
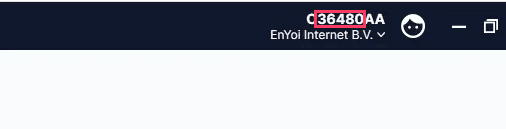
 **b) At the top-right corner** of your screen.
⚠ **Note:** The organization number consists of **numbers only**. For example, in this case it is `36480`, **not** `O36480AA`.
**b) At the top-right corner** of your screen.
⚠ **Note:** The organization number consists of **numbers only**. For example, in this case it is `36480`, **not** `O36480AA`.
 ### 2) API Token :
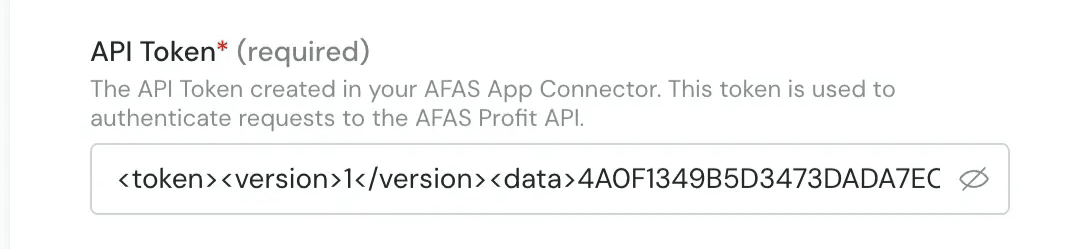 Paste the API token you saved during the preparation phase (**Step 4: Save your API token**).
⚠ **Important:** Make sure you paste the token exactly as saved.
## ❷ Configure
Paste the API token you saved during the preparation phase (**Step 4: Save your API token**).
⚠ **Important:** Make sure you paste the token exactly as saved.
## ❷ Configure
 **Default Payment Terms**
Select the default payment terms for the creation of **customers** and **vendors**.
**Administrative ID**
ℹ *If this field is not displayed on the other side, you can ignore it.*
Select the **administrative ID** you want to connect to.\
This option is used when you need to connect to a **specific administrative ID** (for example, a particular accounting folder).
**Default Analytic Plan**
ℹ *If this field is not displayed on the other side, you can ignore it.*
Select the **Allocation Axis** used by default.
Submit! Congratulations ! 🎉
**Default Payment Terms**
Select the default payment terms for the creation of **customers** and **vendors**.
**Administrative ID**
ℹ *If this field is not displayed on the other side, you can ignore it.*
Select the **administrative ID** you want to connect to.\
This option is used when you need to connect to a **specific administrative ID** (for example, a particular accounting folder).
**Default Analytic Plan**
ℹ *If this field is not displayed on the other side, you can ignore it.*
Select the **Allocation Axis** used by default.
Submit! Congratulations ! 🎉