> ## Documentation Index
> Fetch the complete documentation index at: https://docs.chift.eu/llms.txt
> Use this file to discover all available pages before exploring further.
# a3ERP
# 🚨 PREREQUISITES
Technical requirements
* **.NET Framework 4.8** must be installed on the server where **a3ERP** is installed.
* The **local agent** must be installed **on the same server as a3ERP**.\
→ Installation on another machine is **not supported**.
### Access & credentials required
* **a3ERP username** with access to the target company
* **Password** for the above a3ERP user
* A **Windows admin account** to perform the installation
* **Network Drive Access for a3ERP**
When the a3ERP data is stored on a network/shared drive (e.g. W:), the A3ERPService Windows service must run under a **Windows user account that has access to that drive**.
The default **Local System** account does not have access to mapped network drives, which will cause a login issue.
**To fix this:**
1. Open services.msc
2. Find A3ERPService, right-click → **Properties**
3. Go to the **Log On** tab
4. Switch from *Local System account* to a domain/local user account that has access to the network/shared drive (e.g. W:)
5. Restart the service
### Supported a3ERP versions
* **14.5.2 → ...**
# 📋**️** FILLING THE FORM
## ❶ Connect
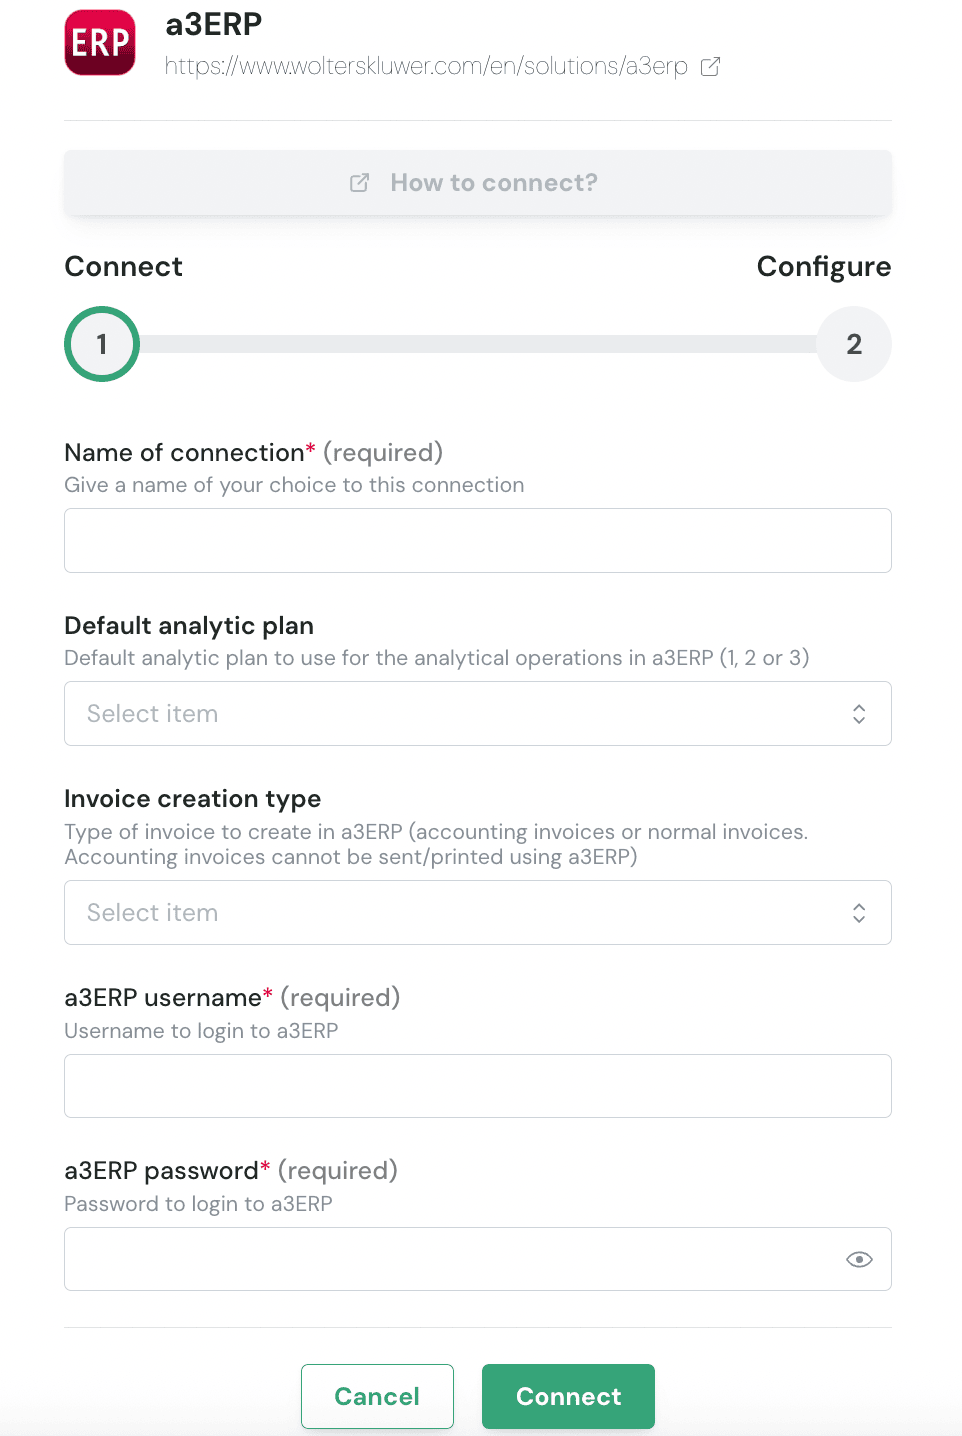 **Step 1:** Choose a name for your connection. (If this field isn’t visible, simply skip this step and continue)
 **Step 2:** Select the **default analytic plan**. (If this field isn’t visible, simply skip this step and continue)
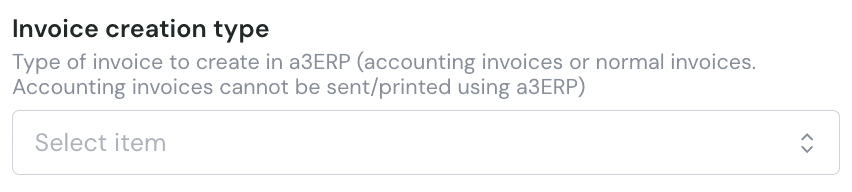
 **Step 3:** Choose the **invoice creation type.** (If this field isn’t visible, simply skip this step and continue)
2 types of invoices can be created in a3ERP:
* Normal invoices
* Accounting invoices
Accounting invoices cannot be sent or printed using a3ERP. Choose the type of invoice you want the integration to create.
**Step 3:** Choose the **invoice creation type.** (If this field isn’t visible, simply skip this step and continue)
2 types of invoices can be created in a3ERP:
* Normal invoices
* Accounting invoices
Accounting invoices cannot be sent or printed using a3ERP. Choose the type of invoice you want the integration to create.
 **Step 4:** Enter the **a3ERP username and password**.
 **Step 5:** Click "Connect" to finalise the form filling.
 👉 **Two options will be displayed :**
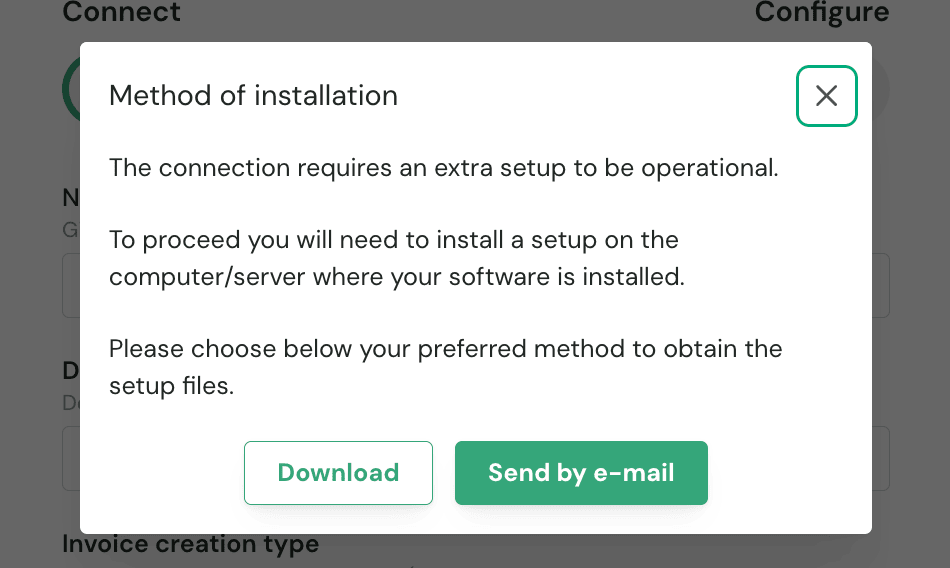 1. If you are filling the form on the server, click **Download** to get the installation file.
2. If someone else will perform the installation, click **Send by Email** and provide their email address.
# ❷ Configure
1. If you are filling the form on the server, click **Download** to get the installation file.
2. If someone else will perform the installation, click **Send by Email** and provide their email address.
# ❷ Configure
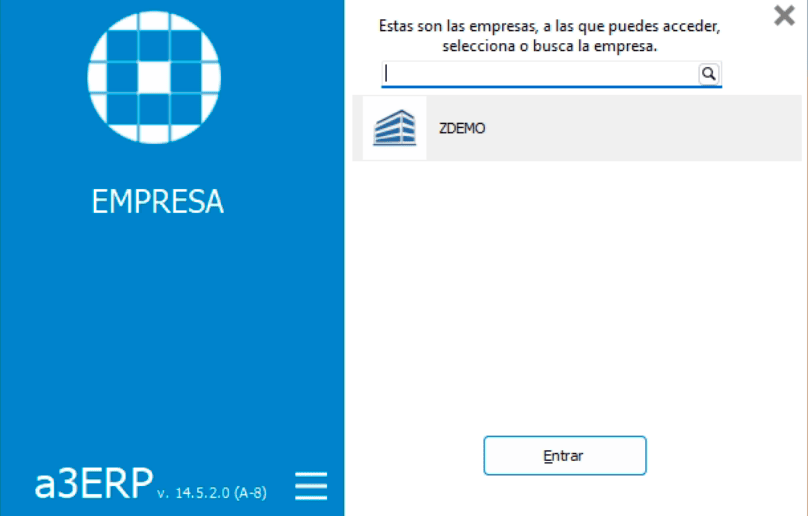
 Once the installer has been downloaded or received, **and before starting the installation**, you must specify the **company code** of the entity in your a3ERP instance you are connecting to.
This step **must be completed prior to the installation process**.
The company code can be found on the **company selection page**, which is the **first screen displayed when launching a3ERP**.
In the example illustrated, the company code is **“ZDEMO”**.
Once the installer has been downloaded or received, **and before starting the installation**, you must specify the **company code** of the entity in your a3ERP instance you are connecting to.
This step **must be completed prior to the installation process**.
The company code can be found on the **company selection page**, which is the **first screen displayed when launching a3ERP**.
In the example illustrated, the company code is **“ZDEMO”**.
 # 💿 Installation process
**Recommendation:** Perform the installation directly on the server running your a3ERP instance.
Perform the installation **directly on the server hosting the a3ERP instance**.
After completing the form and downloading the ZIP archive:
1. Copy the archive to the **a3ERP server**.
2. Extract the contents of `Setup.zip`.
3. Run the executable.
4. Follow the on-screen installation steps to complete the setup.
# 💿 Installation process
**Recommendation:** Perform the installation directly on the server running your a3ERP instance.
Perform the installation **directly on the server hosting the a3ERP instance**.
After completing the form and downloading the ZIP archive:
1. Copy the archive to the **a3ERP server**.
2. Extract the contents of `Setup.zip`.
3. Run the executable.
4. Follow the on-screen installation steps to complete the setup.