> ## Documentation Index
> Fetch the complete documentation index at: https://docs.chift.eu/llms.txt
> Use this file to discover all available pages before exploring further.
# Contasol
# 🚨 Prerequisites
* You must have **Contasol installed** with its API access available.
* Activating the API requires a **developer account** ("cuenta de fabricante") with Software DELSOL. This account provides a **CodigoFabricante** and is tied to an **email address** (EmailFabricante) that receives the API credentials.
You can either **create your own developer account** (fully autonomous — steps below), or **use the developer account your integration partner provides** (they share their CodigoFabricante and EmailFabricante with you). If your partner manages the developer account, skip Step 1 and go straight to [Step 2](#step-2-activate-the-api-in-contasol) with the identifiers they gave you.
***
## 🔑 How the connection works
Contasol's API is activated from inside Contasol using a **CodigoFabricante** and the **email** linked to the developer account. Once activated, Software DELSOL emails the **API credentials**, which you then enter in the Chift connection settings.
There are two ways to organize this:
* **You manage your own developer account** → you create it once (Step 1), receive your CodigoFabricante, and stay independent.
* **Your partner manages the developer account** → they give you their CodigoFabricante and EmailFabricante to create the connection in Contasol; the credentials email is sent to them, and they share the credentials with you.
The steps below cover the autonomous path.
***
# 🛠 Preparation
## **Step 1 — Create a developer account**
Go to the [Software DELSOL developer registration](https://www.sdelsol.com/api/) and create a developer account to receive your **CodigoFabricante**. Choose an email address you have access to — Software DELSOL sends the API credentials to this address.

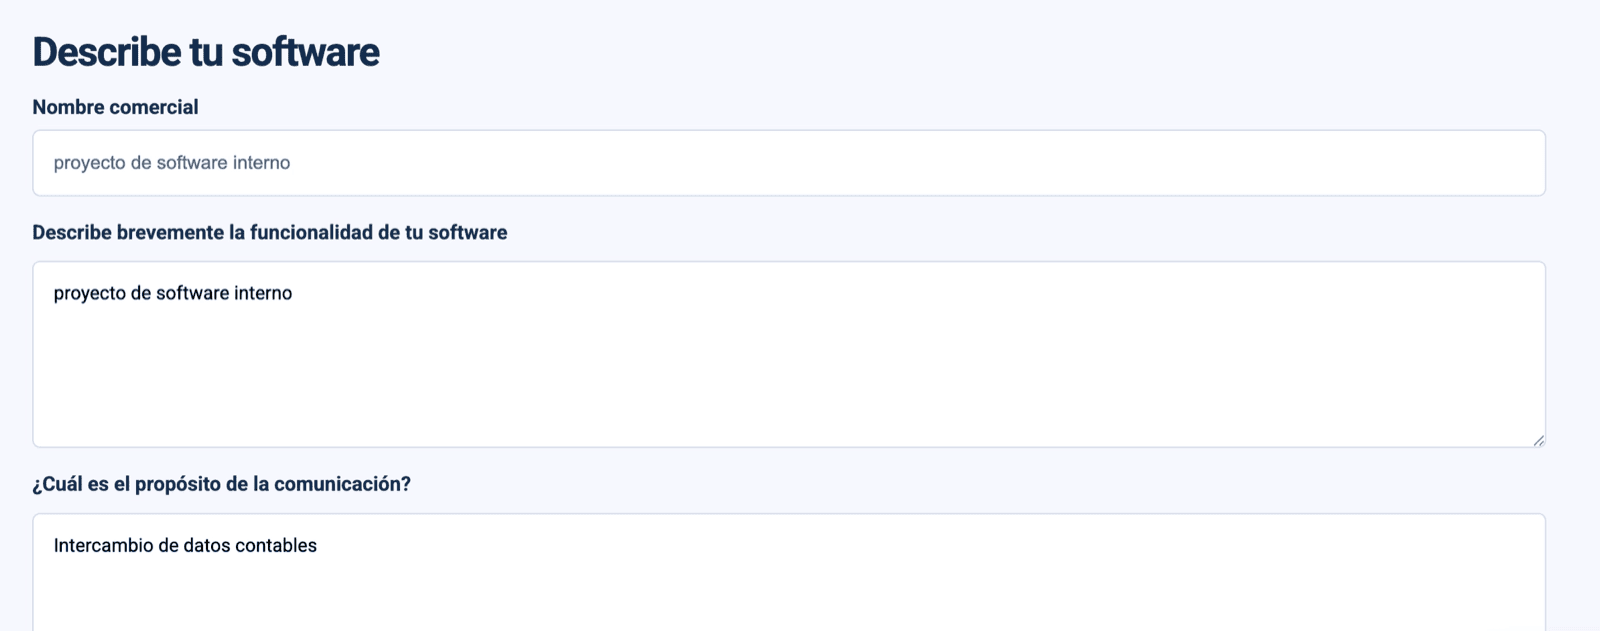
 Use an email you actively monitor: this is where your CodigoFabricante confirmation and, later, your API credentials arrive.
You will receive a confirmation email containing your **CodigoFabricante**.
## **Step 2 — Activate the API in Contasol**
Using your **CodigoFabricante** and the **email** you registered, activate API access inside Contasol. Software DELSOL's official guide walks through each screen:
[CONTASOL | Acceso por API](https://ayuda.teamsystem.es/hc/es/articles/32074527830033-CONTASOL-Acceso-por-API)
Use an email you actively monitor: this is where your CodigoFabricante confirmation and, later, your API credentials arrive.
You will receive a confirmation email containing your **CodigoFabricante**.
## **Step 2 — Activate the API in Contasol**
Using your **CodigoFabricante** and the **email** you registered, activate API access inside Contasol. Software DELSOL's official guide walks through each screen:
[CONTASOL | Acceso por API](https://ayuda.teamsystem.es/hc/es/articles/32074527830033-CONTASOL-Acceso-por-API)
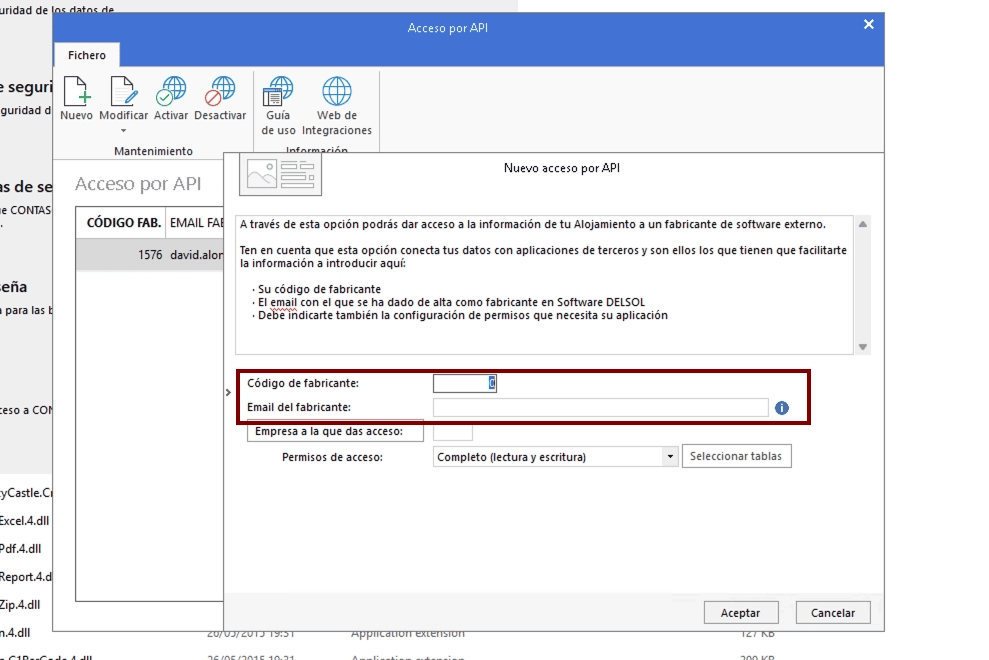 Once activated, you or your partner, depending on who set up the developer account, receives an email with your **API credentials**.
 # ⚡️ Connection
 **Step 1:** Choose a **name** for your connection. *(If the connection name field isn't visible, simply skip this step and continue.)*
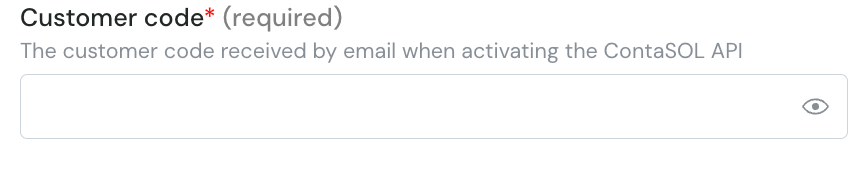
 **Step 2:** Enter your **Customer code**. This is the customer code received by email when activating the ContaSOL API.
 **Step 3:** Enter your **Customer database**. This is the name of the ContaSOL company database you want to connect to, received by email when activating the ContaSOL API.
 **Step 4:** Enter your **Password**. This is the password received by email when activating the ContaSOL API.
 **Step 5 —** Fill in the **Manufacturer code** (if you created your own developer account).
 **Step 6 —** Fill in the **Manufacturer email** (if you created your own developer account).
 **Step 7 —** Click **Connect** to finalise the connection.
 ***
## ❓ Troubleshooting
| Issue | What to do |
| - | - |
| No credentials email received | Check the inbox of the **exact email** registered as the developer account (EmailFabricante), including spam. Re-check the CodigoFabricante entered in Contasol matches the account. |
| Connection fails in Chift | Make sure you entered the credentials exactly as received in the email, with no extra spaces. |
| Using your partner's developer account | You do not need to create your own account — enter the **CodigoFabricante** and **EmailFabricante** your partner provided in Step 2, and ask them for the resulting credentials. |
| You want to test before going live | Create a free trial account (installer + credentials valid for 1 month): [https://www.sdelsol.com/prueba-gratuita/contasol/](https://www.sdelsol.com/prueba-gratuita/contasol/) |
***
## ❓ Troubleshooting
| Issue | What to do |
| - | - |
| No credentials email received | Check the inbox of the **exact email** registered as the developer account (EmailFabricante), including spam. Re-check the CodigoFabricante entered in Contasol matches the account. |
| Connection fails in Chift | Make sure you entered the credentials exactly as received in the email, with no extra spaces. |
| Using your partner's developer account | You do not need to create your own account — enter the **CodigoFabricante** and **EmailFabricante** your partner provided in Step 2, and ask them for the resulting credentials. |
| You want to test before going live | Create a free trial account (installer + credentials valid for 1 month): [https://www.sdelsol.com/prueba-gratuita/contasol/](https://www.sdelsol.com/prueba-gratuita/contasol/) |