> ## Documentation Index
> Fetch the complete documentation index at: https://docs.chift.eu/llms.txt
> Use this file to discover all available pages before exploring further.
# e-Boekhouden
# 🚨 Prerequisites
**API Token in e-Boekhouden** – To connect, you first need to generate an API token in your e-Boekhouden account. The steps to do this are outlined below in the **Preparation** section.
# 🛠 Preparation
* **Log in** to your e-Boekhouden account.
* **Navigate** to the e-Boekhouden API token management page:
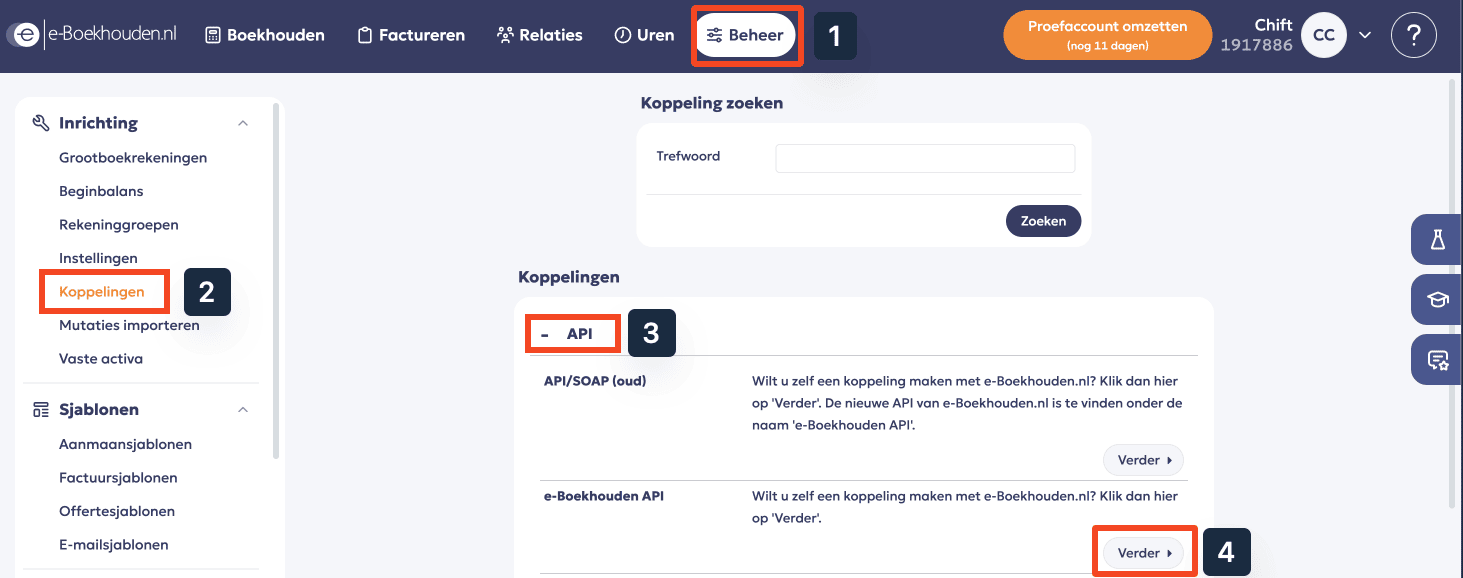 * Go to **Beheer** in the top menu.
* In the left sidebar, under **Inrichting**, select **Koppelingen**.
* In the **API** section, find **e-Boekhouden API** and click **Verder**.
* Click **Toevoegen** to create a new API token.
* Go to **Beheer** in the top menu.
* In the left sidebar, under **Inrichting**, select **Koppelingen**.
* In the **API** section, find **e-Boekhouden API** and click **Verder**.
* Click **Toevoegen** to create a new API token.
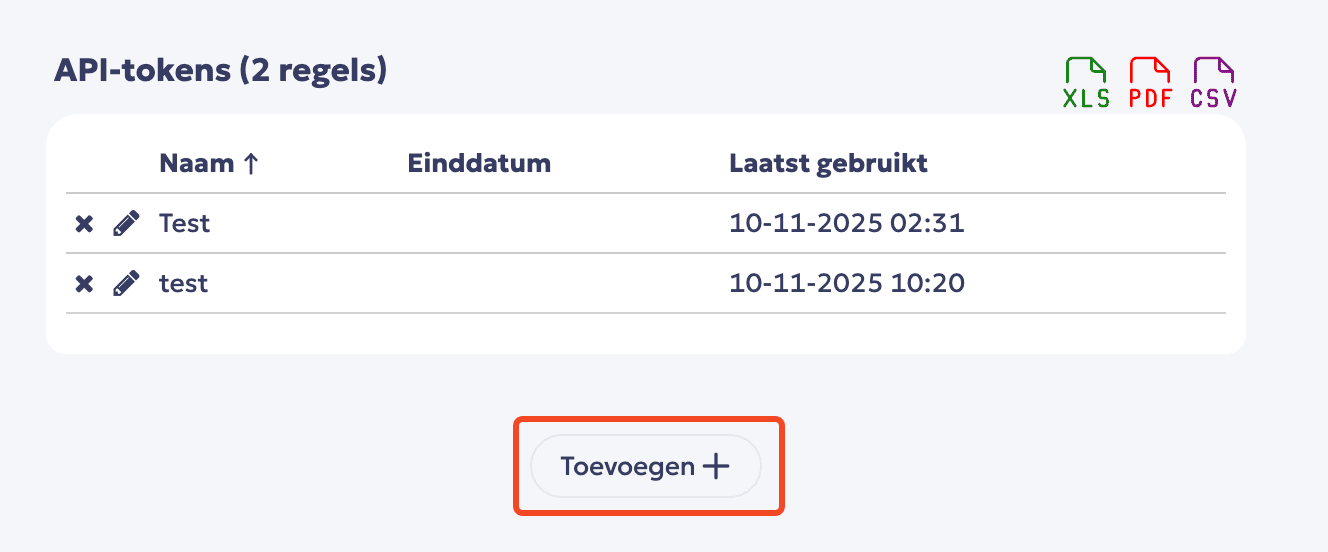 * Set up the key and save
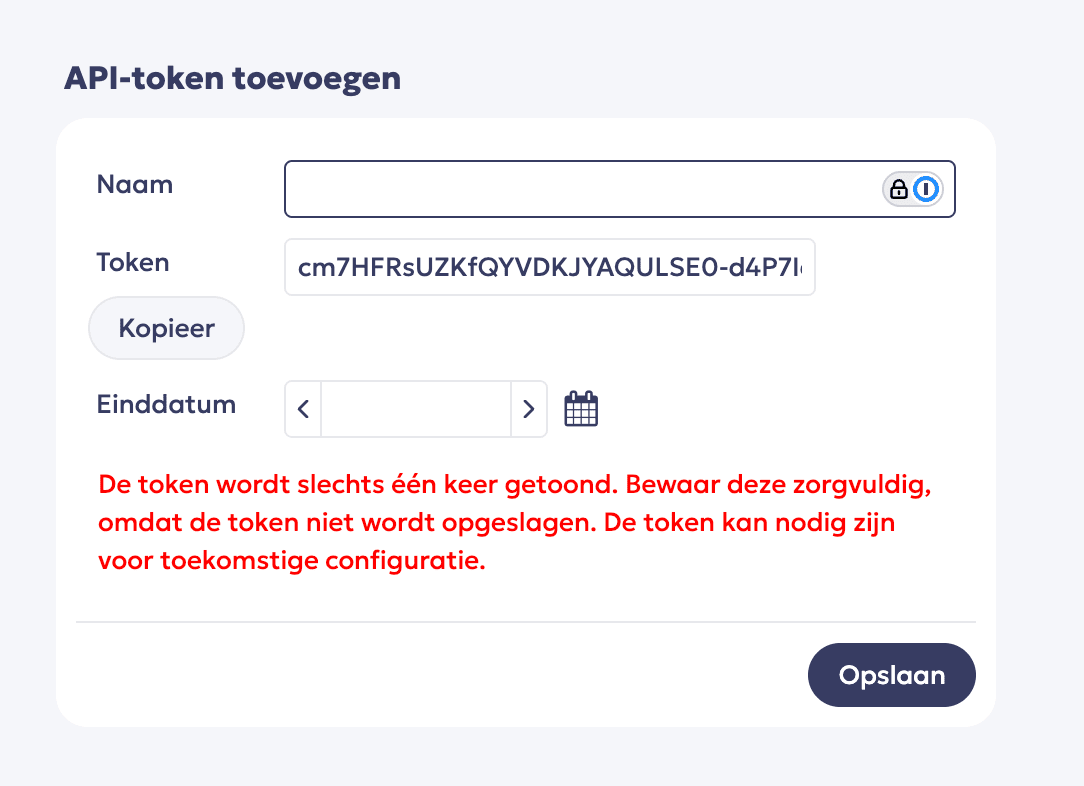 Give your API token a name, **COPY THE TOKEN** and save it.
The token is displayed only once, so make sure to save it immediately. Otherwise, you will need to generate a new token.
You do **not** need to set an end date for the token. We recommend leaving this blank.
# ⚡️ Connection
**Step 1:** Choose a name for your connection. (If the connection name field isn’t visible, simply skip this step and continue.)
Give your API token a name, **COPY THE TOKEN** and save it.
The token is displayed only once, so make sure to save it immediately. Otherwise, you will need to generate a new token.
You do **not** need to set an end date for the token. We recommend leaving this blank.
# ⚡️ Connection
**Step 1:** Choose a name for your connection. (If the connection name field isn’t visible, simply skip this step and continue.)
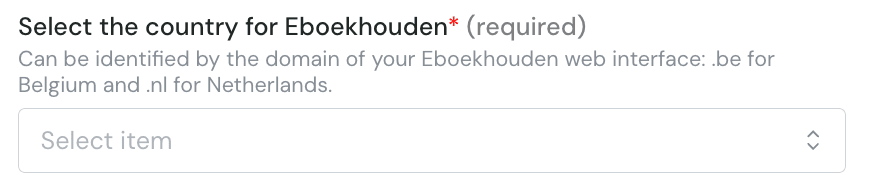
 **Step 2:** Select the country
 **Step 3:** Click "Connect" to finalise the connection.