> ## Documentation Index
> Fetch the complete documentation index at: https://docs.chift.eu/llms.txt
> Use this file to discover all available pages before exploring further.
# Horus
# PRÉPARATION
Il y a deux façons de s'authentifier sur Horus:
1. Utiliser un utilisateur Horus (normalement il s'agit d'un comptable). Aucun pré-requis est nécessaire dans ce cas.
2. Utiliser un utilisateur Falco. Dans ce cas, il faut que la liaison comptable entre Falco et Horus soit activée. Ceci peut être vérifié dans les configurations de Falco:
 # CONNEXION
**Étape 1:** Choisissez un nom pour votre connexion.
# CONNEXION
**Étape 1:** Choisissez un nom pour votre connexion.
 **Étape 2:** Souhaitez-vous récupérer les données analytiques.
Si oui, alors sélectionnez le champ "actif", sinon comptabilité analytique = "inactif".
**Étape 2:** Souhaitez-vous récupérer les données analytiques.
Si oui, alors sélectionnez le champ "actif", sinon comptabilité analytique = "inactif".
 **Étape 3:** Renseignez la langue par défaut de votre compte Horus
 **Étape 4:** Cliquez sur "Autoriser" pour finaliser la connexion.
 # AUTHENTIFICATION
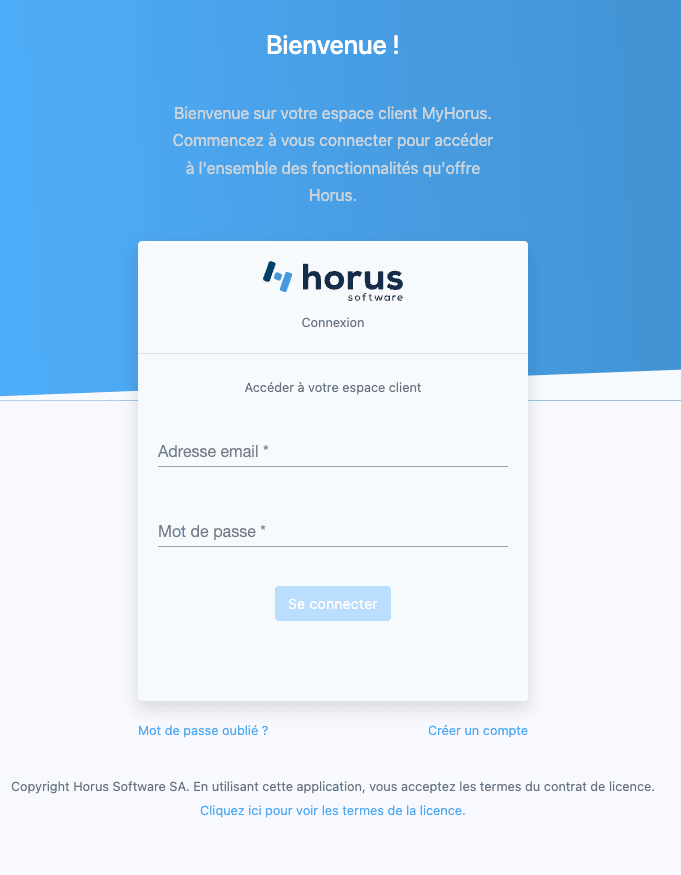
**Étape 1:** Renseignez votre identifiant et mot de passe Horus et connectez-vous.
# AUTHENTIFICATION
**Étape 1:** Renseignez votre identifiant et mot de passe Horus et connectez-vous.
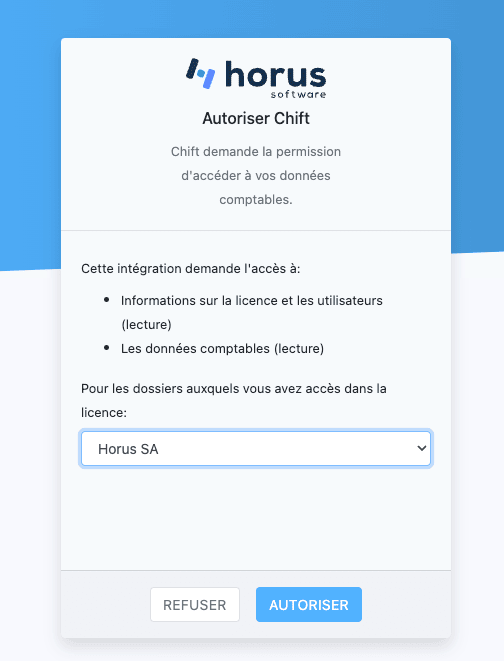
 **Étape 2:** Sélectionnez la licence que vous souhaitez connecter et cliquez sur "Autoriser". La licence que vous sélectionnez déterminera les dossiers détectés pour l'intégration.
 # CONFIGURATION
**Étape 1:** Sélectionnez le dossier comptable à activer. Si vous ne voyez pas votre dossier comptable dans la liste, vérifiez que vous ayez sélectionné la bonne license à l'étape précédente ou que la liaison comptable entre votre dossier dans Falco et votre dossier dans Horus soit correctement configurée.
# CONFIGURATION
**Étape 1:** Sélectionnez le dossier comptable à activer. Si vous ne voyez pas votre dossier comptable dans la liste, vérifiez que vous ayez sélectionné la bonne license à l'étape précédente ou que la liaison comptable entre votre dossier dans Falco et votre dossier dans Horus soit correctement configurée.
 **Étape 2:** Cliquez sur "Valider" pour finaliser la configuration