> ## Documentation Index
> Fetch the complete documentation index at: https://docs.chift.eu/llms.txt
> Use this file to discover all available pages before exploring further.
# e-Boekhouden
# 🚨 **PRÉREQUIS**
**Jeton API dans e-Boekhouden** – Pour vous connecter, vous devez d'abord générer un jeton API dans votre compte e-Boekhouden. Les étapes à suivre sont décrites ci-dessous dans la section **Préparation**.
# 🛠 **PRÉPARATION**
* **Connectez-vous** à votre compte e-Boekhouden.
* **Accédez** à la page de gestion des jetons API d'e-Boekhouden :
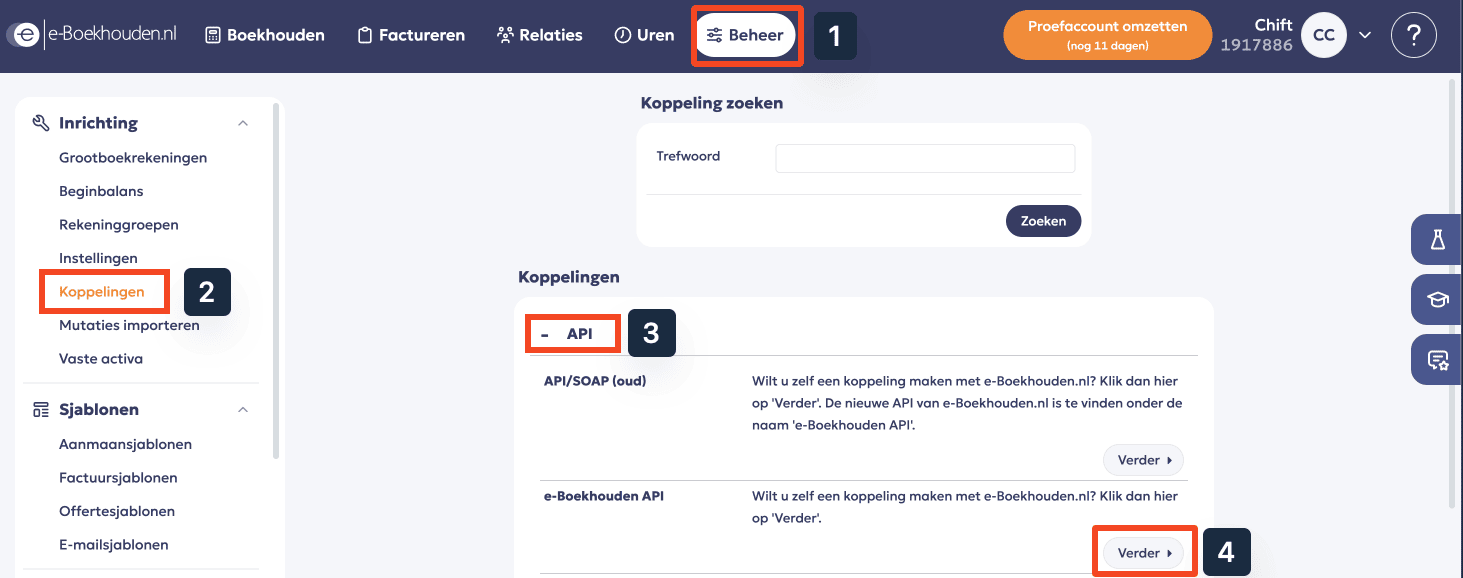 * Allez dans **Beheer** dans le menu supérieur.
* Dans la barre latérale gauche, sous **Inrichting**, sélectionnez **Koppelingen**.
* Dans la section **API**, trouvez **e-Boekhouden API** et cliquez sur **Verder**.
* Cliquez sur **Toevoegen** pour créer un nouveau jeton API.
* Allez dans **Beheer** dans le menu supérieur.
* Dans la barre latérale gauche, sous **Inrichting**, sélectionnez **Koppelingen**.
* Dans la section **API**, trouvez **e-Boekhouden API** et cliquez sur **Verder**.
* Cliquez sur **Toevoegen** pour créer un nouveau jeton API.
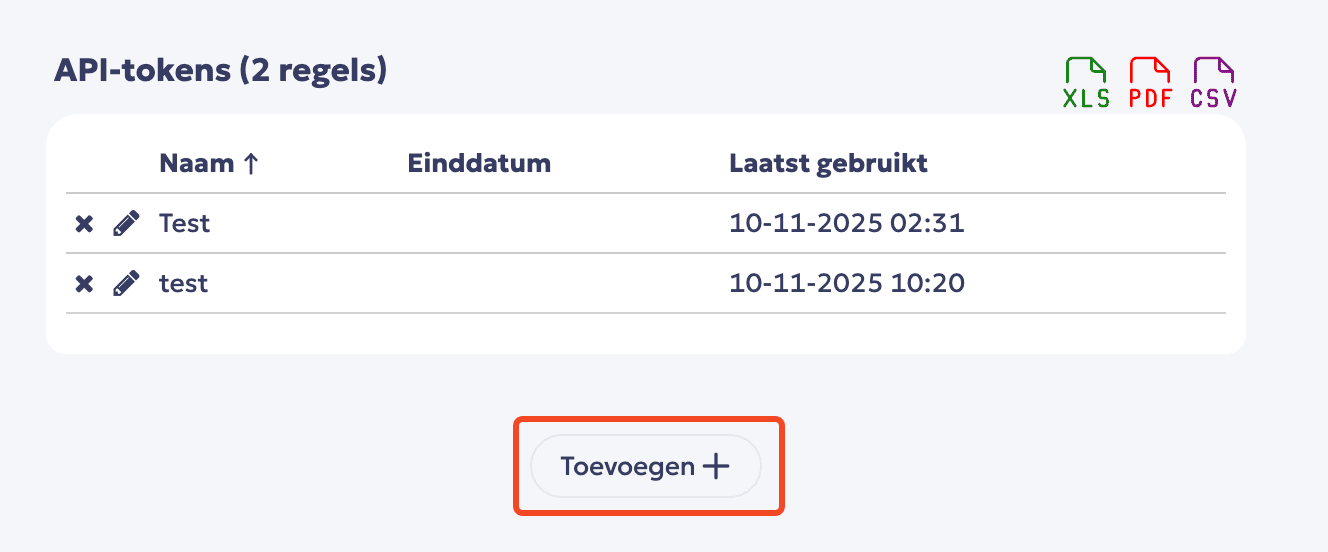 * Configurez la clé et enregistrez
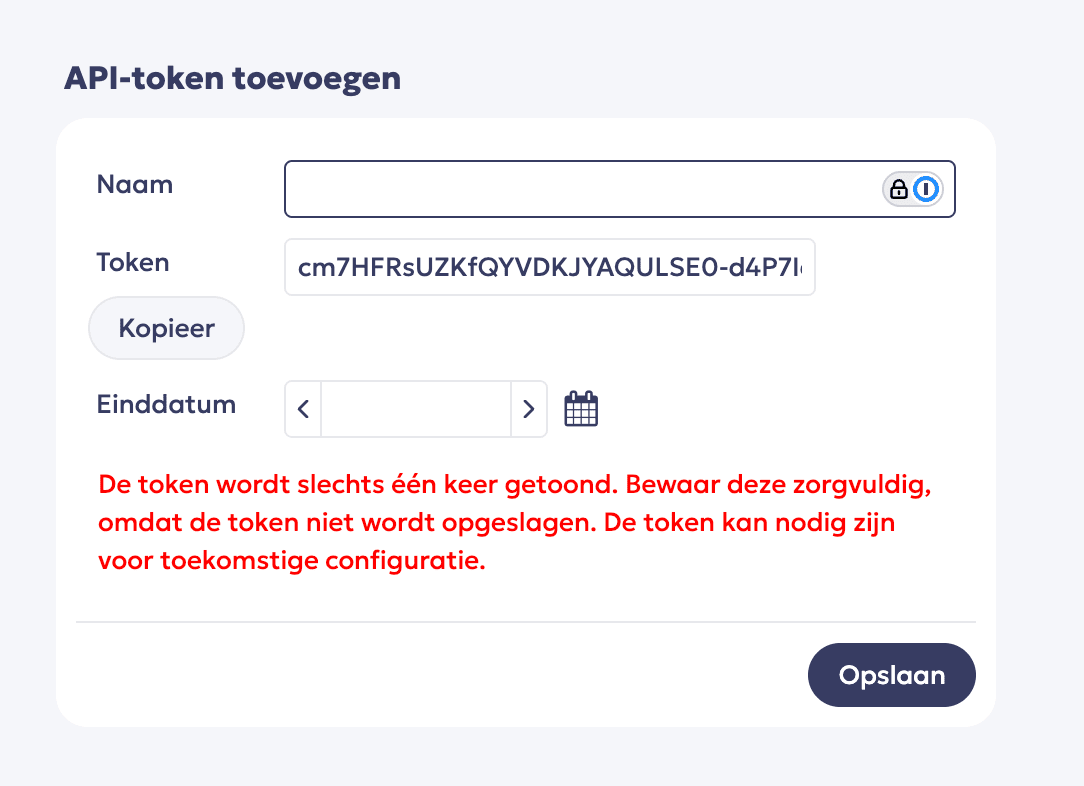 Donnez un nom à votre jeton API, **COPIEZ LE JETON** et enregistrez-le.
**Important :** Le jeton n'est affiché qu'une seule fois, veillez donc à l'enregistrer immédiatement. Sinon, vous devrez générer un nouveau jeton.
Vous n'avez **pas** besoin de définir une date de fin pour le jeton. Nous recommandons de laisser ce champ vide.
# ⚡**️ CONNEXION**
**Étape 1 :** Choisissez un nom pour votre connexion. (Si le champ du nom de la connexion n'est pas visible, passez simplement cette étape et continuez.)
Donnez un nom à votre jeton API, **COPIEZ LE JETON** et enregistrez-le.
**Important :** Le jeton n'est affiché qu'une seule fois, veillez donc à l'enregistrer immédiatement. Sinon, vous devrez générer un nouveau jeton.
Vous n'avez **pas** besoin de définir une date de fin pour le jeton. Nous recommandons de laisser ce champ vide.
# ⚡**️ CONNEXION**
**Étape 1 :** Choisissez un nom pour votre connexion. (Si le champ du nom de la connexion n'est pas visible, passez simplement cette étape et continuez.)
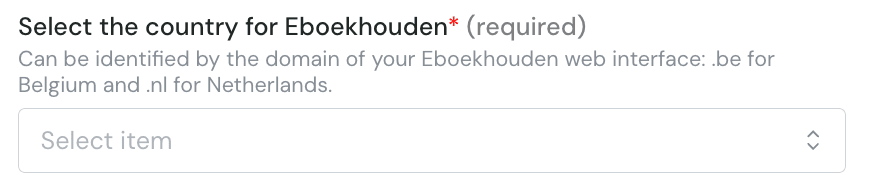
 **Étape 2 :** Sélectionnez le pays
 **Étape 3 :** Cliquez sur « Connect » pour finaliser la connexion.